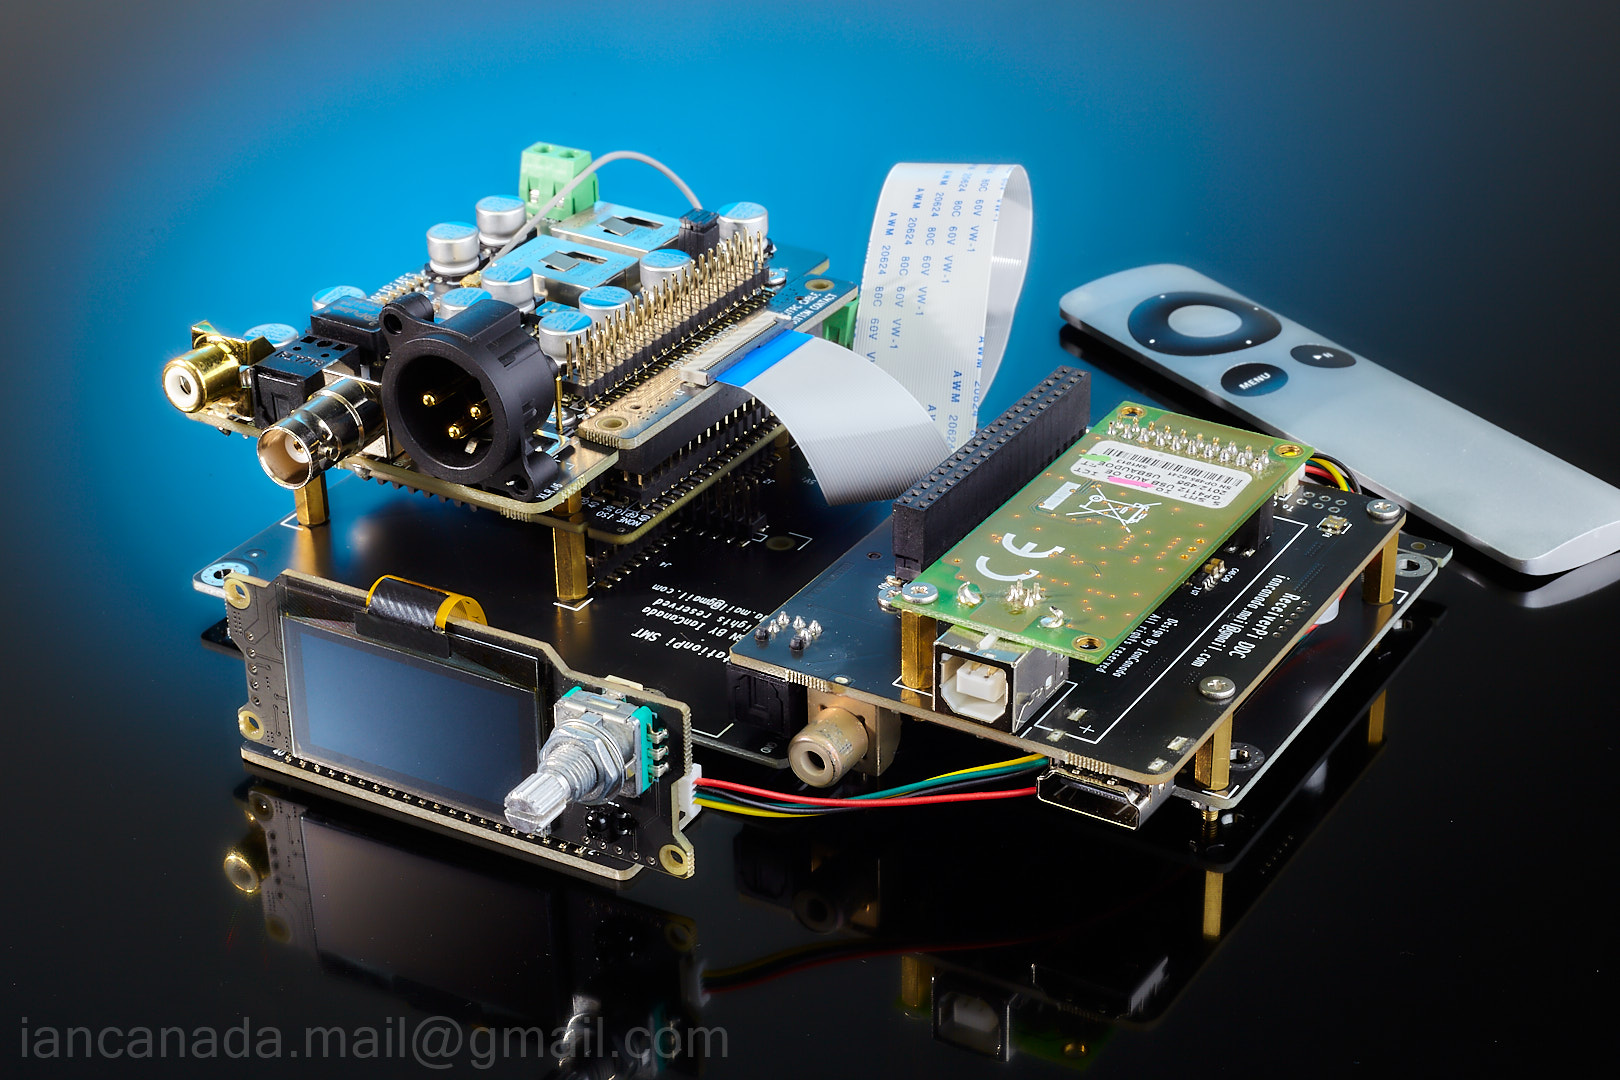
ReceiverPi DDC is really powerful. Here is another example project which I like very much. It make the whole project very organized. Software and hardware issue are on longer mixed up by using the RPi free configuration:
Flagship full-size full-function RPi free DDC streamer (or DAC)
Configurations:
#35C StationPi SMT
#20C TransportPi AES or #17B HdmiPi Pro or #4B ESS Dual Mono II DAC and I/V board
#1D FifoPiQ7
#19D ReceiverPi DDC
#49B MonitorPi Pro
#50A GPIO extender
Apple remote control (optional)
Power supplies:
#32B LinearPi Solo + #25B UcConditioner 5V (optional)
#41C UcPure MkIII 3.3V
Installations:
Possible upgrade:
 FlagshipFullSizeDDC
Flagship full-size full-function RPi free DDC streamer (or DAC)
Configurations:
#35C StationPi SMT
#20C TransportPi AES or #17B HdmiPi Pro or #4B ESS Dual Mono II DAC and I/V board
#1D FifoPiQ7
#19D ReceiverPi DDC
#49B MonitorPi Pro
#50A GPIO extender
Apple remote control (optional)
Power supplies:
#32B LinearPi Solo + #25B UcConditioner 5V (optional)
#41C UcPure MkIII 3.3V
Installations:
- Install the boards as the picture, use all 13mm standoffs
- Connect 5V to J3 of the StationPi SMT, make sure J9 1-2,2-4 are jumped
- Connect 3.3V to J5 of FifoPi from J9 of UcPure
- Connect U.FL coaxial cable from MCLK of FifoPi to the HdmiPi Pro or TransportPi AES or DAC
- Connect the control cable from J6 of the MonitorPi Pro to J7 of the ReceiverPi DDC
- Connect SYNC charging control cable from J5 of the MonitorPi Pro to J10 of the PurePi II
Possible upgrade:
- Upgrade FifoPi Clocks to #80A and #80B SC-Pure 45/49 clocks
- Connect 3.3V to J5 of FifoPi from the continuous output J10 or J13 of UcPure
- Insatll a RaspberryPi if really want
 FlagshipFullSizeDDC
Original Amanero is also not expensive. I bought the original. See the one in the above picture.
https://amanero.com/
https://amanero.com/
The header spacing doesn't match the Amanero USB.
http://www.twistedpearaudio.com/digital/amanero.aspx
Can also buy them here. Shipping from Italy was expensive.
Can also buy them here. Shipping from Italy was expensive.
I use Hdmi Pro.Thank you for the clue.
I'm a little surprised that there is no such setting in the FifoPi Q7 controller itself, if without this option its functioning is impossible.
In the manual for MonitorPI I can't see a single hint of such an option or description of its change too.
How do you transfer a digital stream from FifoPi Q7 to your Audio-Gd R7 He Mk2? I mean, do you use any interface or feed i2s directly?
Anyone, who has MonitorPi Pro, can you test for me the following?
- Turn off the 'Continous clock output mode' in the advanced menu
- With remote control, switch to an input which has no signal (e.g. HDMI)
- Check if the remote control stops working or not
I’ve got one. What does CCOM do?Anyone, who has MonitorPi Pro, can you test for me the following?
Thank you!
- Turn off the 'Continous clock output mode' in the advanced menu
- With remote control, switch to an input which has no signal (e.g. HDMI)
- Check if the remote control stops working or not
Yes, as you said. So if you turn this on, there will not be 'No signal' message with any input even with removed signal cable. So, can you test it?
I switched the setting on. Now I get MUTE at left instead no signal. I get 48 kHz.
I then change volume and it works.
I then switch to another input unused. And volume still works.
I then change volume and it works.
I then switch to another input unused. And volume still works.
I said turn it OFF and then try 🙂
"
"
- Turn off the 'Continous clock output mode' in the advanced menu
Duh! 🙄
I did that. It works after. Also it seems to remember the setting for each input.
Ie one input now shows mute and other now shows no signal.
I did that. It works after. Also it seems to remember the setting for each input.
Ie one input now shows mute and other now shows no signal.
- Home
- Source & Line
- Digital Line Level
- Asynchronous I2S FIFO project, an ultimate weapon to fight the jitter