DC on line stage inputs

I am getting confused about an issue my line stage is having.

The stage, easier to describe than picture probably: Elma input selector - Elma 100k stepped attenuator with 470k resistors parallel to the output - transformer coupled 6SN7 using Sowter 1367 transformers running at 200V, LED bias at 4.8V. Heaters are DC.

Recently, as the stage heats up it appears that a few volts DC is appearing on the input connectors and I am struggling to even think of a mechanism by which this would happen given that the attenuator and the parallel resistors should by definition reference pins 1 and 4 to ground.

I have replaced the valve socket, it is happening with either of the valves I have to hand.

Before I go completely bonkers, am I missing something obvious?

GAS Thoebe Preamp schematics

Hi,
I have a GAS Thoebe Preamp that needs repair on both phono outputs, as they suddenly stopped working. As my local repair shop is working to fixing this, we came across on a couple of more issues and we are in need of the following board schematics.
  • gas-528c
  • gas-333f
  • gas522c
After some internet search I found a couple sches but non of the above. If someone can point me to a link or share with me the sches ill be grateful! I am very eager to repair this pre-amp, not only cos it's a great module but also due to its sentimental value.

Thanks in advance!

Add remote volume control to Logitech X-530/230 speakers

Hi yall!

I would like to add remote volume control to ye olde Logitech X-530 speakers.

This is the 10 kOhm 6 gang potentiometer
Schalter_ansicht_2.jpg
which is located on this board.
20140924_180353_f795a6a.jpg

I think that the best way would be if I could control the volume by directly changing the resistance. I was looking for digital potentiometers and motorized ones, and also using a servo motor to directly rotate the knob. Since I'm new to audio electronics I'm not sure if there are any pitfalls or downsides by using any of those. Or maybe there is a different way to control volume?

Front loaded Horn - how does that work with whizzer cones?

I have a single Lowther A55 waiting for use but the question is somewhat generic - I've been looking around for inspiration and I see a lot of people have been happy putting a full range driver with whizzer cone into a front loaded horn. So I've been reading up on horn theory, and see how a front loaded horn works with a cone driver. But there's not much written about how a whizzer cone driver works in such a horn.
The popular tractrix profile, and other similar profiles usually require the horn to have quite some length in order to reproduce lower frequencies and this looks like a bad starting point to me for a whizzer cone as the high frequencies will be radiated into the walls of the throat and bounce around from there. Or the throat simply cuts off the higher frequencies altogether. I can see why some folk just cut off the whizzer cones and add a separate tweeter.
So it seems to me that only a shallow horn is practical if the whizzer cone h.f. sound is to be preserved. Then it's down to conical profiles for the most part, or oblate spheroid for better loading of the main cone.

Anybody looking into this ??

Attachments

  • A55.jpg
    A55.jpg
    59.5 KB · Views: 134
  • horn profiles.jpg
    horn profiles.jpg
    26 KB · Views: 130
  • Like
Reactions: grindstone

Using Simetrix and want to import triode models from LTSpice

Working on tube emulation with transistors and want to compare with triode models.
I am assuming LTSpice is best source for models. I heard you can import LTSpice models into Simetrix

Where would I go to download the best models for standard preamp and low power class AB tubes?

Hooked on Simetrix - retired switchmode converter engineer and SIMPLIS/Simetrix common in that field

For Sale Pair of JBL 2431H 1.5" compression drivers (Melbourne, Australia)

I'm selling a pair of JBL 2431H compression drivers. These are neo drivers with aluminum diaphragms and a 1.5" exit.
They're used but in good working condition. Were originally for a JBL clone build, but have changed direction and have no use for these anymore.

Price drop, now asking AUD $250 for the pair.

Drivers are in Melbourne, Australia, so prefer local sale, but could negotiate shipment to a trusted buyer.

Attachments

  • P1060418.JPG
    P1060418.JPG
    633.7 KB · Views: 96
  • P1060419.JPG
    P1060419.JPG
    639.6 KB · Views: 115
  • P1060421.JPG
    P1060421.JPG
    420.9 KB · Views: 117
  • P1060423.JPG
    P1060423.JPG
    527.7 KB · Views: 100
  • P1060425.JPG
    P1060425.JPG
    555.8 KB · Views: 96
  • Like
Reactions: scholl

3 way OB line array horizontal driver arrangement.

What is preferable; WMT or WTM horizontal driver arrangement?

I am buying components for a floor to ceiling open baffle line array. The array consists of 24x 12cm vintage alnico drivers supported by 8x 15" woofers and 36 dipole amt's. All first order crossovers at 300Hz and 3600Hz (not set in stone....start of voicing)

Before I start cutting wood I need to decide between WMT or WTM.

And after building I need to decide to place the speakers with woofers on the inside or outside.

Instinctively I would go with WMT TMW but I see many examples of people going for WTM. Anyone can point me to some pro's and con's of different arrangements?

Thanks!

Rockford Fosgate 250M2 left channel issues

Hi everyone. I am currently working on a Rockford Fosgate Punch 250m2. The Amp powers up and the right channel plays as it should. The left channel however, is having some issues. If I run the Amp below 11.8v, the left channel will play loud and clear. If I raise the input voltage above 11.8v, i am only able to get roughly 10 watts out of the left channel before it starts to distort very badly. However, under no load the left channel produces a clean sine wave at all input voltages. I can't seem to find any obviously dead components on the board, so I was curious if anyone else has ever seen a similar fault. Thank you.
IMG_20240424_073445.jpg

How would heater-cathode leakage in AC-heated power tubes manifest itself?

Hi. I’m testing my stereo version of Pete Millett’s Engineer’s mono-block amp.

The power supply is different. Being stereo, it needs a much bigger power transformer for a start. It’s also higher voltage/power with regulators running at 525V. The differential input/drivers are 6EJ7s – higher gain than the original 6CB6s.

As in the original design, the 6HJ5 output tube heaters are AC-powered and elevated to 50V.

There’s no global feedback yet – just anode-to-anode feedback. Here’s a link to the original schematic.

Some 1kHz distortion plots look great. Like this one at 1W:

1713864968857.png


And this one at 2W

1713864995208.png


Others show 50Hz and 100Hz side-bands around the 1kHz fundamental without much 50Hz:

1713865019333.png


That's probably the worst one. Where are the 100Hz side-bands coming from?

Or with a lot of 50Hz. This is at 10W

1713865049458.png


What I’ve found is that this problem is worse with certain output tubes than others, and gets worse as the power level is increased.

My question is, am I seeing artifacts resulting from AC heating of the output tubes or should I be looking for something else?

Attachments

  • 1713865006514.png
    1713865006514.png
    36.3 KB · Views: 62
  • IMG_4545.jpg
    IMG_4545.jpg
    384.1 KB · Views: 62

MosFET for high voltage, high ripple PSU

Hi,

After nearly two decades my 808 SET is finally operational, with an experimental PSU:

808runningpsu.jpg


Due to the unusually high Z plate load (5k), I'd like to keep the B+ as close to the 450V rating of the caps as possible but without severe voltare overshoot during startup.
I'm currently using a 310V toroid, 1300V SS diodes and a simpe CLC filter which works quite well but my gut feeling tells me there's more output power to be harvested if the B+ is increased.
The best idea I can come up with using parts I already own would be a 360-0-360V AnTek toroid followed by a 430-440V Zener string and a big Mosfet as a pass device.
IDH tube rectifiers would solve the startup problem but the current draw is close to 300mA (almost 1/3 of that through the cathode follower driver stages).

Any advice for a current production Mosfet (or IGBT, or whatever) that would survive this situation in the long run?

Problem with Buffalo V 1.2 output voltages

Hello alltogether,

since the Twisted Pear forum isn't really well attended anymore, I try to get some help here. I ran into a problem with a "vintage" Buffalo v 1.2 which still sounds really good. Maybe someone can help me:

My Buffalo 1.2 ist supplied via i2s from a css8416mux. All settings on the Buffalo are set for i2s. The output of the Buffalo goes straight into an IVY v 2.01. The combination plays music when the Mux is fed from the s/pdif in.

But

At my Buffalo 1.2 I measure a voltage offset on one channel when it is connected to the IVY (Out+=1.7V, Out-=0.7V, i2s connected no signal applied) and the same at the output of the IVY. I measure a DC offset of approx. 1V at the SE output. The signal at this output is then significantly quieter. For comparsion: At the other channel I measure Out+ = Out- = 1,56V

Without IVY connected, I get Out+ = Out- = 1.54V at the output of the strange channel.

Even if I connect a Ballsie Lite directly to the output, everything works without DC offset. Accordingly, the level on both channels is the same.

The IVY alone has no DC offset (all inputs on ground). I measure the input resistances In+ -> Ground 3.78 kOhm on both channels and In- -> Ground approx. 20 MOhm. This cannot be the reason for the difference between the channels.

Somehow this seems to be a bug (on the Buffalo?) that only occurs when it is operated as current-out.

I'm a bit at a loss, does anyone know how to help?

Best regards

Flo

Looking for opinions on TPA3255 amp build

I built this case around a Chinese amp board, the "PJW063." It's based on a TPA3255 amp IC and offers decent Bluetooth connectivity.

I've rewired the inputs (Bluetooth, 3.5mm jack, and RCA) to all go through the switches on the front panel and the 10k logarithmic potentiometer for volume control. I've also grounded everything to a ground pin on the board, including the back and front aluminum panels.

The wiring is messy, but it works. It still gets a slight hum when the unit is powered on, and in Bluetooth mode, the potentiometer makes a wiping sound when moved rapidly back and forth.

Are there any suggestions or improvements I can make to this, aesthetically or otherwise ? I was also if there are better amp board options if anyone has any suggestions they'd be welcome.

Thanks for taking a look. I can provide more information if needed.

Attachments

  • IMG_20240421_223300_572.jpg
    IMG_20240421_223300_572.jpg
    251.9 KB · Views: 123
  • IMG_20240421_222529_767.jpg
    IMG_20240421_222529_767.jpg
    302.1 KB · Views: 122
  • IMG_20240421_222847_811.jpg
    IMG_20240421_222847_811.jpg
    386.3 KB · Views: 149
  • IMG_20240423_190400_867.jpg
    IMG_20240423_190400_867.jpg
    385.6 KB · Views: 142
  • IMG_20240423_190406_459.jpg
    IMG_20240423_190406_459.jpg
    408.2 KB · Views: 143
  • IMG_20240423_202848_764.jpg
    IMG_20240423_202848_764.jpg
    404.4 KB · Views: 139
  • Like
Reactions: Gaspar74

F2J clone Build thread

Hi pals,
Starting a build thread for people who bought PCB from me and for my own future reference.
Will List in this thread materials and tools needed and actual construction in 4 different parts.

Since changing the PCB to UMS specs please see that PCB MOUNTING holes changed from 4-40 to M3 and hence hardware is also changed.
Materials
1 set PCB(include a left and Right channel )and CRC supply board.
400VA toroid transformer
Components(see excel sheet)
4U Chassis (either deluxe or Dissipante) with baseplate from DIYAUDIO store.
Good quality drill with bubble level or ideally a drill press
For tapping heat sinks 4 x 40 NC Tap and No 43 Drill Bit with cutting fluid and tap wrench.
A good quality temperature controlled soldering iron😉


Starting with heatsink
DIY store heatsinks comes in a plastic wrap; don't unwrap them in a hurry. We needed those plastics to mark things on! or you may have to use masking tapes.
Taping is the most labor intensive process. And if you are careful enough will end up with that DIY satisfaction or in complete despair with a broken tap inside heatsink. So be cautious!!!


Follow this video to the 'T', IT WORKED FOR ME ,so should work for you too. I never tapped anything before this project! It is not that hard.
YouTube


and I used this tap wrench Irwin T-Handle Tap Wrench - TR-1E 0-1/4" - Pipe Wrenches - Amazon.com


Along with Forney 20857 cutting fluid.


See the attached pdf for dimensions and position of drill holes. Position the lower end of boards, edge 3 to 3.5 cm from lower boarder of heatsink.
Please see that hole positions are different for left and right channels in attached pdf.
You can use a permanent marker to draw lines over plastic wrap .Once spots for drilling are marked place the corresponding PCB over and make sure the position is accurate. Don't skip this part. Measure twice and drill once. Those measurements are all in mm. Follow exactly what is shown in video....😎


The amp PCBs are designed for mounting the JFET/MOSFET on underside of PCB with legs vertical (in contrast to first watt designs). I don't have access to exotic heatsink like Papa does, and this works equally well too.
The mounting hardware is listed in parts list and will provide enough clearance to avoid pins of components from touching the heatsink. (Sorry ,EU fellas, they are in inches).Well ,you can pick the height you want but don't make it more than 1 cm as you may not have enough length for Mosfet pins to get through the holes. Semisouth Jfets however need some trimming of leads. Soldering FETS is the last part so don't solder anything yet.
Mounting holes for FETS are positioned 19 mm from center hole for JFET pins( of the three)and spaced 100mm apart(please see the pdf marked right hole position).
So leave these holes for the last. Once all PCB mounting holes are in place, mount the PCBS .Using a sharp needle mark center pin for both FETs on plastic sheet or masking tape underneath. The FET mounting holes are then marked using scale 19mm vertically from those marking. Again double check before punching hole. Now unmounts PCB and continue with drilling and tapping. Now all holes are ready and keep heatsink aside

Attachments

ACA Mini

Hi all,

I have an ACA Mini that needs a good home.
Works great but Idon't use it. I use my own custom variant of the ACA Mini because I'm crazy and like to make things.

This is built with the Kevin Heem board that he created before the official esstantaols kit was created in the
diyAudio store. https://www.diyaudio.com/community/threads/aca-mini-almost-clone-board.381616/

$20 plus shipping without the power supply.
$55 plus shipping with the supply.
Or you can get a supply from DigiKey or Mouser.
It's a Meanwell GSM90B24-P1M This is the bigger 90 watt supply.
The current completion kit ships with a smaller supply.

Please PM me if interested.

Steve

Mini_Top.jpg

Least intrusive preamp install in passive bass

I recently acquired a passive jazz bass which I fell in love with the second I plugged in and played it.

Its a 60s style passive pickup fretless Fender Jazz, specifically a Jaco signature model. It sounds absolutely amazing plugged straight into an amp or DI. I would however like to install a preamp to give it more output and less noise in live settings without having to run both pickups at once to effectively cancel noise.

The problem is - no back cavity space for a preamp, let alone a battery. The front cavity is small, but could contain a small EMG preamp keeping the stock Vol-Vol-Tone control scheme. Routing a separate cavity is absolutely out of the question. Any ideas for a way to add a battery without mutilating the body?

I have another jazz bass with passive pickups which I used external power over a TRS cable to run the preamp. I just want to keep it simpler on this new one.

Attachments

  • 20240417_134033.jpg
    20240417_134033.jpg
    292.2 KB · Views: 136

KEF Q150’s arrived….let the harvest and progress begin!

So the Q150’s showed up this morning…..$350 shipped to my door…..not a bad deal for a pair of cutting edge Coax drivers and a pretty decent crossover if you intend to listen slightly off axis.

First order of business will be to see if that resonance wiggle in the response between 1-2khz is enclosure related so I’ll do some measures on a flat open baffle outside. It’s a minor abberation and be honest, it never really bothered me with my pair that I use for nearfield clinical mix monitors from time to time…..but this has become a lot about nothing site these days so let’s identify and address it if possible.

Second order of business will be to follow my recent thoughts and mount and measure the drivers in a sphere….let’s see what the DI looks like from 400hz and up. The sphere will start out with a variable aperoidic vent and a 2nd order highnpass on the Uni Q……see how loud these can go when that little cone isn’t asked to play bass……the tweeter looks somewhat stressed in Erin’s power compression measures but some of that might be thermal and pressure gradient.

Anyone have any experience with these A1943/C5200 PCBs?

Does anyone have any experience with these A1943/C5200 PCBs? With the exception of the single pair, the double, tripple, and quad pair boards all basically function the same with the exception of the final output stage. I also provided a schematic of the PCB with a double pair. Sorry for the lousy schematic, I just hacked it together as fast as I could based on the PCB itself as one wasn't supplied. Also, for the diodes and smaller transistors, ignore the part numbers in the middle -- I didn't have models for those parts so I just grabbed generic parts and then added a label for the actual part.

Let me know what you guys think of these.

Attachments

  • IMG_9446.JPG
    IMG_9446.JPG
    554.4 KB · Views: 91
  • 200w_sch.png
    200w_sch.png
    41.8 KB · Views: 95

Aleph J Dim Bulb Tester Post

In the process of @ItsAllInMyHead mentoring me in building an Aleph J, the concept of a Dim Bulb Tester came up. I did a quick search in the forum but thought it might be helpful to any other dim bulbs out there to post what I found. I like the idea of having a switched outlet so I ordered this, and for the socket. Other than that, a 3 conductor power cord, 1 end cut off, and a work box for the outlet, super easy peasy. Add to that maybe 3 different wattage incandescent light bulbs and for about $15-$20 a nice way to test and possibly save an Oops!

Your favorite binding posts?

I have some speakers that are almost done and I need to figure out the binding posts situation. They are veneered in cherry. I'd like something visually fancy. Speak on is my usual go to but it's gonna look kinda crap with these speakers. They are a 3 way with separate boxes for each driver but the tweeter doesn't need a set of posts.

I was looking at PE's posts and their plates for them, but the costs really add up super quick and they seem like they have a lot of metal, which I heard isn't ideal.

Thanks dudes.

Power Supply Soft Start Board (V3)

This thread is for discussions about the Power Supply Soft Start Board (V3) in the store. This is an updated version of the Soft Start V2 boards, primarily to make them compatible with the 10x10 grid mounting pattern we've now standardized on so they can be easily mounted to Deluxe chassis baseplate, riser panels, front panels and/or heatsinks. Refer to the Soft Start V2 discussion thread for additional information.

Change History
  • 2.0 First Production Version
  • 2.0.1 Added board dimensions
  • 3.0 New Layout
    • Double sided board
    • Moved AC in and Txfrmr connections to ends of board
    • Added Keystone connectors as option
    • Conforms to 10mm mounting grid
  • For future changes

    • Add polarity markers for electrolytic capacitor

Information
  • Product Page
  • BOM - Attached below (Last updated: Jan 14 2014)
  • Schematic - Coming soon
  • Dimensions - 110mm x 55mm

Attachments

5AR4 Rectifier Supply Voltage

Something I can't appear to find an answer for.........
( Although I found info regarding 'Battery Powered' Vintage tube Radio's very interesting !)

' Can a separate 5 Volt / 3 Amp DC Supply be used for the Heater on a 5AR4 '.?

That is, something like this : https://cpc.farnell.com/ideal-power...pin-iec-vi/dp/PW04127?st=5 volt power supply

This one does have the 5volt -ve side attached to the Mains Earth, others don't.
I was just wondering if I could use a spare Marshall TX ( supplying the HT & 6.3 vac ) in a 1964 Vox AC30 that has blown its Mains TX.....with a separate DC supply mounted under its wooden shelf
just for the Rectifier Heater !

Attachments

  • Rect Supply.jpg
    Rect Supply.jpg
    47.1 KB · Views: 100

Smokin hot built DCB1

The good news is that it plays music!

The bad news is that it emits some smoke and smells bad!

It worked fine when I built it many years ago, not sure what went wrong in the interim.

Free to a good home, just send me a shipping label.

Info here: https://www.diyaudio.com/community/threads/mezmerize-dcb1-building-thread.176723/

I am selling the transformer separately.

https://www.diyaudio.com/community/...er-115-115-15-15-transformer-on-board.411983/

20240424_114237.jpg
20240424_114255.jpg

Stylus life... 200 playing hours! Really?

Hello all. Just received my new shibata cut stylus from Jico, for my much loved ADC XLM MM cart. The instruction manual/warranty note says:
'Although the criteria for replacing stylus vary depending on conditions of use, it is recommended to replace the stylus after approximately 100-200 playing hours (SAS-stylus 500 playing hours).'

Dude!!! Thats only a few months at best! For a 200USD needle?

My ADC cart has the original stylus still on it, and it is probably from the mid '80s if not earlier. It sounds great to me, but I figures it time to try a new stylus just for ***** and giggles.

Any real world experiences regarding stylus life? This just cannot be... 200hours... jeeezuss!

I am starting to understand the need for two arms on my TT. One for background listening and one for precious late night music enjoyment.

Want to find 2SA1141 / 2SC2681 or equivalent for Electrocompaniet AW100

Hello

These are the Electrocompaniet AW100 output transistors I need to replace. As they are now impossible to find, what can I use to replace them.
Little diode seems to have some but pictures are not the same as the NECs I have. In the past, I always had good things from this place. It was costly but always worked.
Any other suggestions ?
Thanks

Rauland Borg Dax 60 Audio Amplifier

So, I was wandering through my friend's scrap warehouse and saw these two units that had just came in so I grabbed them figuring they may have some useful components.

It appears that they were used for audio/visual projects or institutional P.A. systems as they have some interesting features such as a 28 Volt DC aux output and 70V/25V speaker outputs. There are two 2N3773 transistors on the heat sinks. I powered them up and tested the DC outputs and they were a bit higher than advertised, but both units read the same 32 Volts. I hooked up a music source and plugged a speaker in and they worked.

My level of audio knowledge is mediocre, so I stopped there until I can understand the following statement "the balanced outputs for 70.7 volts and 25 volts are for speakers designed for constant voltage lines. Each speaker must have a line matching transformer and the speakers muct be connectted in parallel."

The output impedences are listed as follows 70.7V = 83.3 ohms, 25 Volts = 10.4 ohms

Anywho, I am planning to work up to building a 30-50 Watt guitar combo amp sometime in the future (2x10 or 2x12) and wondered if this unit could be upgraded to potentially accomplish the task at some point. I assume they could drive two 8 ohm speakers as is, but the internal circuitry is perhaps not "high fidelity" At the very least the transfomers, chassis, and/or heat sinks could be repurposed I suppose. I was planning on using a high end chip amp for my main power for my first guitar amp, but these might come in handy for a later project.

Any thoughts?

Attachments

  • Dax 60.png
    Dax 60.png
    75.3 KB · Views: 99
  • Dax 60-2.png
    Dax 60-2.png
    79 KB · Views: 106
  • Transistor.jpg
    Transistor.jpg
    7.6 KB · Views: 102
  • taps.png
    taps.png
    5 KB · Views: 107

Praise for TME

I found TME while shopping for a Brymen meter a few years ago and the pricing was great, delivery was way faster than expected but it never occurred to me to use them for smaller ticket items.
They just put a 9lb package on my PNW doorstep in 4 days for $13.
That's Poland > Washington.
My suppliers across Puget Sound will UPS a 2lb box that takes 2-3 days for only twice as much. *Bonus- no tax.
If they're not on your radar, it might be worth a look... cheers.
-1 point for barely adequate packaging
+1 point for Stonecold Heatsink pricing
  • Like
Reactions: Boydk

Another RH-84 build thread this time with a JR-Audio OT (tertiary winding) and Salas '6v6' nay 6P43P-E

I'll think it will become an integrated amp. With direct-in or something as an alternative.

As usual I started by giving the transformers (Transformers by https://jr-tubeaudio.com/) a makeover. With some hammerite and I gave them my Magnequest EXO-800 brass shrouds. (Exo-800 are small enough to put under a chassis)

Choke is a One-Electron UBT-1 (Primaries only ofcourse) that was the odd one out. (I once built a three channel 6c41c for my home theatre. But only ever used it for stereo)
PXL_20230123_151337476-EDIT.jpg

Gave the covers a coat or two of Urethane because I hate polishing brass since my stint in the South African Navy 😉

PXL_20230123_001755232.jpg


Mock up:

PXL_20240126_212237338.jpg
  • Like
Reactions: zintolo and yoaudio

HQ-AUDIO DAC-END R (ESS9018) $300

I am the original purchaser of this complete DAC. It is described in this thread: https://www.diyaudio.com/community/threads/dac-end-r-es9018-full-assembled-board.228755/post-3410121

I used it for a year or two, then moved a few times using only a single AV system. I just used it for a few days and confirmed that it works as it should.

Light scratches on the top.

Smoke-free home.

Price includes shipping within USA mainland.

Payment via PayPal.

Thanks.

Attachments

  • 20240423_101220.jpg
    20240423_101220.jpg
    473 KB · Views: 113
  • 20240423_101224.jpg
    20240423_101224.jpg
    528.1 KB · Views: 110
  • 20240423_101247.jpg
    20240423_101247.jpg
    578.6 KB · Views: 109
  • 20240419_181756.jpg
    20240419_181756.jpg
    427.8 KB · Views: 116
  • 20240419_181801.jpg
    20240419_181801.jpg
    401.2 KB · Views: 126
  • 20240419_164830.jpg
    20240419_164830.jpg
    542.6 KB · Views: 131
  • 20240419_164844.jpg
    20240419_164844.jpg
    698.6 KB · Views: 128
  • 20240419_164847.jpg
    20240419_164847.jpg
    599.1 KB · Views: 124

  • Locked
For Sale Ian Canada COVID and Post-COVID parts for sale. CONUS. Summer Sale.

The majority of energy spent on Ian Canada parts were during COVID. I did pick up some parts at the beginning of this year for some upgrades and have to let them go too.

I had an amazing time and learned a great deal, but I need to downsize for the flexibility of going abroad in 2025. The use of an external clock takes up additional space which makes it impossible for travel.

There's no rush on any transactions as I plan the whole Summer to spend on this sale. So, first time in a long time I'm spending the Summer on a sale and not a DIY project.

Standard PayPal only. 1/2 Buyer, 1/2 Seller Fees so split PP Fee. USPS preferred unless Batteries involved which require UPS. Buyer covers shipping fees. Let's try CONUS first. If you are outside CONUS and I have a rare product, I might consider. No trades.

I can test the part(s) before shipping so it may require additional time to ship. Everything listed was working flawlessly before disassembly.

COVID parts (50% off):

Q3. No clocks, just the placeholders. $67.50

Q3.png

LiFePO4 MKIII. I can throw in never used UcMate, UcHyrid (2). UcAdapter. I think I can throw in the Batteries too ($80 value). $100 for everything (UcBoards and 26650 Batteries).

MKIII.png
UcAdapter.png
UcHybrid.png
UcMate.png

ReclockPi. $37.50

RCP.png

I'll list the rest including external clock this month.

Post-COVID parts:

Help with burned PCB

Hi all , I am just getting into amplifier repair. I have read Perry’s guide and watched Barevids videos. I purchased a lot of amplifiers and have successfully repaired a few. I have what looks like a basic Zenon 5k Korean amp. The power supply fets, gate resistors and buffer transistors are all toast. The issue I have is the board has burned through. I have a few of these amps and I added photos of the burnt pcb along with an undamaged one for reference. Is there a proper way to repair this or is this unrepairable?

Attachments

  • IMG_1384.jpeg
    IMG_1384.jpeg
    485.4 KB · Views: 111
  • IMG_1387.jpeg
    IMG_1387.jpeg
    345.1 KB · Views: 110

TPA3221 Amp design Reset and Mute Pins

Schematic.png
Hi
this is my second time with class-d amp ,,the first one was with TPA3116d2 so i wanted to make a higher version power so i went to TPA3221 but to be honest i want to make a minimal components design to keep it simple and till be good and understand this kind of amps.
here is my schematic ..my question is i want to operate the Reset Pin and Mute pin as if this functions ignored or not exist in order not to use special circuit for either of them so am i doing it right in this design? Please advice

Loudness circuit on stepped attenuator

I add loudness circuit on stepped attenuator and my question is about quality of C1 capacitor. I think that C1 is in signal path and it's quality is important. My current C1 is ceramic type. Any suggestions which type of cap is best choice since value is only 470pF? I found Kemet paper, Silver Mica, caps, Wima MKP, Amtrans AMCH Polypropylene...

Thanks.

Attachments

  • PXL_20240306_095151974.jpg
    PXL_20240306_095151974.jpg
    160.2 KB · Views: 150

2018 Ottawa and Environs DIY Audio Get Together

2018 Ottawa and Environs DIY Audio Get Together
April 28th
General Burns Lodge Ottawa, Ontario, Canada

Google Maps
Hint: Click on Blue Link (Google Maps) For The Map!
Time
10:00AM to 6:00PM


Shaping up to be as good as always.

List of Attendees

John Kucharski ( Multisync )
Andre ( Tell me your last name Andre I'm the worlds best name forgetter )
Grant Marshall ( Pilover2000 )
Felix A
John Weisberg
Pierre Lavoie
Daniel Lavoie
Ron Urquhart
Dave Dalfarra ( the one and only )
macboy (Aaron)
jjrh88 ( Name???)
TechnoDweeb ( Byron )
Me , not you, nope me....
soundchaser001 (Matt )
Richard Dolan

KEF Blade DIY effort now a more affordable venture

So anyone interested in tackling a DIY effort using the Q150 drivers, they’re on sale again at a little more than 40% off suggested retail……I already have the white pair with the raw aluminum colored Uni Q but I just ordered another pair of the Walnut version for another variation…..a hybrid active 3 way with powered bass module and 2 8” woofers

Sony TA-8650 integrated amplifier Disassembly

Does anyone know what is required to get the back panel on this amplifier to swivel down? Let me explain further. I have the top panel removed and there are two screws at the top and back that if removed I think will allow the swivel down to occur. But they have built-in washers that I cannot remove due to the side wood panels obstructing them. The side wood panels are each held on by two screws but these are very difficult to get to without removing other parts. This has been a weakness of me as part-time DIYer - getting this stuff apart. Any help is appreciated. Thanks, Don

Understanding Power Supplies

Hi everyone,

I'm embarking on learning more about microcontrollers, ICs, etc and I have a small project that I'm working on that will use a PGA2311. I've done stuff like this before, I'm a decent programmer, and I understand a lot about the EE side of things, but my degrees are in music, so I have some holes I probably need to plug.

One of these gaps in my knowledge is that on the spec sheets, it specifies +5V for the digital side, and +5V and -5V on the analog side. Does this mean the digital side is DC and the analog side is AC ? If not, how does one get both the positive and negative DC voltages ? I always thought of DC as being just... well... DC.

Any reading materials that anyone can recommend, or resources to go learn would be appreciated.

best,

matt

Help identifying static noise when powering up my Sennheiser Me66 with K6 power module

Hi, I have a Sennheiser ME66 on a K6 module and I get the attached noise when I power it up. Sometimes it takes quite a while before the static completely goes away, sometime it does not even go away.

I'm suspecting my capacitors but am no sound engineer!

Can you guys listen to the attached recording to help me figure it out?

Thanks

Attachments

Newby Push Pull Question

Hello,

I just registered and I am so happy to find this forum.
I am 22 and trying to build my first tube amp.
Hope that I can add some questions here.

I am building a push pull 6550 power amp with cathode bias. It looks that could be work.

My first question is.
I am measuring about the double AC current before rectification compared with the total cathode DC currents.
Why is that?

thank you so much

Hypex UCD180 OEM Build questions

HI, I have some Hypex UCD180OEM boards and a SMSPS400180 PSU and am looking to build an amp. I see these UCD180oem boards are different than the offerings from other Class D DIY based offerings like the ones UcD180 HG with HxR. I se theres a board used to connect the 2 modules to the PSU however I do not have such a board. I am assuming I can wire directly onto the header pins on the module. Anyone have any suggestions?

EL34 PP Layout Proposal

Hi,

I found Guiseppe Amato’s DIY Tube page and this project inspired me to look into a layout editor for myself. Here are my results…

A) Guiseppe’s page: https://www.vtadiy.com/
B) The amp I am specifically interested in (Il Primo Bis): https://www.vtadiy.com/home/tube-amplifiers/il-primo-bis/
C) Guiseppe used an open source layout designer app which amazed me, DiyLC by bancika (who also builds his own guitars): http://diy-fever.com/blog/, http://diy-fever.com/software/diylc/

Guiseppe provided a picture of his build’s layout which I took and re-engineered for learning purpose. I herewith share my result with the community. Any feedback welcome…
EL34.png


You can find the schematics on Guiseppe’s home page…

Attachments

Aluminum trimmed subwoofer cabinet

I am finally adding a pair of 12” sealed subs to expand the dynamic range of the bottom couple of octaves of my previously described diy open baffle planar magnetic tower system. I need to assemble the ICE amp to drive them, and add a miniDSP-based crossover, but here they are still fresh on the workbench. I’ll add more details once I actually install them. The plan (if I haven’t really botched the measurements) is to put the subwoofers under the woofer towers so the foot print doesn’t get out of hand. I’ll add details as they emerge over on the original thread so I don’t hog electrons by running parallel threads.

Few

IMG_2357.jpeg

Reverse engineering old 2 way speaker from church

My friend gave me this pair of speakers and i was thinking they may need some tweaking for hifi listening.
Woofer is Celestion, i have sent message to them to see if they have some info. Waiting for response.
Tweeter seem to be MB Quart MCD25M but there seem to be some variants.
Box is 25liter and there is a vent thats 45mm diameter and 18mm deep ,just a round cutout in front of box.
Filter is a bit weird but its probably tweaked for the application.

Maybe need to borrow mic and driver measurement equipment from friend or just alter the crossover abit.
It does not play very low but i guess its a combination of woofer/box and the weird capacitor in series with woofer.

Attachments

  • filter.jpg
    filter.jpg
    45.5 KB · Views: 142
  • PXL_20240422_104122773.jpg
    PXL_20240422_104122773.jpg
    540.5 KB · Views: 152
  • PXL_20240422_104137490.jpg
    PXL_20240422_104137490.jpg
    604.1 KB · Views: 137
  • PXL_20240422_104150164.jpg
    PXL_20240422_104150164.jpg
    539.4 KB · Views: 138
  • PXL_20240422_134048095.jpg
    PXL_20240422_134048095.jpg
    555 KB · Views: 133
  • PXL_20240422_134248423.MP.jpg
    PXL_20240422_134248423.MP.jpg
    521.3 KB · Views: 120
  • PXL_20240422_134343247.jpg
    PXL_20240422_134343247.jpg
    836.8 KB · Views: 143

Vacuum tube replacement E424 (solid state)

Hello everyone on this forum,

I recently received a Philips 2531 radio.
But unfortunately all the tubes where missing.
So, I was searching for the E424, E442 and C443.
But some of these tubes are hard to find here.

But I really wanted to use the radio.
Via a Dutch forum I was instructed on how to make a C443 with a PL95 tube.
I tested this substitute in another radio of mine, and it works.

That brings me to the problem I have right now.
I am trying to make a replacement for a E424 tube.
And I found a page were someone tried this with 2 BF422.
When I was testing this circuit, I found out that it doesn’t match the curve of an E424.
So, I made some changes to the design, and the linear part of the curve matches quite good now.
I am curious, if there is anyone who has a suggestion about how to get het curve more like an original E424.
I would like to have a rounder curve at the bottom, so that not only the linear part matches the E424 transfer characteristics.

*note
I also tested this E424 substitute in another radio. And it works.
Because in that radio the grid is biased with 0 Volt.
So, it than operates in the linear part of the characteristics.

This E424 tube is mostly used as preamplifier and detector in Philips radios.

Here are my test results and my schematics.

If you have any tips or tricks for this replacement, I am happy to hear about them!

Attachments

  • E424 Replacement.png
    E424 Replacement.png
    8.7 KB · Views: 136
  • Schema E424 Vervanger.png
    Schema E424 Vervanger.png
    10.5 KB · Views: 145

2N3055 the early years

According to wikipedia "The 2N3055 is a silicon NPN power transistor intended for general purpose applications. It was introduced in the early 1960s by RCA using a hometaxial power transistor process, transitioned to an epitaxial base in the mid-1970s"

The epitaxial process gave it a higher transition frequency which is arguably better for most applications.

What I am particularly interested in is the European sources of the 2N3055 in the transition period i.e the 1970s. Any information gratefully received.

Cheers

Ian

Bob Heil, Audio Engineer to the Who, Jerry Garcia, Peter Frampton,RIP

From the NYTimes, April 23, 2024:

By Alex Williams

Bob Heil, Whose Innovations Enhanced the Sound of Rock, Dies at 83
A groundbreaking audio engineer, he provided the large-scale systems that brought tours by the Who and the Grateful Dead to life.

Bob Heil’s career as a groundbreaking sound engineer who brought thunder and rich sonic coloring to tours by rock titans like the Grateful Dead and the Who began behind a pipe organ in a 1920s movie palace.

Mr. Heil, who helped usher rock into its arena-shaking era by designing elaborate sound systems that allowed rock juggernauts of the late 1960s and ’70s to play at volcanic volumes, first learned to appreciate the full spectrum of musical tones as a teenager, when he took a job playing the massive Wurlitzer pipe organ at the opulent Fox Theater in St. Louis.

“We had to voice and tune 3,500 pipes, from one inch to 32 feet,” he said in a 2022 video interview with the audio entrepreneur Ken Berger. “Voicing taught me to listen. Very few people know how to listen. Listening, you’ve got to mentally go in and dissect.”

<SNIP>

Although he worked behind the scenes, Mr. Heil was enough of a force that the Rock & Roll Hall of Fame in Cleveland credited him with “creating the template for modern rock sound systems” In 2006, the Hall installed a public display containing his mixing boards, speakers and other items.

Mr. Heil developed some of the first effective sound systems for large rock concerts in the 1970s. The two men here were unidentified.Credit...via Heil Sound
“The concert business became what it is today because he made the experience so much better for the customers,” Howard Kramer, who at the time was the Hall of Fame’s curatorial director, said in an interview that year with The Houston Chronicle. “No one made the leaps in live sound that he did.”

Mr. Heil got started in the business in 1966. Up to that point, top rock ’n’ roll bands often had to rely on feeble sound systems that were drowned out by screaming fans. That roar, Keith Richards of the Rolling Stones wrote in his 2010 autobiography, “Life,” was often so deafening in the band’s early days that audiences could hear nothing more than the drums: “We used to play ‘Popeye the Sailor Man’ some nights, and the audience didn’t know any different.”

Mr. Heil gave rock shows the sound arsenal they needed. “We were the first company back then to build a package P.A.,” he said in a 2008 interview with the audio magazine TapeOp. “You could come to Heil Sound in 1972 and leave the facility with a complete system: snakes, road cases, everything — even a modular mixer.”


Mr. Heil put a distinctive stamp on 1970s rock with the Heil Talk Box, an effects pedal that was a signature of Peter Frampton’s monster-selling 1976 double album, “Frampton Comes Alive!”Credit...Carl Lender
He also put a distinctive stamp on 1970s rock with the Heil Talk Box, an effects pedal that transformed guitar parts and vocals into an interstellar drone. Joe Walsh used it in memorable fashion on his hit “Rocky Mountain Way” in 1973, and the Talk Box was a signature of Peter Frampton’s monster-selling 1976 double album, “Frampton Comes Alive!”

Mr. Heil’s career took a major turn in 1971, he told Mr. Berger, when a manager for the Who frantically called him in St. Louis, asking if he could get his crew to Boston the next day. The opening show there, part of the band’s tour in support of its hallowed album “Who’s Next,” had been a disaster, with one newspaper noting that the band’s “soaring brand of rock could not be heard” under the venue’s “miserable conditions.”

Roger Daltrey, the band’s lead singer, threatened to fly back to England until Mr. Heil arrived with his rig. When Mr. Daltrey “did the sound check,” Mr. Heil recalled, “it was OK, because it was a monster P.A.” He would work with the Who for the next decade.


Mr. Heil with a microphone used by Roger Daltrey of the Who and the mixer he built for the band’s 1974 tour. The equipment was part of a 2006 exhibition at the Rock & Roll Hall of Fame in Cleveland.Credit...Wayne Crosslin/St. Louis Post-Dispatch
Robert Gene Heil was born Oct. 5, 1940, in St. Louis, the elder of two children of Robert and LaVerna (Bills) Heil. His parents owned a clothing shop in the small town of Marissa, Ill., about 40 miles east of St. Louis.

As a youth, Bob not only played the accordion and the organ but also became a ham radio enthusiast, which gave him an early opportunity to fiddle with electronics. After graduating from Marissa Township High School in 1958, he spent time studying at the University of Illinois in Urbana-Champaign and the St. Louis Institute of Music.

Mr. Heil in 1959, when he worked as a demonstrator of Hammond organs.Credit...via Heil Sound
In 1966 he opened Ye Olde Music Shop in Marissa, where he rented Hammond organs and repaired instruments for professional musicians. He also began to design his own audio systems.

Before long, he was supplying them to country acts like Dolly Parton and Little Jimmy Dickens as they came through St. Louis. His big break came in 1970, when management of his old employer, the Fox Theater, called him and told them of a crisis: The Grateful Dead was set to play there, but the band’s P.A. system had been confiscated by authorities in a drug raid.

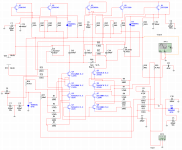
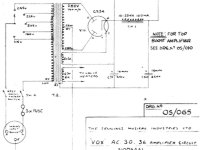
On a subsequent call with Mr. Heil, Jerry Garcia, the band’s lead guitarist and vocalist, “almost dropped the phone” when he learned that Mr. Heil had a sophisticated system featuring an amplifier by McIntosh, the high-end audiophile brand, Mr. Heil told Mr. Berger. Performing Musician magazine later called the resulting concert “the night that modern live sound was born.”

In addition to his daughter Ms. Staley, Mr. Heil is survived by his wife, Sarah (Benton) Heil; another daughter, Barbara Hartley; a stepson, Ash Levitt, the president and chief executive of Heil Sound; a sister, Barbara Schneidewind; and seven grandchildren. Both daughters are from his first marriage, to Judy Mortensen, which ended in divorce.

By 1980, Mr. Heil had grown weary of life on the road, so he created a new line of headsets and microphones for the ham radio industry. At one point, Joe Walsh, another ham enthusiast, told him he wanted to use one of his microphones onstage.

Mr. Heil protested that the microphones were not concert quality. Mr. Walsh disagreed. “I was at his house and went downstairs to his little studio and he proved it to me,” Mr. Heil told TapeOp. “So I had to start listening all over again.”

Audiomatica Medusa turntable with Clio Pocket

I own a Clio pocket system and I found the instructions on how to build the Medusa automatic turn table: https://www.audiomatica.com/wp/?page_id=3024

I will not build exactly this one, but it will be also based on GRBL, Arduino and CNC shield. I will use two smaller motors and a pulley between them, just because I had them from a 3D printer. Powered from an old laptop supply.

From a serial terminal, it works perfectly. I got it moving also from Clio Pocket - if your Windows use a decimal comma instead of a decimal dot, you need to change that in Windows to get it to work. At least in the current 2.2.0.0 release.

Attachments

  • 6C037661-AC98-4002-A58B-E6B34B2075E8.jpeg
    6C037661-AC98-4002-A58B-E6B34B2075E8.jpeg
    465 KB · Views: 150

CD Lens adjustments (Philips)

Hi there!!
Recently I repaired a Philips CD620 that was in a very poor condition, with serious damage in the main board.
After 2 weeks of work, I repaired it and now it’s full working.
Everything was allright until today, by listening the album Dangerous (Michael Jackson). When playing the last tracks I noticed some distortion and artifacts.
When I repaired it I forgot to adjust the lens, so I opened it again to do it.
When I checked the values for Focus and Laser current, it was very very low. So I adjusted the pots to get a better value and now it’s “working fine”.

BUT, here is the problem:
The service manual says that the correct values (using a test cd) has to be:
- 50mV for laser current across a specific resistor.
-400mV (+-40mV) for Focus across certain point and ground.

I have not a test cd, so I took 3 of the best quality cd’s I own and adjusted the pots to get an average value near to the values shown in the service manual.
Example: with cd1 I get 35mV(laser) and 360mV(focus).
With cd2 I get 32mV(laser) and 470mV(focus)
With cd 3 I get 37mV (laser) and 420mV (focus).

The first problem is that I cannot set the laser current to 50mv across the resistor. The max value I can set is 37mV. Is this value too low???
Once adjusted, I tried some other CD’s with different quality pressings and I get very very different values, examples:
  • 22mV (laser) and 560mV(focus)
  • 21mV (laser) and 980mV !!!!!!!!(focus)
  • 34mV (laser) and 160mV (focus)

I think this values are so far to the ideal.
But, remember that I adjusted the lens with 3 of my best pressings (reflective quality, etc etc) and the average values I can set are: 37(laser) and 400(focus).
So the only thing I can suppose is that the lens is well calibrated but the different quality of my other CD’s makes the lens to work different with very different values for laser current and focus.

The thing here is that now ALL cd’s sounds fine. No distortions. Just pure sound.

Can I be sattisfied with the results? Or is the laser current too low? Service manual says 50mv and I get 37 as much.

Or maybe the diode is in the end of its life?

Postdata. Sorry for my horrible english.

Supercap Charger PCB

Hello, i wanna utilize these here: https://de.aliexpress.com/item/1005002737105856.html but you need to limit charge current, balance (which is included on the chinese board), and manage/control when to charge again to make it a "standalone" power supply

since you dont wanna include measuring circuitry of the voltage, one could just use a power switch IC (which limits current well) and a isolated microcontroller to recharge in a timebased manner depending on the max. current consumption

4,8V - 5,2V, 250F, 100mA = 15 minutes discharge time
4,8V - 5,2V, 250F, 300mA = 5 minutes discharge time
4,8V - 5,2V, 500F (2 banks), 100mA = 30 minutes discharge time
4,8V - 5,2V, 500F (2 banks), 300mA = 10 minutes discharge time

Any better ideas here or am i on the right track?

Balanced line driver (SE to Bal) board suggestions?

Hi

I need to convert a few SE sources to balanced. I have seen quite a few boards on AE featuring the DRV134 and similar. Some require DC and others differential AC with various levels of filtering etc. I could not find any discussion or reviews on diyaudio.

Can anyone suggest one of these affordable boards or link to a discussion I may have missed?

Thank you

For Sale DDDAC Clearance sales - Workshop - Demos and Prototypes

I really need to get my workshop cleared up. I have several boards, products, components etc. which are just lying around. A waste of my money and a pity as they are not getting a home to be part of a music system 🙂
So, I will start cleaning up my workshop and edit this post with anything which could get out for sale...
This is all private sales and there will be no invoices.

Pricing will be my idea, but I am always open for (serious) offers. The longer something is on sale here, the better your chances are for a lower price. 😉
Shipping depends on region and kind of shipment. I will agree with the buyer on this individually.

Please come around so now and then to see what is in the shopping window.

Doede

ok, let's start:

1) My very first hand-made MK3 prototype. This is still without the electronic rectifying. In fact, very close to the "old" PSU - The choke recommendation is out of date - see my blog... )
The DAC board itself is also very close, but no separate gate driver for the MCK and the UFL are not soldered on it. Also, daisy chaining is only possible by flat cable. The board is stereo and work 100% of course.... The analog section capacitors are Elna Silmics - those are obsolete now. When sold, I will clean up the loose wires of course and free up the solder holes. Could add UF/L if required

My price expectation for the set (PSU and DAC Board) excl. shipping cost is 555 Euro.
2024-04-23_17-31-17_IMG_4024.JPG 2024-04-23_17-31-54_IMG_4027.JPG


2) let's see what I dig out next.

Pioneer 8500 II rebuild

I purchased a ~1970s vintage 8500 II Pioneer Amplifier from Japan. I am wondering if anyone here does restoration on older equipment and has recommendations on replacing the transformers vs using it on a step-down transformer. The Japanese unit is designed for 100 vac at 150 watts. I assume I can run the unit on my Variac and see what I think.

It looks like (from the service manual) I could replace the existing transformers with 120 to 35-volt transformers (I'll verify the voltage when I have a unit). Using Anetk toroids would be pretty cost-effective if they fit. I don't know if there is an advantage of one option over the other. In any case, I would keep the existing transformers in case I want to put it back to stock.

Any advice would be appreciated. I do plan to re-cap the electrolytic and fix whatever else I find. I'll probably preemptively replace a few transistors that are known to fail as well.

Need some help sizing an SUT

I need more gain out of the phono amp I built and am exploring the SUT route. I have a Dynavector DV20X2H cartridge.
Output 2.8mv
Impedance 150Ω
Recommended load >1000Ω

From the reading I have done and I'll admit I don't have a comfortable amount of understanding but it seems like I would want to increase the output to roughly 5mv to put it on par with most MM carts. What ratio SUT do I want? 1:2?
Then to get my 1000 loading parallel the 47000 with a 5.1k resistor which is divided by 4 the square of my ratio.

These numbers seem a bit extreme. Is the output of my cart too high to use a SUT?
I also posted about raising the gain of my amp. Maybe if thats possible would be a better solution?

Design Study of 3D Printed Loudspeaker Port

Hello Everyone!

I would like to share with you the concussions of a study I have been working on over the past months to design an optimised 3D printed port for a desktop loudspeaker. I tested various methods to reduce unwanted resonances, while keeping an eye on port turbulence.

EDIT 22/04/24: The design study has been significantly revised to include more information and correct some erroneous conclusions.

3D Printed Loudspeaker Port Design Study V2

Baseline Original vs Practical CLD Final.png


Original post:

3D Printed Loudspeaker Port Design Study < Clicky Click

Here are a few snap-shots:


1706639529392.png

1706639584407.png

1706639612066.png

1706639634566.png


There is a whole lot of info in the paper beyond this including the effect of holes in ports, reduced wall thickness, constrained layer damping and what bending ports does to the response. I encourage you to check it out, since it took me a lot of work 🙂

While I unveil the fruits of the efforts, I must confess I have the intention of eventually offering a DIY kit and a finished product for sale based on the methods revealed in this study. I hope this doesn't detract from my wish as a fellow enthusiast to share what I discovered.

Thanks also to @stv for encouraging me to make the effort writing up what I was doing. His thread on port resonance is a gold mine. Also thanks to @andy19191 for early feedback on the document.

Simon

Any HVAC technician here?

My GF mother inherited little house in Florida and 3.5 tonne AC unit just went belly up. Last year they replaced $$$ blower motor since it was still under 10 year warranty. Now they are told that compressor failed and local HVAC company suggest a whole new unit for 8 grands. They quoted $2.5k for compressor replacement. It's not easy (for me ) to find relevant info but from quick internet search Copeland compressor costs around $1K . Anybody with account in HVac distributor can check the exact compressor which will be drop in replacement for compressor in Bryant 707CNXA4200AATP?

Tascam M2600 Meter Bridge (MU-2632)

Hey all. I recently picked up a TASCAM MU-2632 meter bridge unit. It’s an old unit and I can’t find much info on the meter bridge specifically online, but it looks like it was used with the M-2600 MK2: https://reverb.com/item/29128921-tas...24-meterbridge

It looks like it uses 8-pin mini DIN connections (I’m not really that experienced with DIN connections) that provide signal to each of the visual meters.

Is there any way that I can add this to my VERY basic home studio setup? It would probably really just be more decorative than anything, but I wondered if there was a way to take an L-R 1/4” Jack signal and somehow get those into the unit to watch the lights dance?

Attachments

  • 0AA89F7D-19A3-4311-887C-B4885EDBEFB1.jpeg
    0AA89F7D-19A3-4311-887C-B4885EDBEFB1.jpeg
    448.2 KB · Views: 253
  • 1D712BAD-7CA0-4310-9BAD-5D1A7C77AB6C.png
    1D712BAD-7CA0-4310-9BAD-5D1A7C77AB6C.png
    354.5 KB · Views: 156
  • 5DE11CF2-08D6-470A-B4D4-7193AD58DF87.jpeg
    5DE11CF2-08D6-470A-B4D4-7193AD58DF87.jpeg
    269.2 KB · Views: 136
  • B0DDB72B-072D-42B2-B8A0-1CB3B28021E6.jpeg
    B0DDB72B-072D-42B2-B8A0-1CB3B28021E6.jpeg
    267.8 KB · Views: 148
Projects by fanatics, for fanatics
Get answers and advice for everyone wanting to learn the art of audio.
Join the Community
507,687
Members
7,884,285
Messages

Filter

Forum Statistics

Threads
406,038
Messages
7,884,285
Members
507,687
Latest member
sarah xenran