The previous link...
is SP10 specific, but the basic characteristics of the plinth material and volume should be valid.
is SP10 specific, but the basic characteristics of the plinth material and volume should be valid.
Stuey, When It's summertime in England conditions are perfect for resin work, Unlike Aus where it would be hard to stop resin going off it a matter of minuets.
Squiffy, use corse sandpaper first then a finer grade then wet n dry.
For this general sort of thing I have some 120 grit oxide paper glued onto 4 sides, of a piece of mdf 20mm X 20mm X 6" long. NOt in any way critical, use what you have.
I will be doing a direct comparison with the newly modded LP12, OC9 in Audiomoded Arm
It's not High End but not far off….Anyone with a Valhalla should really consider changing it to a Geddon (cheep) which is an Naim Armageddon (very expensive) Clone.
So a 219 on a resin based Striped Down GL 78 + OC9 has to go some to match this setup.
If anyone has an early OC9 or Any Decca London Cartridge, they want rid of I would be interested.
Ive only briefly come across the term Hybrid Belt / Idler, But have no Idea How its been done. Any links would be appreciated.
Stew would the SP10 plinth be layered or box design? Is a more solid construction better sonically than a box? I know most low mid range TTs are shipped in a box style platter indeed the two or three that I have pulled apart for my earlier projects have been boxes, a Systemdek and an old Rotel.
The Saturns are of a Skeletal style and suspended and is a joy to look at and play. As I mentioned earlier I'm thinking long and thin with maybe a step down for the pivot mk11 and a space for the bath all arm Oh yes I gotta do one of them babies 🙂
The Saturns are of a Skeletal style and suspended and is a joy to look at and play. As I mentioned earlier I'm thinking long and thin with maybe a step down for the pivot mk11 and a space for the bath all arm Oh yes I gotta do one of them babies 🙂
Ready to be "blown away"?
Most are Baltic Birch, built up in layers. The point of trying to create a mold (mould?) is to have a means to model the turntable top plate with all parts attached (as to be used), then create a template. The spray foam I used doesn't seem to hardening quick enough and not enough detail has occurred. So a couple other thoughts:
I would never consider a LP12, whatever guise to be not HiFi. They can be glorious sounding (I've only heard a few). But even a lowly Dual with a 219 and an old Ortofon MC3 Turbo competes nicely with a Roksan Xerxes (original)/rewired and modified RB250/ Denon DL103R.
The venerable Thorens TD124 uses such a system. The motor drives a belt which drives a stepped pulley which drives an idler wheel. In the attached photo I drew the belt in red. The TD124 's proponents state that it is quieter than the Garrards of the same day. It is an interesting option. Just do a search for Thorens TD124 information or reviews. There are tons of places to look, but as usual, user510's site is a great resource. (Steve Clarke)
Stew would the SP10 plinth be layered or box design? Is a more solid construction better sonically than a box? I know most low mid range TTs are shipped in a box style platter indeed the two or three that I have pulled apart for my earlier projects have been boxes, a Systemdek and an old Rotel.
The Saturns are of a Skeletal style and suspended and is a joy to look at and play. As I mentioned earlier I'm thinking long and thin with maybe a step down for the pivot mk11 and a space for the bath all arm Oh yes I gotta do one of them babies 🙂
Most are Baltic Birch, built up in layers. The point of trying to create a mold (mould?) is to have a means to model the turntable top plate with all parts attached (as to be used), then create a template. The spray foam I used doesn't seem to hardening quick enough and not enough detail has occurred. So a couple other thoughts:
- create a mold using plaster of Paris and get the detail I am looking for
- try another type of consumer spray foam
- talk a local spray foam insulator to spray the bagged and oiled underside of the Garrard
- wrap the complete turntable in cling fils and get the insulator guy to spray that
- start with foam insulation board and attemp to sculpt that into a female mold for the tt o sit into.
I will be doing a direct comparison with the newly modded LP12, OC9 in Audiomoded Arm. It's not High End but not far off….Anyone with a Valhalla should really consider changing it to a Geddon (cheep) which is an Naim Armageddon (very expensive) Clone.
I would never consider a LP12, whatever guise to be not HiFi. They can be glorious sounding (I've only heard a few). But even a lowly Dual with a 219 and an old Ortofon MC3 Turbo competes nicely with a Roksan Xerxes (original)/rewired and modified RB250/ Denon DL103R.
But wouldn't it "blow you away" if it did? 😉So a 219 on a resin based Striped Down GL 78 + OC9 has to go some to match this setup.
Ive only briefly come across the term Hybrid Belt / Idler, But have no Idea How its been done. Any links would be appreciated.
The venerable Thorens TD124 uses such a system. The motor drives a belt which drives a stepped pulley which drives an idler wheel. In the attached photo I drew the belt in red. The TD124 's proponents state that it is quieter than the Garrards of the same day. It is an interesting option. Just do a search for Thorens TD124 information or reviews. There are tons of places to look, but as usual, user510's site is a great resource. (Steve Clarke)
Attachments
That 214 looks a bit tasty !
All Have a good think about using plastercine to hold back any resin etc it's easy to work holds its shape & is readily removable (might also use masking tape) I'm going to use it on the inside of the Pan of the Lenco.
An aside, for the belt / Idler drive, has it been done with a Linn motor & sub plater ?
my plinth mould woes.
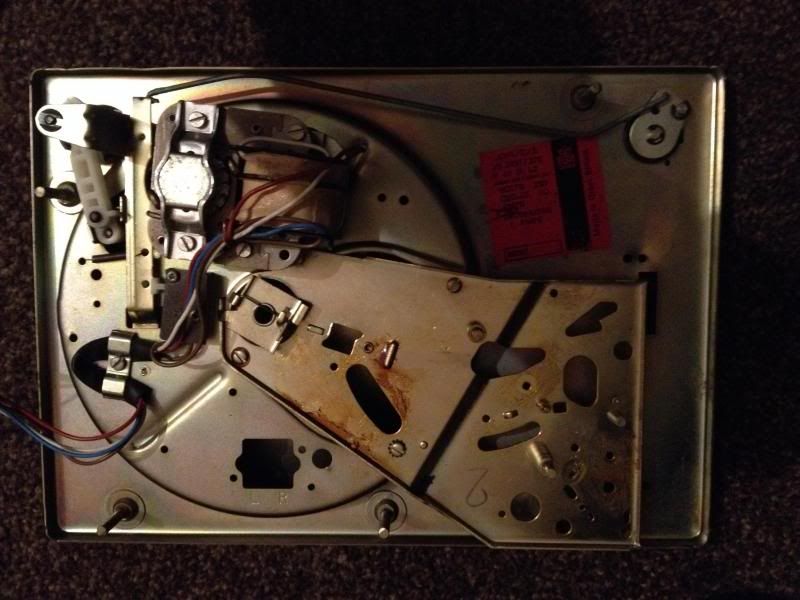
Had this worked out, I was going to post images, but it didn't. What I did was vacuum wrap the Lab60, with plastic. Applied cooking spray to the plastic, then sprayed spray insulation on top it. The bag ripped as the foam expanded and covered all the working parts of the tt. I've spent a couple of hours cleaning the mess, but will need to completely disassemble the Lab60 and do a thorough job of it.
So a caveat: consumer grade "gap filler" type spray foam should not be used.
Jay: Be careful, because I am sure once cured the resin will be difficult (if not impossible) to remove.
Thats one of those heartbreaking moments when you realise that you'r carefully worked out plan hasn't worked, because one is using a material that can be a bit unpredictable..
I know Stew, I've used it before on another project a few yrs ago, it's one of the reasons I'm breaking the build up into more manageable sections.
I did also use it on my speakers (the JBLs that i built) on & around the Aluminium ports to stop the vibrations from the two base units above & below the double ports.
I have found that as solid a 'form' as one can get is best.
Though plasticine can & does work, in some instances it may need a bit more support but it will work as a barrier.
As a 'filler' for the resin I'm going to use Cat Litter.
Stew you might be able to use cat litter as an absorbent 'barrier'. perhaps in small plastic bags… some creative thinking needed.
Another plinth template model attempt, but more successful.
all:
Well I reverted to a less elegant solution for this. Previously I had started to "hog out" a piece of rigid foam insulation board. The turntable now fits it (although it is slightly fugly). The basic shape is there though and I could glue small pieces of board to the existing one to fill in the gaps. I suppose I could tear everything off of the metal top plate and start with a "raw board, then build little covers for each of the most significant protrusions, then glue that to the existing board.
The idea of course is to end up with a close fitting plinth. Once the shape is roughed in I'll use drywall mud, plaster of Paris, or plasticine to to finish the interior (the female mould of the turntable parts as installed in playing condition). I imagine a lot of sanding to get the shape fairly nice. Then I'll create a drawing with better dimensions, and transfer it all to a single hand sketch of it, including contour lines (or take a photo of the underside of the Garrard) Another alternative (remember I thought the foam would be quick and easy, would be to create a drawing from an underside view of the tt, then do measurements for 2D locations. Once done then do some measurements from those points to a "z" axis for 3-D information.
As it appears now it is far too terrible looking to provide a photo 🙁 .
Stew are you intending to end up with a plinth along the lines of this one or will the moulding get a tighter fit to the mechanism of the turntable?
An externally hosted image should be here but it was not working when we last tested it.
Oh and come on photos of the good are only proved by the mistakes along the way and we do like a giggle now and again 🙂
Hi,
I'm lost as to what you are trying to do. A CNC machining guide ?
I had no problems making a multilayer ply plinth for my first
turntable (many moons ago), a Lenco, and though I messed
up by not moved the springs to under the plinth, it would only
of been slightly more complicated getting the first layer near
right regarding the topplate edge and the dropped main plane
of the topplate if I had wanted to intimately couple the two.
There is generally only one plane below the top plate that you can couple
to below and its the most important, as it holds the main bearing. Support
that plane and generally only the rolled edge of the visual top plate needs
supporting, i.e, don't worry too much about the underside of the visual
top plate, though there are ways of addressing that area for the finicky.
Details differ somewhat for an onboard arm compared to off board arm.
(i.e. whether the arm is mounted to the plinth or the toplate).
Making a ply plinth is just common sense, and the insides
don't have to look that pretty. Just work out each layer.
Interjecting bitumen roofing felt * between the ply's and
glueing the lot together with contact adhesive properly
may not end up with the most solid plinth, but it will
be very well damped comparatively to solid ply.
The aesthetics may or may not appeal to you.
The pliant layers also make excellent coupling layers,
e.g. under the mainlayer and around the rolled edge.
rgds, sreten.
* terminology varies, tar sheet, tar paper, or something
similar like PVC sheet, rubber sheeting, anything suitable.
Last edited:
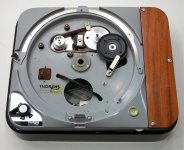
Not sure if you would class these as ugly but having had my eye on these beauties for a little while now I decided that if I'm going to do this then I'd better bite the bullet.
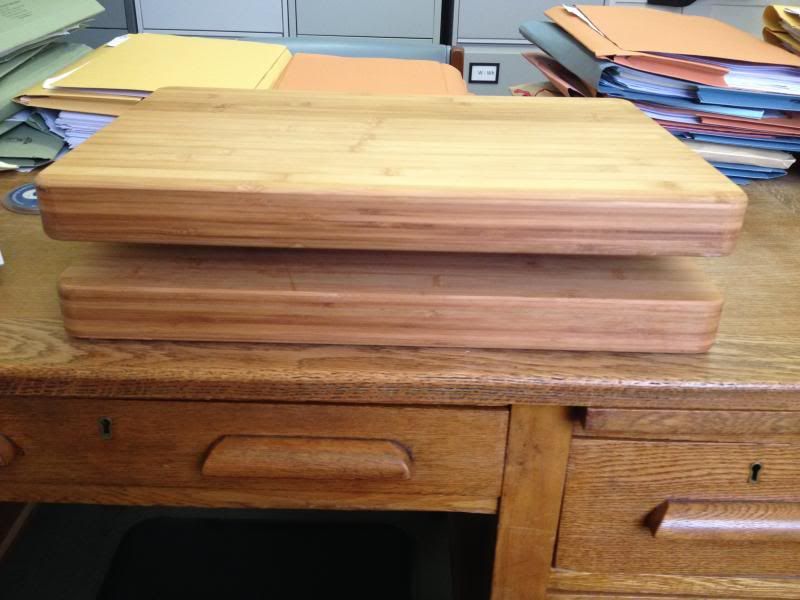
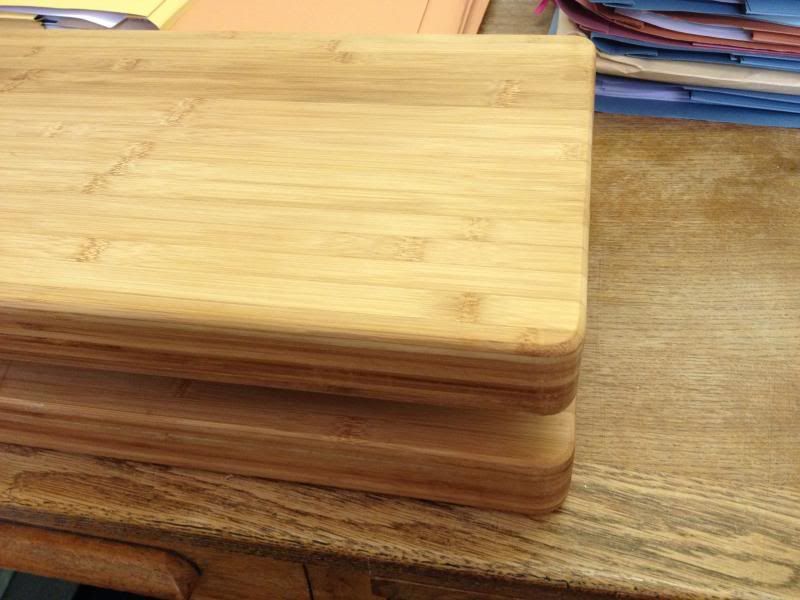
Lovely compact bamboo boards in a perfect size. They have a good solid weight to them and I believe bamboo is a pretty good material for using as a plinth. My thinking so far is to cut a recess in the top board to sink the player so that the top of the deck is level with the top of the board. On the underside of the BSR are four legs,
Im thinking at these points I can sit four springs to suspend the deck.
I will need to route the cavity to take the bearing and motor etc which may come all the way through.
Plenty of space on the board for two tonearms and in the gap between I hope to hide a wiring setup for both tonearms wiring into a switchable single outlet to the amp therefore no more unplugging at the back of the amp when I want to change arms.
Chrome legs to seperate the two boards with some kind of rubber dampening and some nice spiked feet to sit the whole thing on its final resting place.
Comments and advice please.
Oh and the cost of the boards? A hefty £14.99 each 🙂
Thanks for the comments and suggestions, Squiffy, sreten and Jay.
sreten and Squiffy: Thanks for your ideas and your observations. Yes I would like to model underside of the tt accurately enough to have it CNC'd if I decide the end result is worthy. A file could then be shared with any using the same or similar tt. I would prefer not to pay someone to digitize it as I am financially challenged.
I guess the alternative would be to take the time and manually draw out each layer. The fellow who I have in mind to do the CNC work is some distance away, so I will end up building a solid plinth (marine grade BB ply) with the correct over-all dimensions, and send it along to him and the tt, else send him the most accurate drawing of what I want the mould to be. The mould is intended to be a female one that can be filled with plaster of Paris or similar to represent the mechanical bits and top plate, then it can be altered relatively easily for minor variations. The mould would be effectively a complete plinth.
Squiffy: that rounded corner plinth looks quite good. Mine will need to be much larger to accommodate the 219. Nothing wrong with the use of existing cutting boards as long as the material is suitable. My Sugden re-plinth uses a single thick board (split to allow the experimentation of tonearm lengths)
sreten: The use of bitumen sheeting (or rubberized ice guard, or Dynamat or similar) is obviously a great idea, but the BB ply is essentially a CLD construction. The glue between the plys takes the place of the bitumen. I should follow my own suggestions though and make a couple of shelves of just BB ply/glue, and BB ply/bitumen/glue. And then have a listen. Then I could do a manual "hog out" of which ever sounds the best as a start on a plinth.
I mean fugly! I'll take a photo under less than ideal conditions and photoshop it to obscure it even more...and post it (much) later 😉.mmm lets see some truly UGLEY pics
sreten and Squiffy: Thanks for your ideas and your observations. Yes I would like to model underside of the tt accurately enough to have it CNC'd if I decide the end result is worthy. A file could then be shared with any using the same or similar tt. I would prefer not to pay someone to digitize it as I am financially challenged.
I guess the alternative would be to take the time and manually draw out each layer. The fellow who I have in mind to do the CNC work is some distance away, so I will end up building a solid plinth (marine grade BB ply) with the correct over-all dimensions, and send it along to him and the tt, else send him the most accurate drawing of what I want the mould to be. The mould is intended to be a female one that can be filled with plaster of Paris or similar to represent the mechanical bits and top plate, then it can be altered relatively easily for minor variations. The mould would be effectively a complete plinth.
Squiffy: that rounded corner plinth looks quite good. Mine will need to be much larger to accommodate the 219. Nothing wrong with the use of existing cutting boards as long as the material is suitable. My Sugden re-plinth uses a single thick board (split to allow the experimentation of tonearm lengths)
sreten: The use of bitumen sheeting (or rubberized ice guard, or Dynamat or similar) is obviously a great idea, but the BB ply is essentially a CLD construction. The glue between the plys takes the place of the bitumen. I should follow my own suggestions though and make a couple of shelves of just BB ply/glue, and BB ply/bitumen/glue. And then have a listen. Then I could do a manual "hog out" of which ever sounds the best as a start on a plinth.
I have previously thought that construction adhesive would be a good inter-layer dampener - common name here in Aus is 'Liquid Nails'. This stuff stays very slightly flexible (slightly...) and used quite thickly with a toothed applicator, would be excellent IMO. I believe it has some sort of filler in it such as talc as one of the ingredients. I'd imagine a multi layered ply plinth would be very dead sounding with this stuff between each layer. Might be fugly on the sides though, if not painted, as it's brown.
Mind you, it'd probably be pretty non resonant just with ply and PVA glue...but the above would be better.
Mind you, it'd probably be pretty non resonant just with ply and PVA glue...but the above would be better.
Last edited:
The skeletal design is quite appealing !
As yet I haven't decided on the wood section of the plinth
I have some ply, not birch so not really best but could be pressed into service if I can disguise it !
I have now decided to Make & use 'Play Dough' as a form for the resin part of the plinth.
Ive seen many 'High End' TT makers use Aluminium between layers.
Any thoughts on this,
Thin layers of ali can be obtained from a well known Swedish dpt store, that don't allow geeky peeps with beards to shop their….
sreten:
The use of bitumen sheeting (or rubberized ice guard, or Dynamat or similar)
is obviously a great idea, but the BB ply is essentially a CLD construction.
Hi,
No, BB ply essentially is not CLD construction at all,
and there is no further point commenting on the
wrong assumptions that suggest it might be.
rgds, sreten.
Comments and advice please.
Oh and the cost of the boards? A hefty £14.99 each 🙂
Hi,
I can't really tell but all indications to me are that deck is garbage.
You need something a lot better as a basis for a project IMO.
Using those two boards, springs between them "springs" to mind,
and belt drive, with the motor attached to the the lower board.
rgds, sreten.
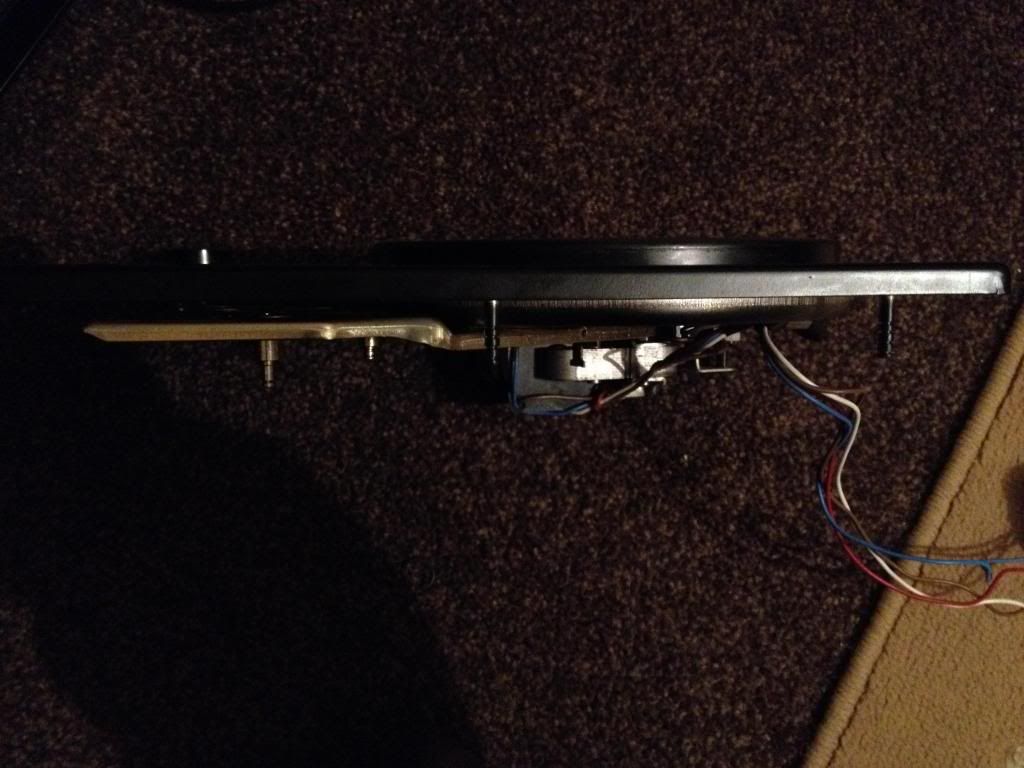
The mess...
Hi, sreten.
That was how the BB ply has been described by others. Regardless, the use of bitumen sheets would be beneficial. (sometimes we actually agree 🙂 ).
I tried to upload a few photos of my mess. If the album wasn't created, I'll try again or post smaller images in the thread.
Hi, sreten.
That was how the BB ply has been described by others. Regardless, the use of bitumen sheets would be beneficial. (sometimes we actually agree 🙂 ).
Hi,
No, BB ply essentially is not CLD construction at all,
and there is no further point commenting on the
wrong assumptions that suggest it might be.
rgds, sreten.
I tried to upload a few photos of my mess. If the album wasn't created, I'll try again or post smaller images in the thread.
- Status
- Not open for further replies.
- Home
- Source & Line
- Analogue Source
- The Nanook turntable thread