Remember to add the acid to the water, not the other way round!
Yup, big reaction done the wrong way.
Acid no likey likey water...
Remember to add the acid to the water, not the other way round! 😱
For us German speaking members:
»In das Wasser gieß die Säure, sonst geschieht das Ungeheure!«
Translates to:
Always pour the sulphuric acid into the water, otherwise something very unpleasant will happen!
Besyt regards!
Hi
No, i use same screws everywhere.
Those shown at the first post second picture.
Hi Thimios,
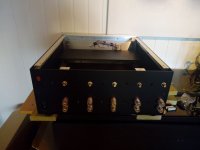
Do you use self-tapping screws for the front plate ?
No, i use same screws everywhere.
Those shown at the first post second picture.
Last edited:
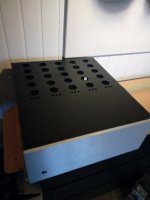
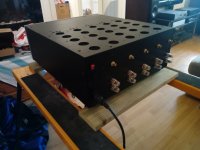
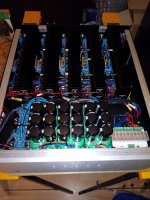
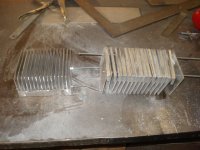
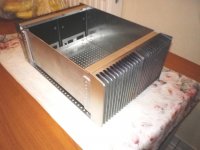
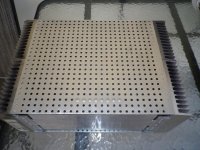
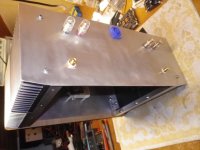
here's the last chassis i build from scratch (besides the front panel that is from modushop). build cost was about 130€ inkluded Paint.
Attachments


Anodizing is pretty simple.
The "nasty" chemicals are:
- Sodium Hydroxide (drain cleaner) 2% solution (i.e. a couple of large spoons per litre)
- Sulfuric Acid for the anodizing bath 10% (mix battery acid 1-3 or 1-4 in water)
Ah, I was thinking of chromic acid which is used industrially, very nasty and carcinogenic, H2SO4 is much safer.
Titanium anodizing I've done with borax which is even safer.
Can you explain your method in details?Ah, I was thinking of chromic acid which is used industrially, very nasty and carcinogenic, H2SO4 is much safer.
Titanium anodizing I've done with borax which is even safer.
Looks tasty thimios. As regards painting do you know to use etching primer on aliminium? It's also a good idea to get the paint and metal at the same temperature and practice on a scrap bit of ali first. Obviously all metalwork has to be clean. Lastly it's easier to get a good finish with matt black rather than gloss.
Andy.
Andy.
Some nice looking stuff here. I respect you guys for your skills!!!
🙂
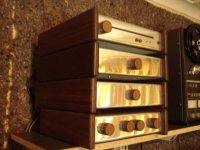
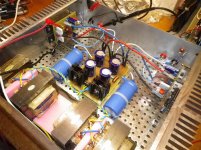
Hi bonsai, i work on this when listening the SX Class A using my new FANE 12"-250TC.
Great marriage!
Looks tasty thimios. As regards painting do you know to use etching primer on aliminium? It's also a good idea to get the paint and metal at the same temperature and practice on a scrap bit of ali first. Obviously all metalwork has to be clean. Lastly it's easier to get a good finish with matt black rather than gloss.
Andy.
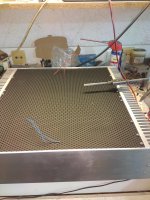
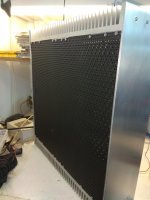
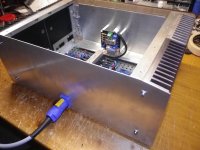
Look Andy, the top and bottom aren't aluminium.
They are steel 3mm.
They are painted using primer and then paint.
Frond and rear are 4mm aluminium.
My plan is to anodize and paint this.
I use a mixed method,as i can't buy clear, not scratched aluminium.
I will anodize the rear and frond and then i will paint with a mat black spray.
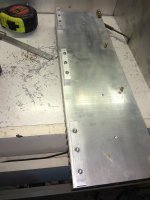
Some pictures with the progress.
Attachments


Last edited:
Hi bonsai, i work on this when listening the SX Class A using my new FANE 12"-250TC.
Great marriage!

Last edited:
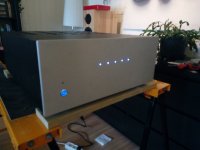
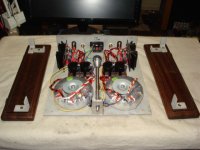
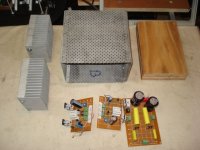
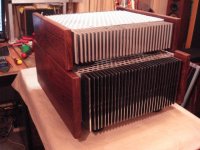
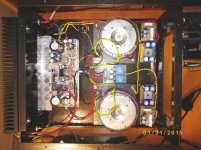
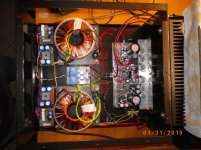
Some of my boxes.
Attachments


Hello!
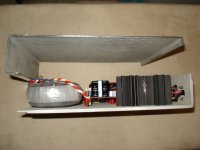
I'm building 6 monoblocks right now, and after thinking about what boxes to make, I decided on the following option.
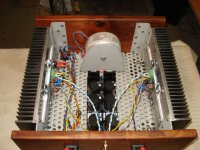
From the sheet metal, I built the internal skeleton of the amplifiers, making sure that the power supply was separated / shielded / from the circuit boards.
Since the monoblocks will be in bridge mode, there will be 1 radiator board on each side and the power supply in the middle.


I know it looks pretty ugly, but it's the internal skeleton of the amplifiers, the supporting structure, and you won't see any of it in the final version.
When completed, there will be facade panels installed around the skeleton.
The topic is very interesting and contributes to the exchange of experience.
Greetings!
I'm building 6 monoblocks right now, and after thinking about what boxes to make, I decided on the following option.
From the sheet metal, I built the internal skeleton of the amplifiers, making sure that the power supply was separated / shielded / from the circuit boards.
Since the monoblocks will be in bridge mode, there will be 1 radiator board on each side and the power supply in the middle.
I know it looks pretty ugly, but it's the internal skeleton of the amplifiers, the supporting structure, and you won't see any of it in the final version.
When completed, there will be facade panels installed around the skeleton.
The topic is very interesting and contributes to the exchange of experience.
Greetings!
Last edited:
...
I wonder where Tony sourced the extrusions?
...
Kuhlkorper fur die Leistungselektronik - Cool Tec Electronic GmbH
ct-400: 400mm x 10mm, height as you want.
BR, Toni
Hand made all as my friend Thimios.
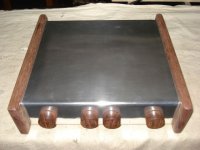
Mimesis 9.2 clone steel plate 4 mm -USSA -P3A.
Mimesis 9.2 clone steel plate 4 mm -USSA -P3A.
Attachments

Last edited:
What a clever idea, Btsd, of DIY'ing the sinks! To get the back surface plain, I'd take them to an engine overhaul shop and ask them to put them at their cylinder head milling machine.
Best regards!
Best regards!
- Home
- Amplifiers
- Solid State
- Building your own amplifier enclosure