To increase the stability you could always make the outrigger out of plate steel, your 160x200 @25mm thick would net 6.28kg then the 4 outrigger bits maybe another kg or so, wont subtract from the enclosure volume either.
Agree with STV great colour.
Agree with STV great colour.
Nice shape and proportions, too.
Just realised they are not symmetrical!
Just realised they are not symmetrical!
@stv uncanny isn't it!?
Last time I used Montana Gold Reef acrylic but I am still finding overspray years later. I opted for Rustoleum Peacock Suit furniture paint this time which is way less mess. They are much closer to each other in colour IRL.


I'm quite impressed with this furniture paint, though. Only took two coats and its looking ready for some top coat.
@Harry72 I had considered that but it takes away from my totem image in my mind. Let's see what happens though, I am leaving it fairly open atm.
@6thplanet @AlmaAtaKZ Thanks! The placement of the drivers is a little odd, I wanted to keep them as central to the COG of the cabinet as possible which does make it look uneven from front to back but hey - tbhat side won't be seen that much.
Last time I used Montana Gold Reef acrylic but I am still finding overspray years later. I opted for Rustoleum Peacock Suit furniture paint this time which is way less mess. They are much closer to each other in colour IRL.
I'm quite impressed with this furniture paint, though. Only took two coats and its looking ready for some top coat.
@Harry72 I had considered that but it takes away from my totem image in my mind. Let's see what happens though, I am leaving it fairly open atm.
@6thplanet @AlmaAtaKZ Thanks! The placement of the drivers is a little odd, I wanted to keep them as central to the COG of the cabinet as possible which does make it look uneven from front to back but hey - tbhat side won't be seen that much.
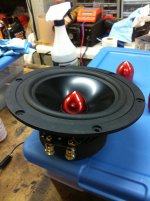
One thing's for sure with the W5-1138SMF - its Faston tabs are junk. They deform easily, making connector installation and removal an ABSOLUTE SAGA. Surprising for such a hardy little driver.
Flat faced needle nose pliers for a heat sink.


Fixed.
Flat faced needle nose pliers for a heat sink.
Fixed.
Cabinets finished. Next grilles then feet.
Not massively happy with the clear coat as the dead flat finish shows up the orange peeling when sheer light hits it. It won't be apparent in the front room though - it'll do is my mantra here.


Not massively happy with the clear coat as the dead flat finish shows up the orange peeling when sheer light hits it. It won't be apparent in the front room though - it'll do is my mantra here.
Grille prototype done!
I used the same method as before - machining it out of 12mm MRMDF with steps for the staples to tuck into. The difference this time is that the magnets also serve as risers, making the grille flush (ish) with the baffle while sticking directly to the woofer chassis.
With the material stretched over the 5x8mm magnets, they have a little bit of give, allowing me to lift them out using magnets embedded in the front of the grilles. I really thought I’d painted myself into a corner when I realized I had no way of getting them out…
This one is a bit rough around the edges, but when I make the final four, I’ll finesse the design.
Grilles done.
These are only 155mm in diameter so getting the staples in the right spot was tricky. Frames painted with black board paint (super matte).
What I feared most happened - twice:
Also, the clear coat is getting right on my proverbials.


These are only 155mm in diameter so getting the staples in the right spot was tricky. Frames painted with black board paint (super matte).
What I feared most happened - twice:
- Over-sanding made the baffle uneven, so I had to set each grille’s height individually with the magnets floating in epoxy until it set.
- A couple of magnets pierced the material, but since the grilles aren't meant to be removed so it's not a real issue.
Also, the clear coat is getting right on my proverbials.
Feet / Outriggers
I’m after a specific type that’s already available to buy, so I have two options:
1. Buy the Dayton Audio OA-4 here ~£75
✅ Pros: Ready-made with a nice finish. Quick.❌ Cons: Expensive for my needs (I don’t need the spikes) and less fun since it's pre-made.
2. Make my own from 6mm aluminium ~£280
✅ Pros: I get to make them myself. I'd get to buy new tools.❌ Cons: I'd need to buy a disc sander for shaping and taps for threading, increasing the cost.
Additional Details
For both options, I plan to use either:- M8 DIN 653 thumb screws with 1mm rubber sheet on the bottom
- Hard rubber buffers (25mm diameter x 10mm height)
3. Any suggestions?
I am also looking for similar feet. there are some cheaper options on eBay, but I am still looking.
Cool combination of colors, looks great! Somehow I like them more without grilles, it creates an interesting interplay of shapes, textures and shadows.
@VoxCelestial You know, I kinda agree. The large surrounds of the driver and the deep recesses of the baffle remind me of a bio-mechanical feature of a Geiger drawing. Perhaps when my daughter is old enough to be reasoned with I can put this to her as grounds to not fiddle with them! Until then, the grilles are a neccesaity 🙁
I found a way!
I always try to include a new skill in each project, and I was worried I wouldn’t manage it with this one. But I ended up squeezing in a few, so I’m very happy:
I copied it to birch ply, rough cut the aluminum bar to shape, then used a pattern cutter. For the first pass, I wrapped the template in Kapton tape, then removed it for a wafer-thin climb cut. The finish isn’t amazing, but it’ll sand out — and it’s going to be painted anyway.
Tapping was entirely new to me, but I’ve watched over 1000 hours of machining videos on YouTube... so that makes me an expert, right?
It took a bit of effort to figure out how to position everything precisely, but the jig worked well.
Now, time to sand, etch prime, paint, and top coat.


I always try to include a new skill in each project, and I was worried I wouldn’t manage it with this one. But I ended up squeezing in a few, so I’m very happy:
- Having a 3D design printed
- Machining aluminum on my router
- Cutting threads
I copied it to birch ply, rough cut the aluminum bar to shape, then used a pattern cutter. For the first pass, I wrapped the template in Kapton tape, then removed it for a wafer-thin climb cut. The finish isn’t amazing, but it’ll sand out — and it’s going to be painted anyway.
Tapping was entirely new to me, but I’ve watched over 1000 hours of machining videos on YouTube... so that makes me an expert, right?
It took a bit of effort to figure out how to position everything precisely, but the jig worked well.
Now, time to sand, etch prime, paint, and top coat.
- Home
- Loudspeakers
- Multi-Way
- 3-Way Co-ax Floorstander

