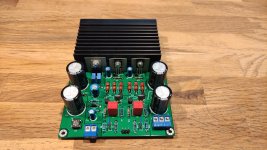
Finally I got time to finish the amplifier.
Looks good - I like the tough industrial look.
Another completed build to add to the Lineup 😉

Looks good - I like the tough industrial look.
Another completed build to add to the Lineup 😉

My right ear is slightly worse than the other so I use a balance potmeter at the front to compensate for that. B.t.w. listening to some recordings I suspect I am not the only one...
Agreed. And volume pot secions don't track either other perfectly, either. I like this option better than adding a separate balance control with associated high-impedance circuitry:
Bourns RK097221005C
A concentric dual-shaft 10k audio taper pot.
Last edited:
I used 100k now but that may be too high. The balance does not shift that much turning the pot, only when I reach 'the edges' of the potmeter.A concentric dual-shaft 10k audio taper pot.
That is one spectacular die-cast case, widea! 😀 Gorgeous!
If your 100k pot is linear, you can parallel a 22k resistor, wiper to ground, to get a decent approximation of log taper. Of course it'll change the knob position for where you listen most often. But it does lower the output resistance.
Cheers
If your 100k pot is linear, you can parallel a 22k resistor, wiper to ground, to get a decent approximation of log taper. Of course it'll change the knob position for where you listen most often. But it does lower the output resistance.
Cheers
Boards have arrived and are looking great 🙂
Next week I can get the rest of the components.
Almost ready for testing 🙂
Attachments
Decent heatsink there and looks pretty good. See how you go with the power resistors against the PCB with regard to heat. I spaced mine off the board to keep the PCB temp down.
These are 3W resistors. We will see. If needed I will place them higher. I think we still have some old stock of ceramic spacers for this purpose at work. Would be a nice touch.
Ceramic spacers would look good!
3w shouldn't generate too much heat but let us all know how you get on 🙂
3w shouldn't generate too much heat but let us all know how you get on 🙂
Sorry, logged in using another account. Please ignore the reply above.
So the board is up and running, works perfectly 🙂
Resistors are not getting that hot by the way. I can easily touch them for 10 seconds.
So the board is up and running, works perfectly 🙂
Resistors are not getting that hot by the way. I can easily touch them for 10 seconds.
Last edited:
That´s a really nice build and DIY spirit though and through.Finally I got time to finish the amplifier...
Goes to show that you don´t necessarily need a PCB when you know what you´re doing and with PCB its too easy anyway ;-)
Like that little enclosure too; reminds me that I have to drill a couple of holes in my chassis because it gets pretty hot after a while in a sealed enclosure!
You really should not have two accounts. Read the forum rules.Sorry, logged in using another account. Please ignore the reply above.
Thanks Joensd!That´s a really nice build and DIY spirit though and through.
Goes to show that you don´t necessarily need a PCB when you know what you´re doing and with PCB its too easy anyway ;-)
Like that little enclosure too; reminds me that I have to drill a couple of holes in my chassis because it gets pretty hot after a while in a sealed enclosure!
I do have a lot of patience to think through the way I want to have it look and how to fit everything in the small enclosure but not the extra patience to design a PCB and waiting for it to return from the factory. I hoped for the amplifier to function properly but did not know for sure, modifying it is a lot easier with a piece of perfboard.
The components I used like the BC550C and BC560C I had in a box for many years and finally I got a chance to use them. Other components I just recycled. And the components I did not have I got from the only electronics shop left in the city where I live and from China like the perfboard. Example, the on/off switch at the front is very old and the 'housing' of the switch looks like it is made of bakelite plastic...
Anyway, this way I keep the costs fairly low and it stays a hobby.
So, for me thinking how to fit everything is fun, actually making it is the challenge and listening when all is done is the reward...
When you're about to drill holes I advice you to use light oil or WD40 as a lubricant for the drill.
Use a template (like an old piece of perfboard) and preferably new drill bits. And take your time.
And any modifications to a perfboard build don't stick out like a black eye! 😉
A nice PCB, all pretty and solder-masked and component-designated, is a horrible thing to have to hack up. 😡
Cheers
A nice PCB, all pretty and solder-masked and component-designated, is a horrible thing to have to hack up. 😡
Cheers
Hahaha true, all true! 😀And any modifications to a perfboard build don't stick out like a black eye! 😉
A nice PCB, all pretty and solder-masked and component-designated, is a horrible thing to have to hack up. 😡
Cheers
I got contacted by widea.
He wants to publish an article about this amplifier in his blog.
I say I permit anything about this amplifier
to be published
by anyone.
Do not worry about publish or copyright.
Just go on publish.
He wants to publish an article about this amplifier in his blog.
I say I permit anything about this amplifier
to be published
by anyone.
Do not worry about publish or copyright.
Just go on publish.
- Home
- Amplifiers
- Headphone Systems
- 3 Transistor HP Amplifier with low dist