I am just starting this build and I've never installed a SMD. I am truly amazed at how small these are. Seems most of you are using soldering irons to install them. But solder paste and a heat gun just looks easier. Is there any reason everyone stays away from solder paste?
Solder paste is messy, has shelf life, needs to be refrigerated, only needs a small amount, expensive heat source and on and on. For a sot-23 package, Passives, small gauge, no clean eutectic solder is all I have ever used going back to the 90’s. But to remove ics like pqfp types, yes a heat gun is required
Last edited:
I don’t have the appropriate tools for „real“ SMD. And everyone here did it with their irons… it’s a bit fiddly, but it’s not that difficult! (Just be careful not to blob over them)
I've already ordered a tiny solder tip. Can someone give me a link to the "no clean eutectic solder" that was referenced? And maybe a temp recommendation for that solder? Below is what I've use all previous builds very successfully. Doesn't sound like it's what I need to go SMDing with though. Thanks for help folks!
Attachments
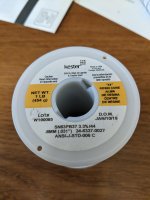
Multicore is a way better deal than the AIM version I am using, but it lasts a long long time.
https://www.mouser.ca/ProductDetail/AIM/13368?qs=/ha2pyFadujXSz6rydELAdvi0SSMULuvI30KycfCWSI=
I also use a very small chisel tip, I found the weller pointed tips always oxidize on me, hard to keep them tinned. 600F tips or set your iron temp that low. 700F is too hot imo.
https://www.mouser.ca/ProductDetail/AIM/13368?qs=/ha2pyFadujXSz6rydELAdvi0SSMULuvI30KycfCWSI=
I also use a very small chisel tip, I found the weller pointed tips always oxidize on me, hard to keep them tinned. 600F tips or set your iron temp that low. 700F is too hot imo.
Last edited:
andynor, thank you for the list of suggestions. I am going to run through them over the next couple of nights out in the shop. I really appreciate you taking the time.
I've had very good luck using a dab of solder paste on each pad, holding the SMD passive part with tweezers and applying heat to each pad. For SMD IC's, I use solder flux on all the pads, very generously, position the part, hold with tweezer, apply a small amount of solder on solder tip and touch to one corner, then opposite corner, then all the pads. Solder wick works well for removing bridges from using too much solder. It takes practice for any method.

If I put the SMDs in first, is there any way to test them to be sure they are properly connected and that I didn't kill them before I populate the remainder of the board. It would be easy if they were just leds or resistors. And I apologize for all the low level questions.
Not low level. Important. To not kill ‘em all, just be careful. Enough heat, stop at once when flow is achieved. If need to reflow, just wait a bit so it does not overheat. If you use flux, which you should, be careful not to spill on the jfet itself. I used a toothpick to apply. Also, I used a toothpick to hold it down for the first joint.
To check the joint, one way is diode/beep mode (explained above) on DMM. One lead on jfet leg, next on next unpopulated joint on the PCB. I did that with all of mine, and they checked out. And turned out to be good once the rest was soldered in too 🙂
I recommend liquid flux. Grease gets under the fet, impossible to remove.
I tip small enough to first heat the pad, and then move it towards the jfet leg, is recommended as far as I am concerned. But prolly a million ways to do it, which will all more or less work.
Cleaning, cleaning and cleaning, and then leave it to dry for a while before powering up, is also recommended. What gets inder the pesky JFETs dissipates sloooowly.
My three cents. Good luck!!
Last edited:
Yup. It's important to remove the flux residue around the jfets. I had an issue in my build
that was caused by the residue and cleaning fixed it.
that was caused by the residue and cleaning fixed it.
Bullit, I see now that I mostly missed your key question: is there any way to be SURE they work before continuing to populate the board.
Also, I forgot to say that all the extremely good advise from Mark Johnson and others wrt solder and equipment are important to follow/check out.
I suspect the only way to really, really know is to build a micro jig and test the JFETs in position. But Dennis or Mark: could one perhaps use diode mode on a DMM to partially/wholly test whether a JFET has survived or not? I think I did that, can’t really remember. And I saw they gave approx the same results on my DMM, so continued with the rest of the board. Don’t remember which legs I «tested».
Regards.
Andy
Thanks again folks for the sage advice.
I have the correct small solder coming. I also have a tip set for my Stahl iron coming. I have liquid flux and 99% alcohol. I'll use all the techniques suggested above and mybe my Pass DIY 100% success rate will continue if I'm careful. If not, I'll make sure I have some of the 99% alcohol left to self medicate.
I have the correct small solder coming. I also have a tip set for my Stahl iron coming. I have liquid flux and 99% alcohol. I'll use all the techniques suggested above and mybe my Pass DIY 100% success rate will continue if I'm careful. If not, I'll make sure I have some of the 99% alcohol left to self medicate.
If I put the SMDs in first, is there any way to test them to be sure they are properly connected and that I didn't kill them before I populate the remainder of the board. It would be easy if they were just leds or resistors. And I apologize for all the low level questions.
If you don't populate anything else on the board other than the 8 JFETs, then you can test them in place since nothing else will be connected to them. The Mega328 component tester is used by many of us here use and should work. Trace the schematics and you should find open holes in the board that correspond to the JFET pads to insert your probe tips of the tester.
As long as you don't go crazy on the heat, they are pretty robust. They are made to be baked. I set my iron on 350degrees Celsius and had no issues, that's 660degrees Fahrenheit.
I actually used 360-365C. But was careful with the flux iot not risk too mich heat transfer to the fet body.
In for one on the Mega328. And as far as heat, I also thought about the baking thing being worse than heating a lead. In fact it seems like you could use paste and just put an iron near is until it melted. But probably not the time to try to re-invent the wheel.
First time around, i put greasy flux on the pads, and just touching the iron against the flux ensured instant flow. But somehow a fet or two did not work as expected, dunno if it was a bad joint or damaged fet. So I ended up desoldering and resoldering, in the end damaging the PCB. Next time around on a new PCB I followed Mightys advice to the point. It required more precision, and yes the heat transfer was a bit less effective. But also a feeling of more control of the result. And it turned out to work.
Last edited:
bullitt: once you fearlessly tackle SMDs (these are not that difficult) you’ll take your soldering skills to a new level! I do it this way and some basic items are necessary (in my experience):
Finest chisel tip you can use on your iron (I don’t like conical tips)
Paste flux
Eutectic solder (which you should be using anyway; thin is best for SMD parts)
A long pin or fine tipped tweezers of some sort
A base-mounted magnifier or magnifying headband
Something to hold your PCB (securely) so you’re free to work with both hands (tape onto your work surface is ok)
A bright, flexible light source
Clean the pads with alcohol. Dab small amt of flux onto each of the pads (I use toothpicks). Position your SMD onto the pads and a bit onto one of the legs of the SMD. Clean your iron tip and apply a bit of solder (very small blob). Hold your SMD using the tip of the needle ( I have better luck resting my hand on the device holding the SMD) and gently bring the tip of you iron onto that one fluxed pad. The SMD will want to move and don’t worry if it does since you can go back and adjust it afterwards. The solder will flow onto the SMD lead & onto the pad. Remove iron tip after a few seconds but hold the SMD until the solder sets. Let that SMD cool down so go do another SMD lead, and so on. Then when you’ve got all 8 initially set go back and do another pin of each using normal soldering technique. Finally go back and reflow the initial pins if necessary. The SMDs should be done before all the other components. Thin solder is key to not making a sloppy mess. Use more flux paste if reflowing is necessary. Then clean the board when done.
Unless you’re going to do a lot of SMDs on the same PCB, solder paste, as previously mentioned can be troublesome.
Just my (verbose) two cents
I am just starting this build and I've never installed a SMD. I am truly amazed at how small these are. Seems most of you are using soldering irons to install them
- Home
- Amplifiers
- Pass Labs
- Wayne's BA 2018 linestage