I have a post all ready to go but just been busy with work and life. Will post the schematic and details tomorrow. The PCB is further away. But I have been listening to the buffer with all kinds of devices and it sure does sound good. It will also help with Alan's build because it isolates the gain stage from the output and the next stage, and so the gain can be more easily changed.
BTW, the stock version drives larger headphones just fine. It is the sub-300 ohm ones that need the buffer.
BTW, the stock version drives larger headphones just fine. It is the sub-300 ohm ones that need the buffer.

BTW, the stock version drives larger headphones just fine. It is the sub-300 ohm ones that need the buffer.
What’s the estimated output impedance of the non-buffered version? I’m guessing it can’t be much less than 70 ohms?

I measured it as about 50 ohms but it rises below 50 Hz.What’s the estimated output impedance of the non-buffered version? I’m guessing it can’t be much less than 70 ohms?
I'm also curious about the power amp version. I've seen Georges high voltage version with OPT but I've alsways though a low voltage version without OPT should be possible.
Hi Mr. Ra7, yes it's ccs loaded Aleph style, i use IRFP150N for ccs and gain mosfet, for P channel mosfet at first i use IRFP9140N, it's sounded great with very transparent treble, then i change to J162 and it's sound quality is improved in treble region. With J162 treble respons more extended and relax. Supply voltage after capacitance multiplier is 36.6volt, I bias around 2A, voltage at P channel mosfet source leg at 6volt, at gain mosfet drain leg at 21volt.
Last edited:
Nice! I would try to get the P-channel FET source leg at about 20V or so. But that would increase the dissipation quite a bit.
How does it sound?
How does it sound?
A few posts ago I posted the measurements of the SCG with an output buffer. Here's the push-pull buffer circuit. It is drawn with the same supply as the SCG, which is about 100V with the zener stack and regulator and tapped from R107/207, above the CCS FET.
I was shooting for a fully transparent buffer that will let the SCG do the talking and at the same time provide the drive needed for low impedance headphones. One could use a single-ended MOSFET source follower, easy enough, but I wanted to try this push-pull circuit without source degeneration. Jam provided inspiration at one of our visits and Papa has said many times that no degeneration is better. The XA25 review on Positive Feedback is an interesting read as well and the circuit looks very much like the BA-3 gain stage driving a PP follower.
https://positive-feedback.com/reviews/hardware-reviews/pass-labs-xa25-class-a-stereo-amplifier/
So, with all that as inspiration, I set about designing this buffer. Push-pull buffers are no big deal but doing it without degeneration means you need some sort of current limiting and temperature compensation. The circuit shows the bias control circuit, which is based on TL431 and is similar to the F4 (and BA output stages) except it has a thermistor (R8) to provide thermal compensation. R9 is a trimmer that is used to adjust the bias. No resistors on the FET source pins, which otherwise would've provided some level of bias control feedback. In this case, the thermistor provides feedback to the bias control and should be mounted in contact with one of the FETs. When the FETs heat up, it drives the bias down. This is not a novel circuit by any means and it still needs some form of current limiting (not shown).
The FETs should be mounted on a decent sized sink because each is dissipating about 45V x 25 mA = 1.1W, and we don't want it to drift too much with temperature. If shooting for 25 mA, I'd start it at 15 mA and let it drift for about 5-10 minutes while keeping an eye on it, then come back and fiddle with the trimmer. If it starts running away, shut it down, let it cool off, and start with the pot dialed back to a lower starting bias current.
The sound of the buffer is totally transparent. This circuit could easily be scaled up to a class A amplifier driving regular speakers. At 25 mA bias, there is more than enough drive for headphones. Based on my understanding, it will deliver twice the bias current in Class A, so 50 mA peaks, which translates to 80 mW into 32 ohms. The sensitivity of my Etys (EX4R) is 98 db/mW, which means there is plenty of power available. Output impedance is less than 10 ohms and likely much lower though I haven't really tried measuring it below that point. It drives my Etys with ease and provides thundering bass.
In my test bed, I have it running from a supply that limits the current. Without the ability to limit current, I would put a 100 mA fuse in the line between the supply and the circuit. With small heatsinks, I found the bias ran away. With bigger sinks and the thermistor in the TL431 loop, it stabilizes nicely. There is some sensitivity to where you position the thermistor. Right at the FET face is good for maximum feedback wrt temperature. You can put a 10k trimmer across the thermistor and match the compensation to the MOSFET's drift.
Well, there it is. If someone has the SCG and wants to try this buffer, go for it. Don't go without a 100 mA fuse on the supply to the FETs (between the regulator and this output stage). The great benefit of this buffer, apart from being able to drive headphones, is that we can scale down the current through main SCG circuit and use TO92 parts with lower input capacitance. More on this later.
It is very likely that this design will be refined further. A bipolar supply will get rid of a few caps and we definitely need some sort of current limiting. I have begun working on two PCBs: one is an add-on to the existing PCB and a second one that is a totally redesigned PCB with TO92 parts for the SCG circuit.
Thanks!
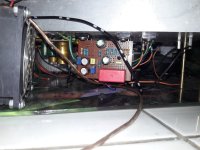
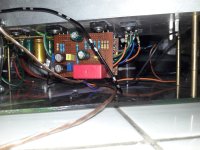
Got back to this build today after a long work break.
Did step 1 of checkout and all was well.
Moved on to step 2 and I couldn’t get RV101/RV201 to pass more than 12-13 mA. Then R11 started to smoke and I had to pull the plug.
Does that ring a bell for anyone?
I’ll verify all the parts tomorrow.
Did step 1 of checkout and all was well.
Moved on to step 2 and I couldn’t get RV101/RV201 to pass more than 12-13 mA. Then R11 started to smoke and I had to pull the plug.
Does that ring a bell for anyone?
I’ll verify all the parts tomorrow.
R11 will smoke when the circuit draws too much current. Did the LED light up? If the regulator is working without any draw in step A, then it must mean that when you put R107 in and connected the CCS section to ground, it drew too much current. Check values of RV101 and Rlim1.
R11 will smoke when the circuit draws too much current. Did the LED light up? If the regulator is working without any draw in step A, then it must mean that when you put R107 in and connected the CCS section to ground, it drew too much current. Check values of RV101 and Rlim1.
Yes, you got all that right. R107/R207 went in. The LEDs light up fine. I get 127-128V out of the Zener string.
I will check RV101 and Rlim1 in the morning.
Thanks, Rahul!
So, it's going to be hard to draw conclusions because damage had probably happened by the time I flipped the variac off.
But, R11 measured 77R this morning.
RV101 was 157R at maximum resistance. 0.33R wide open.
Rlim1 was at its stated 10R or extremely close to it.
On the good side, the side that didn't go sideways, R21 is at 100R.
RV201 is near 500R at maximum resistance. Didn't check wide open.
Rlim2 is at 10R.
I'm guessing that I was so eager to reach 0.3V at step B, I opened RV101 to excess.
But in that case, why couldn't I reach 0.3V across R107?
I pulled the damaged parts (R11 and RV101), but I am not sure I understand what led to this outcome. So, I fear it could happen again with the new parts.
Replace R11. Hopefully that’s cheap. Short RV101 and put 100R in Rlim. Then connect the other leg of Rlim to ground. It should work and draw some current. Maybe like 10-15mA though it depends on the CCS FET. For now, we just want to know the CCS FET is good. Also, measure the D-S resistance of the CCS FET with everything off. It should read a non-zero finite value. Mine are about 11 ohms.
Last edited:
Replace R11. Hopefully that’s cheap. Short RV101 and put 100R in Rlim. Then connect the other leg of Rlim to ground. It should work and draw some current. Maybe like 10-15mA though it depends on the CCS FET. For now, we just want to know the CCS FET is good.
The CCS FET I have on there is this one: https://mou.sr/3N57BuS
I ordered replacement trimmers and resistors. They'll be here on Thursday.
It's really odd because R11 smoking indicated there was too much current being drawn.
And there are only 3 paths, through R107, R15 and R105. If it wasn't through R107, then it makes me worry I messed up royally. Because the LED path and the R105 path are unlikely.
Oh, let me confirm my understanding: it smoked when you went to adjust the CCS but reg tested fine.
Oh, let me confirm my understanding: it smoked when you went to adjust the CCS but reg tested fine.
Regulator tested just as expected: A steady 127V out of the 130V Zener string.
OMG, I know what happened…
I blindly followed step B, which says to adjust RV101 until the voltmeter reads 0.3V. But those checkout steps assume R107/R207 are 10R while the BOM and my board has them at 1R.
Hence I could never get RV101 to make the voltmeter read 0.3V, hence the goal should have been 0.03V, hence I had 5X the desired current going through when things went sideways.

- Home
- Amplifiers
- Pass Labs
- Schade Common Gate (SCG) Preamp