Will do.....and if you ever tire of your JVC Boombox, keep me in mind....!
(Got to ask--do you maintain the C-12 Huron? I'm a retired AF Colonel, who has some cockpit experience with that airframe.....)
That is correct sir. I work on the Navy birds here in GTMO. We have the only planes stationed here permanently. Some days I wonder about my choice of profession but for the most part it is an easy plane to maintain. The only Air Force planes I know of now are either embassy or testbed platforms. I know quite few of the guys who maintain them all. It is a rather small community of people who deal with these planes.
Back on topic, if by some chance things don't go as planned for the JVC you will be the first person I contact. I've seen them pop up from time to time in different places so don't give up hope.
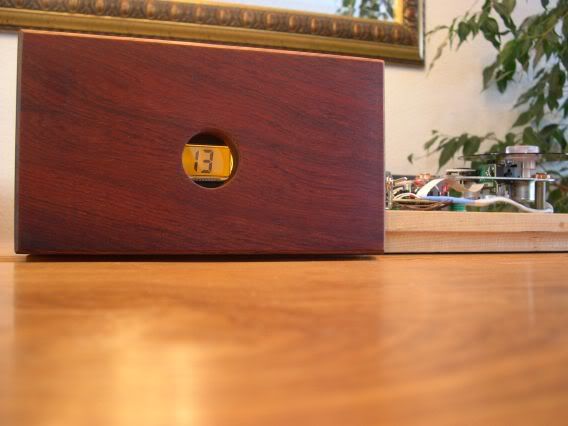
Maybe a bit sickening but I tuned the display with resistors just until I got the best matching colour with the cocobolo....😀
That is correct sir. I work on the Navy birds here in GTMO. The only Air Force planes I know of now are either embassy or testbed platforms.
Considering you're in GTMO, you DESERVE the boombox more than I do! Enjoy it, and the mods.....
As for the C-12, we had two outfitted with "special sensors" for data collection. I doubt if you'd recognize the tail numbers (we used to change them--and repaint the planes--often).... 🙂
P.S. my "operative term" is RETIRED, these days. I go my Ken. I'll keep an eye out for you in the Forums.....
Looks nice Erik.....
Thanks Fran,
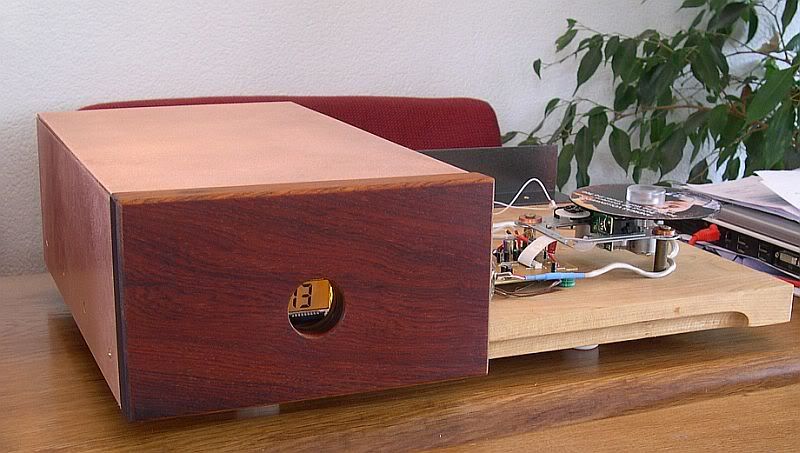
The idea is to give it a "2-box-operation" look but practically on one board.
The player part will be ebony and copper with a Slim-Look.
All in all a PiTbull look ....but in the end its younger brother.....since there can only be one (to quote Highlander)
Now I know why it is useless to build these things for a living....too many hours when you are passionate....even if it outperforms a lot of high-end transports....🙂
Last edited:
As for the C-12, we had two outfitted with "special sensors" for data collection. I doubt if you'd recognize the tail numbers (we used to change them--and repaint the planes--often).... 🙂
P.S. my "operative term" is RETIRED, these days. I go my Ken. I'll keep an eye out for you in the Forums.....
As far as I know, those planes do not exist.😉 My boss has seen all the Navy and AF C-12's out there. He used to be in the rep at the facility that did all the 5 year depot level inspection work. There are some interesting configurations scattered around.
GTMO is not as bad as people make it out to be. I've been here a little over 2 years and will sign another 3 year contract a the end of this year. It's all in what you make it.
I'll be sure to post pics of all my mods on here about this project. I can't wait to get started.
Sorry, this will hopefully be my last question on connecting the shiga to the dac.
If I buy a 75 ohm RG-59U cable terminated with BNC connectors, cut in half solder 1/2 to the inputs of the dac
solder other 1/2 to the resistor network (and grnd) of the shiga
Then I have to use a female to female connector to connect the two BNC's
male ends.
Is there a better way or is this it?
Thanks,
Paul
Yes that work fine. You could also fit a bnc socket to both the shiga and dac and then not have to cut the cable. You can buy bnc terminations and there's loads of videos on youtube on how to do it. That way you would only need some 75r coax.
Hopefully next week sometime I will have an ez-31 in hand. It should leave Canada today or tomorrow headed for Florida for pick up next week.
Can someone point me in the direction to the post about the dimensions for the screw on clamp? I remember seeing it but can't seem to find exactly what I am looking for. I have a lathe and the ability to turn my own just need the dimensions. Thanks.
Can someone point me in the direction to the post about the dimensions for the screw on clamp? I remember seeing it but can't seem to find exactly what I am looking for. I have a lathe and the ability to turn my own just need the dimensions. Thanks.
Thanks for that Peter. I wonder how many of those I can break before I get one that is usable? Should be fun either way.
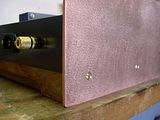
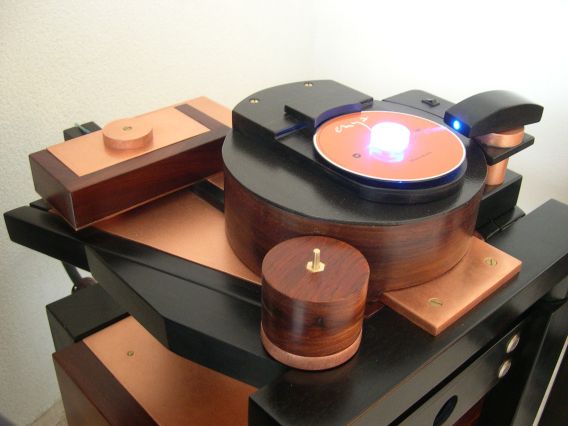
Today I worked further on the quasi-seperate Power Supply Box.
I use 3mm copper to give it a nice and sturdy finish equal to a (Mini) PiTbull.
The weight of this transport is getting seriously heavier by the day...😀
I use 3mm copper to give it a nice and sturdy finish equal to a (Mini) PiTbull.
The weight of this transport is getting seriously heavier by the day...😀
That looks really nice so far. Can't wait to see it finished.
Thanks !!
You can already see the resemblance between the Mini- and my own PiTbull.
Minor setback today.🙁
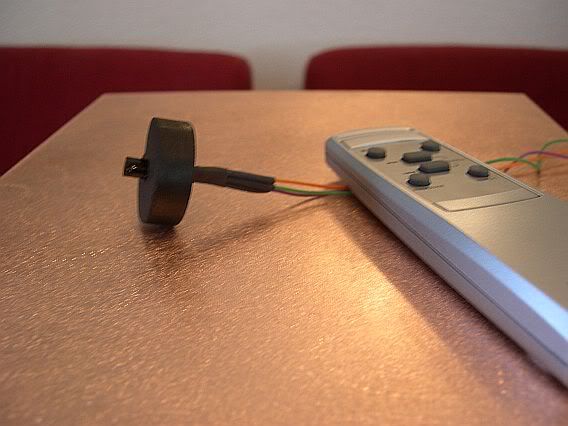
The "remote control" now only worked as a kind of "close control" 🙄
Eversince the Power Supply became boxed in with copper the designed cyclop was not reflecting the commands any longer towards the inside eye .... unless you were in the vicinity of say 10 cm....
so "very close control".....a pity because I was without the extra work convinced it would be enough for future operation.
This happens ofcourse always when you have finished all the surroundings
Anyway I cannot stand defeat so from the most impossible angles I soldered the 3 wires on the display-print and while I was at it I made an ebony encasing. Now it can sit on top of the players platform and still looks okay...
No need to say that it now takes commands even send from the garden...😀
Thanks !!
You can already see the resemblance between the Mini- and my own PiTbull.
That thing looks awesome. I guess I'm going to have to go back through the threads and read more about it.
I can see where the initial cost of the ez-31 will be rather small compared to all the other expenses incurred during this build.
I can see where the initial cost of the ez-31 will be rather small compared to all the other expenses incurred during this build.
...while unpacking the boombox I had to implement an RCA connector in order to listen to it....I used a WBT Nextgen which was even more expensive...😀
BUT it all depends, a friend of mine unpacked it, mounted it on a board, and is still living happily ever after.....winning plenty of shoot-outs on his way 😎
BTW
I will save you the first 118 pages before it starts
http://www.diyaudio.com/forums/digi...rdable-cd-transport-shigaclone-story-118.html
Last edited:
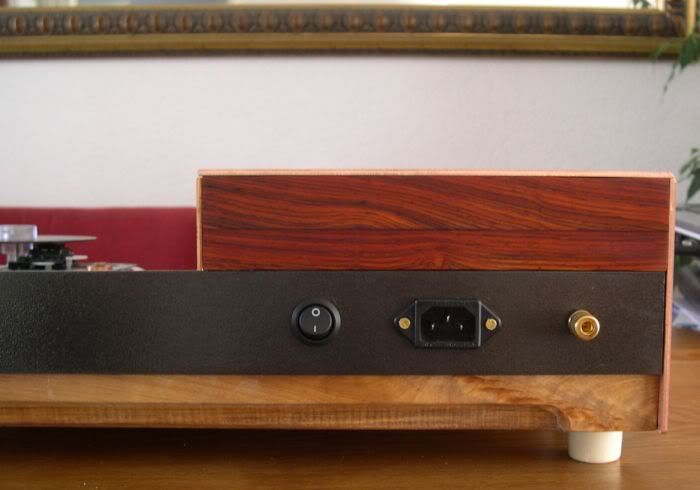
I have a wooden enclosure, so what should be connected to the ground prong on the electical outlet.hi pforeman,
Most people use a 3 prong ,one reason is it's polarized and the other is it is grounded at the outlet,with a two prong you can turn it around and induce HUM sometimes, the ground should go to the case ,there is 2 grounds one for power and one for signal,In the case from a phono I would ground as near the phono preamp input as I could,and there is a common ground at the power supply,maybe others can add to this!
cheers!
Laser mechanism and a wire from the ground next to the DOUT?
Thanks,
Paul
- Home
- Source & Line
- Digital Source
- Finally, an affordable CD Transport: the Shigaclone story