Forr, what is the equipment you used for these measurements? Jan
It's Clio Pocket. I think I will put a few words about it in the dedicated thread.
I have worked a lot with WtPro of Smith & Larson and then with Arta, Clio diagrams are nicer.
Tone control : when the pots are set to get a flat response, there was no significant level difference(about 0.01 dB or less) when on or off.
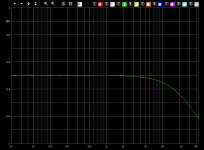
Here are the diagrams. Level full scale at +/- 1 dB
07. level with tone control flat, off and on, right channel
¨¨¨¨¨¨¨¨¨¨¨¨¨¨¨¨¨¨¨¨¨¨¨¨¨¨¨¨¨¨¨¨¨¨¨¨¨¨¨¨¨¨¨¨¨¨¨¨¨¨¨¨¨¨¨¨¨¨¨
tone control, off -> red
tone control, on -> green
08. level with tone control flat, off and on, left channel
¨¨¨¨¨¨¨¨¨¨¨¨¨¨¨¨¨¨¨¨¨¨¨¨¨¨¨¨¨¨¨¨¨¨¨¨¨¨¨¨¨¨¨¨¨¨¨¨¨¨¨¨¨¨¨¨¨¨
tone control, off -> red
tone control, on -> green
Attachments

the THD+n of this is?
The maximum THD quoted by Douglas Self for this preamp using anAudio Precision analyzer is less than 0.0005% for 9 Vrms ouput in the audio band.
The -3 dB frequency response that I checked with a sine wave generator and a scope extends from 1.6 Hz to 160 kHz.
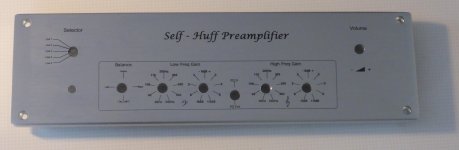
Front panel
Well, if anyone is still following this thread, I finally finished my front panel. Not perfect, but not too bad.
It was all done with a single transfer from CraftyComputerPaper at Frequently Asked Questions
Alignments are not perfect but we shall see. It is easy to remove and repeat. One small issue is that the transfer material can stretch slightly and this can make alignment a little tricky...that's my excuse anyway🙂
Attachments
HI Carl, I'm very, very late to this thread I know, however are there any "kits" still available? If so I'd love one. Many thanks. David Whistance
George,
I am still working on my case as well. i am going to try this product on my Wood case.
Waterslide Decal Paper, Image, Transfer Paper, Iron On, Decals
failing that i will try what you used. 🙂
Rick
I am still working on my case as well. i am going to try this product on my Wood case.
Waterslide Decal Paper, Image, Transfer Paper, Iron On, Decals
failing that i will try what you used. 🙂
Rick
Transfer paper
Hi Rick,
Let me know how that goes.
The only problem with the method I used is that the edge of the transparent film is just visible to the left and right of the panel. That was why I used one large decal..fewer edges to worry about. The best solution would be something that transferred just the text and used no film. Still, with a couple of sprays of clear varnish the edges are nearly invisible
George,
I am still working on my case as well. i am going to try this product on my Wood case.
Waterslide Decal Paper, Image, Transfer Paper, Iron On, Decals
failing that i will try what you used. 🙂
Rick
Hi Rick,
Let me know how that goes.
The only problem with the method I used is that the edge of the transparent film is just visible to the left and right of the panel. That was why I used one large decal..fewer edges to worry about. The best solution would be something that transferred just the text and used no film. Still, with a couple of sprays of clear varnish the edges are nearly invisible
HI Carl, I'm very, very late to this thread I know, however are there any "kits" still available? If so I'd love one. Many thanks. David Whistance
Hi David, I have a kit for sale, currently located with my brother in the USA.
PM me if interested.
Paul.
Hello Carl, I've just joined the Forum. Is there a spare kit available (pre-amp, extension board & PSU)? I read the impressive Linear Audio article some time ago, but hadn't expected a PCB to be designed. A terrific achievement on your part. Best Regards, Martyn Bennett
I have a 3d printer and will be making a front and back panel, albeit plastic (abs). So let me ask has anyone made a cad file of the front and back, or is there a pdf drawing showing the the dimensions including the screw centers etc., if so I can draw it up in Autocad and then print the panels using an stl file.
my printer is limited in size to 9" x 6" so the panels will have to be in two pieces and spliced together and include matching knobs, but my days of drilling out aluminum are done.
my printer is limited in size to 9" x 6" so the panels will have to be in two pieces and spliced together and include matching knobs, but my days of drilling out aluminum are done.
Panels
These 2 are what i used.
I didn't use the Power switch hole.
The Rear Panel Large holes are 22mm (7/8") works fine. The RCA jacks are 10mm, i used a 10mm drill bit & a reamer to make em just a tad larger.
Hope this Helps.
Rick
These 2 are what i used.
I didn't use the Power switch hole.
The Rear Panel Large holes are 22mm (7/8") works fine. The RCA jacks are 10mm, i used a 10mm drill bit & a reamer to make em just a tad larger.
Hope this Helps.
Rick
Attachments
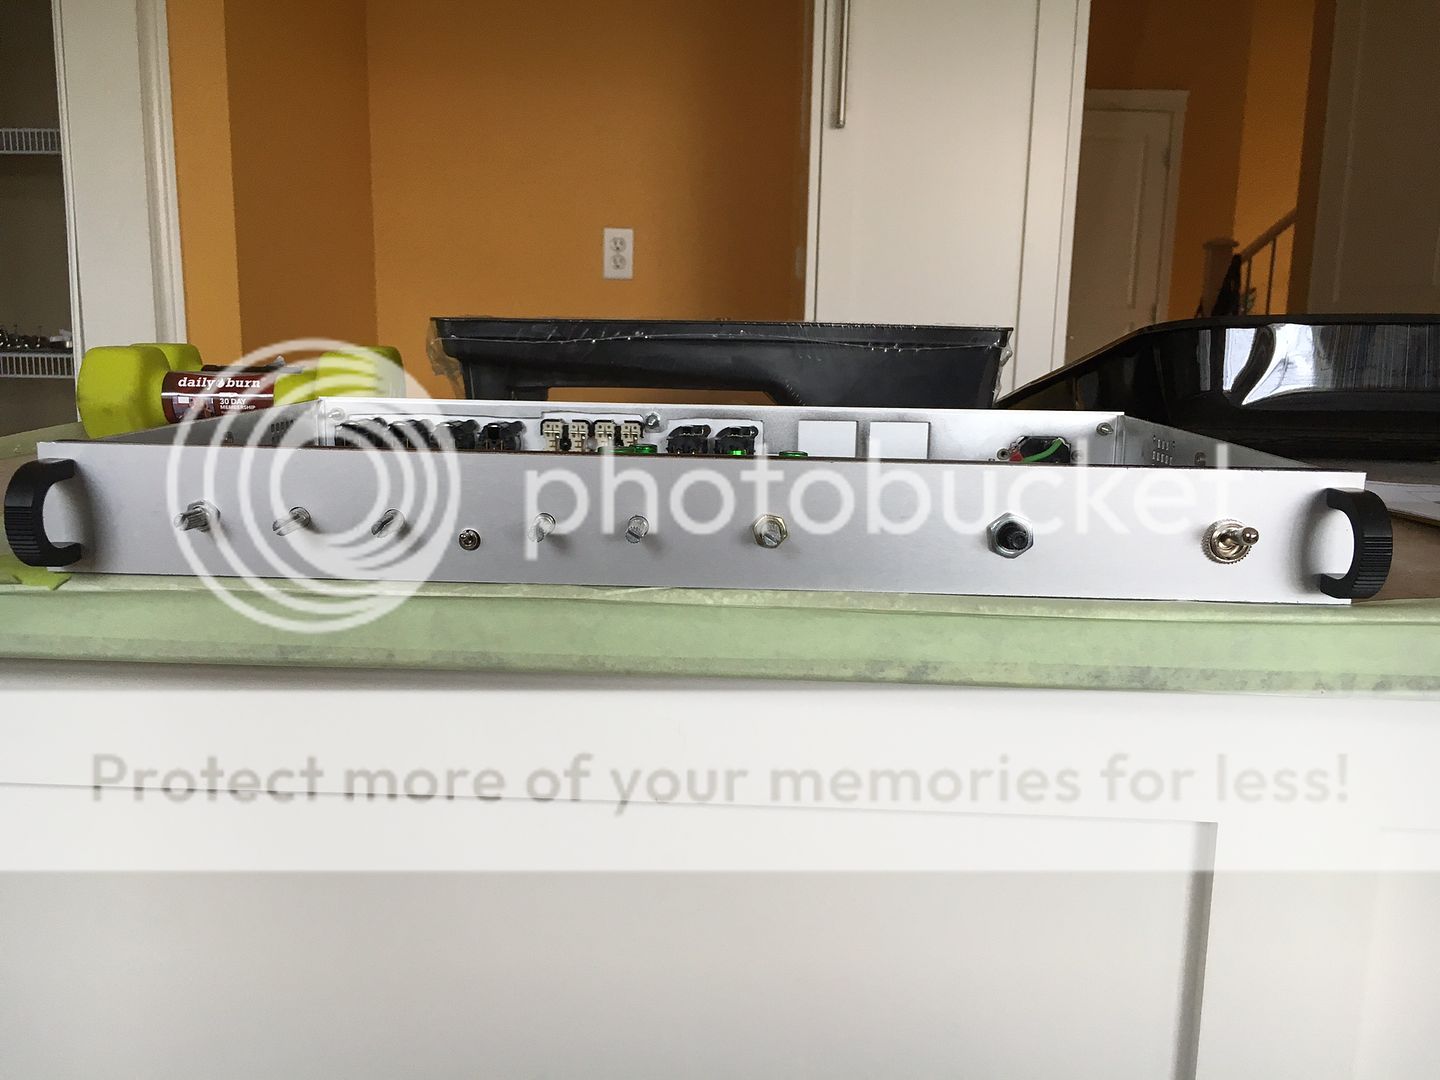
Panels and BOMs
Here's the current status of my DSelf Pre-amp project.
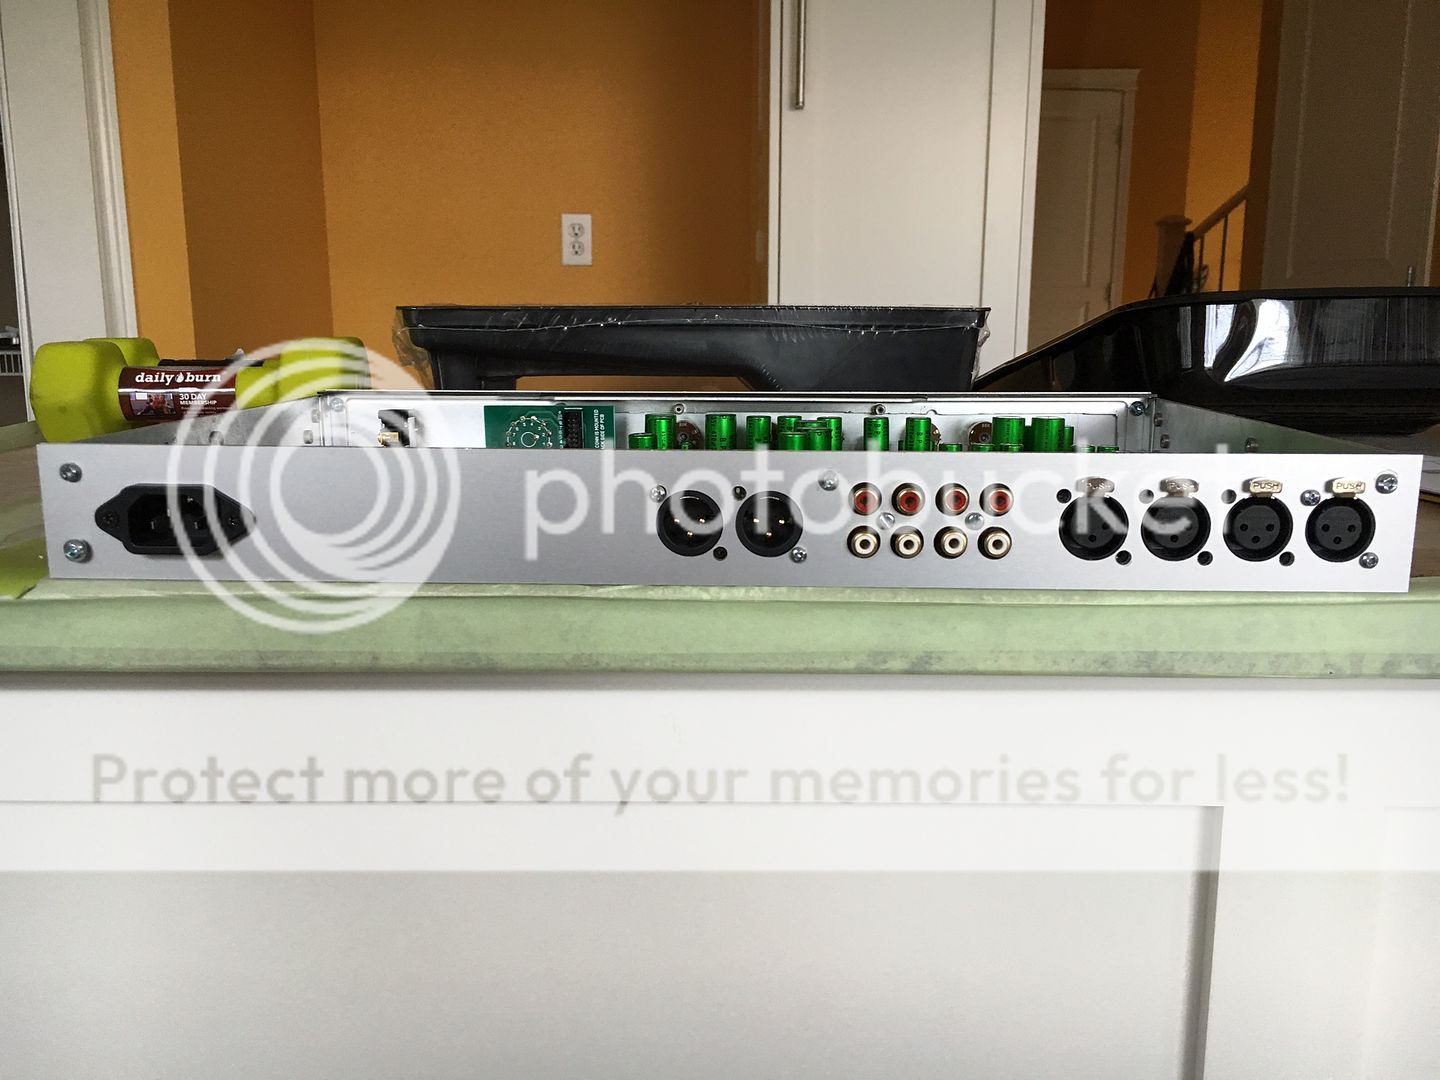
Most recent BOMs and panel templates (in SVG and PDF formats) here:
https://drive.google.com/drive/folders/0B_svLQu7hxPtTUcxZ1hma2RwR0k
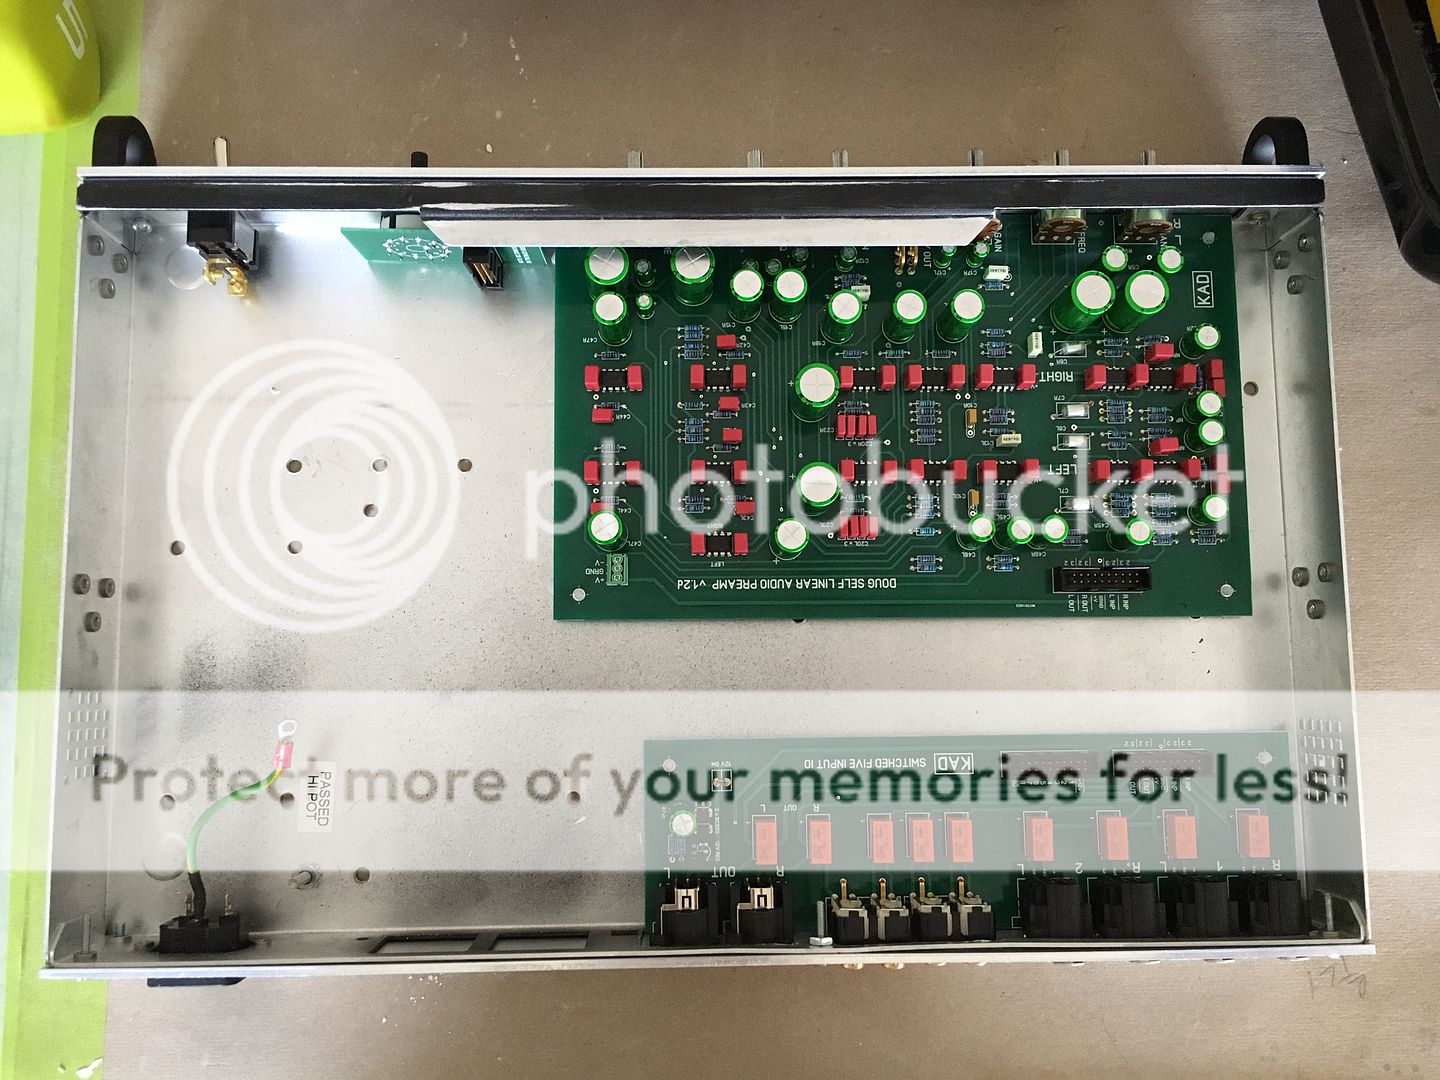
(The enclosure is a repurposed case from a piece of hospital gear(?) I got from an electronics recycler. The panels were cut by a local guy with a CNC router. I had to rebore the holes on the front panel because they were a bit small, but I think that was a problem with the cutting, not the PDF template. Sorry if this isn't the proper way to share photos.)
Here's the current status of my DSelf Pre-amp project.
Most recent BOMs and panel templates (in SVG and PDF formats) here:
https://drive.google.com/drive/folders/0B_svLQu7hxPtTUcxZ1hma2RwR0k
(The enclosure is a repurposed case from a piece of hospital gear(?) I got from an electronics recycler. The panels were cut by a local guy with a CNC router. I had to rebore the holes on the front panel because they were a bit small, but I think that was a problem with the cutting, not the PDF template. Sorry if this isn't the proper way to share photos.)
Last edited:
Thanks, Rick! This is the first time I've actually spent time figuring out an enclosure for a project. (Most of my past DIY efforts have included a easy-to-configure recommended enclosure.)
A quick question for you pros. I plan to run a 120V AC line from the IEC on the back of the enclosure to the switch on the front, then to the power supply. Is that acceptable practice? If so, should I twist the two (up and back) 120V wires together and run them along the side of the interior of the enclosure?
TIA.
Harold,
Yes, that would be the proper way to do it. Also twist your DC wires from PS to main Board as well.
I am waiting for the Air Temp & Humidity to drop to Reasonable levels so i can finish up my Cabinet. (oiling it, & finish sanding). Hopefully some day SOON.!
Rick
Yes, that would be the proper way to do it. Also twist your DC wires from PS to main Board as well.
I am waiting for the Air Temp & Humidity to drop to Reasonable levels so i can finish up my Cabinet. (oiling it, & finish sanding). Hopefully some day SOON.!
Rick
Anyone have any kits or boards they might like to sell?
Hi All,
Please let me know if you just happen to have a kit your could possibly be persuaded to sell, or even just the boards?
Regards,
Rob
Hi All,
Please let me know if you just happen to have a kit your could possibly be persuaded to sell, or even just the boards?
Regards,
Rob
- Home
- Source & Line
- Analog Line Level
- Doug Self Preamp from Linear Audio #5