
kasra said:trigon: what material is the front made of?
/kasra
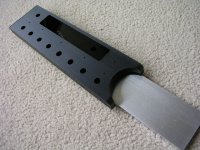
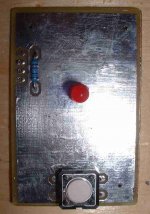
It is the same brushed acrylic as Peter's front panel. I have only used double layer with black acrylic as bottom plate.
Peter, what do you think how it will sound with these MKP1837 Vishay-Roederstein 😉
Trigon
Attachments

I just wonder if Algar's remote control be available to the community ?? Obviously it can be used with any other DIY pre.............
Also since it seems that Apox is out of circulation...???
Also since it seems that Apox is out of circulation...???
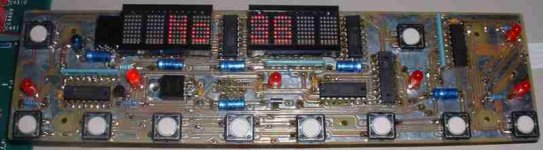
Hi. The remote is a direct replicant of the original ML38 remote. It used a now discontinued IC, the Philips SAA3008. An other user from Europe save our lifes and found a stock left of the SAA3008. The protocol used is also almost not use anymore, the RECS 80.
The receiver part is also all taking care of by the ML38 processor. So there is not much to share.
Before starting the ML38 project, I was working on a remote controlled preamp. It use the any SOny compatible remote. I small PIC decode the IR received codes. Then an easily programmed Basic Stamp controlled the preamp.
Check: http://www.diyaudio.com/forums/showthread.php?s=&threadid=20908
I never had time to complete the project, too busy at work and home. A first version of the schematic/Basic code for a motorized volume control is almost completed. Check the previous thread. I will post my actual prototype. Have fun...
Bye.
I just posted the schematic and the Basic Stamp code version 0.5, still not fully functionnal. See the previous thread. Bye...
What type of acrylic?
Guys,
What type of acrylic are you using and where did you get it from? The panels look wonderful and I would love to experiment with this stuff. Any help is appreciated. Anyone have pictures of their step by step Mark-Levinson front panel construction process? Would be a great educational thread - superb basis for other DIY panels
Thank you -ALBQ
http://mywebpages.comcast.net/gillespie147/AlbuquerqueAudio-MainPage.html
It says "CYRO Acrylite GP" on acrylic sheets. It is tinted type (so it is dark, but still seethrough). We got them locally, from Plastc Warehouses. Cut offs are usually cheaper.
As you Trigon already improved on my original idea, as he added additional black piece behind the tinted piece for reduced transparency. Came out really nice.
It is very easy to work with. I do initial cuts on table saw, then use router to form final shape (with straight bit). After that the edges (or sides) are sanded on belt sander (with 100 grid belts).
Later all necessary holes are drilled ( this is a tricky part as the drill's tip is rather important to make proper hole, and not to break it: sharper angles are preferred).
After that a paper protective mask is taken off, a regular clear tape can be applied to define the winow (opening) and abrassive pads is used to make the brushing. I'm using those purple Scotch Brite pads available from home improvement stores.
The results are truly spectacular😉

- Home
- Amplifiers
- Solid State
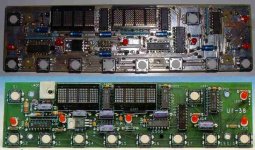
- Building Mark Levinson 38 preamp chassis from scratch