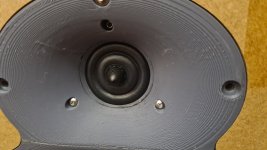
3 screws and it comes off. Might be a little bit stuck first time, but pull gently and it will come. 3D print from JLC will look a lot nicer than my one here.
Attachments
Last edited:
But you don't need to do ant of the work shown in that site. Just undo the 3 screes and pry the front plate off.
Can you please send me a source file so that I can adapt the edges to fit cut gaskets on woofers?3 screws and it comes off. Might be a little bit stuck first time, but pull gently and it will come. 3D print from JLC will look a lot nicer than my one here.
I did include a step file, that should be editable. Or if you want to give me a dimension to match it to I might be able to do it quicker.
Can you just make it the same dimensions and shape as original, but with screws only on the sides, so that I can cut off the top and the bottom of the circle.
This thread reminds of some old electrocompaniet qube speakers from back in the day. Build four of them and tilt them horizontally and place two and two to make a line array.


Exactly that, with same radius as original if I may be picky. Routing for woofers is already complicated enough without CNC.
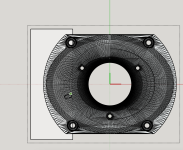
argh, I just noticed your radius is bigger than original - I already routed a slot for original faceplate (52mm)...
- Home
- Loudspeakers
- Multi-Way
- 8 Excel W12CY001 looking for a DIY project to fit in