So unless someone thinks I should ground the chassis to the AC supply I'm leaving it off.
This is an absolutely brilliant project, well done !!
I would make sure all the anodised panels are grounded together by scraping off the non-conductive anodising and either nut/bolt/solder-tag/wire them all together, or by scraping two mating pairs and using a serrated star washer between them done up tight. The regulations in the USA are different from the UK, here we would have to earth it, as we have to on everything. As it wasn't originally designed that way, with the two pin plug, you should be OK.
However you must check carefully and if you are not confident/qualified seek professional advice.
Regards & much respect

Dave
Wow, just revisited this thread. C2C great work and Dave Stellar job developing the SP10 further. I tilt my hat to your collective efforts.
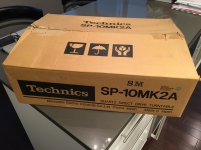
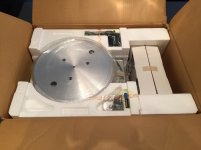
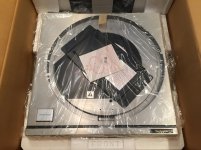
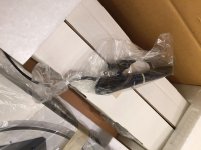
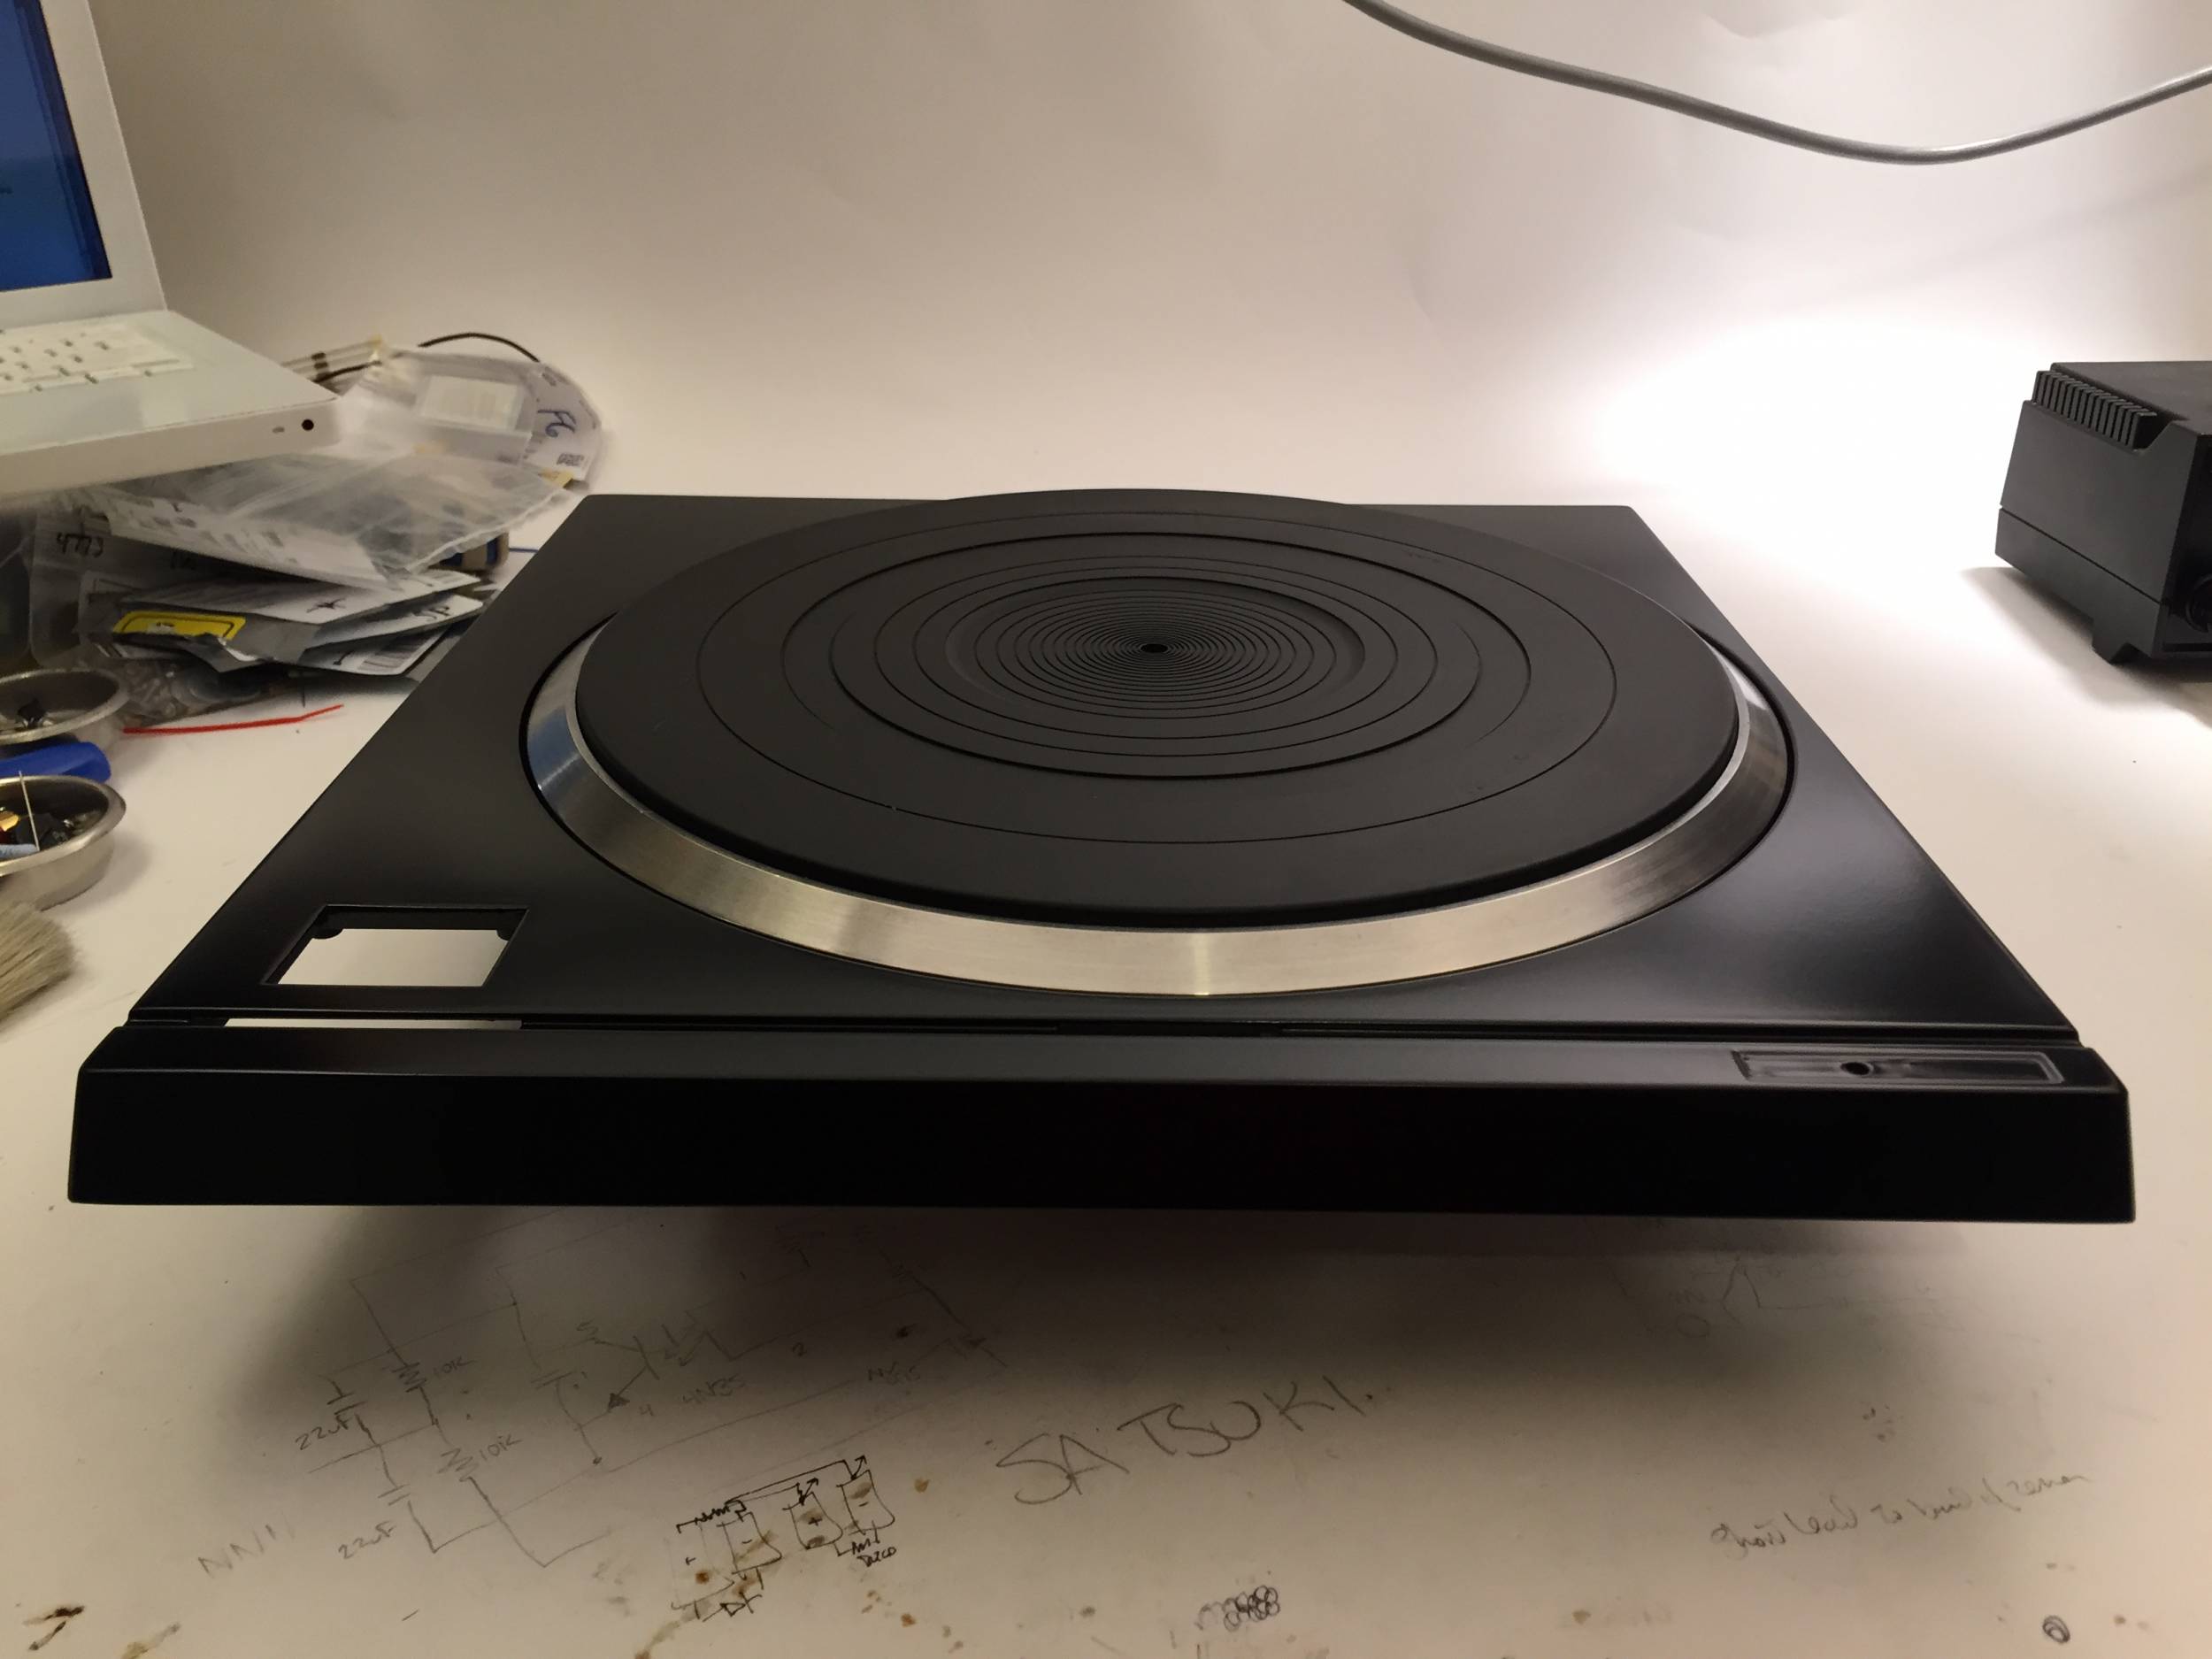
I don't know when I'll get to it, but my intent with this unit will be full photo documentation as I go through it. There's no lack of pictures of these, but I've never come across any of a factory 'fresh' unit.
Attachments

My first one came like that: it had been a reserve unit [and never used] for the British Forces in Cyprus; they had a local radio station. It came with the Rosewood and Obsidian plinth, the Technics arm referred to above with spare heavy tube, Cover and a Technics MC cartridge which was in need of a stylus transplant due to an accident - and a spare arm-board. It was a completely 'domestic' version. I bought the lot for just under UK £ 400. [roughly then $600].
I have had five others since then - all ex BBC and requiring some modification for non broadcast use. Two had a MC pre-pre in the oversize power supply chassis; they were not too good by today's standards. I still own one completely unmodified set as well as the very heavily modified one - of which pics - when the re-plinth is complete and its working well - will appear here. The broadcast versions I am familiar with all had the 'SP-10 MkII-P' label.
I have had five others since then - all ex BBC and requiring some modification for non broadcast use. Two had a MC pre-pre in the oversize power supply chassis; they were not too good by today's standards. I still own one completely unmodified set as well as the very heavily modified one - of which pics - when the re-plinth is complete and its working well - will appear here. The broadcast versions I am familiar with all had the 'SP-10 MkII-P' label.
I wish I could say I bought it long ago for next to nothing, that I bought it from a Craig's List seller after I spied it in their garage when I'd shown up to buy a toaster, or that it was in the trunk of an Aston Martin I found in a barn. Alas, I was simply the guy with the least sense and the highest bid. Lack of impulse control may have played a small part as well. Maybe.
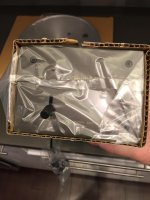
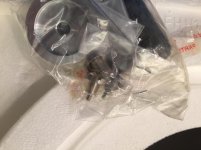
FINALLY got it!!

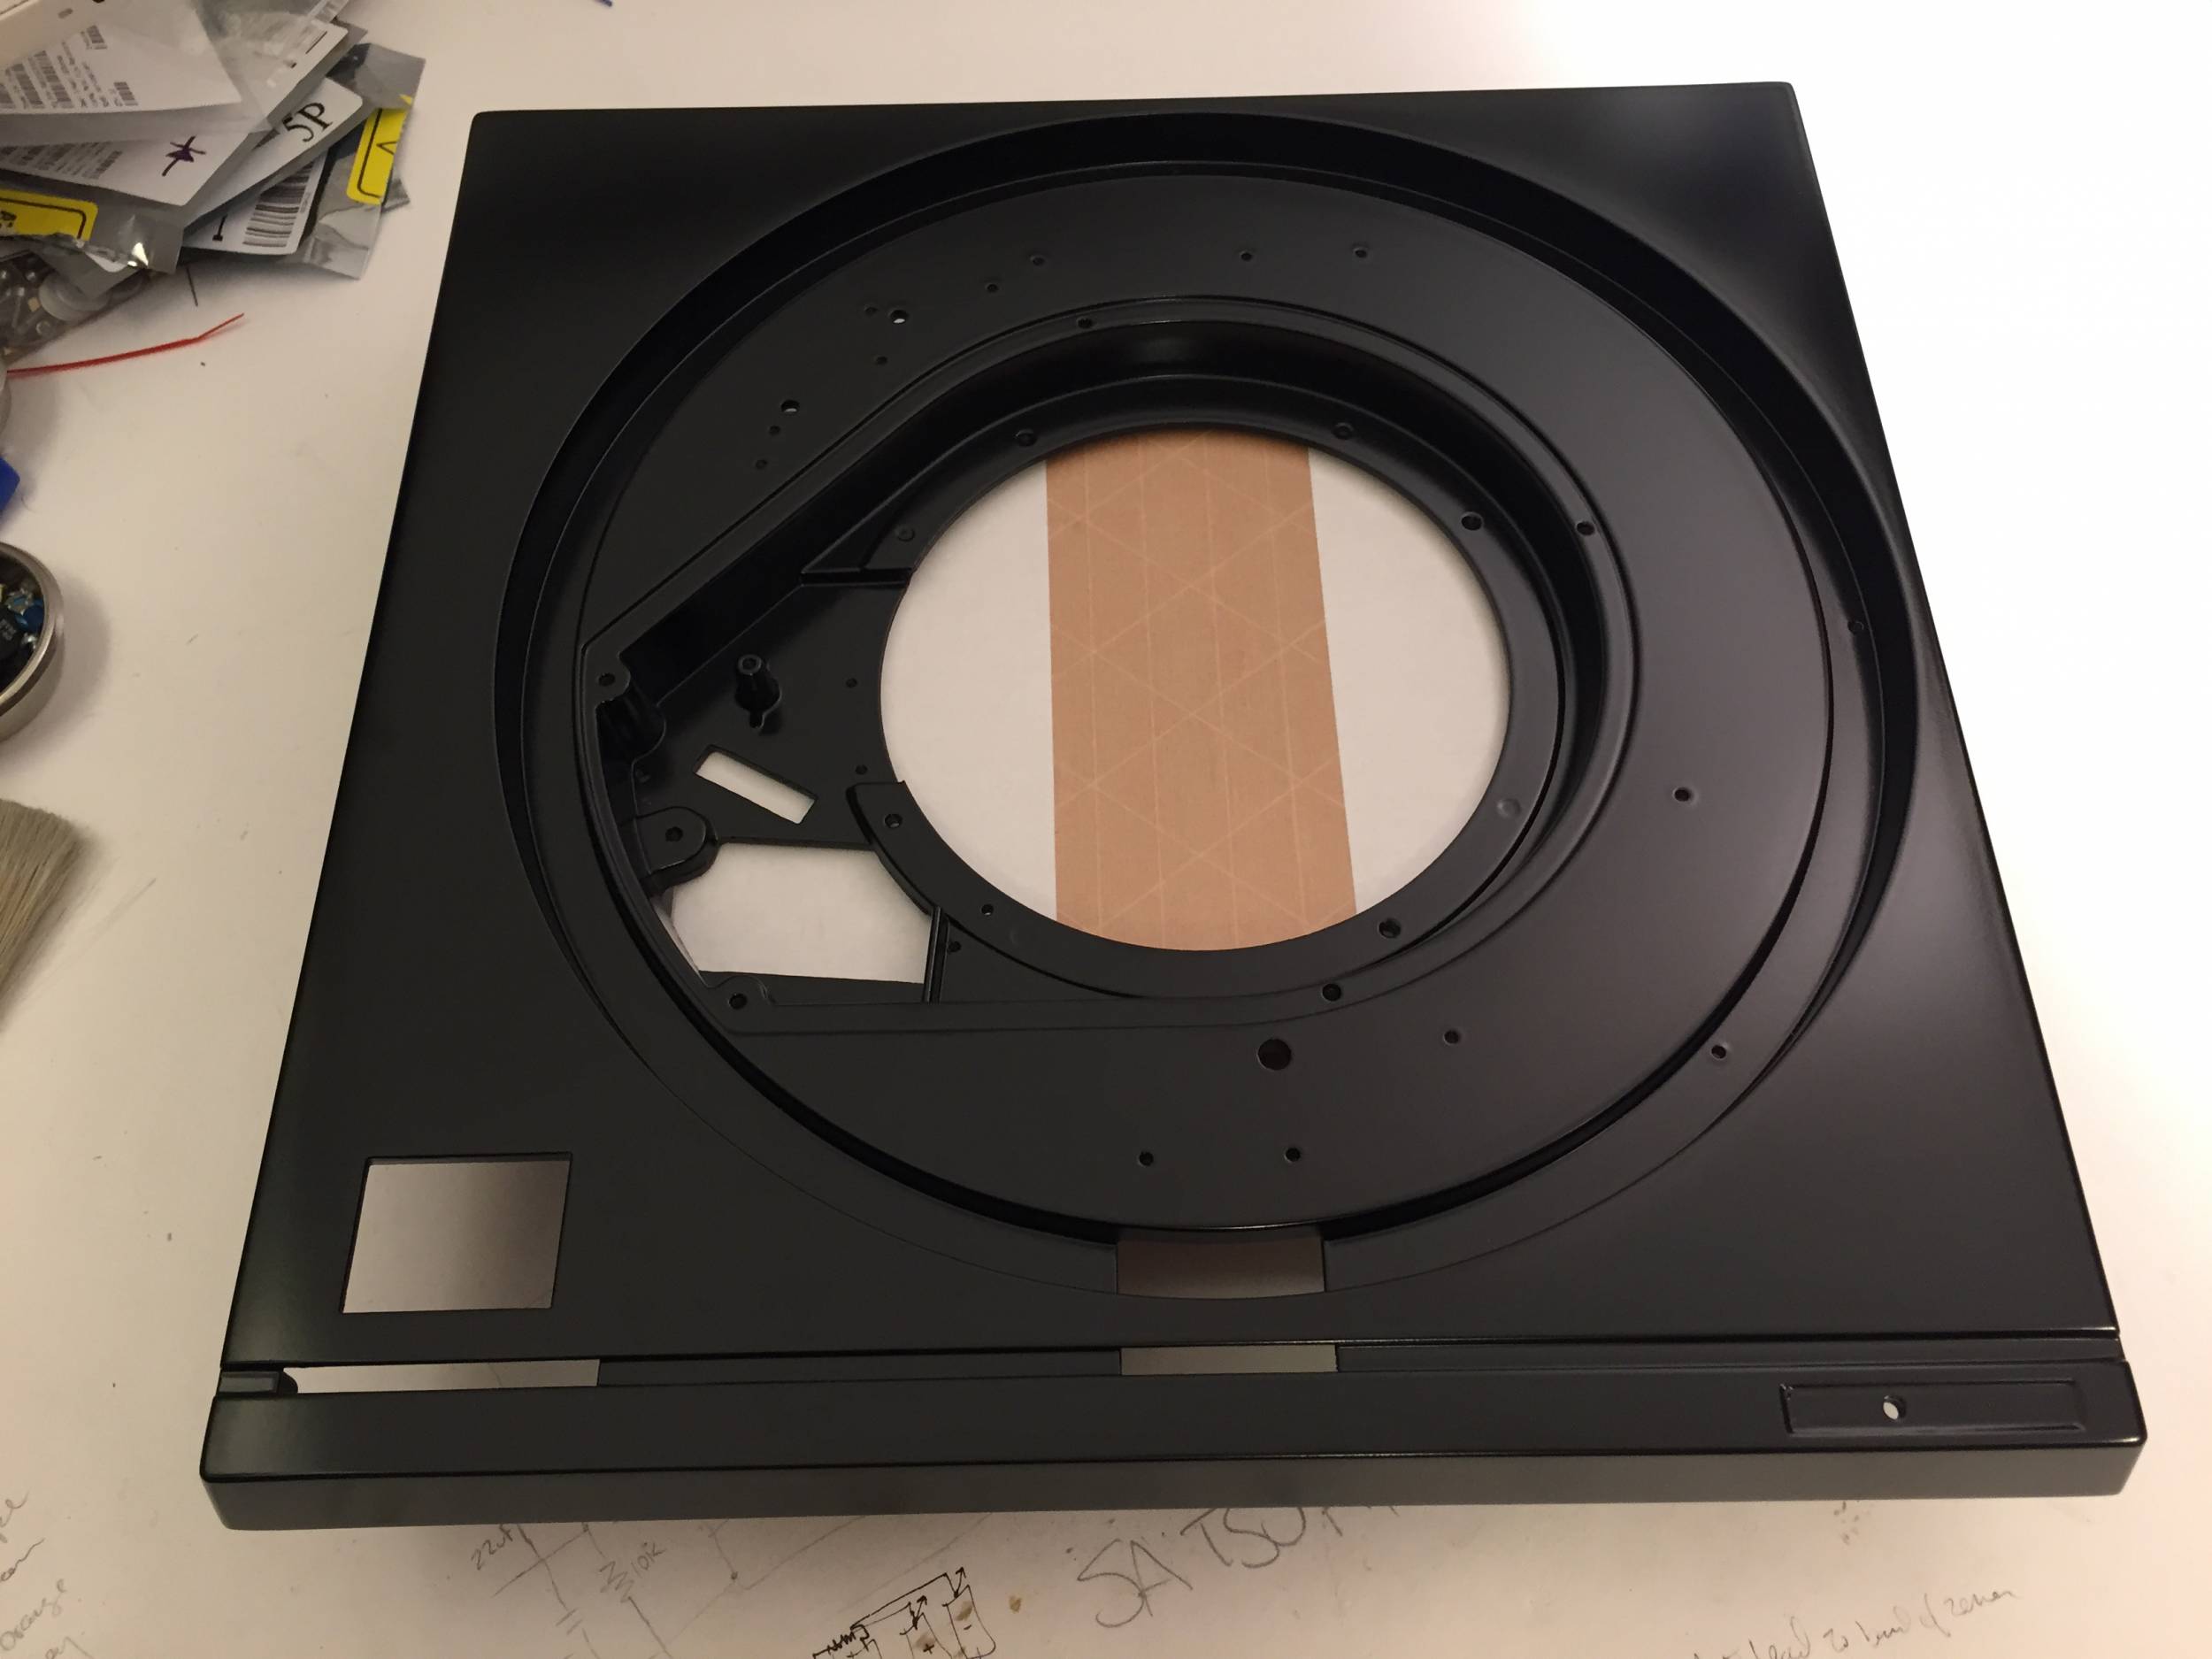
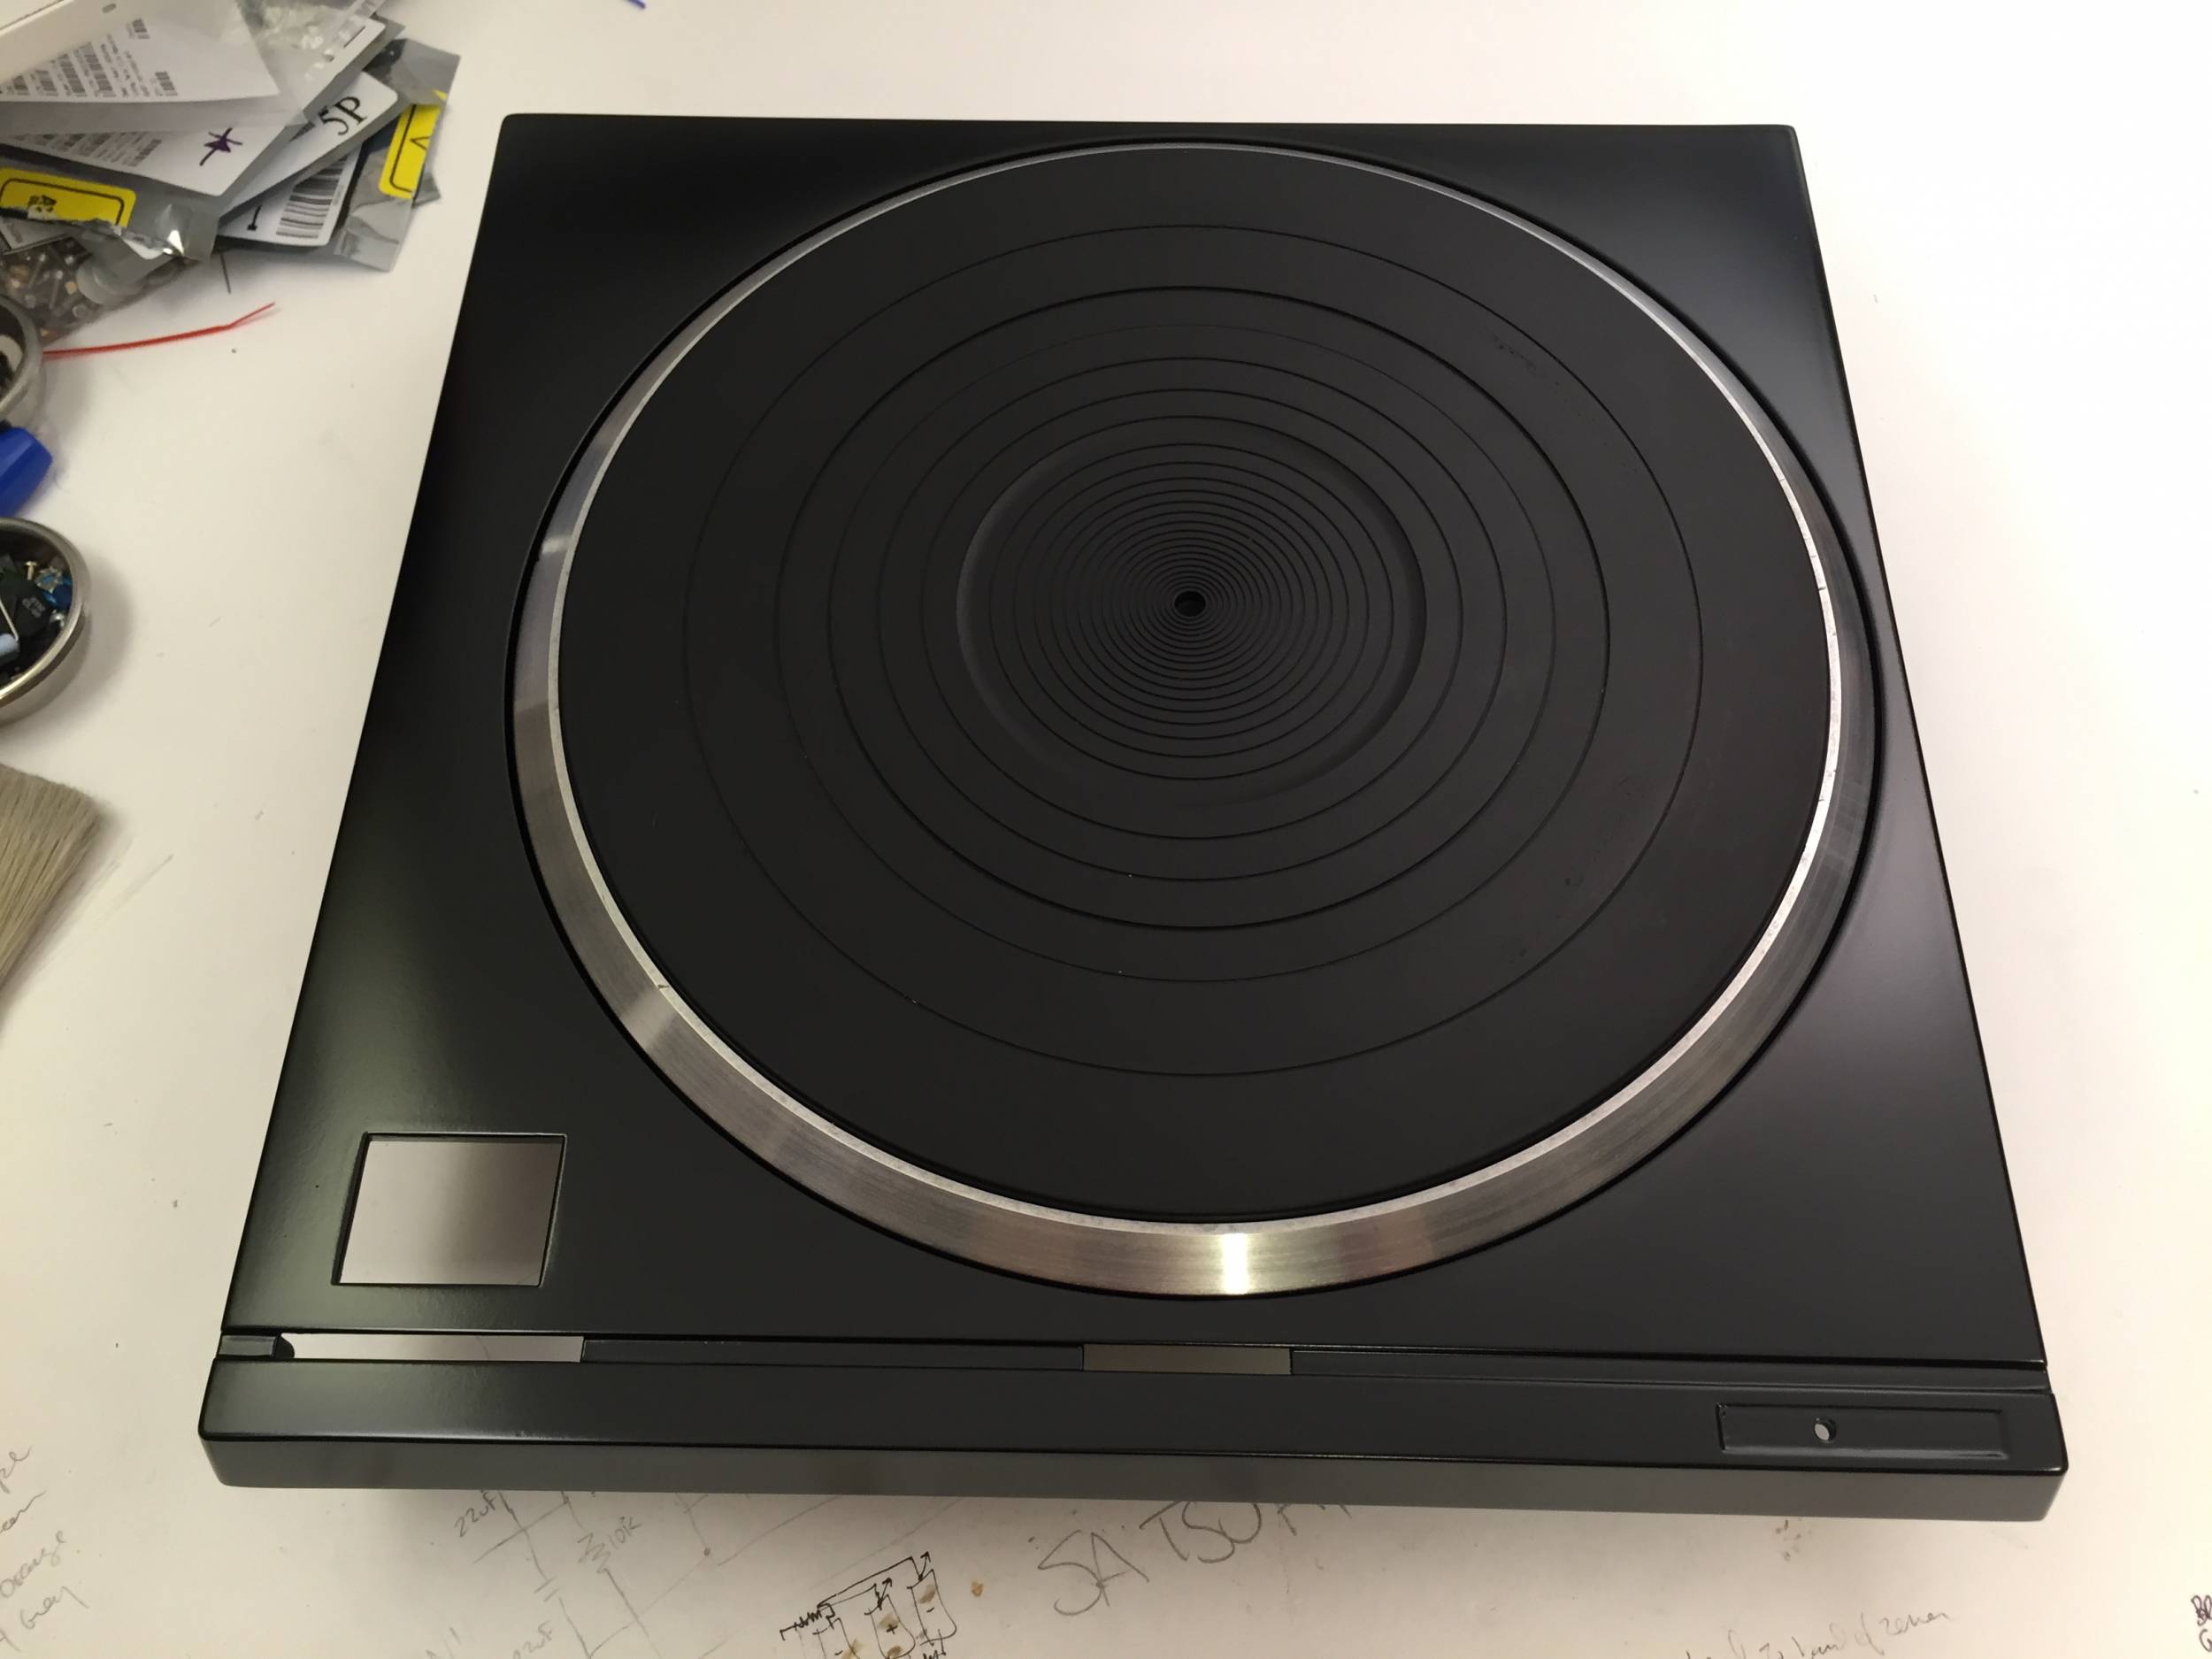
I think it looks grand. Not super duper shiny, exactly what I was hoping for.
BTW, this is the uglier of the two original chassis. I'm so completely happy with how it looks, it's a million times better than before.
I think it looks grand. Not super duper shiny, exactly what I was hoping for.
BTW, this is the uglier of the two original chassis. I'm so completely happy with how it looks, it's a million times better than before.
Wow ! 😱 That is cool ! Can you tell me what processes he did so I can get some done here in the UK please ? 
Thanks
Dave
Thanks
Dave
It looks great!
By now, i hope you KNOW that you will have to polish the platter rim...and all the other shiny bits...
By now, i hope you KNOW that you will have to polish the platter rim...and all the other shiny bits...
Nice!
The one I'm restoring has suddenly started popping fuses in the 5V supply. Looks like my weekend will be taken up with troubleshooting...
The one I'm restoring has suddenly started popping fuses in the 5V supply. Looks like my weekend will be taken up with troubleshooting...
Can you tell me what processes he did so I can get some done here in the UK please ?
Yes, of course. 🙂
I plan on talking to him today. I suspect, but will get clarification, that it's been chemicaly stripped, the corrosion filled with some kind of auto-body filler, and then merely painted and baked. There isn't a topcoat on it, and the finish is somewhat soft. (I.E., not as hard as an autobody clearcoat.) I didn't want it super-shiny black, and it looks fantastic.
The next question is what to do with the other one... Perhaps the same thing but painted approximately the stock color? Or just strip, re-brush, and have only a clearcoat applied, much as stock.
Next step, re-assemble this one (the black) and strip out the other table down to chassis only so the plinth can be completed. 😀
It looks better than pink.
Oh, that one very arguable, Jim! 🙂)
(Your table looks amazing btw)
FINALLY got it!!
I think it looks grand. Not super duper shiny, exactly what I was hoping for.
BTW, this is the uglier of the two original chassis. I'm so completely happy with how it looks, it's a million times better than before.
You can have your SP10 in any color you like, as long as it's black! Or was that a Ford?
Anyway, looks fantastic and glad to see you moving forward. I'm still waiting for my Cad guy to catch up so I can CNC my plinth. So I can feel your excitement in having the chassis back in your hands and in your control. Can't wait to see how you move to the next step.
I finally finished (well, still some touch up) the turntable stand I was building.
Looking at it finished, I can't believe it's taken two months of my free time, as it looks somewhat simple. But the devil is in the details as they say. The entire structure is stainless steel, painted Porsche pearl black, then a coat of Alsa Corp Soft Touch. The wood portion is ribbon Mahogany plywood, at least the lower 3 shelves and the upper valance. The very top is solid Mahogany. I tried to incorporate some of the details of the table into the shape edge profile of the top shelf.
Had to use a couple of tricks to get the color so dark, dark stain at first, then tint in the final coat of satin. It took a gallon of sanding sealer to fill the grain of the Mahogany.
The valance hides a Minus K, which sits on 1 1/2" of plywood shelf with a top layer of black laminate.
The table for which this shelf was built was a collaboration between my friend and Artisan Fidelity. Its core is a SP10 MK3. There will soon be a published write up on this table, so I won't spoil it here. But to give you an idea of the mass, it was CNC'd out of a 300lb block of aluminum. It took three of us to hoist the table onto the shelf!
Here is a shot just after I finished before we loaded it out of the cabinet shop.
Couple of views from different angles, hard to really get a concept of the overall look in pics. The shelf unit is 29" wide and 27 1/2" deep and the platter is just a few inches below eye level.
Looking at it finished, I can't believe it's taken two months of my free time, as it looks somewhat simple. But the devil is in the details as they say. The entire structure is stainless steel, painted Porsche pearl black, then a coat of Alsa Corp Soft Touch. The wood portion is ribbon Mahogany plywood, at least the lower 3 shelves and the upper valance. The very top is solid Mahogany. I tried to incorporate some of the details of the table into the shape edge profile of the top shelf.
Had to use a couple of tricks to get the color so dark, dark stain at first, then tint in the final coat of satin. It took a gallon of sanding sealer to fill the grain of the Mahogany.
The valance hides a Minus K, which sits on 1 1/2" of plywood shelf with a top layer of black laminate.
The table for which this shelf was built was a collaboration between my friend and Artisan Fidelity. Its core is a SP10 MK3. There will soon be a published write up on this table, so I won't spoil it here. But to give you an idea of the mass, it was CNC'd out of a 300lb block of aluminum. It took three of us to hoist the table onto the shelf!
Here is a shot just after I finished before we loaded it out of the cabinet shop.
An externally hosted image should be here but it was not working when we last tested it.
Couple of views from different angles, hard to really get a concept of the overall look in pics. The shelf unit is 29" wide and 27 1/2" deep and the platter is just a few inches below eye level.
An externally hosted image should be here but it was not working when we last tested it.
An externally hosted image should be here but it was not working when we last tested it.
An externally hosted image should be here but it was not working when we last tested it.
An externally hosted image should be here but it was not working when we last tested it.
An externally hosted image should be here but it was not working when we last tested it.
- Home
- Source & Line
- Analogue Source
- The Incredible Technics SP-10 Thread