After the kits sell out, will there be an option to buy just the (P3) boards? For me part of the fun of DIY is deciding for each component which one I prefer, so it will be truly "my" version of the P3. Currently satisfied with the P2, but I suspect that sooner or later I cannot resist the temptation of a new project 😉

After the kits sell out, will there be an option to buy just the (P3) boards? For me part of the fun of DIY is deciding for each component which one I prefer, so it will be truly "my" version of the P3.
You could always lay out your own boards (or hire a PCB expert to lay out boards); the attachment to post #824 in this thread is a real life demonstration of this option. If the layout artist's fee is too high, maybe you could share the cost among several members who all want the same thing: copycat clone P3 board Gerbers.
It’s worth mentioning that Pearl 3 pioneer kit will include the (2) Pearl 3 circuit boards, all the stuffings for the Pearl 3 boards, semis and passives both, and the bare PSU board.
…All for less money than the Pearl 2 boards + Jfets were sold for.
So you could just toss the passives, choose whatever parts you are interested in, and still be money ahead.
…All for less money than the Pearl 2 boards + Jfets were sold for.
So you could just toss the passives, choose whatever parts you are interested in, and still be money ahead.
I admire this out-of-the-box thinking! Good on ya.So you could just toss the passives, choose whatever parts you are interested in, and still be money ahead.
Or, offer the parts you don't want to other members. Surely you wouldn't be substituting every part on the boards?
After making some adjustments to reduce input noise, here are the new test results, showing better performance. I'll probably do more tests as I learn the software. Also shown is a frequency response test result.
For those who don't like measurements, don't worry, I've previously described how much I like the sound of this preamp.
😀


For those who don't like measurements, don't worry, I've previously described how much I like the sound of this preamp.
😀
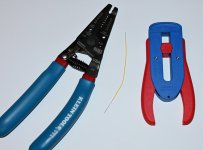
I received two wire strippers today for stripping thin wires. The main purpose is to strip vintage AWG 30 solid core wirewrap wire having a PTFE insulation. A quick review showed that the Kleintool for this purpose work more than perfect. But only if I use the AWG 30 hole for stranded wire (AWG 28 for solid wire). The other tool is better for wire that has softer insulation. The Klein tool cuts all the way round in "one go" where the other you need to twist the wire to cut all the way around. It needs more practice. I have 100m yellow, black, red, blue of this type of wire. Should be enough for P3.
Attachments
Hello Abx74,
I've also used the DRV134 in DIP8. Works great.
THAT1646 is also a very interesting alternative to the DRV134. Both available in DIP8.
Cheers
Dirk
I've also used the DRV134 in DIP8. Works great.
THAT1646 is also a very interesting alternative to the DRV134. Both available in DIP8.
Cheers
Dirk
Hello,After making some adjustments to reduce input noise, here are the new test results, showing better performance. I'll probably do more tests as I learn the software. Also shown is a frequency response test result.
For those who don't like measurements, don't worry, I've previously described how much I like the sound of this preamp.
The Pearl 3 is a good project to sort out and measure with a Quant Asylum analyzer. There is plenty of noise and distortion above the analyzer lower limits to be measurable. For the right brain thinkers, this is not a bad thing.
The 47k input resistor alone is enough for any or every vinyl pre-amp to produce a little ear in speaker hiss.
The Quant Asylum software has a nV/rthz function that scales the FFT Y axis noise floor in nV/rthz, the actual noise measurement units.
The QA software has an option for a white background so you do not need to empty your bk toner cartridge if you print your plots.
Thanks
DT
Last edited:
Pioneer kits will include his nifty sticker for the inside of your chassis -


Thank @rhthatcher for having them made to be put in the early kits, we owe him one.
🙂
👏 👏 👏
Thank @rhthatcher for having them made to be put in the early kits, we owe him one.
🙂
👏 👏 👏
It's Canare L-4E6S. Which is to say Mic cable. Can use it for the umbilical as well.
https://www.redco.com/Canare-L-4E6S.html
https://www.redco.com/Canare-L-4E6S.html
2 Pearl 2 boards were $200 IIRC. Sounds attractive if the complete P3 kit goes for less. Of course I wouldn't toss everything. I just like Vishay Dale 25ppm resistors everywhere, maybe boutique coupling capacitors, not 7815's (use a super regulator instead) etc etc.It’s worth mentioning that Pearl 3 pioneer kit will include the (2) Pearl 3 circuit boards, all the stuffings for the Pearl 3 boards, semis and passives both, and the bare PSU board.
…All for less money than the Pearl 2 boards + Jfets were sold for.
So you could just toss the passives, choose whatever parts you are interested in, and still be money ahead.
Very curious how Super Regulator would work in this, most likely it will be wonderful, looking forward to hearing about it!
Are those scratch marks on the chassis to help electrically connect the separate chassis pieces? If so, that's pretty smart, I'll have to try that out on my pearl2.
Exactly right.
Because of the requirement for shielding, all 6 sides of the RIAA enclosure must have good continuity to each other, and thence to ground. If one (or more) panels don't connect, hum increases.
Because of the requirement for shielding, all 6 sides of the RIAA enclosure must have good continuity to each other, and thence to ground. If one (or more) panels don't connect, hum increases.
- Home
- Amplifiers
- Pass Labs
- Pearl 3 Burning Amp 2023