cyberspyder said:A saw is only dangerous if its operator is a doorknob...sigh...
No, saws, like guns, are dangerous. I have seen guys with thousands of hours at the machine cut themselves. A heartbeat, that's all the time it takes. Anything designed to easily cut through the hardest hardwood needs to be respected.
Heck, they are even dangerous when they are not running. I know a guy that fell off a 6' step ladder (in his own garage) onto the blade of the tablesaw that was setup on the floor.The blade was sticking up all the way. A very nasty cut and 3 broken ribs.
MJL21193 said:
No, saws, like guns, are dangerous. I have seen guys with thousands of hours at the machine cut themselves. A heartbeat, that's all the time it takes. Anything designed to easily cut through the hardest hardwood needs to be respected.
Heck, they are even dangerous when they are not running. I know a guy that fell off a 6' step ladder (in his own garage) onto the blade of the tablesaw that was setup on the floor.The blade was sticking up all the way. A very nasty cut and 3 broken ribs.
That's what I've been taught, but heck, I'm only 16. Anyways, if you're careful not to do anything stupid and concentrate at the task on hand, there's a really low chance you'll hurt yourself.
Brendan
cyberspyder said:
That's what I've been taught, but heck, I'm only 16. Anyways, if you're careful not to do anything stupid and concentrate at the task on hand, there's a really low chance you'll hurt yourself.
Brendan
Not what I was taught, that's for sure.
The instructor did a "loose clothing demo" back in trade school (20+ years ago!, I'm getting old). Lowered a rag stapled to a stick onto the spinning blade. Pretty graphic, it left NO DOUBT in anyones mind about the hazards of a loose shirt sleeve.
I'm not clear on what "sand" means here. What grit? By hand? With my rotary sander?
I followed Krutke's advice to the letter for the baffles on my ZDT3s. I lightly sanded with 320 grit. And by lightly I mean I slightly scored the surface to make sure that everything was flat and smooth and slightly roughed up to accept the paint. They turned out fantastic, so rest assured that if you follow his advice you'll have nice looking baffles.
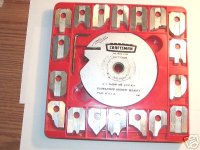
Table saw is a wonderful tool but it is dangerous. My neighbor just lost about an inch on his fingers on a sliding panel saw and he has about 15 years behind the belt. I do insane things like ruining concave moldings across the blade. If you are a noob in the woodworking shop, perhaps it is better to cut this holes by hand. Nice ruler, sharp pencil and a good file can make this happen very fast. After all, you only doing a pair of speakers.
R-Carpenter said:
I do insane things like ruining concave moldings across the blade.
Ah, me too. Nothing wrong as long as you setup guides and raise the blade by small increments.
I milled about 2 miles of 7" MDF baseboard, 5" MDF door casing for a house a few years ago with the dreaded Craftsman molding head Cutter. Truly scary. Still have all of my fingers though (knock on wood)
Attachments
A healthy fear of power tools, etc.
Thanks to everyone for the tips on the terminal block flush mounting jig thang. I'll do it better on my next pair of speakers.
And I already have a very healthy fear of table saws, but I welcome the emphasis. I know a cabinetmaker with years on the blade who nearly lost his fingertip recently. I see guys regularly in Home Depot missing a tip.
I take my router deadly serious too.
Thanks Stangbat. Your baffles look excellent, so I'm hopeful.
That answers my first question.
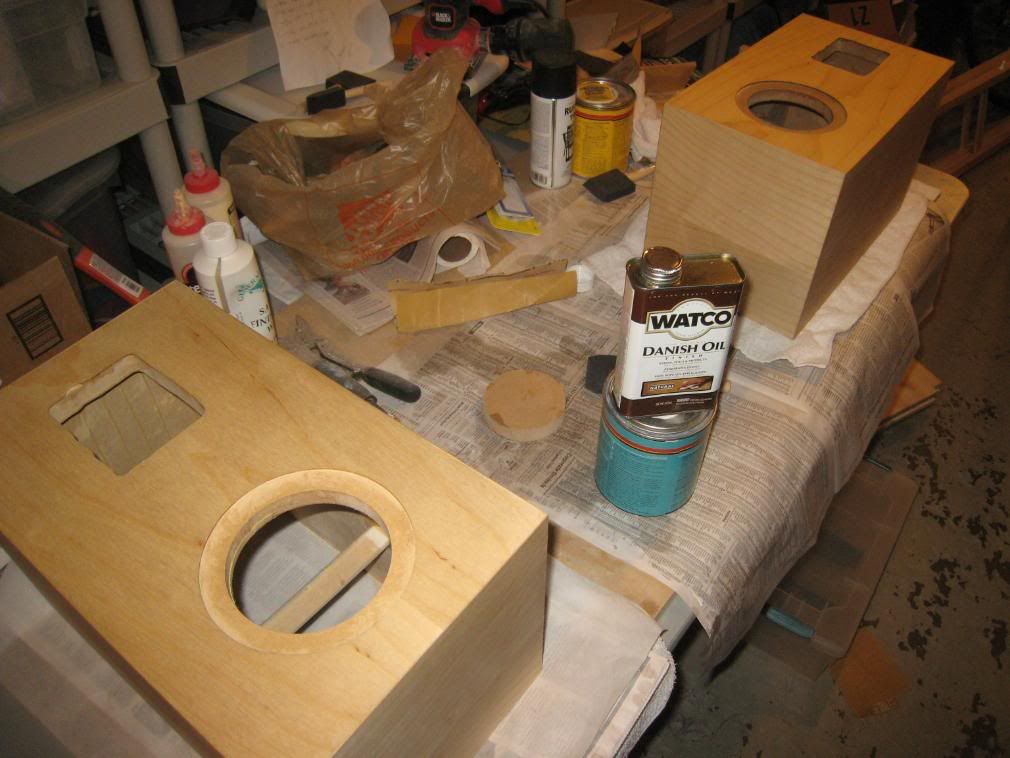
Anyone expert enough on types of sandpaper to answer my second? Is black Ok for sanding birch veener with Danish oil or should I be using something else? If so, what else?
Thanks to everyone for the tips on the terminal block flush mounting jig thang. I'll do it better on my next pair of speakers.
And I already have a very healthy fear of table saws, but I welcome the emphasis. I know a cabinetmaker with years on the blade who nearly lost his fingertip recently. I see guys regularly in Home Depot missing a tip.
I take my router deadly serious too.
stangbat said:I followed Krutke's advice to the letter for the baffles on my ZDT3s. I lightly sanded with 320 grit. And by lightly I mean I slightly scored the surface to make sure that everything was flat and smooth and slightly roughed up to accept the paint. They turned out fantastic, so rest assured that if you follow his advice you'll have nice looking baffles.
Thanks Stangbat. Your baffles look excellent, so I'm hopeful.
That answers my first question.
Anyone expert enough on types of sandpaper to answer my second? Is black Ok for sanding birch veener with Danish oil or should I be using something else? If so, what else?
Black is usually Aluminum Oxide. It is probably wet-dry sand paper designed to be used with water as a lubricant on lacquers and polyurethanes. Not the best choice for this application but not a disaster by any means.
Better choice is a Silicon Carbide sandpaper. It is also known to finishers as “no-fill” or “free-cut”.It is Grey in color.
Spacing between abrasive grains on the paper is larger and the finish doesn't fill it up. I believe it also goes up to 400grit.
Oil finish fill the grain faster if you don't wipe the sanding dust off.
http://www1.mscdirect.com/CGI/NNSRIT?PMPXNO=2694661&PMT4NO=0
'"I milled about 2 miles of 7" MDF baseboard, 5" MDF door casing for a house a few years ago with the dreaded Craftsman molding head Cutter. Truly scary. Still have all of my fingers though (knock on wood) [/B][/QUOTE]'"
I love that thing! It's like having a bunch of tiny shaper heads.
BTW, ever used feeder on the table saw?
I love that thing! It's like having a bunch of tiny shaper heads.
BTW, ever used feeder on the table saw?
More sandpaper novice-ness
I guess I'm afraid of the black oxide from the paper mixing into the slurry and adding possibly undesirable coloration to the finish. (Which might make it sound like I know what I'm talking about. Which I don't.)
Ok, thanks.
And if I want to go higher than 400? (Some Danish Oil finishing guides talk about going to 1000).
I apologize if all this is rudimentary and simplistic.
I did figure this out already.
Thank you again for taking the time to reply!
R-Carpenter said:Black is usually Aluminum Oxide. It is probably wet-dry sand paper designed to be used with water as a lubricant on lacquers and polyurethanes. Not the best choice for this application but not a disaster by any means.
I guess I'm afraid of the black oxide from the paper mixing into the slurry and adding possibly undesirable coloration to the finish. (Which might make it sound like I know what I'm talking about. Which I don't.)
Better choice is a Silicon Carbide sandpaper. It is also known to finishers as “no-fill” or “free-cut”.It is Grey in color.
Spacing between abrasive grains on the paper is larger and the finish doesn't fill it up. I believe it also goes up to 400grit.
Ok, thanks.
And if I want to go higher than 400? (Some Danish Oil finishing guides talk about going to 1000).
I apologize if all this is rudimentary and simplistic.
Oil finish fill the grain faster if you don't wipe the sanding dust off.
http://www1.mscdirect.com/CGI/NNSRIT?PMPXNO=2694661&PMT4NO=0 [/B]
I did figure this out already.
Thank you again for taking the time to reply!
There are also different types of Aluminum Oxide sandpaper. I don't think, you could contaminate the finish with the abrasive grain from it. The one you are using is wet-dry and the grain is glued to the backer pretty good. Sandpaper also differs with the type of backing and the adhesive.
Going higher then 400 between coats is useless.
Sanding the finish, not only cuts down on imperfections but also creates a physical bond between the previous and the next coat.
The glossiness of the finish becomes better as the pores of the wood are being filled. If you absolutely have to, use the paper you have now or as someone mentioned, 0000 stellwool.
If you using stellwool, make sure you clean it off. It CAN contaminate the finish and little fibers will turn black after a while.
Your questions are quite normal for a beginner finisher. They are not rudimentary or simplistic at all.
We all have to learn sometimes.
OH, make sure you deep your oil rags in the water bucket after use!You don't want spontaneous combustion there.
More minor progress; questions about gloss finish
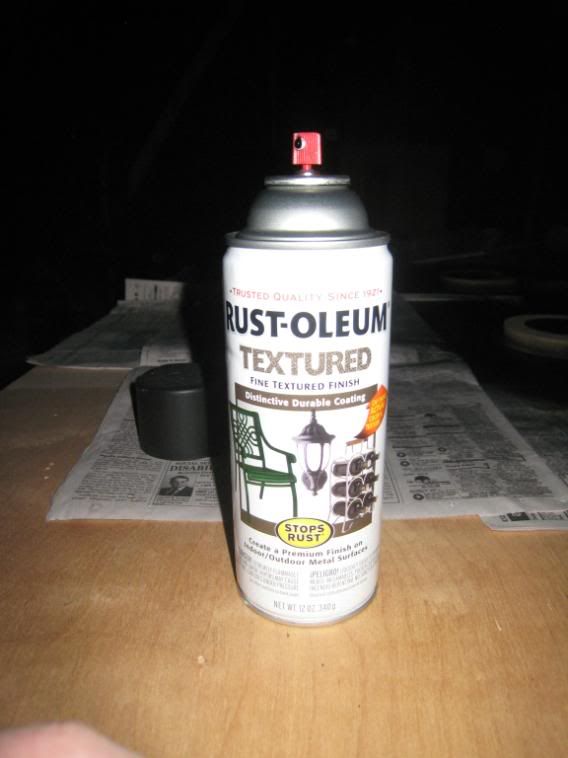
First off, I couldn't find "Textured" when I looked for canned Rustoleum paints, so I got this hammered stuff, thinking it must be what Zaph was talking about:
It isn't. Finally I figured out the right stuff, which is only available as a spray:
Finally after some testing, I actually painted the baffles. I'm deliberately cropping the bad bits here in shame:
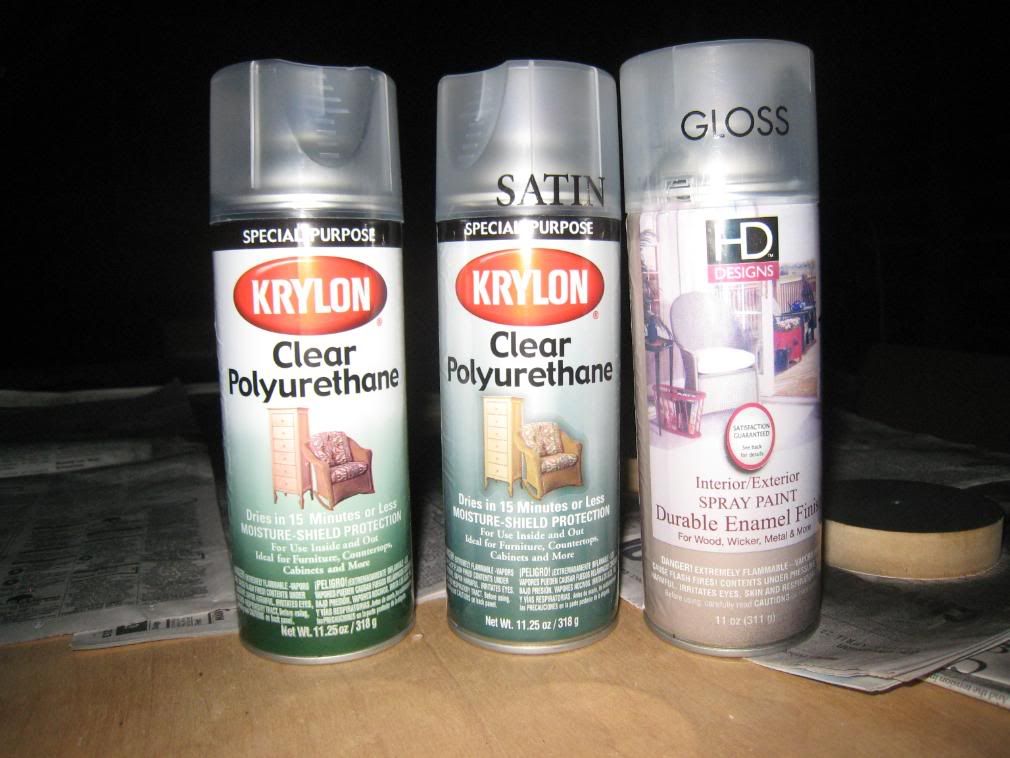
QUESTION: Which of these glosses is appropriate/best for a coat according to Zaph's directions? If none, what product should I use?
First off, I couldn't find "Textured" when I looked for canned Rustoleum paints, so I got this hammered stuff, thinking it must be what Zaph was talking about:
An externally hosted image should be here but it was not working when we last tested it.
It isn't. Finally I figured out the right stuff, which is only available as a spray:
An externally hosted image should be here but it was not working when we last tested it.
Finally after some testing, I actually painted the baffles. I'm deliberately cropping the bad bits here in shame:
An externally hosted image should be here but it was not working when we last tested it.
QUESTION: Which of these glosses is appropriate/best for a coat according to Zaph's directions? If none, what product should I use?
An externally hosted image should be here but it was not working when we last tested it.
Started finishing cabinets; first coat Danish oil
I started finishing the cabinets. Here's the first coat of Danish oil:
I must say, the application of Danish oil is described on the internet like it was a cult ritual, full of guild mysticism and arcane procedures. All the descriptions I've found both contradict each other, and partly overlap. It's very hard to figure out what people agree on and what is superstition or guesswork.
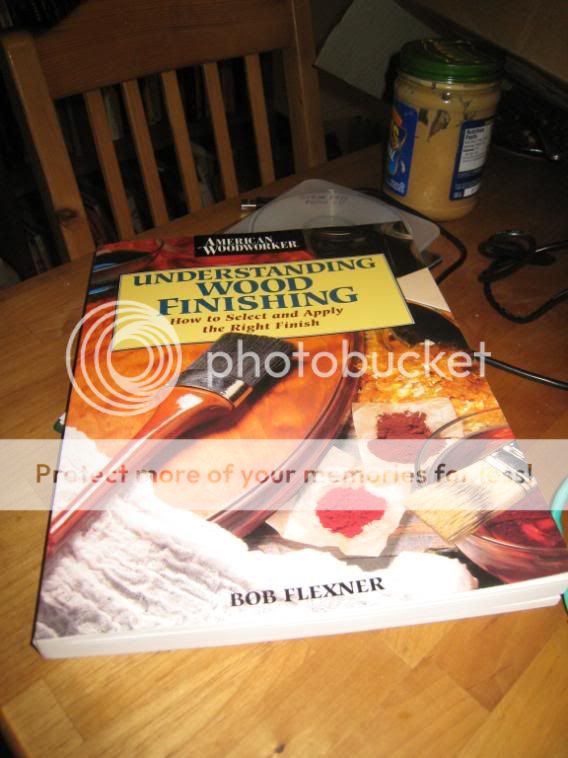
Anyhow, I'm following the instructions in this book, whose author is fairly scientific:
It should take me 4-5 days until I'm done, doing a coat every 24 hours.
I started finishing the cabinets. Here's the first coat of Danish oil:
I must say, the application of Danish oil is described on the internet like it was a cult ritual, full of guild mysticism and arcane procedures. All the descriptions I've found both contradict each other, and partly overlap. It's very hard to figure out what people agree on and what is superstition or guesswork.
Anyhow, I'm following the instructions in this book, whose author is fairly scientific:
It should take me 4-5 days until I'm done, doing a coat every 24 hours.
All I can tell you is I used this and I liked the end result when used with the Rustoleum textured finish:
http://www.rustoleum.com/CBGProduct.asp?pid=166
http://www.rustoleum.com/CBGProduct.asp?pid=166
An externally hosted image should be here but it was not working when we last tested it.
Great work so far. Keep us updated. 😎
It's a shame the crossovers come pre-assembled. That's half the fun. They should just include the components and knock off a few $'s off the kit price.
It's a shame the crossovers come pre-assembled. That's half the fun. They should just include the components and knock off a few $'s off the kit price.
SR-71 guild
StewLG - thank you for documenting the common problems of a beginning speaker builder, I am sure many will benefit from it, and the associated advice.
re: clear coat. I am a big fan of satin clear coats. They are much more forgiving than a gloss. Either polyurethane or a lacquer should work fine (unless you're a dry martini drinker, in which case I would stick with the poly.)
re: screwing mdf cabs together. I've made lots of things out of mdf (furniture, kitchen cabinets, etc... incl speakers) and I am surprised nobody has mentioned nail guns. (or biscuit joiners, for that matter). I trust the glue joint to be strong enough (provided it is clamped), but tacking things together with a finish nail gun helps alignment, and leaves a small hole to fill.
I'll be waiting for a report on how they sound.
regards,
Michael
Re: SR-71 guild
That's what I do, but it never occurred to me that he would have a nailer and compressor, so it would be empty advice.
Biscuits would be good for lining everything up and add some strength. A wise investment for anyone serious about building stuff (not just speakers).
mlwebb said:
re: screwing mdf cabs together. I've made lots of things out of mdf (furniture, kitchen cabinets, etc... incl speakers) and I am surprised nobody has mentioned nail guns. (or biscuit joiners, for that matter). I trust the glue joint to be strong enough (provided it is clamped), but tacking things together with a finish nail gun helps alignment, and leaves a small hole to fill.
That's what I do, but it never occurred to me that he would have a nailer and compressor, so it would be empty advice.
Biscuits would be good for lining everything up and add some strength. A wise investment for anyone serious about building stuff (not just speakers).
Attachments

Test & Assembly
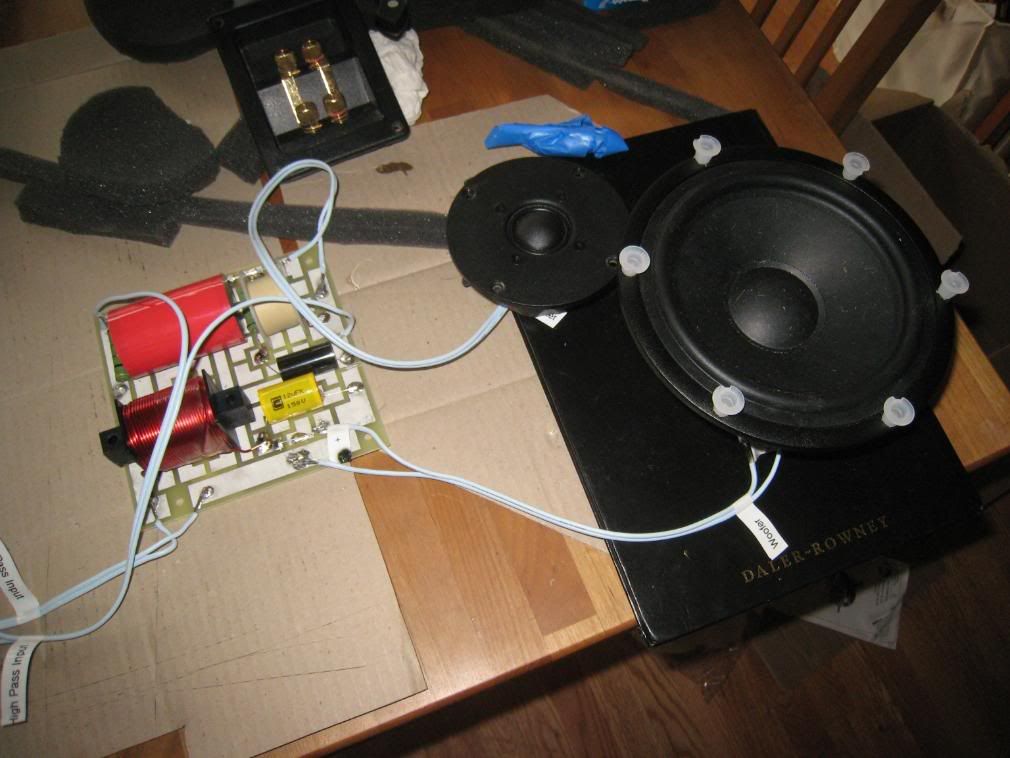
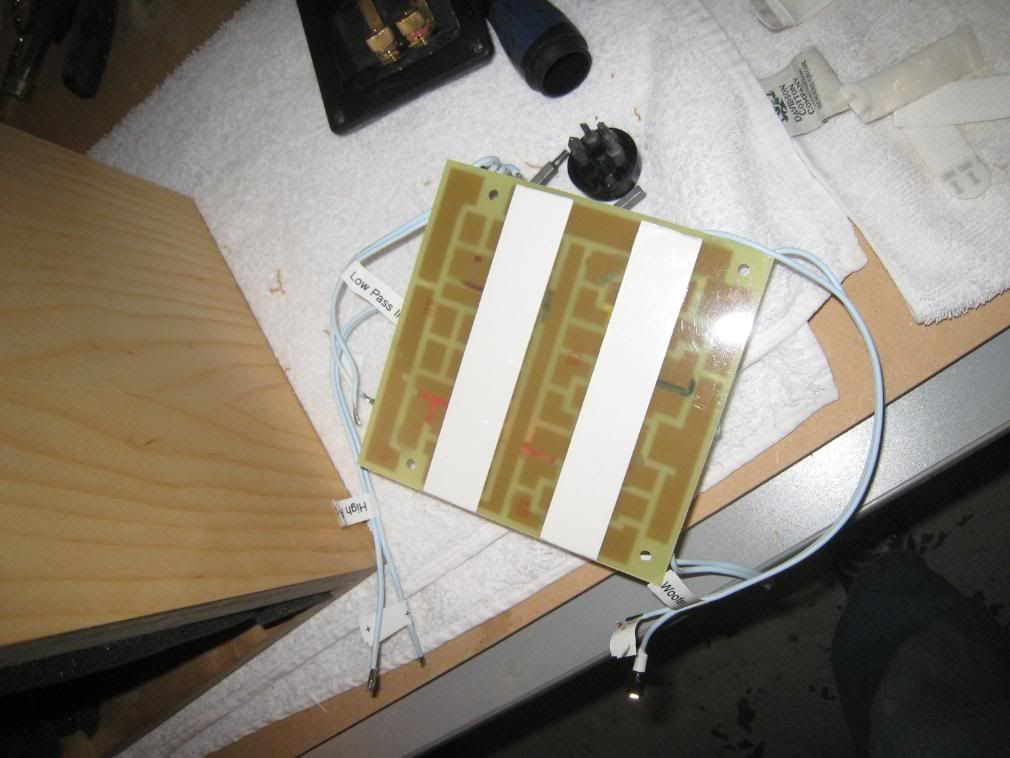
First, I checked the crossovers & drivers:
Sounded good. Definitely not $380 good, but everything is working OK.
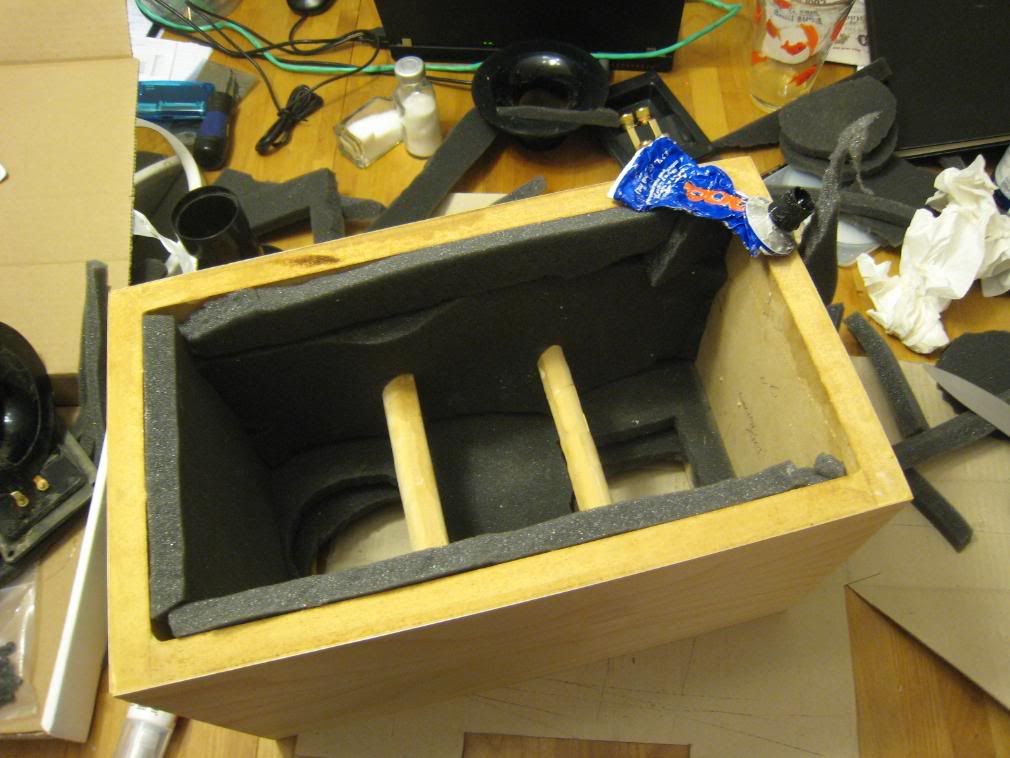
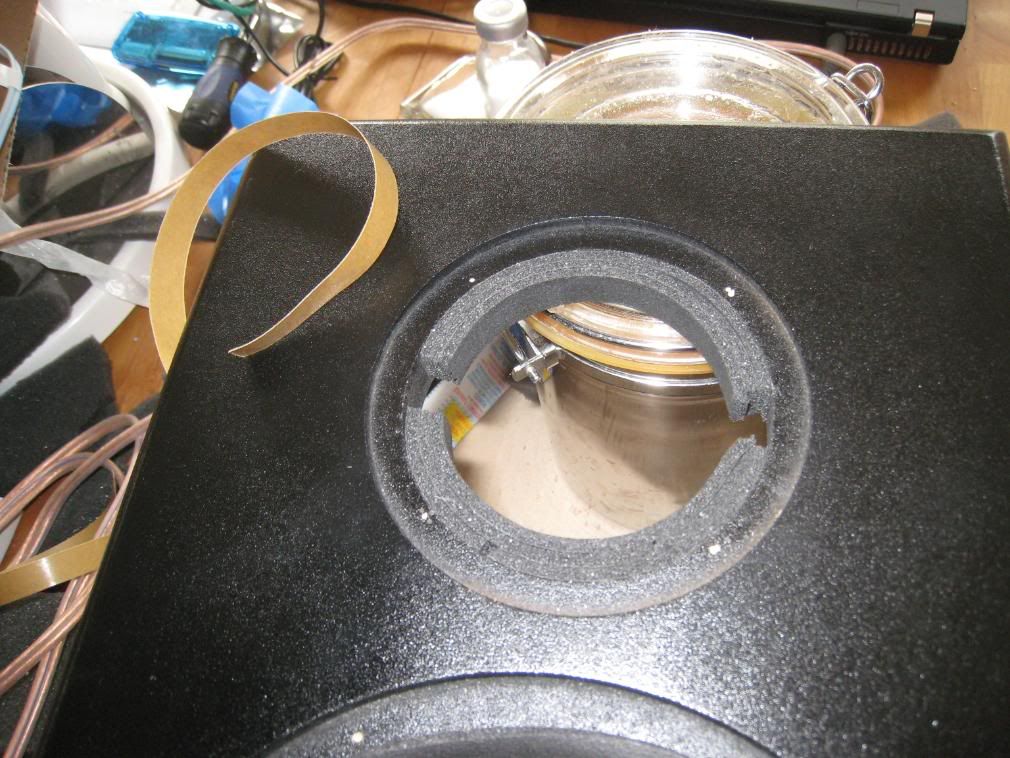
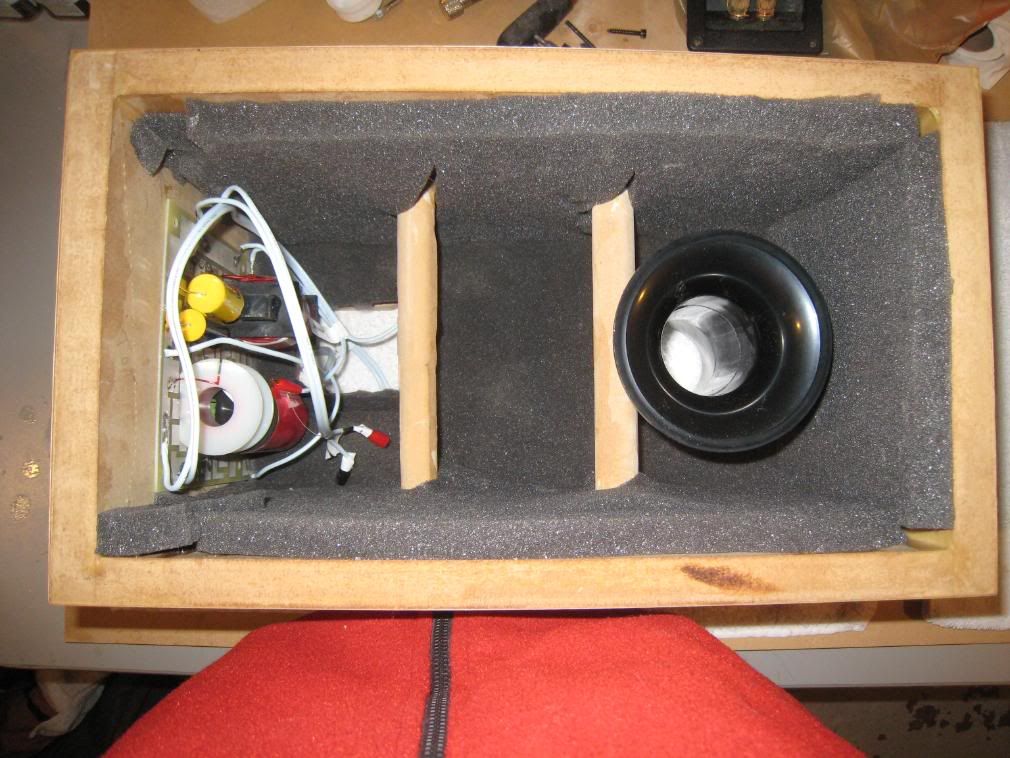
Added foam to interiors. Double layer on back wall.
Madisound could definitely include more foam, I ended up scavenging scraps to get full coverage, and it looks awful.
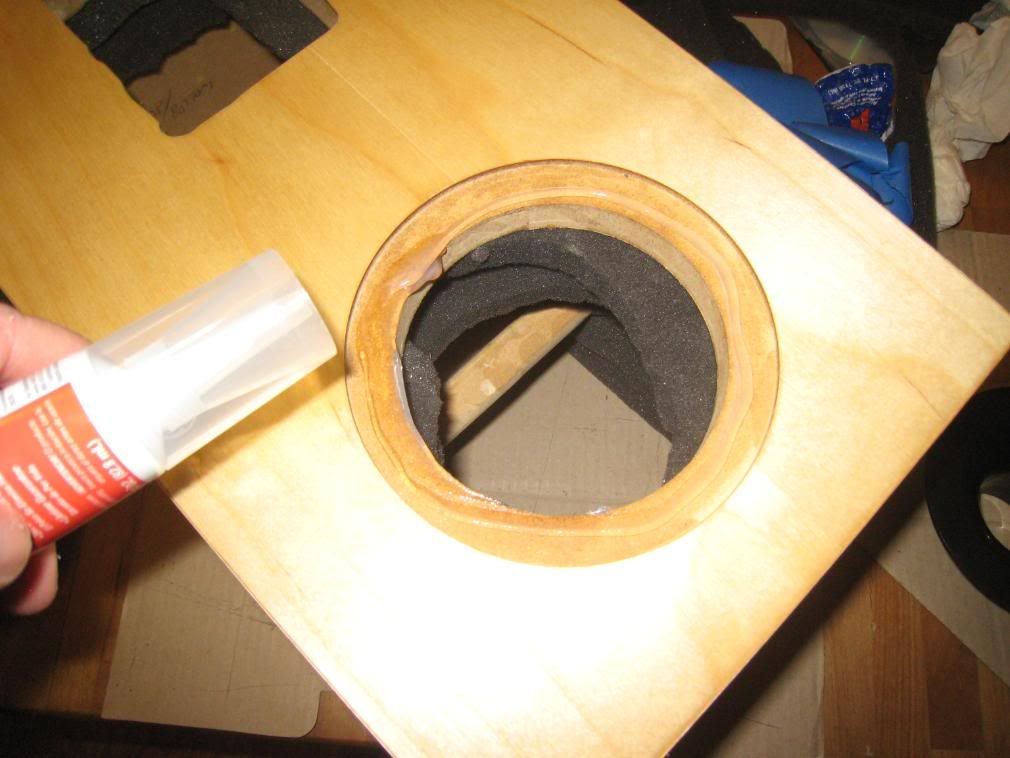
I then siliconed in the rear of the port:
I put some foam scraps in the tube to give myself something to push against. I wanted to hold the tubes in while the silicone set. I then used tape to hold the scraps down, followed by books (not shown, sorry).
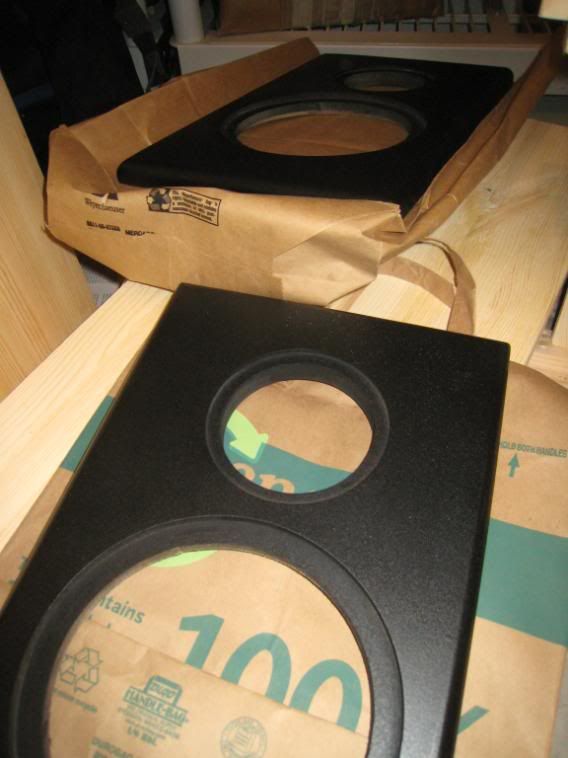
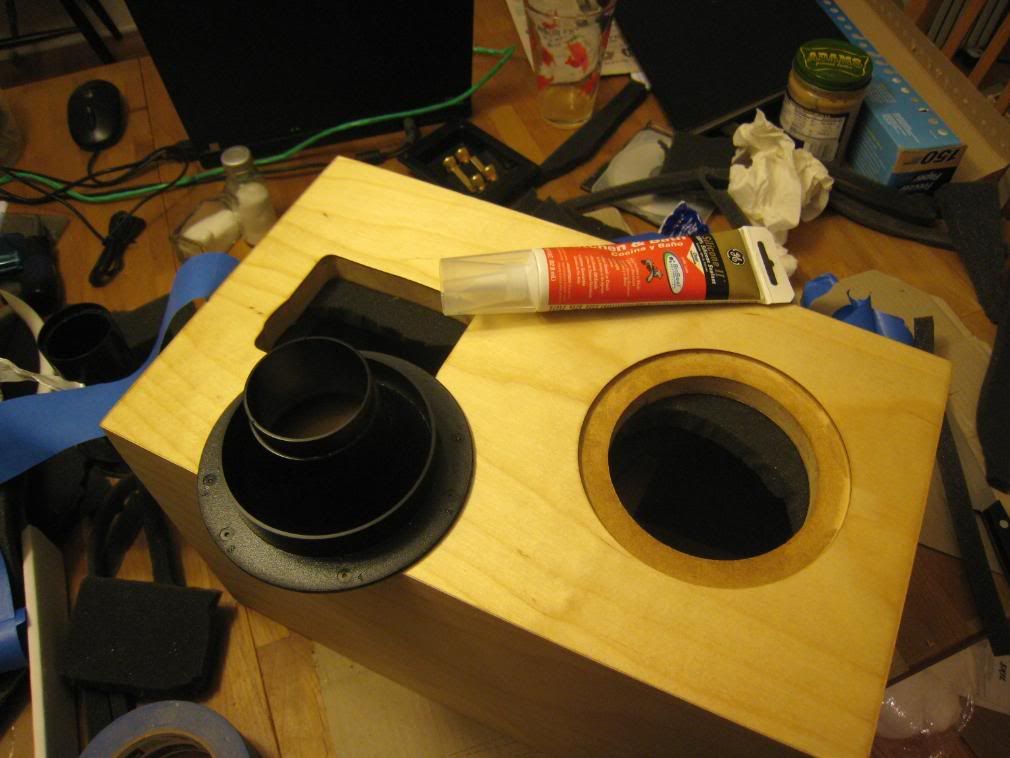
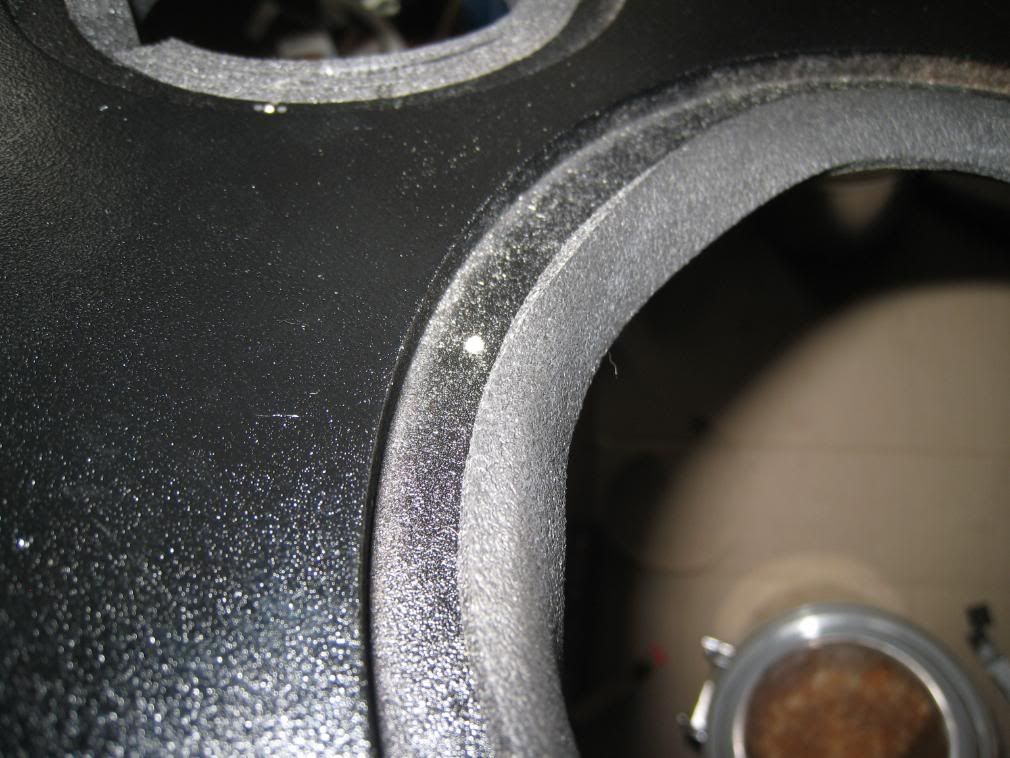
I also foamed the driver openings in the baffles. I think I did the right thing here, but please let me know if this all looks completely screwed up.
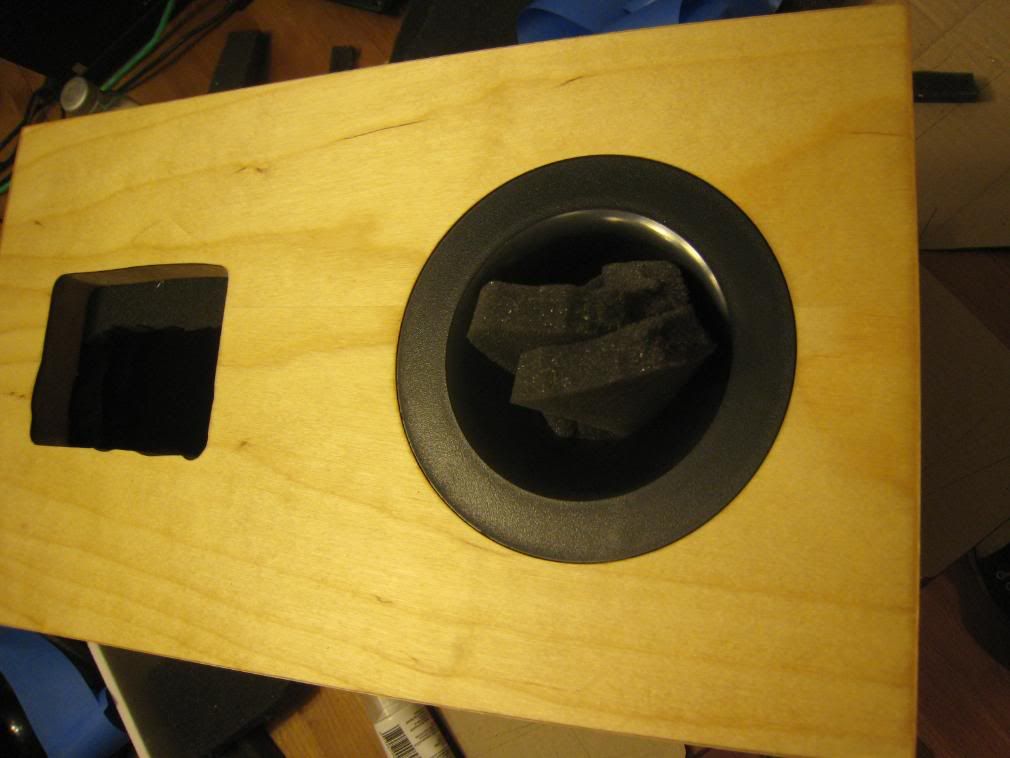
Madisound puts double sided tape on the back of the crossovers. I ended up using it:
First, I checked the crossovers & drivers:
An externally hosted image should be here but it was not working when we last tested it.
Sounded good. Definitely not $380 good, but everything is working OK.
Added foam to interiors. Double layer on back wall.
An externally hosted image should be here but it was not working when we last tested it.
Madisound could definitely include more foam, I ended up scavenging scraps to get full coverage, and it looks awful.
I then siliconed in the rear of the port:
An externally hosted image should be here but it was not working when we last tested it.
An externally hosted image should be here but it was not working when we last tested it.
I put some foam scraps in the tube to give myself something to push against. I wanted to hold the tubes in while the silicone set. I then used tape to hold the scraps down, followed by books (not shown, sorry).
An externally hosted image should be here but it was not working when we last tested it.
An externally hosted image should be here but it was not working when we last tested it.
I also foamed the driver openings in the baffles. I think I did the right thing here, but please let me know if this all looks completely screwed up.
An externally hosted image should be here but it was not working when we last tested it.
An externally hosted image should be here but it was not working when we last tested it.
Madisound puts double sided tape on the back of the crossovers. I ended up using it:
An externally hosted image should be here but it was not working when we last tested it.
An externally hosted image should be here but it was not working when we last tested it.
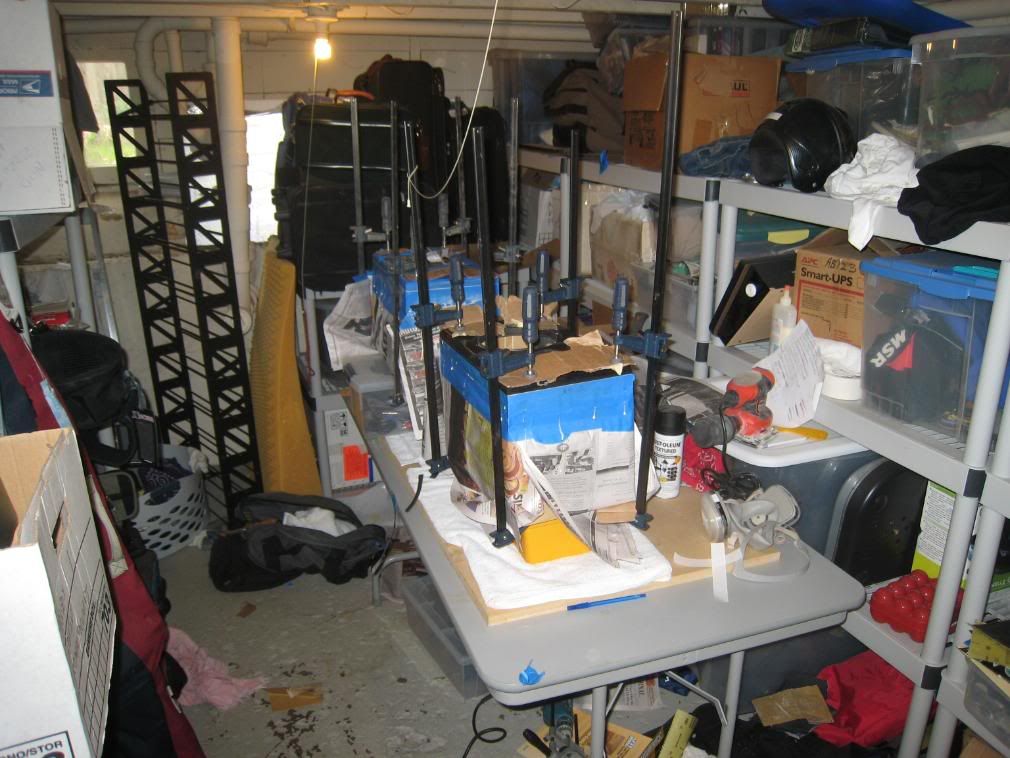
Gluing on baffles
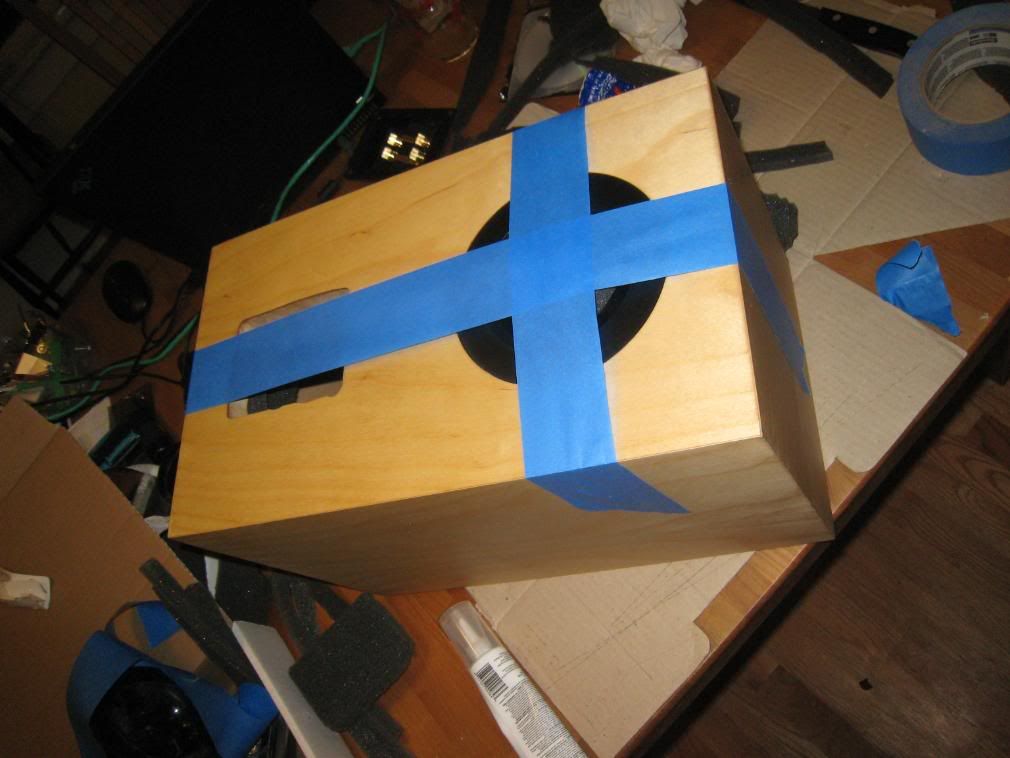
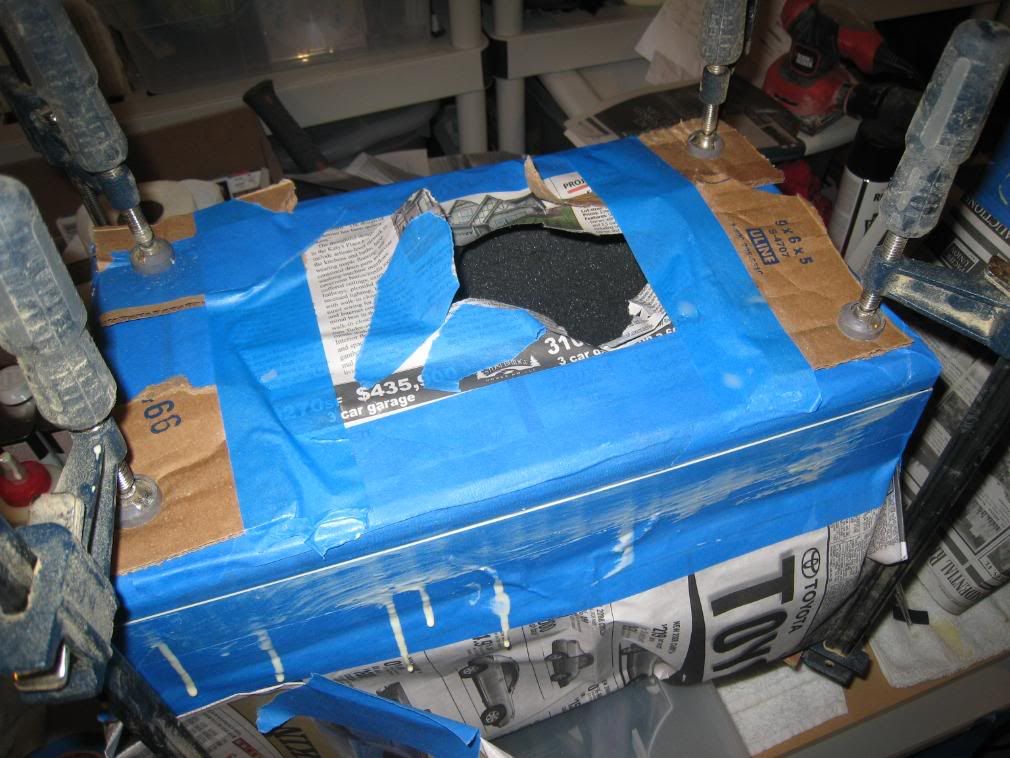
I masked off the cabinets with painter's tape and newspaper:
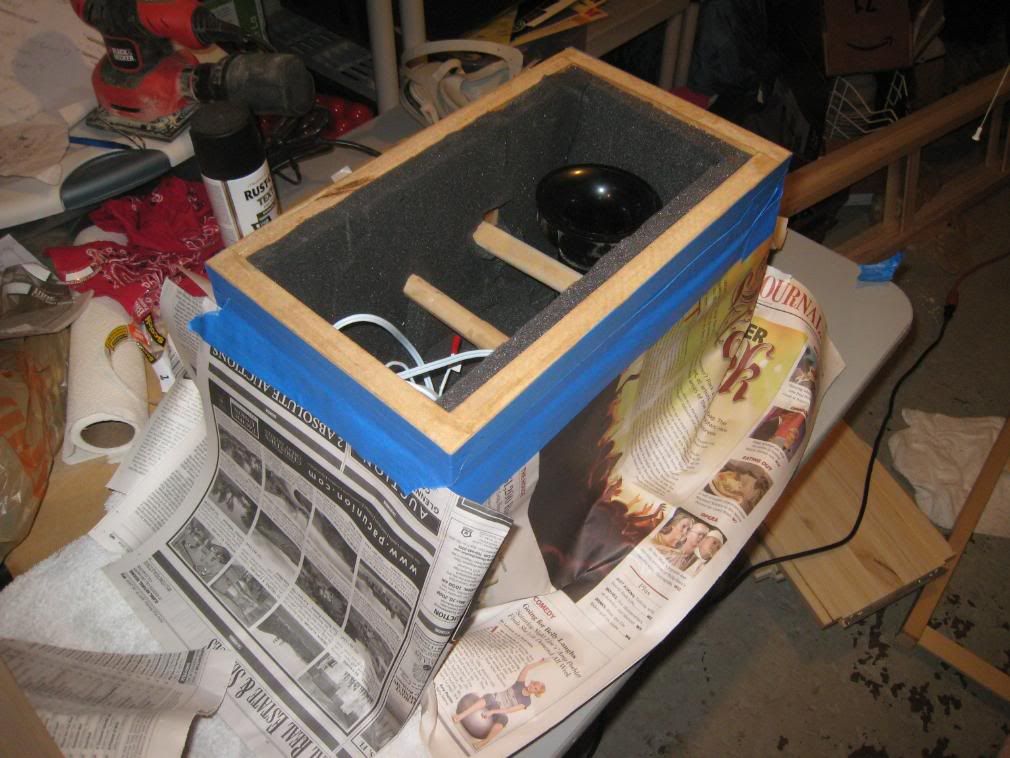
On the first cabinet (shown nearest to the camera), I didn't mask off the baffle too, which was a mistake - I had to run around trying to clean off glue while the titebond started to set.
On the second cabinet, I masked off both:
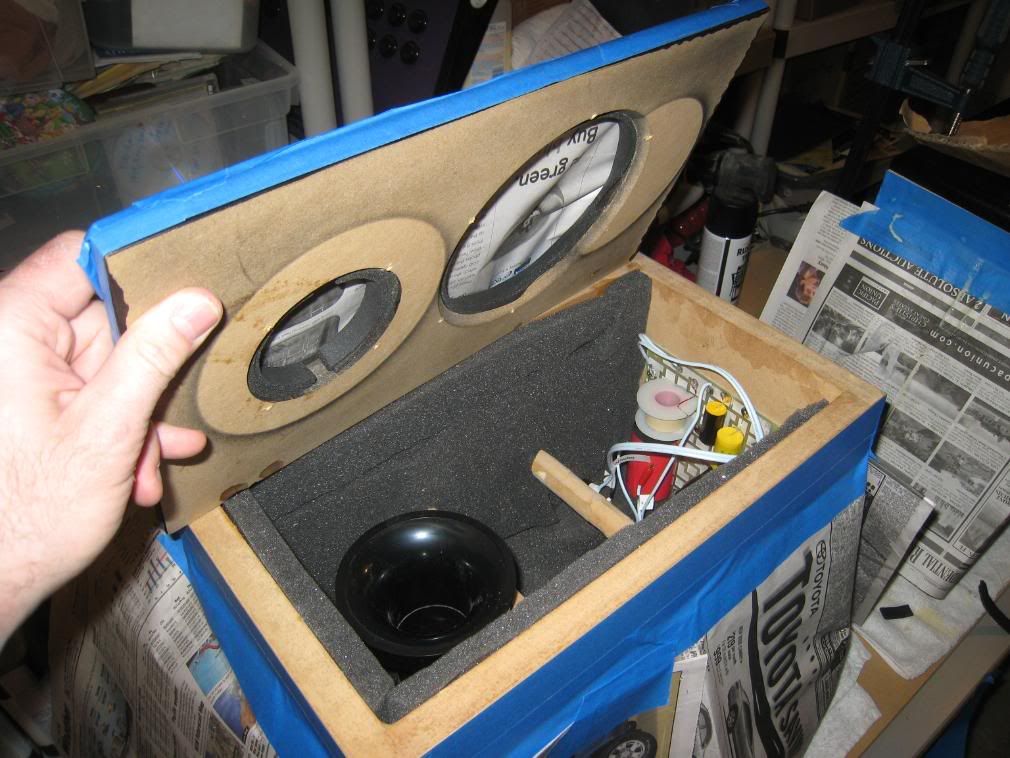
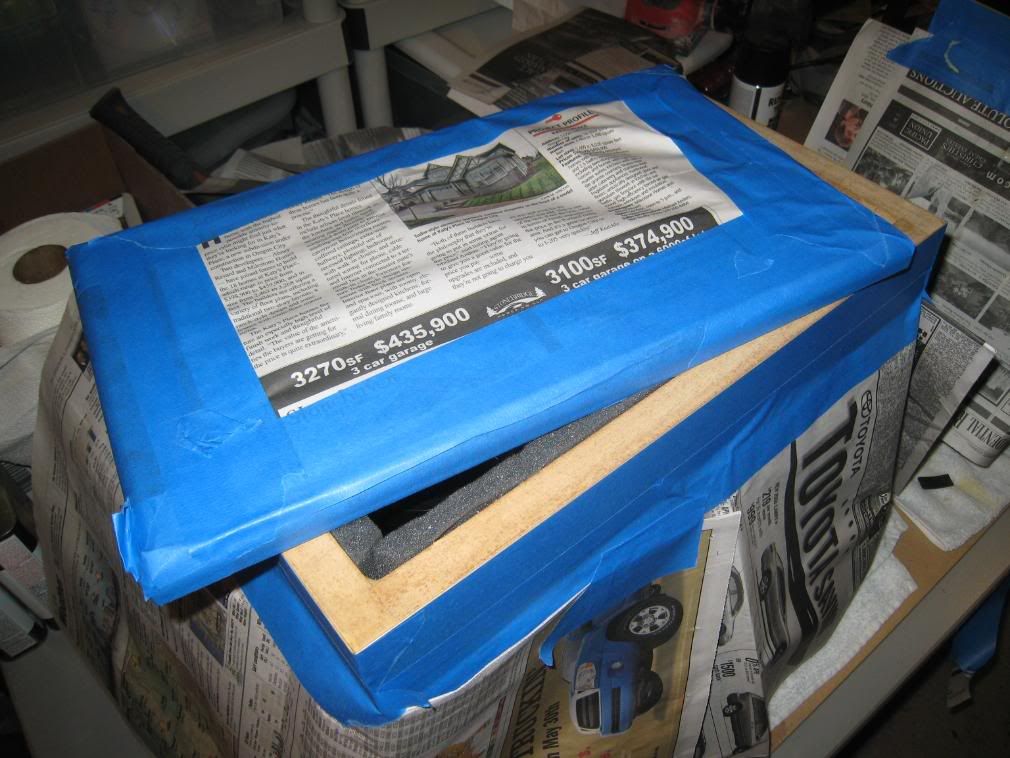
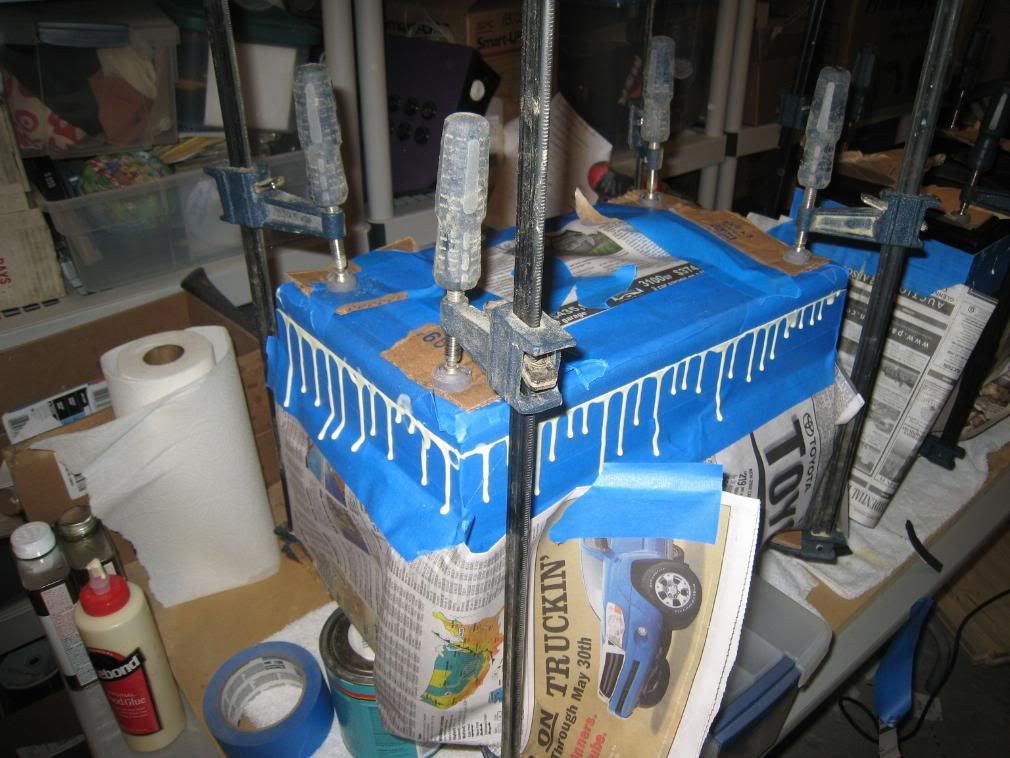
Because the baffle was obscured by the newspaper, I had to keep checking to make sure I was putting the baffle on the right way on the cabinet.
Even when I was done, I had to poke a hole to make sure (and to let the solvents from the Goop & silicone escape. They're still outgassing at 12+ hours.)
They're in the basement now. I'll let them set for 24 hours before moving on to the final bits.
I masked off the cabinets with painter's tape and newspaper:
On the first cabinet (shown nearest to the camera), I didn't mask off the baffle too, which was a mistake - I had to run around trying to clean off glue while the titebond started to set.
On the second cabinet, I masked off both:
Because the baffle was obscured by the newspaper, I had to keep checking to make sure I was putting the baffle on the right way on the cabinet.
Even when I was done, I had to poke a hole to make sure (and to let the solvents from the Goop & silicone escape. They're still outgassing at 12+ hours.)
An externally hosted image should be here but it was not working when we last tested it.
They're in the basement now. I'll let them set for 24 hours before moving on to the final bits.
- Status
- Not open for further replies.
- Home
- Loudspeakers
- Multi-Way
- PDX Zaph SR-71 Build Thread