I do not mean to hijack or detract from your thread in any way, but I am also working on a pair of SR-71's and thought I would share:
I am shooting for a blend for classical and contemporary styling with mine. The front is is a 1/2" thick, solid piece of black walnut which has been laminated onto some 3/4" MDF for stability. The rest of my enclosure, like your own, is all MDF. I am aiming for a simple semi-gloss polyurethane finish on the baffles, with the the cabinets being gloss black (automotive basecoat/clearcoat). From a s stylistic approach, it is fascinating to see how two builds of the exact same kit can take such different forms.
An externally hosted image should be here but it was not working when we last tested it.
An externally hosted image should be here but it was not working when we last tested it.
An externally hosted image should be here but it was not working when we last tested it.
I am shooting for a blend for classical and contemporary styling with mine. The front is is a 1/2" thick, solid piece of black walnut which has been laminated onto some 3/4" MDF for stability. The rest of my enclosure, like your own, is all MDF. I am aiming for a simple semi-gloss polyurethane finish on the baffles, with the the cabinets being gloss black (automotive basecoat/clearcoat). From a s stylistic approach, it is fascinating to see how two builds of the exact same kit can take such different forms.
Cataclysm said:I do not mean to hijack or detract from your thread in any way, but I am also working on a pair of SR-71's and thought I would share:
Lovely!
Did you run Baffle Diffraction Simulator to figure out the tweeter offset?
StewLG said:
Lovely!
Did you run Baffle Diffraction Simulator to figure out the tweeter offset?
There was actually a side-by-side comparison done right on the Zaph|Audio site for a 1" offset, as shown below:
An externally hosted image should be here but it was not working when we last tested it.
So it should be a little smoother for on-axis listening purposes, yet slightly more harsh than the centered model as you get into an off-axis scenario.
Plus they look kinda nifty when they're skewed like that

Very nice work. Though for some bizarre reason, your baffles remind me of these: http://www.germandeli.com/070569291409.html
😀
😀
Veneers complete
Laid out veneer (birch) and applied glue to entire back.
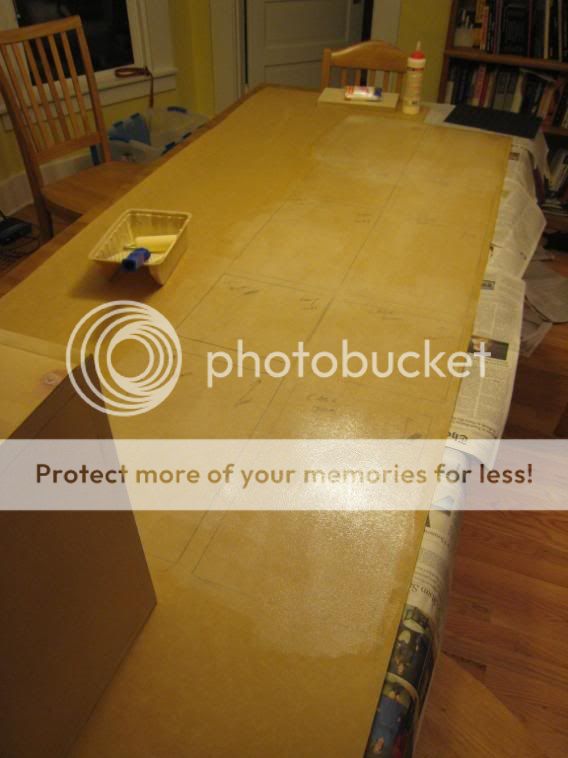
Let dry, then cut. I was fairly generous with the margins between sides - I wasn't feeling confident, having never done this before.

I marked grain direction on the cabinets because I expected I'd become confused at some point.


It helped, but I still screwed up and put my grain wrap seam on the top of the cabinet, not the bottom. (If this makes no sense to a newbie reading this, I apologize, but, also, don't worry about it - it looks decent anyhow.)
These foam rollers are great for application of glue:


Ironing on:

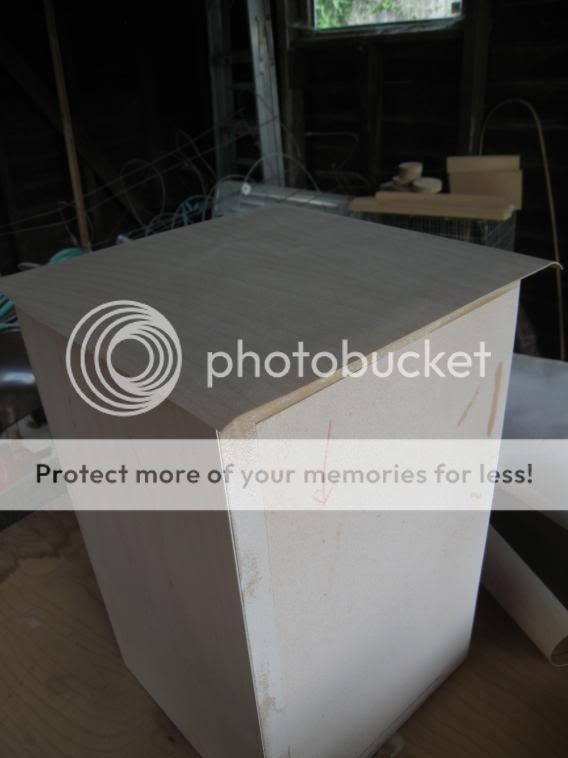
Top/bottom before trim:
A few minor problems, none of which really bother me too much:
I knew this bottom would be ugly, but it actually turned out better than I feared, so I'm happy, surprisingly:

I generally didn't have a problem cutting directly through a wide veneer edging with the flush trim bit, but once this happened. (It cleaned up perfectly with a razor, then the flush-trim again.)

Also, a couple of corners detached as I was rounding. I was extremely lucky here that the veneer did not crack or break off. The fix has been to insert a bit of glue using a razor blade:

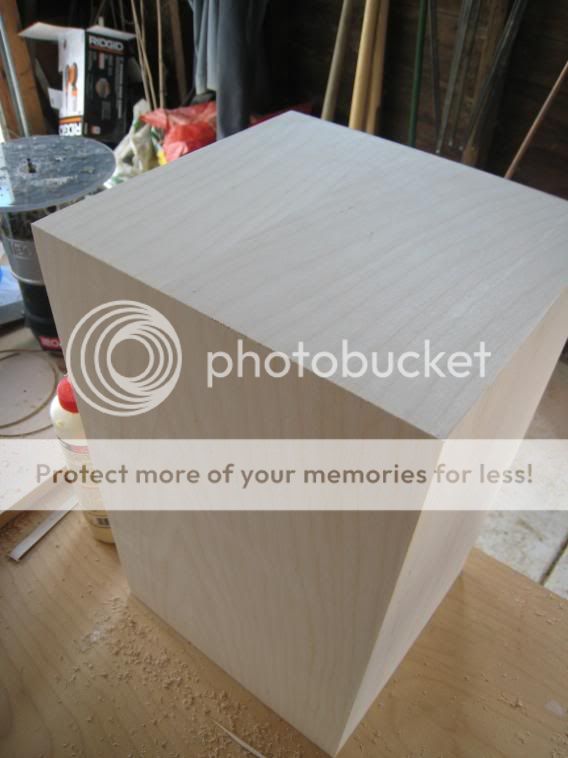
The end result is pretty good, at least when you back up a few feet:
Laid out veneer (birch) and applied glue to entire back.
Let dry, then cut. I was fairly generous with the margins between sides - I wasn't feeling confident, having never done this before.
I marked grain direction on the cabinets because I expected I'd become confused at some point.
It helped, but I still screwed up and put my grain wrap seam on the top of the cabinet, not the bottom. (If this makes no sense to a newbie reading this, I apologize, but, also, don't worry about it - it looks decent anyhow.)
These foam rollers are great for application of glue:
Ironing on:
Top/bottom before trim:
A few minor problems, none of which really bother me too much:
I knew this bottom would be ugly, but it actually turned out better than I feared, so I'm happy, surprisingly:
I generally didn't have a problem cutting directly through a wide veneer edging with the flush trim bit, but once this happened. (It cleaned up perfectly with a razor, then the flush-trim again.)
Also, a couple of corners detached as I was rounding. I was extremely lucky here that the veneer did not crack or break off. The fix has been to insert a bit of glue using a razor blade:
The end result is pretty good, at least when you back up a few feet:
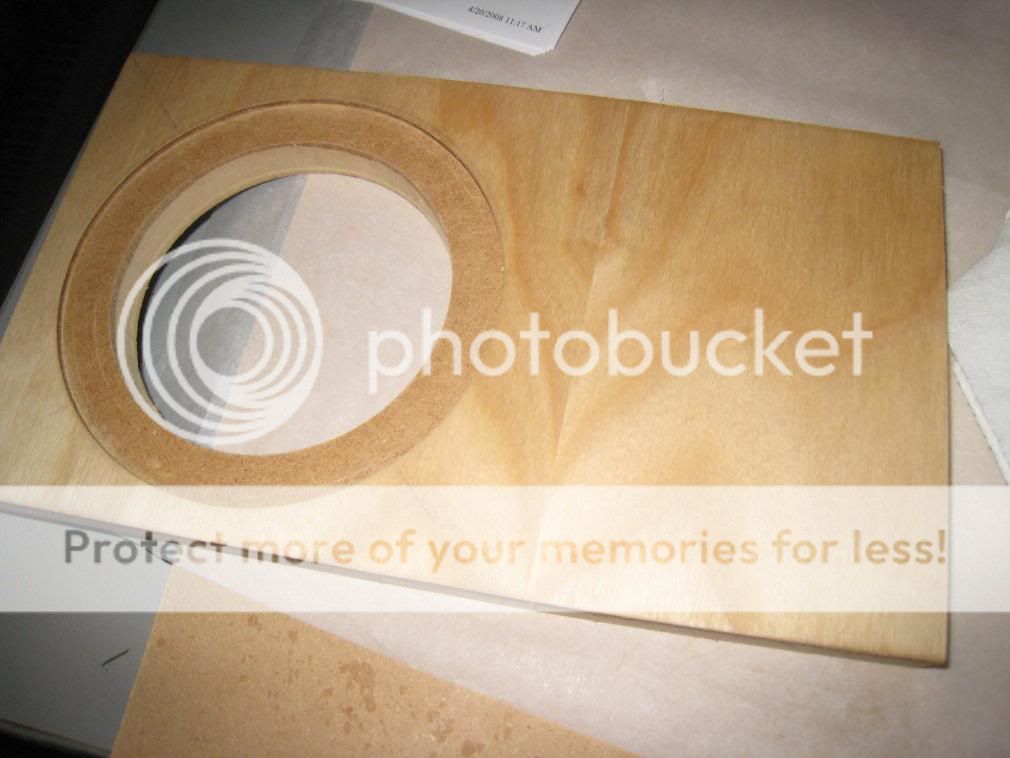
Final box holes going in
One port hole was a bit too shallow. I may sand it down more, I may not - it's very close.

I overcompensated a bit on the next one and ended up a bit too deep. I might fill in a bit with putty or something, but again, I may not - it too is pretty close.
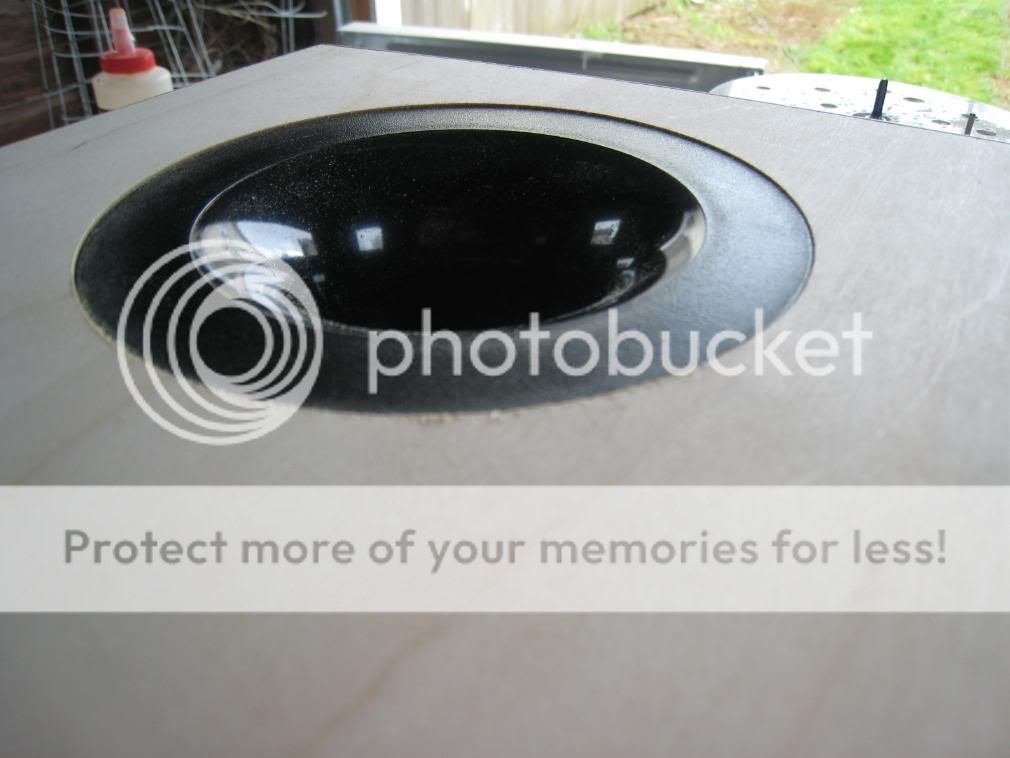
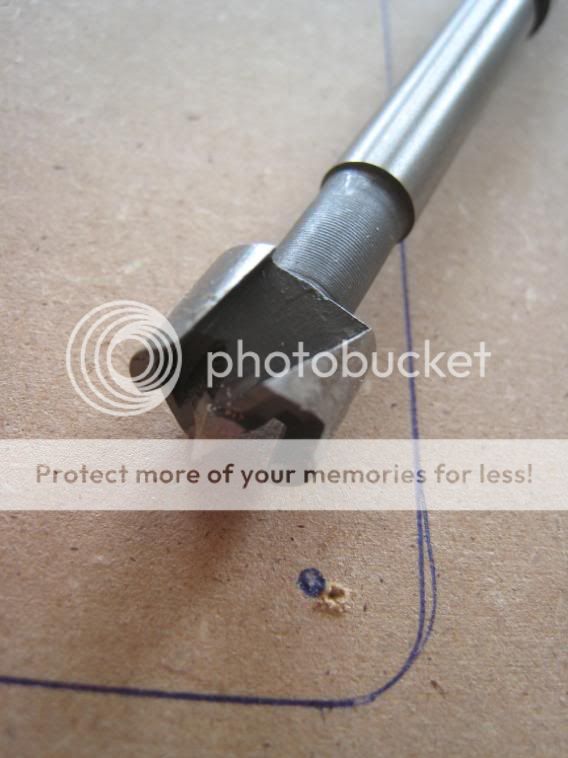
I did a chamfer test. This was a simple bit to use.

Chamfered both baffles for the woofer:
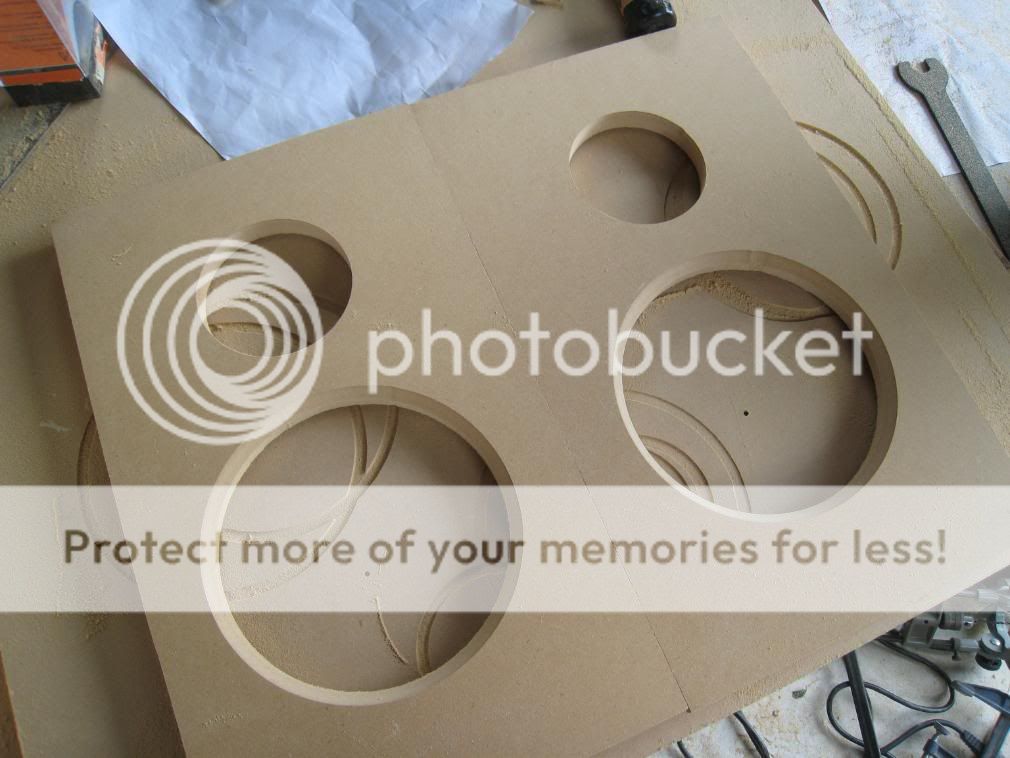
I have a few questions in my next post.
One port hole was a bit too shallow. I may sand it down more, I may not - it's very close.
I overcompensated a bit on the next one and ended up a bit too deep. I might fill in a bit with putty or something, but again, I may not - it too is pretty close.
I did a chamfer test. This was a simple bit to use.
Chamfered both baffles for the woofer:
I have a few questions in my next post.
Questions on cutting rectangles & sealing port/terminal block
I tried freehand routing holes for the terminals in a block of scrap. This works, but just barely, and I'm pretty sure I'd screw up the hole 50% of the time.
What is the right tool/tools for cutting a rectacngle into 3/4" MDF?
Should I drill a pilot hole, then use a jigsaw to cut the lines? 4 pilot holes, one for each corner, then jigsaw between to connect the dots? Details appreciated here.
What glue/filler/sealant should I use to seal the port and terminal block to the cabinet?
Goo? Silicon sealant? PVA wood glue? Hot melt?
Thanks very much!
Re: Questions on cutting rectangles & sealing port/terminal block
Hi, Very nice work.
Yes, jigsaw is the best tool for that. 1/2" holes in the corners to start the jigsaw work well.
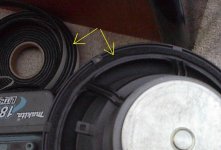
I use foam weatherstripping cut down the middle for gasket on all drivers and terminals.
To glue in the port tube you could use silicone, but you need to be very careful not to get any on the veneer. Finish doesn't stick to it.
StewLG said:
What is the right tool/tools for cutting a rectacngle into 3/4" MDF?
Should I drill a pilot hole, then use a jigsaw to cut the lines? 4 pilot holes, one for each corner, then jigsaw between to connect the dots? Details appreciated here.
What glue/filler/sealant should I use to seal the port and terminal block to the cabinet?
Goo? Silicon sealant? PVA wood glue? Hot melt?
Thanks very much!
Hi, Very nice work.
Yes, jigsaw is the best tool for that. 1/2" holes in the corners to start the jigsaw work well.
I use foam weatherstripping cut down the middle for gasket on all drivers and terminals.
To glue in the port tube you could use silicone, but you need to be very careful not to get any on the veneer. Finish doesn't stick to it.
Attachments
The jig I made was used to make recesses but you get the idea it works for any shape you make the jig.
I dont know if you are following any of my projects but here are a few.
http://www.diyaudio.com/forums/showthread.php?threadid=119892
http://www.diyaudio.com/forums/showthread.php?threadid=120459
I dont know if you are following any of my projects but here are a few.
http://www.diyaudio.com/forums/showthread.php?threadid=119892
http://www.diyaudio.com/forums/showthread.php?threadid=120459
Attachments
Failing at flush mounting speaker terminals
Added wires to my crossovers, along with labels, etc. Have not tested them yet.

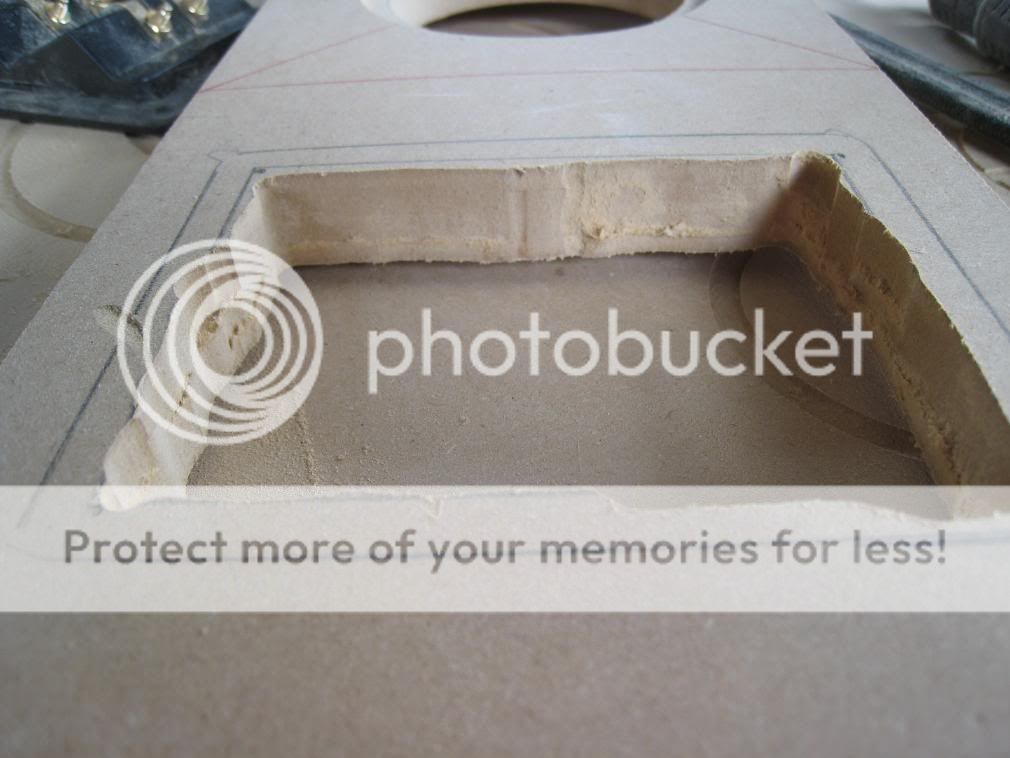
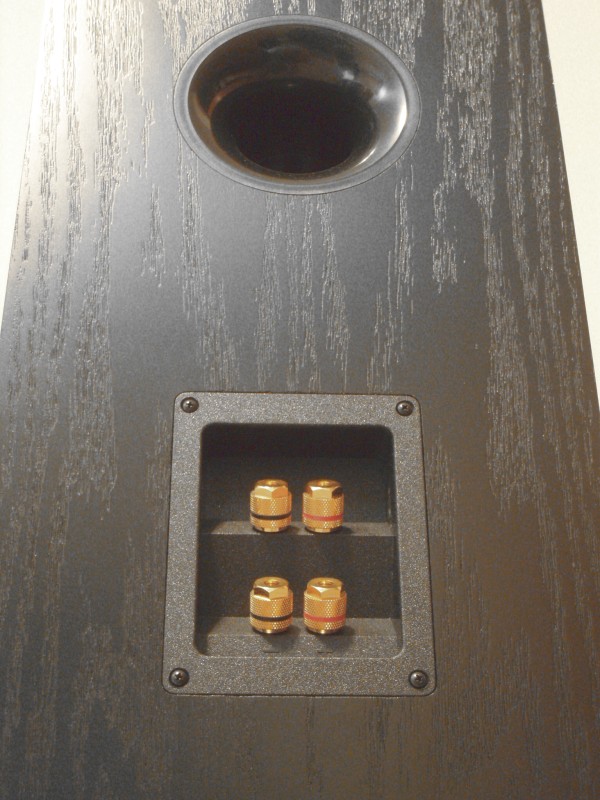
I wanted to try to get a flush mount for the terminal ports, as shown here on Zaph's site:
I tried using a pattern bit and a pattern. Watch me fail:


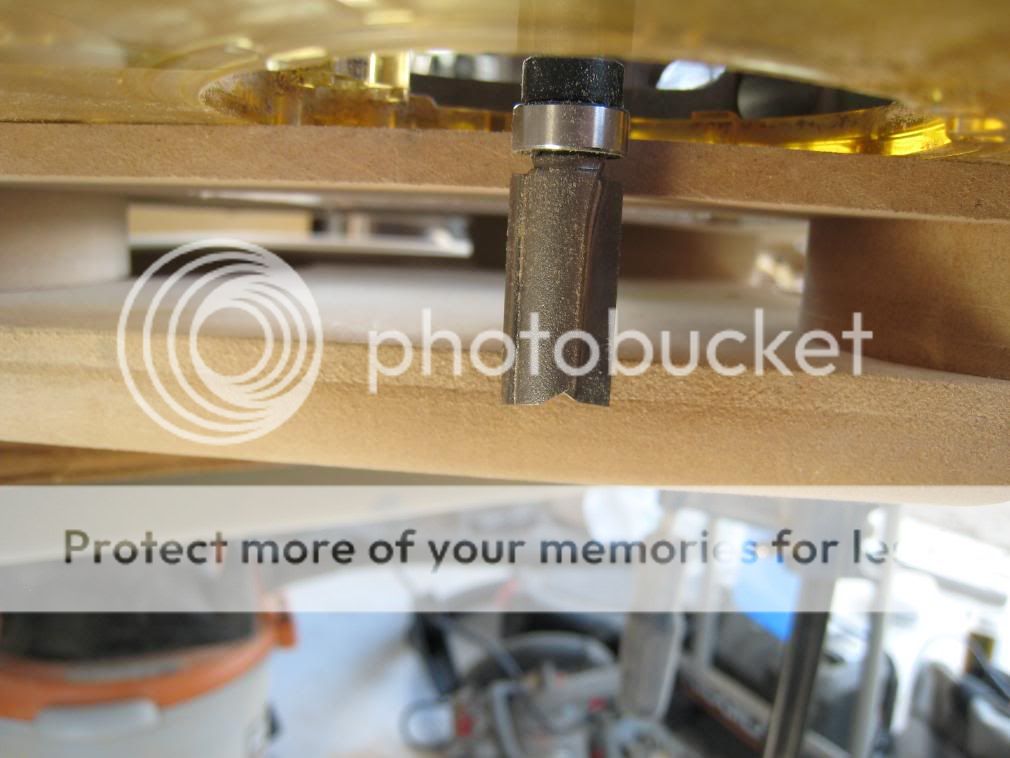
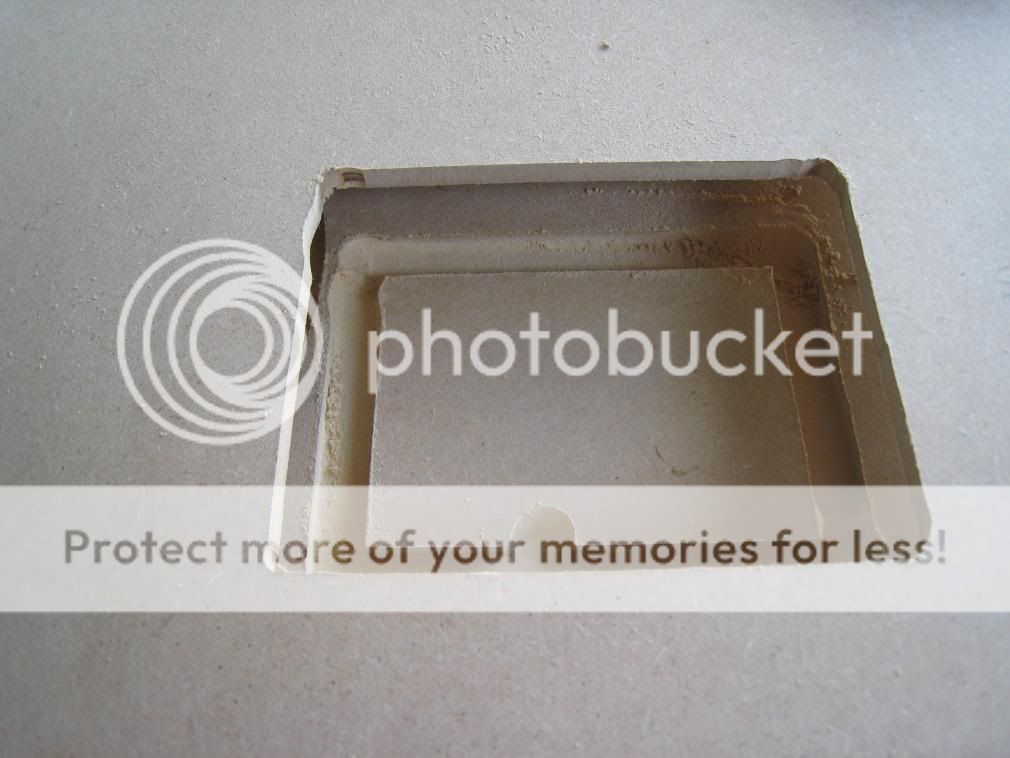
That's all from the first attempt at making and using a pattern. It sat about flush, but looked terrible:

After the first attempt, I tried making another template and using it again. It also looked bad, for the same reasons - sloppy looking and ugly.
In the end, I opted for the simple, non-pimp version, and cut a simple hole, leaving the mount floating on the outside. It isn't slick, but it looks better than my flush version would have:


Router-masters please advise if there's something obvious here I could be doing better with pattern cutting. I have Bill Hylton's book on using a router, but clearly I failed to absorb something important from the relevant chapters.
More questions in the next post.
Added wires to my crossovers, along with labels, etc. Have not tested them yet.
I wanted to try to get a flush mount for the terminal ports, as shown here on Zaph's site:
I tried using a pattern bit and a pattern. Watch me fail:
That's all from the first attempt at making and using a pattern. It sat about flush, but looked terrible:
After the first attempt, I tried making another template and using it again. It also looked bad, for the same reasons - sloppy looking and ugly.
In the end, I opted for the simple, non-pimp version, and cut a simple hole, leaving the mount floating on the outside. It isn't slick, but it looks better than my flush version would have:
Router-masters please advise if there's something obvious here I could be doing better with pattern cutting. I have Bill Hylton's book on using a router, but clearly I failed to absorb something important from the relevant chapters.
More questions in the next post.
Finishing Questions
I'm working on trial runs of the finishing for both the veneer and the baffles. I'm trying to be slow and deliberate here before I work on the cabinets or the baffles. I have two questions:
Question 1
I'm trying to follow Zaph's advice as quoted here:
I'm at the point where I have enough sanding sealer on, I think:

I'm not clear on what "sand" means here. What grit? By hand? With my rotary sander?
Question 2
For the veneer, I'm going for a finish with Watco Danish Oil, and I'm gearing up to do 4-9 coats, letting them dry and then wet sanding them with new oil at progressively finer grits.
Here's what it looks like after 3-4 coats:
Here's the sandpaper I'm using:

I read somewhere that black is a bad choice for sanding veneer like this. What exact sort of sandpaper do I want? Remember I want grits of ascending fineness.
All help appreciated. Thanks!
I'm working on trial runs of the finishing for both the veneer and the baffles. I'm trying to be slow and deliberate here before I work on the cabinets or the baffles. I have two questions:
Question 1
I'm trying to follow Zaph's advice as quoted here:
I finish most of my baffles with black Rustoleum texture finish. Before that I'll use sanding sealer on bare MDF, and I'll do about 5 coats of it on the edges with 1 or 2 coats on the face. Sand it all smooth before painting. Depending on how well I seal the edges, I'll likely need two coats of texture finish. Then finally I'll put a single clear coat over that for a for a bit of smoothness that makes wiping dust off easier.
I'm at the point where I have enough sanding sealer on, I think:
I'm not clear on what "sand" means here. What grit? By hand? With my rotary sander?
Question 2
For the veneer, I'm going for a finish with Watco Danish Oil, and I'm gearing up to do 4-9 coats, letting them dry and then wet sanding them with new oil at progressively finer grits.
Here's what it looks like after 3-4 coats:
Here's the sandpaper I'm using:
I read somewhere that black is a bad choice for sanding veneer like this. What exact sort of sandpaper do I want? Remember I want grits of ascending fineness.
All help appreciated. Thanks!
Yep thats about how my test recesses came out too. I spent a few hours free handing with various methods to come to this conclusion. That is why I went for option #2 and made the router jig. It takes a little time to set up but once done you can spit out recesses until the cows come home. I'll never fear making precise rectangular recesses again.
Attachments

Re: Finishing Questions
Hi Stew,
Don't take this the wrong way, but there is a whole ship load of woodworking knowledge that you don't have. There are easy ways to do everything, but you need to know how.
Accuracy. It's not going to happen with hand held tools (not the kind of accuracy demonstrated in Zaphs builds), when you don't have the experience necessary.
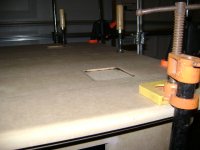
To build a very accurate jig for your router, use a tablesaw. Yes a tablesaw. The picture below will give you the general idea. Cut pieces of MDF or plywood with the tablesaw and glue them together. Do something else while the glue dries.
StewLG said:
I wanted to try to get a flush mount for the terminal ports, as shown here on Zaph's site:
I tried using a pattern bit and a pattern. Watch me fail:
Router-masters please advise if there's something obvious here I could be doing better with pattern cutting. I have Bill Hylton's book on using a router, but clearly I failed to absorb something important from the relevant chapters.
Hi Stew,
Don't take this the wrong way, but there is a whole ship load of woodworking knowledge that you don't have. There are easy ways to do everything, but you need to know how.
Accuracy. It's not going to happen with hand held tools (not the kind of accuracy demonstrated in Zaphs builds), when you don't have the experience necessary.
To build a very accurate jig for your router, use a tablesaw. Yes a tablesaw. The picture below will give you the general idea. Cut pieces of MDF or plywood with the tablesaw and glue them together. Do something else while the glue dries.
Attachments
Re: Re: Finishing Questions
No offense taken. I know I'm a novice, and that's mostly why I'm here posting at such great length.
Ooh. This is what CC was talking about. I get it. I don't have a table saw, so did not have this option. I'm not sure it would have occurred to me if I *did* have a table saw. Maybe next time I can get this right. (And maybe it's time for a table saw..)
Thank you very much for taking the time (moments? minutes?) to put that image together in what I assume is Sketchup.
MJL21193 said:
Hi Stew,
Don't take this the wrong way, but there is a whole ship load of woodworking knowledge that you don't have. There are easy ways to do everything, but you need to know how.
No offense taken. I know I'm a novice, and that's mostly why I'm here posting at such great length.
MJL21193 said:
Accuracy. It's not going to happen with hand held tools (not the kind of accuracy demonstrated in Zaphs builds), when you don't have the experience necessary.
To build a very accurate jig for your router, use a tablesaw. Yes a tablesaw. The picture below will give you the general idea. Cut pieces of MDF or plywood with the tablesaw and glue them together. Do something else while the glue dries.
Ooh. This is what CC was talking about. I get it. I don't have a table saw, so did not have this option. I'm not sure it would have occurred to me if I *did* have a table saw. Maybe next time I can get this right. (And maybe it's time for a table saw..)
Thank you very much for taking the time (moments? minutes?) to put that image together in what I assume is Sketchup.
Re: Re: Re: Finishing Questions
No problem. A pic is worth a 1000 words, right? Better to illustrate sometimes.
Tablesaw is fairly essential equipment for the budding finger cutter...oops, woodworker.
Cheap one will do until you gain enough arrogance to believe you deserve the best. 🙂
Keep up the good work.
StewLG said:
(And maybe it's time for a table saw..)
Thank you very much for taking the time (moments? minutes?) to put that image together in what I assume is Sketchup.
No problem. A pic is worth a 1000 words, right? Better to illustrate sometimes.
Tablesaw is fairly essential equipment for the budding finger cutter...oops, woodworker.
Cheap one will do until you gain enough arrogance to believe you deserve the best. 🙂
Keep up the good work.
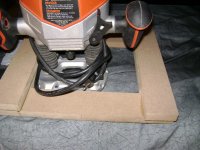
Yes stew that was why I posted pictures of the jig with the router in it and the recesses I created with it. The jig I made does not require a table saw only four pieces of wood with straight edges some clamps and glue. Its a trial and error deal to get it set up. I marked off the recess area as you did then placed my router with bit in over a corner area and clamped jig sides down as I went around the marked off piece with the router. I had no idea I lost you in my limited explaination. SO sorry. If you like I can go step by step with pictures to illustrate. Really once you do it once you will be a pro. The hardest thing about using a jig is gettng the router bit to cut through the mdf. Just chip away at it a little at a time. I dulled out many bits messing with this mdf. Its not power tool friendly. By the way good job so far. Its nice to watch your progress. Nope these stumbling blocks havent discouraged you. You do plan on more builds after this one? Maybe some speaker stands?? I see allot of nice tools and bits recently purchased.
I sometimes forget others havent messed with power tools their whole life. The router is one of my favorite tools.
I sometimes forget others havent messed with power tools their whole life. The router is one of my favorite tools.
Re: Re: Re: Finishing Questions
Stew, you don't need a table saw to make straight cuts but you do need a fence or high quality straight edge. You can make very accurate cuts with a high quality circular saw and a clamped straight edge and a little patience.
StewLG said:
No offense taken. I know I'm a novice, and that's mostly why I'm here posting at such great length.
Ooh. This is what CC was talking about. I get it. I don't have a table saw, so did not have this option. I'm not sure it would have occurred to me if I *did* have a table saw. Maybe next time I can get this right. (And maybe it's time for a table saw..)
Thank you very much for taking the time (moments? minutes?) to put that image together in what I assume is Sketchup.
Stew, you don't need a table saw to make straight cuts but you do need a fence or high quality straight edge. You can make very accurate cuts with a high quality circular saw and a clamped straight edge and a little patience.
- Status
- Not open for further replies.
- Home
- Loudspeakers
- Multi-Way
- PDX Zaph SR-71 Build Thread