Edit: it adds very little to the diameter, my coat with 300 grams fibre glass weave adds 0.3 mm. In my case the micro balloon layer after that adds a little more.
You could use a lighter/thinner weave, or none at all...
Wow, that is Thin with 300g cloth....... must be 'E' cloth as double twill 4 'S' wont go like that!
I could go with a very light fiber cloth and do a laminate surface.might also leave better finish for painting.
That will be next step.The mounting ring will have to wait until this is finished.
Danny
That will be next step.The mounting ring will have to wait until this is finished.
Danny
Hi Sippy, I coated the enclosures with epoxy first, second coat wet in wet was with the matt. The areas that were previously covered in PU foam sucked up much less epoxy from that first coat (although the PU was sanded down), that much was visible. While doing the weave coat I was too busy pressing out the excess epoxy with a bondo spreader to notice anything. It was my first time working with this stuff 🙂. After about an hour or so after that coat I packed the entire enclosure in household plastic foil.
Don't ask me too much, lol, I'm no expert on this subject.
Edit: This is the matt I used: http://www.mrboat.nl/glasweefsels/glasweefsel-300-gr-5-m2/
My information comes from that site:
Harsverbruik: 250 gr./m2
Laminaatdikte: 0,31 mm
Laminaatgewicht: 550 gr./m2
Don't ask me too much, lol, I'm no expert on this subject.
Edit: This is the matt I used: http://www.mrboat.nl/glasweefsels/glasweefsel-300-gr-5-m2/
My information comes from that site:
Harsverbruik: 250 gr./m2
Laminaatdikte: 0,31 mm
Laminaatgewicht: 550 gr./m2
Last edited:
Im more inclined to use the lightest cloth available.and just one layer.Used to do this on sheeted wings for rc planes.Adds little thickness and strenghtens a lot.
Danny
Danny
If you're going to paint anyway I wouldn't know a reason to not use epoxy + cloth.
Should give you a nice base for paint.
Now you only need to decide if you have to epoxy the inside of the enclosure as well 😉.
Should give you a nice base for paint.
Now you only need to decide if you have to epoxy the inside of the enclosure as well 😉.
Was thinking about that now. Should noy be too hard to do it.Just a lot of work.Will give it a thought on night shift 🙂
Danny
Danny
Im more inclined to use the lightest cloth available.and just one layer.Used to do this on sheeted wings for rc planes.Adds little thickness and strenghtens a lot.
Danny
Been there with OGY (Open Goodyear) c/l racers....
I'd go the same route as wesayso - 300g/sq m rather than 25 / 50g cloth as speakers don't have to fly.
PS, shame your pictures are no longer available, was looking forward to looking at what you've made 🙁
Last edited:
sippy I will upload pics tomorrow. Will make some new too.
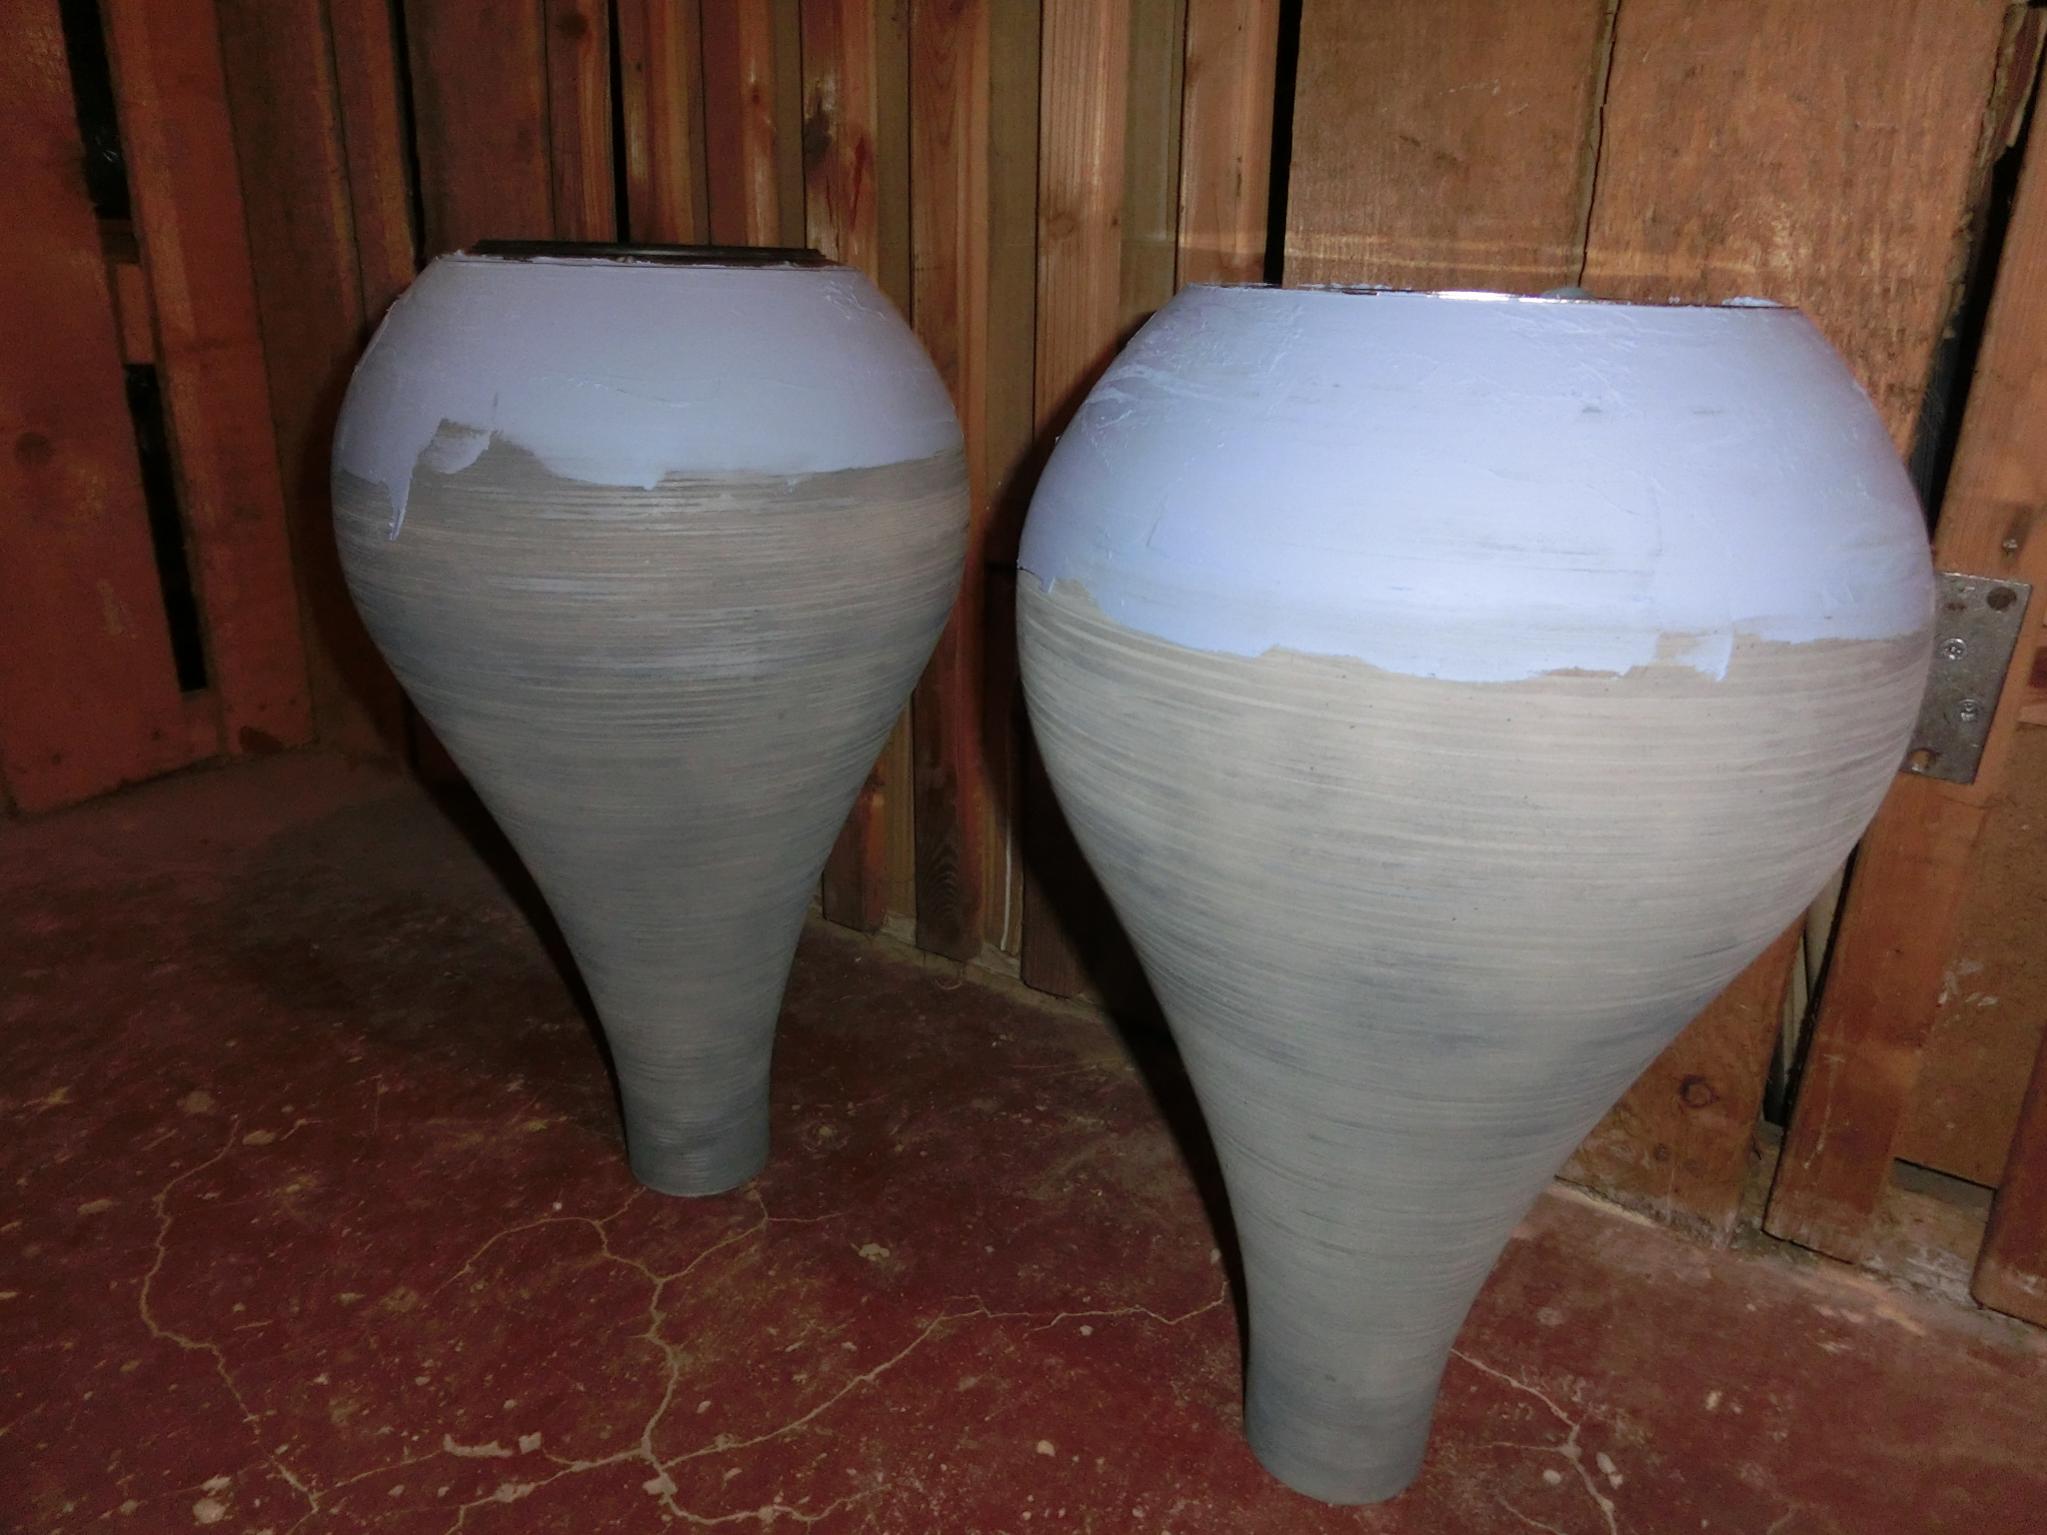
Not much to look at. Still just a raw enclosure B&W style.
Danny
P.S. I consider the heavier cloth too
Not much to look at. Still just a raw enclosure B&W style.
Danny
P.S. I consider the heavier cloth too

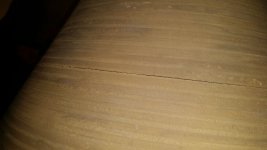
If you are going to glass these anyway, the easiest fix for the crack would be to wick in some thin superglue (cyanoacrylate) and clamp it tight for 24 hrs or so.
You might be able to force some diluted epoxy into there with a pallet knife, but it wouldn't wick in to fully stop the crack.
Humidity change is the cause.
You might be able to force some diluted epoxy into there with a pallet knife, but it wouldn't wick in to fully stop the crack.
Humidity change is the cause.
Greg Im goint to open the crack uo a little bit with a saw or dremel and put it thin plywood and glue.Then to fiberglass it and i hope it will hold together.
Have to think about the inside too.Smooth it out somehow and seal it in.
Danny
Have to think about the inside too.Smooth it out somehow and seal it in.
Danny
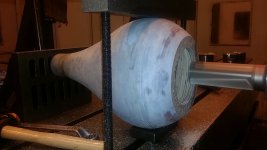
OK so going to fix the crack and then fiberglass.Then I will have to fabricate new mounting ring (previous one made by ShinObivan from DIY forum). They are good, but now too small.
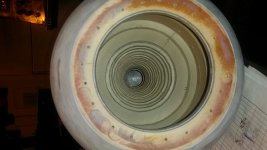
I have to make them taller, the bottom diameter will be 210mm the top 190 to give some material thickness to work with. Here you can see the original ring and cut down length of enclosure again.
P.S.: I'll probably use Dynamat for the internal smoothing of the steps.
I have to make them taller, the bottom diameter will be 210mm the top 190 to give some material thickness to work with. Here you can see the original ring and cut down length of enclosure again.
P.S.: I'll probably use Dynamat for the internal smoothing of the steps.
Attachments
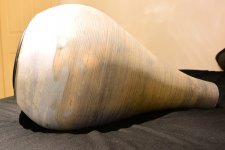

Fiberglass kit ordered and in the post.2 sq meters 400g cloth and finishing cloth (probably very light like 50g or less).
Will give it a try during weekend
Will give it a try during weekend
yes wes..i would appreciate your help.Im strugling with the mounting ring.How to join it to the wood.I was thinking of a small groove and use a O ring as a fusion line...
I hope your plans go well, you even bought heavier cloth than I did!
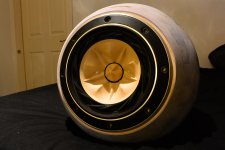
On the mounting ring business... how do you plan to attach, what do the mounting surfaces look like? Is it like in the picture? The ring mounted around the speaker and flat face to face on the enclosure? I'd be inclined to make it one part with the speaker (small lip under the mounting ring of the speaker) and use an o-ring on the outside and a neoprene seal where the bolts are.
Another way would be to create a ring that goes over the face of the speaker and curves back to the enclosure. Neoprene between speaker and ring and speaker and enclosure.
More difficult (but not impossible) to make though.
If I were in your shoes I'd use 3D printing to create the rings. First a couple of plastic ones and maybe if everything fits right make some RVS ones. RVS printing is expensive though. But for a plastic one you can use an online printing service.
I've used the "Strong and Flexible" materials from Shapeways a few times...
Hi wes...
the wood surface is plane flat plywood.the OD is 206mm ID is 144mm.
The mounting ring is also simple.Bottom is flat.top has a reces for driver and chamfer on outside.
I will use a gasket between the two surfaces.
Tonight at work i will mill them to same length and diameter on top.Just general clean up of surfaces.Im working on sunday too so might be later when i do the laminating.Working 12h a day has its drawbacks.....
Danny
Will make a pics of boxes getting machined
- Status
- Not open for further replies.
- Home
- Loudspeakers
- Full Range
- FE168E Sigma teardrop enclosure