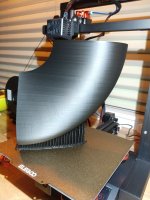
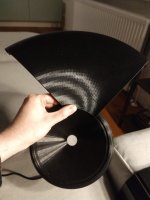
I printed a petal at full scale. I knew I didn't have enough filament, but I reckoned it would be a nice test to see what would happen as I never printed anything this large.
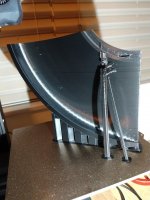
The support was very thin and didn't survive, but wasn't needed either. I fixed it with slicer settings for the next time.
At some point the printer accuracy dropped. I figured it had something to do with the rail/wheels and cleaned them with some alcohol and the problem went away.
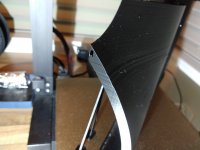
At some placed the was some filament sticking out, but it was easily removed.
The adhesion to the bed was not optimal at the corner of the bed and some warping did occur. I'll try to focus the bed-leveling a bit more to that corner.
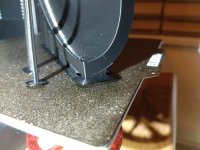
Removal of the support is not my hobby. If anyone has some tips, I'm all ears.
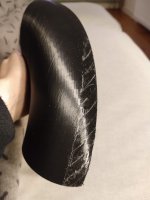
I'm using a 10% grid infill. The part is very sturdy. Z-seam was set to random, I think I'll try to put that on the back side.
Did I say already it's gonna be large?

The support was very thin and didn't survive, but wasn't needed either. I fixed it with slicer settings for the next time.
At some point the printer accuracy dropped. I figured it had something to do with the rail/wheels and cleaned them with some alcohol and the problem went away.

At some placed the was some filament sticking out, but it was easily removed.
The adhesion to the bed was not optimal at the corner of the bed and some warping did occur. I'll try to focus the bed-leveling a bit more to that corner.

Removal of the support is not my hobby. If anyone has some tips, I'm all ears.

I'm using a 10% grid infill. The part is very sturdy. Z-seam was set to random, I think I'll try to put that on the back side.
Did I say already it's gonna be large?

I tried to fix some things in the mean time. I tweaked some slicer settings and increased to accuracy of the stl export in fusion 360 and tried Arc Welder. I got new filament in the mean time, so I tried a print. Unfortunately it was not what I expected. The printer made some really weird travel movements all the way along the edge of the build plate. I stopped the build (and am currently printing one without Arc Welder). Below are some results:
I switched to 'lines' support in order to be able remove the supports more easily and that seems to help.
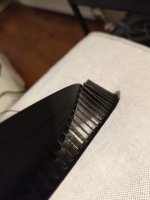
I increased the brim for better adhesion. It's still pulling some off, but not all:
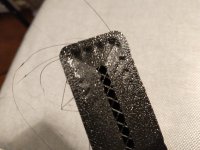
This is the weird 'stringing' caused by the strange movements I mentioned:
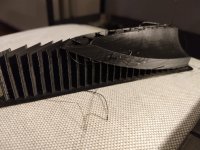
Removal of the supports is indeed way easier:
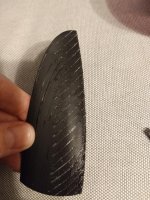
After removal of the weird stringing, the part shows some promising printing. Let's hope the new print is living up to that.
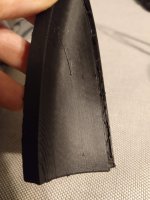
I switched to 'lines' support in order to be able remove the supports more easily and that seems to help.

I increased the brim for better adhesion. It's still pulling some off, but not all:

This is the weird 'stringing' caused by the strange movements I mentioned:

Removal of the supports is indeed way easier:

After removal of the weird stringing, the part shows some promising printing. Let's hope the new print is living up to that.

I found arc welder to behave a bit strangely too it does not seem to like doing the infill particularly when it is not a bunch of arcs 🙂
Bad news... The printer stopped printing at 2/3. Not clear what happened, but what I found on the octoprint community makes me think that I might need to play it safe and Keep It Simple Stupid and just print from SD card.
What was printed was really nice. Still some thick stringing, but acceptable. Again some minor wobble, but now at a different height. I think I am going to slow down a bit and investigate what is going on.
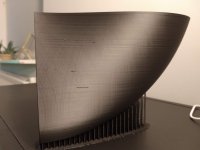
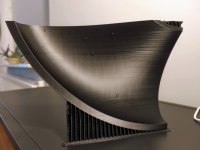
What was printed was really nice. Still some thick stringing, but acceptable. Again some minor wobble, but now at a different height. I think I am going to slow down a bit and investigate what is going on.


I use Repetier Server and have zero problem even while printing with three printers at once. Running on a HP T620 thin client with Linux.
I couldn't resist it and tried again with a USB cable with a bead. I had significantly less retries (<1%). I also tried a faster setting.
Unfortunately we had a powerdip during printing. I can't even remember when or even if we had that before...
What was printed was quite nice actually (at 1/3 of the time!).
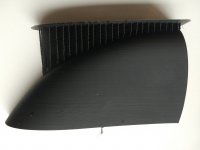
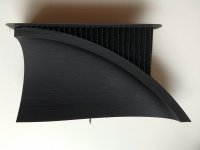
Unfortunately the strength is significantly less, probably due to the infill being printed too fast.
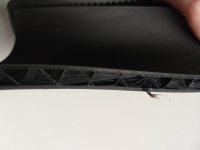
Unfortunately we had a powerdip during printing. I can't even remember when or even if we had that before...
What was printed was quite nice actually (at 1/3 of the time!).


Unfortunately the strength is significantly less, probably due to the infill being printed too fast.

Still busy printing...
Of course I did something stupid again.
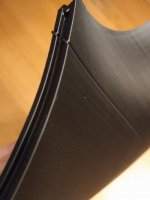
I opened the blinds during the print to let the sun in. I saw the artefact starting to appear. I realised what I did and closed the blinds quickly. The misalignment disappeared as quickly as it appeared.
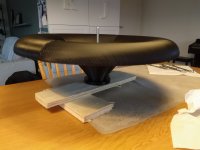
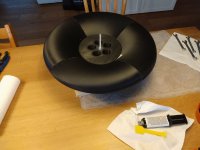
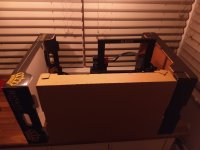
Inspired by this mishap, I hacked an enclosure together and the next petal was by far the cleanest.
Of course I did something stupid again.

I opened the blinds during the print to let the sun in. I saw the artefact starting to appear. I realised what I did and closed the blinds quickly. The misalignment disappeared as quickly as it appeared.
Inspired by this mishap, I hacked an enclosure together and the next petal was by far the cleanest.


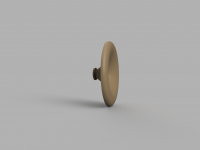
I printed my version of mabat's mounting helper: https://www.diyaudio.com/community/...-design-the-easy-way-ath4.338806/post-7022703
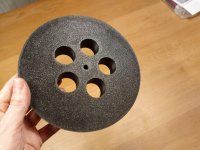
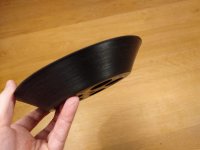
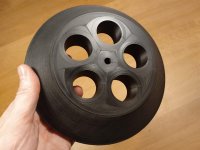
For the next time I need to put some fillets where the shape is not that important. It'll make the piece immune to the elephants foot.

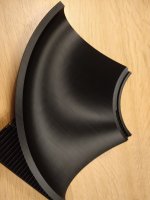
The petal parts had some 'texture' on them:
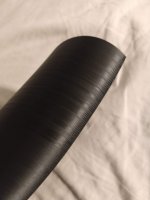
It seems to match the starting points per layer as shown in the slicer:
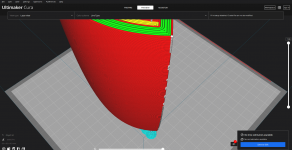
I've watched the animated printing, but can't really find what is different. Playing with the seam settings can make this more uniform.
Speeding up the inner walls (25mm/s to 40mm/s) shaves a considerable amount of time (hours...) from the total print time. My earlier (failed) experiment, shows that that speedup might work fine.
Printing the fifth petal. The one with the anomaly is getting scrapped.


For the next time I need to put some fillets where the shape is not that important. It'll make the piece immune to the elephants foot.

The petal parts had some 'texture' on them:

It seems to match the starting points per layer as shown in the slicer:

I've watched the animated printing, but can't really find what is different. Playing with the seam settings can make this more uniform.
Speeding up the inner walls (25mm/s to 40mm/s) shaves a considerable amount of time (hours...) from the total print time. My earlier (failed) experiment, shows that that speedup might work fine.
Printing the fifth petal. The one with the anomaly is getting scrapped.
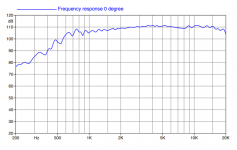
After my first ever spinorama measurement yesterday with a very crappy test setup, I played with my setup today and got a bit better results.
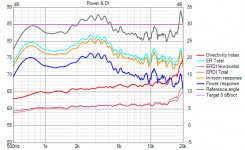
No smoothing; the measurements have cleanup quite a bit after removal of reflections. The peaks around 10kHz are always present. Also on the response given by faital:
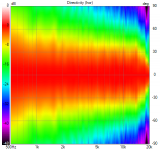
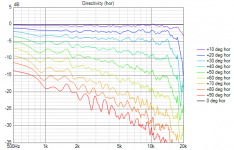
Directivity plots are quite nice (normalized):
Measurement & simulation:
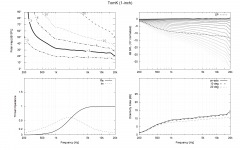
I could refine the measurement setup, make it automatic and all kinds of other stuff, but I guess the next big step is the woofer + cabinet.

No smoothing; the measurements have cleanup quite a bit after removal of reflections. The peaks around 10kHz are always present. Also on the response given by faital:

Directivity plots are quite nice (normalized):

Measurement & simulation:


I could refine the measurement setup, make it automatic and all kinds of other stuff, but I guess the next big step is the woofer + cabinet.
Tom, that's still contaminated with reflections. There are two things that must be done right - 1) place the waveguide (and the mic!) as far as possible from any reflecting surfaces, somewhere in the middle of the room, 2) for a FR calculation use only the portion of the measured impulse response that's free of reflections. Typically you will get only a few milliseconds of reflection-free time in a small room but that's already enough to get a better quality data than this.
There is a reason why I didn't include a photo of the measurement setup 🙄
I did remove a large reflection between the two setups. I changed the chair to a rotating thingy. I moved both the waveguide and mic higher of the floor. As I only have a mic standard for my guitar cabinet, I had to put it on something. I rotated that 45 degrees, and that removed a reflection I just introduced. It was a nice journey, seeing reflections in the impulse response, time-gating that and seeing ripples disappear in the FR.
Encouraged by your post I now seriously limited the time-gate (to 1.9ms). There is a reflection around 2.0ms. Johan Cruyff would say something like: "You only see it once you notice it". The measurements are now way cleaner, although I obviously lost some low frequencies.
I know I should fix the real problem (the setup), but I need some more time for that.
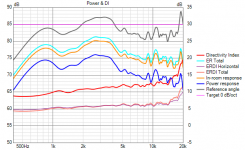
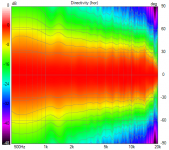
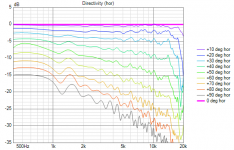


looks very good doesnt it ?
I think, but I'm nowhere near experienced enough to say for sure.
Well, 1.9ms is a little bit on the low side 🙂 Make it twice as long and it will be fine - for the waveguide alone.
Anyway, I just wanted to note that there's actually a very good performance hidden in the contaminated data. I don't doubt that when you'll be measuring the whole system for a crossover design, you'll do your best.
Anyway, I just wanted to note that there's actually a very good performance hidden in the contaminated data. I don't doubt that when you'll be measuring the whole system for a crossover design, you'll do your best.
- Home
- Loudspeakers
- Multi-Way
- Efficient 2-way
