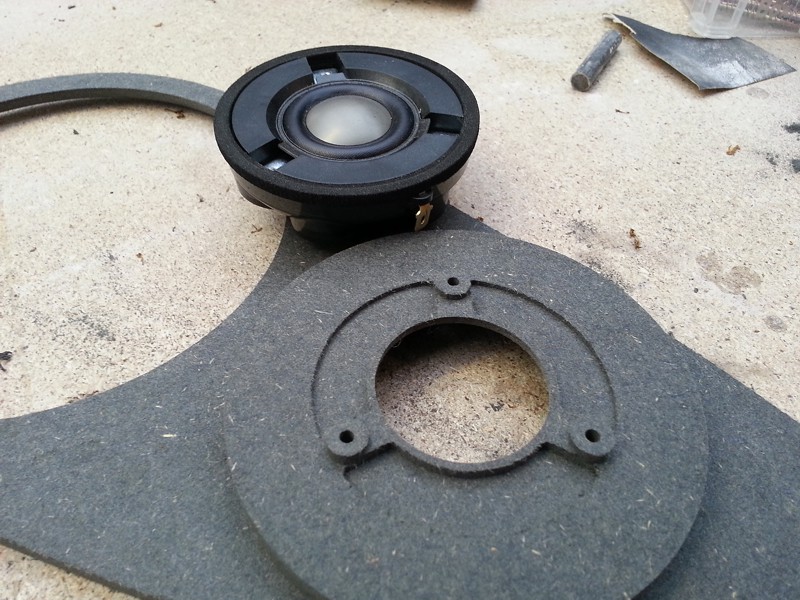
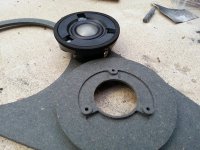
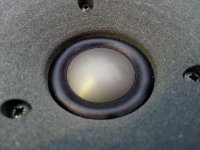
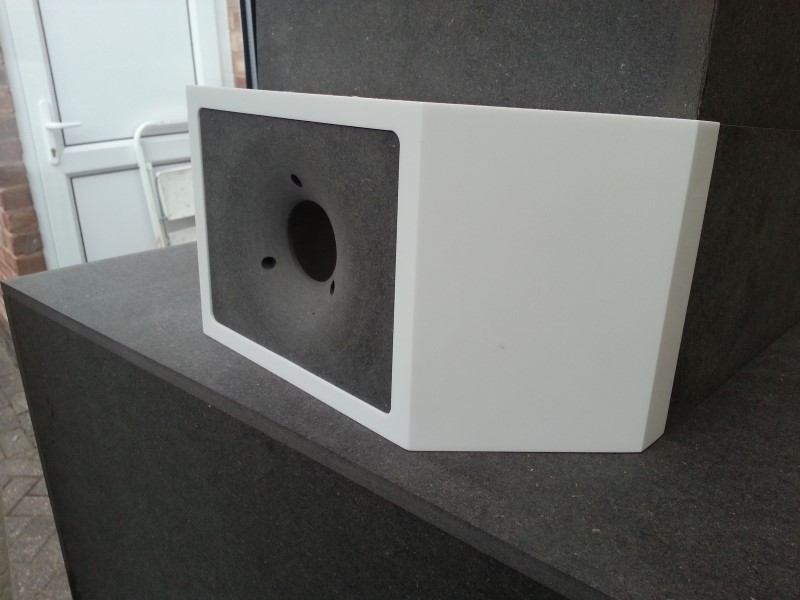
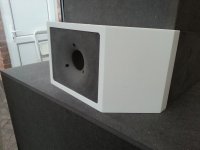
Fixed the errors in the waveguide.
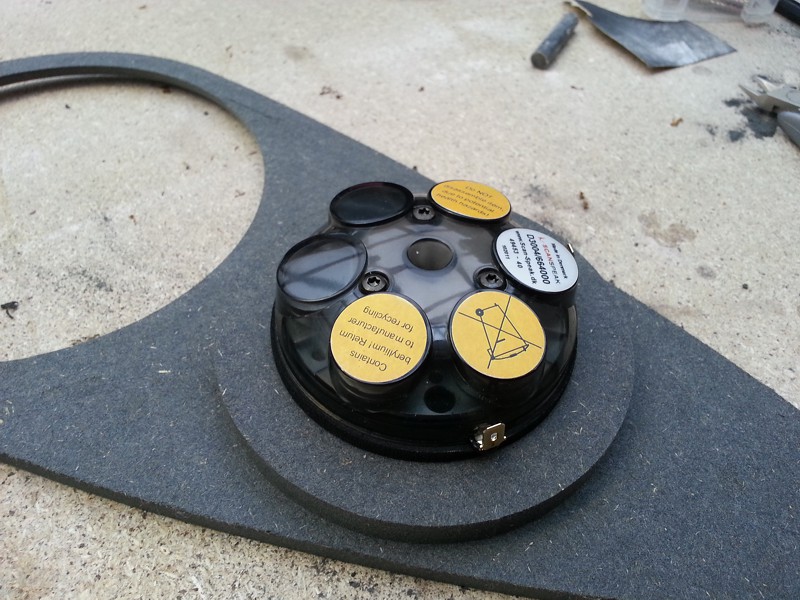
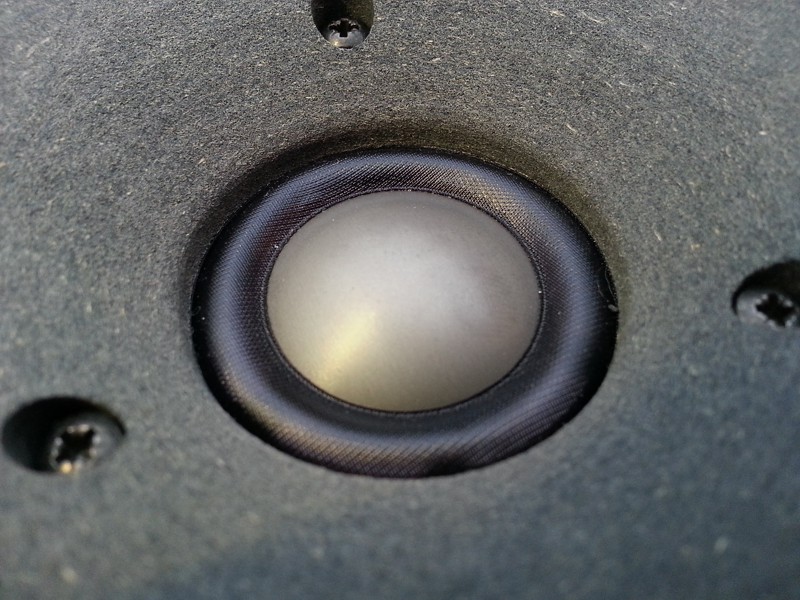
Perfect fit now particularly around the throat where it meets with the dome. Measures arguably better than scanspeaks original faceplate. Displays similar characteristics to Seas DXT.

Perfect fit now particularly around the throat where it meets with the dome. Measures arguably better than scanspeaks original faceplate. Displays similar characteristics to Seas DXT.
Attachments


great looking as always.
have u played around the curve and depth of the waveguide before u made it? dave pellegrene did alot of experiment of all kinds of shape to xt19, hds and sb29. although it involves round and elliptical shapes, but he did mention some of the problems with the throat to the measurement (giving odd and irregular responses), but i can see it fits cleanly on yours 😀
cheers
henry
henry
great looking as always.
have u played around the curve and depth of the waveguide before u made it? dave pellegrene did alot of experiment of all kinds of shape to xt19, hds and sb29. although it involves round and elliptical shapes, but he did mention some of the problems with the throat to the measurement (giving odd and irregular responses), but i can see it fits cleanly on yours 😀
cheers
henry
henry
Thanks Henry.
I've played somewhat with the waveguide shape in software but not done as much real world testing as I'd like. My observations have been that by far the most critical area is the throat interface with the dome. Even small changes here make big differences and if its flat out wrong like there's a gap between the dome and throat edge then the response is ragged and often horrible. The shape of the dome plays some role too. I have Scan 6600 with a rounded fabric dome as well as the same tweeter with the flatter beryllium dome and get quite different results.
Now that I have the throat dialled in I can go ahead and start trying out some of the other profiles I have.
By the looks of those, you could probably make a few extra bucks on the side just by selling wave-guides of various sizes!
Amazing work, ShinOBIWAN . Thanks for documenting your journey, the pictures are great and i always look forward to seeing more updates. You do such great DIY!
dave pellegrene did alot of experiment of all kinds of shape to xt19, hds and sb29. although it involves round and elliptical shapes, but he did mention some of the problems with the throat to the measurement (giving odd and irregular responses), but i can see it fits cleanly on yours 😀
I've got a batch of different small waveguides designed by DP... There is a very large difference in the top octave response caused by the throat matching. Some guides which actually cover over the surround of the tweeter have a very very good response, which surprised me a lot.
Loving the pics Ant. Thanks for posting.
..Fixed the errors in the waveguide.
Perfect fit now particularly around the throat where it meets with the dome..
😎
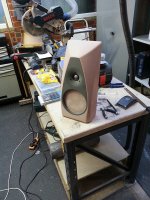
Some progress yes but its mostly mundane stuff like lining the internals with lead, stuffing, cabling, connectors and that sort of thing.
I'm cutting some more parts this week and will update.
I'm cutting some more parts this week and will update.
More pics
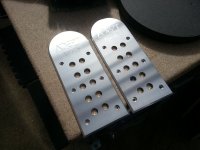
The foot that the cabinets sit on. Nice and strong too so as to hold the considerable weight.
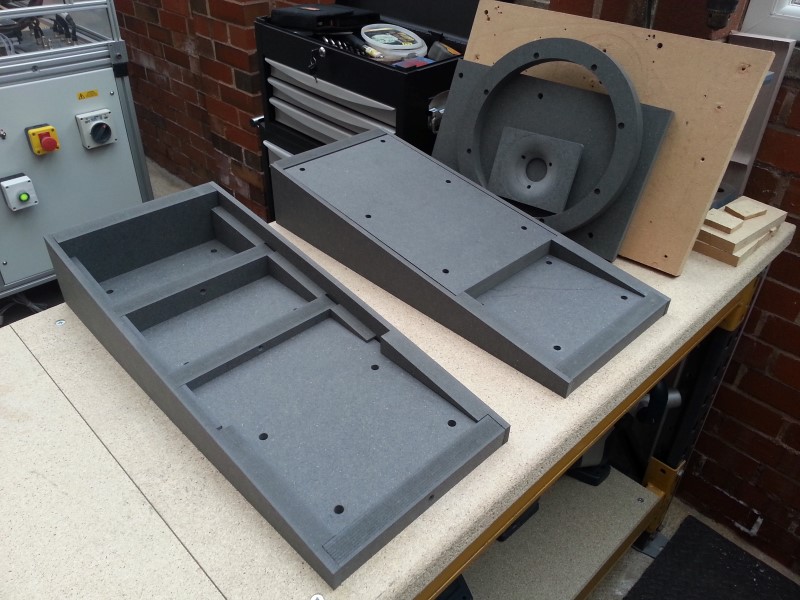
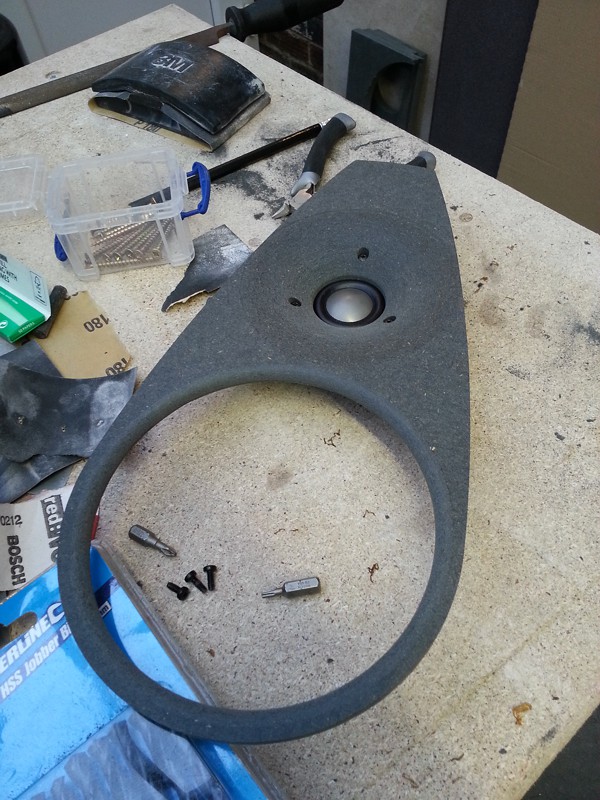
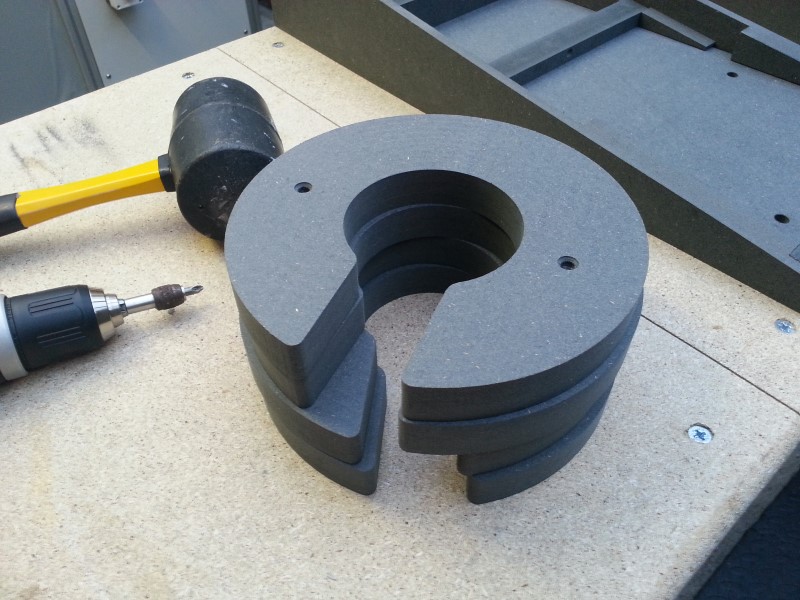
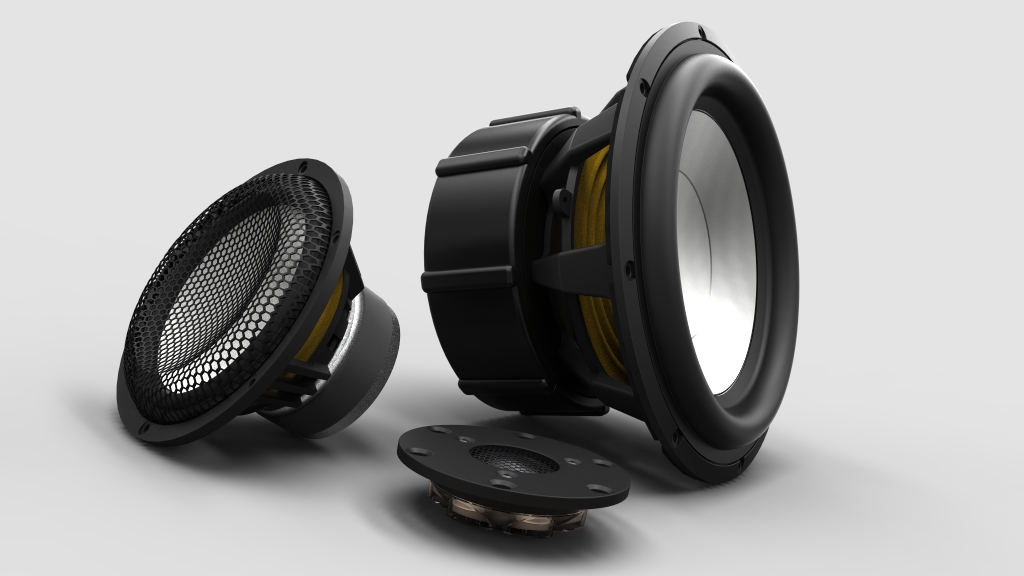
Waveguides for tweeters:
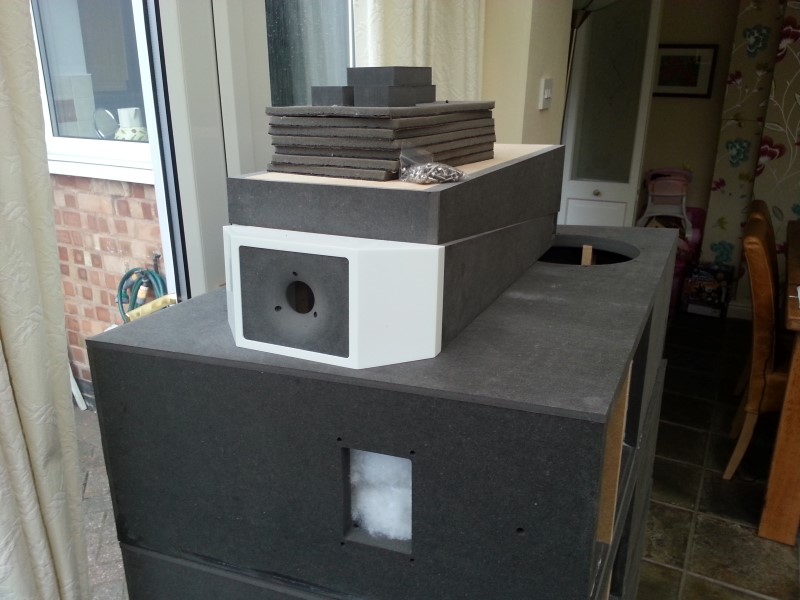
Spacers for the subs to mount against when coupling them together for out of phase mechanical cancellation. More on this soon.
The foot that the cabinets sit on. Nice and strong too so as to hold the considerable weight.
Waveguides for tweeters:
Spacers for the subs to mount against when coupling them together for out of phase mechanical cancellation. More on this soon.
Attachments


Hi Shin:
You should look into filling the screwholes on the waveguide- someone measured a surprising amount of ripple from screws like those, might've been djk? But it was significant HF ripple, like baffle edge diffraction.
You should look into filling the screwholes on the waveguide- someone measured a surprising amount of ripple from screws like those, might've been djk? But it was significant HF ripple, like baffle edge diffraction.
Hi Shin:
You should look into filling the screwholes on the waveguide- someone measured a surprising amount of ripple from screws like those, might've been djk? But it was significant HF ripple, like baffle edge diffraction.
100% agree. A blob of modelling clay gets pushed over each before being covered with fabric.
100% agree. A blob of modelling clay gets pushed over each before being covered with fabric.
Why am I completely unsurprised? 🙂
Great build shin, as always.
Small update.
Playing around testing engraving in scrap material before committing to aluminium.
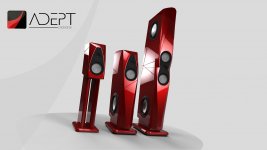
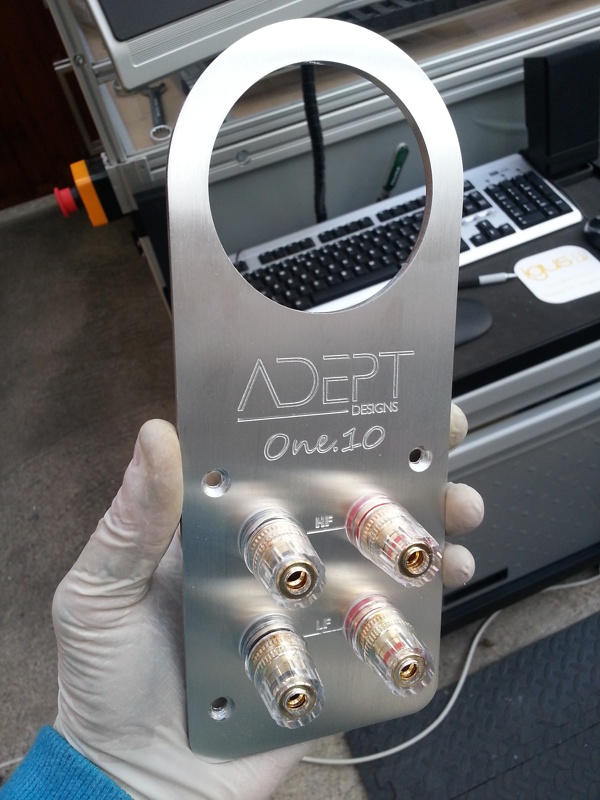
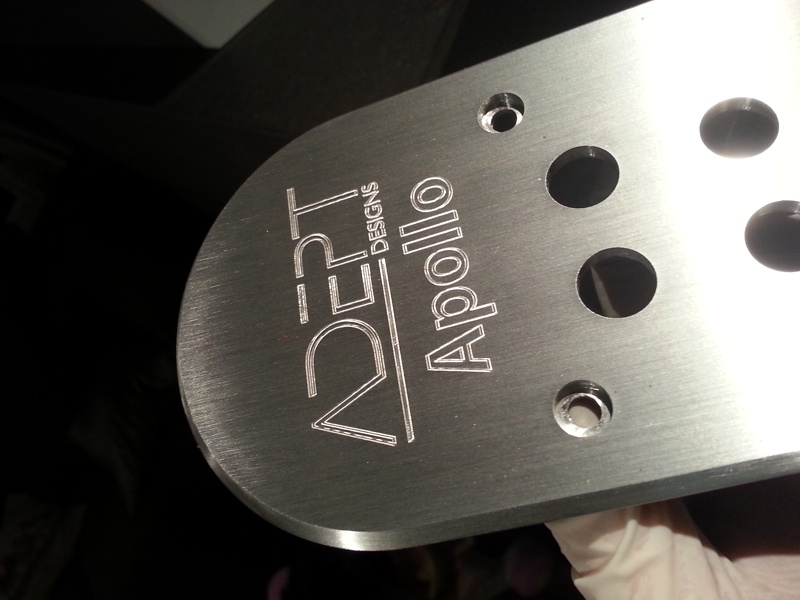
And I've done a ton of work making CNC friendly refinements and all sorts of other small details for the One range. After testing I've swapped out the Peerless XLS10 for Seas L26 too. What you see here are the final versions.

Playing around testing engraving in scrap material before committing to aluminium.
And I've done a ton of work making CNC friendly refinements and all sorts of other small details for the One range. After testing I've swapped out the Peerless XLS10 for Seas L26 too. What you see here are the final versions.
Attachments

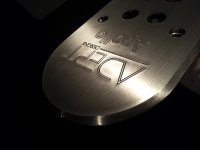
OK here we have my first go at cutting aluminium. I had so much fun with these. Wood seems boring in comparison and you've got to be so much more mindful with how you go about cutting it. Oh and the engraving was an absolute frigtastic nightmare as well. Broke 3 cutters before I finally hit the g spot. Admittedly the cutters are uber fragile since they're pretty much needles sticking out of a 3hp spindle spinning them round at 24000 rpm. Even getting it slightly wrong would break them. There's a strong chance I'll end up getting a laser cutter/engraver at some point because its a painfully slow this way. Looks cool though and that's what counts.
I finished them up with fine brushed effect and then sealed with a couple of coats of clear because without either that, etching or anodising then natural aluminium is a finger print magnet.
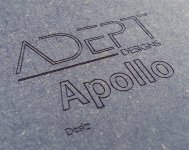
As an experiment I'm going to have a go at filling the text with black spray on the One.10 plates. Once the excess paint is sanded back to the aluminium leaving only the lettering black it should look alternatively awesome. I choose not to do it for the Apollo as I really like the way they're looking straight out.


I finished them up with fine brushed effect and then sealed with a couple of coats of clear because without either that, etching or anodising then natural aluminium is a finger print magnet.
As an experiment I'm going to have a go at filling the text with black spray on the One.10 plates. Once the excess paint is sanded back to the aluminium leaving only the lettering black it should look alternatively awesome. I choose not to do it for the Apollo as I really like the way they're looking straight out.
Attachments


looks great!, I reckon keep trying to get it right with the CNC so its more reliable. with what ive seen, laser etching looks hardly noticeable unless you turn at a specific angle as its just like a very uniform surface abrasion, with no depth/relief, cutting maybe with some copper or something else behind to show though would look cool, but the logos would need some fiddling.
looks great!, I reckon keep trying to get it right with the CNC so its more reliable. with what ive seen, laser etching looks hardly noticeable unless you turn at a specific angle as its just like a very uniform surface abrasion, with no depth/relief, cutting maybe with some copper or something else behind to show though would look cool, but the logos would need some fiddling.
Yeah they're pants on straight aluminium. But you can get some invisible etch spray that you apply before hand and once the laser has had its way you get a dark brown almost black text. Another option is to anodise the aluminium but the end result is pretty much colour dependant and you need more garish or dark colours for a nice contrast. Don't know if its just me but I'm not a fan of anything other than black, champagne or clear anodised and only the black would give good results with the laser.
At the more serious end and completely beyond my budget are the YAG lasers. Yum!
They look really good, how did you manage to do the brushed effect on the aluminium?
An incredibly expensive machine that consists of your elbow and a block of wood with a bit of sand paper wrapped around it! 😀
- Status
- Not open for further replies.
- Home
- Loudspeakers
- Multi-Way
- Apollo Construction Diary