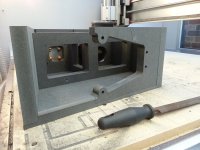
Anything upward of 300mm/min was asking for trouble. Too slow and the cutter gummed up and broke. I found 250mm/min worked fine for me with a DOC of 0.075mm and total depth of 0.15.
The engraving bits are 10 degree and almost needle like. Very fragile.
A kind soul recommended a diamond tipped drag cutter as used in vinyl cutters for this sort of job. Much harder to break.
The engraving bits are 10 degree and almost needle like. Very fragile.
A kind soul recommended a diamond tipped drag cutter as used in vinyl cutters for this sort of job. Much harder to break.
Wow, hope they weren't expensive. No manufacturer specs for feed rate? I'm a CNC noob, so I don't know if that's a thing or if it is totally dependent on the cut you are doing. Seems odd there would be a minimum feed rate.
No not at all really. They were these:
5 x Carbide PCB Engraving CNC Bit Router 10 Deg 0.1mm | eBay
I bought a bunch of them knowing I'd probably break a few. Your feedrate is determined by lots of things including the machine, material, depth of cut/step over, finish quality and so on. You sometimes get generalised advice for common materials but really you'll have to play around until your getting results.
I should be using one of these instead of the engraving bits:
SIGN VINYL DRAG KNIFE & ENGRAVING BIT CNC END MILL VACUUM TABLE VINYL CUTTER | eBay
SIGN VINYL DRAG KNIFE & ENGRAVING BIT CNC END MILL VACUUM TABLE VINYL CUTTER | eBay
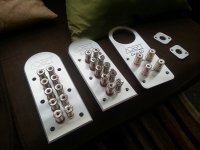
With the black lettering. These still need clear coat to finish them up.
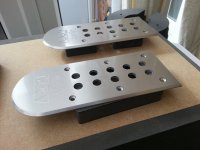
Daylight shots of the Apollo plates. You can see the fine brushed finish looks almost satin. Really pleased with these.
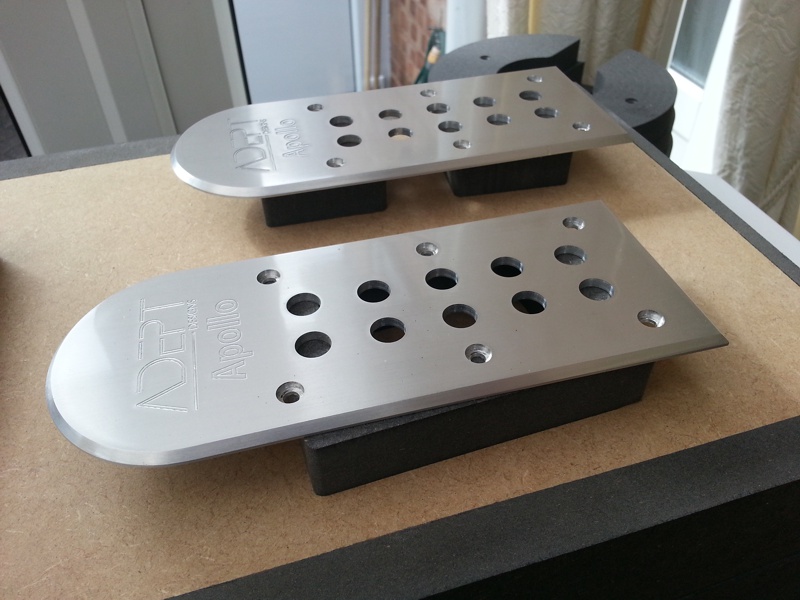
Daylight shots of the Apollo plates. You can see the fine brushed finish looks almost satin. Really pleased with these.
Attachments

Last edited:
With the black lettering. These still need clear coat to finish them up.
Daylight shots of the Apollo plates. You can see the fine brushed finish looks almost satin. Really pleased with these.
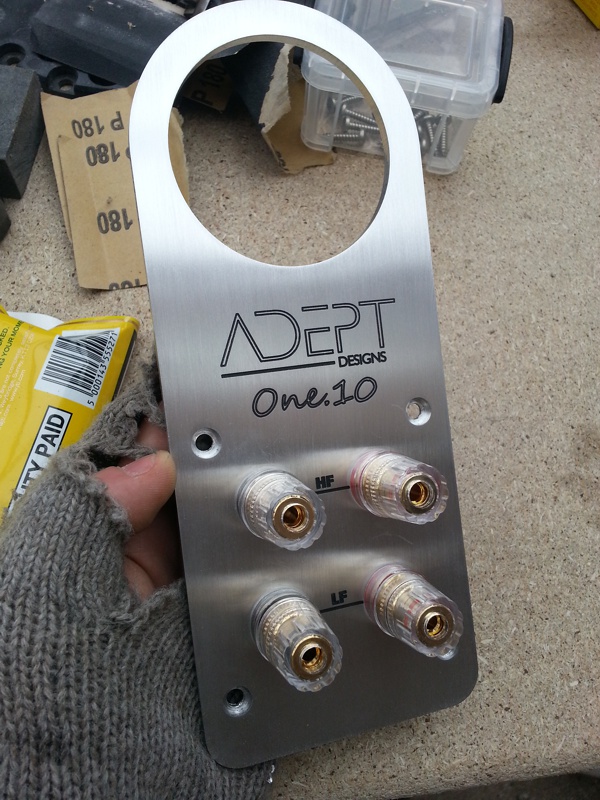
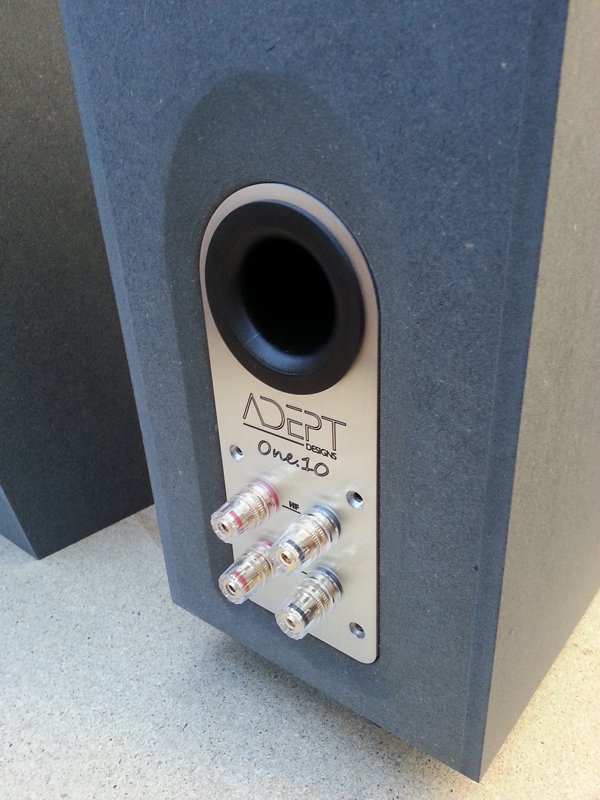
Great looking plates. A couple suggestions-
1) You may wish to tweak the spacing to allow dual bananas. This would have the added benefit of grouping the HF/LF inputs together more closely than their vertical spacing, making the wiring more intuitive/foolproof.
2) I'm a big fan of the cardas patented single-knob binding posts for spades. You may want to consider these, they're a very elegant UI for input wiring on a loudspeaker.
Completed:

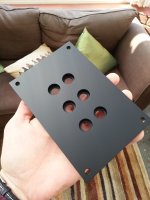
Another alu plate for the hidden connections between cabinet sections. Finished in matt black:

Another alu plate for the hidden connections between cabinet sections. Finished in matt black:
Superb work as always Ant.
BTW The black plate; how long did that take to machine, and what have you painted it with?
I've often found the edges/corners on painted metal to rub off pretty easily - hence my question.
BTW The black plate; how long did that take to machine, and what have you painted it with?
I've often found the edges/corners on painted metal to rub off pretty easily - hence my question.
Here's an update on the Apollo.
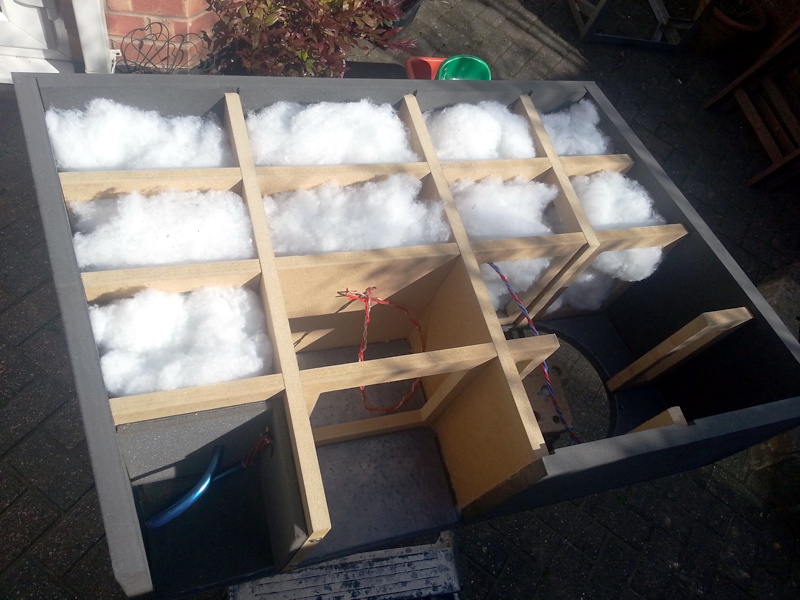
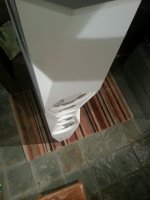
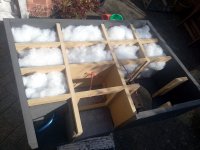
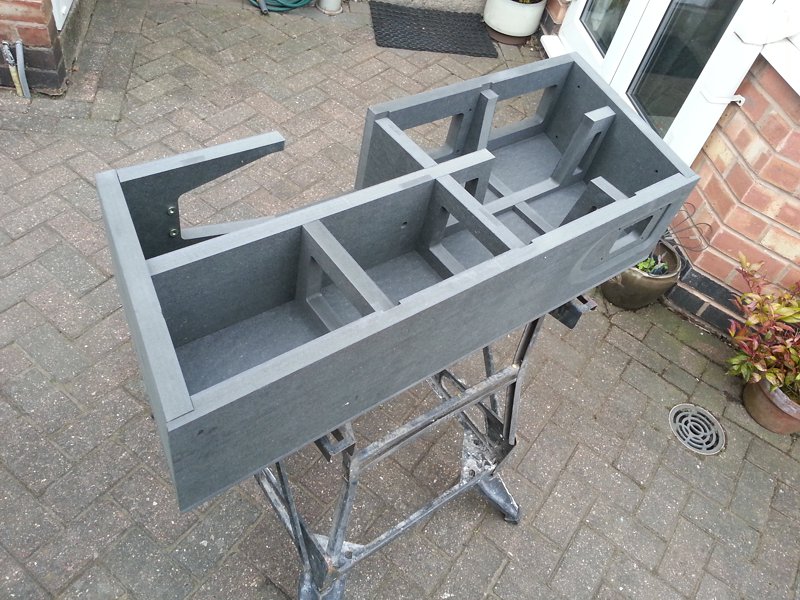
Shot of the internals. There's a relatively loose fill of stuffing for the sealed subs and you can make out the lead sheet attached to the walls. The mid compartment is further treated with bitumen sheet and foam.
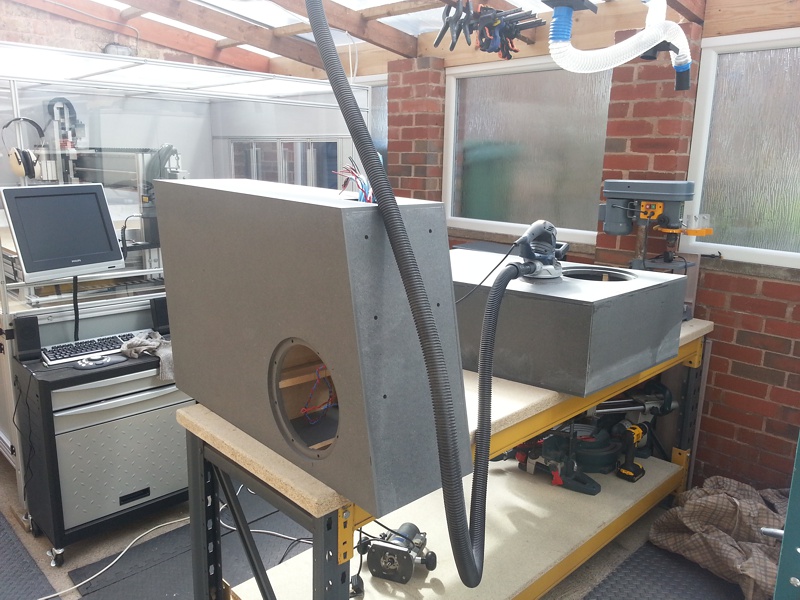
Going over the cabinets and carefully filling any imperfections, adding finishing touches and then sanding from 80grit up to 300.
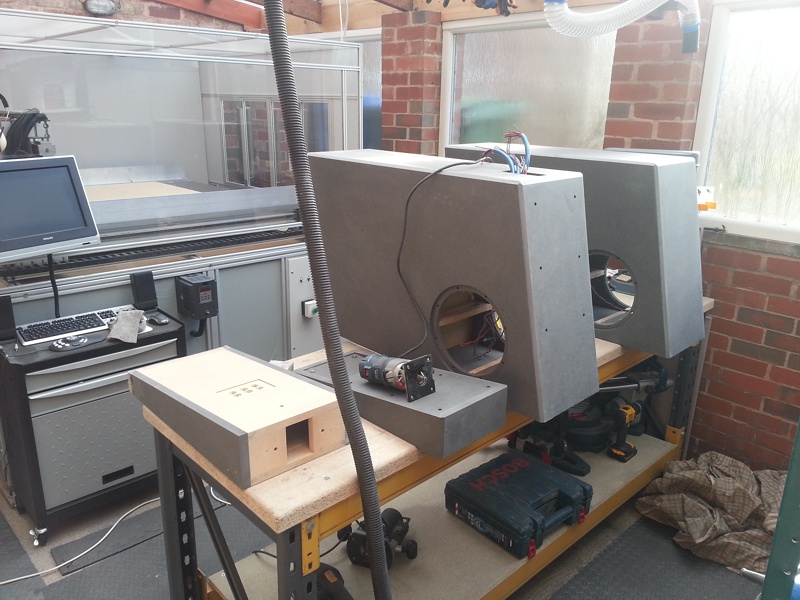
Last off is checking it all bolts together and fits. This one is now ready for paint. Its missing the foot but I've a bunch of hassle sourcing 50mm MDF. Got it in hand now though and should have that done over the next week. Because of the weight of the speaker the foot will have to be reinforced with 20mm aluminium. This will also provide a sturdy fixing point for Cerabase feet.

Shot of the internals. There's a relatively loose fill of stuffing for the sealed subs and you can make out the lead sheet attached to the walls. The mid compartment is further treated with bitumen sheet and foam.
Going over the cabinets and carefully filling any imperfections, adding finishing touches and then sanding from 80grit up to 300.
Last off is checking it all bolts together and fits. This one is now ready for paint. Its missing the foot but I've a bunch of hassle sourcing 50mm MDF. Got it in hand now though and should have that done over the next week. Because of the weight of the speaker the foot will have to be reinforced with 20mm aluminium. This will also provide a sturdy fixing point for Cerabase feet.
Attachments


Superb work as always Ant.
BTW The black plate; how long did that take to machine, and what have you painted it with?
I've often found the edges/corners on painted metal to rub off pretty easily - hence my question.
Hi Gordon
Machine time was quite long compared to MDF but you have to go a lot slower and lighter. I did 8 parts in a day with each taking about 30-40 minutes. Most of that was the engraving - painfully slow.
They're sprayed with clear etch and then regular clear coat. If you don't etch then the paint will sit on top of the alu and flake off eventually.
Hi Shin
For terminal panels can you ink fill engravings? I'm trying to find somewhere to CNC terminals from plain anodised aluminium and then infill in black an etched logo.
For terminal panels can you ink fill engravings? I'm trying to find somewhere to CNC terminals from plain anodised aluminium and then infill in black an etched logo.
Hi Shin
For terminal panels can you ink fill engravings? I'm trying to find somewhere to CNC terminals from plain anodised aluminium and then infill in black an etched logo.
I imagine you could. Would have to be careful how you go about filling the engraving since you wouldn't want to sand that nice anodised aluminium, well not unless you fancy anodising it again.
I've just finished reading this from start to end, and I've got tool envy. Your CNC router/mill is brilliant, and I could watch that working all day. Those machines have a much underrated elegance of movement.
As for the speakers - Wow 🙂
As for the speakers - Wow 🙂
Bit of a random update since I've been working on a bunch of stuff.
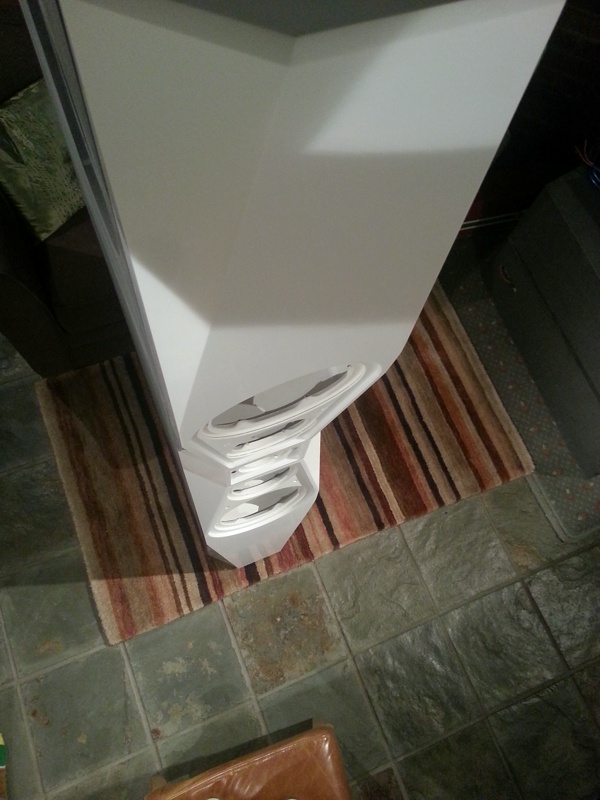
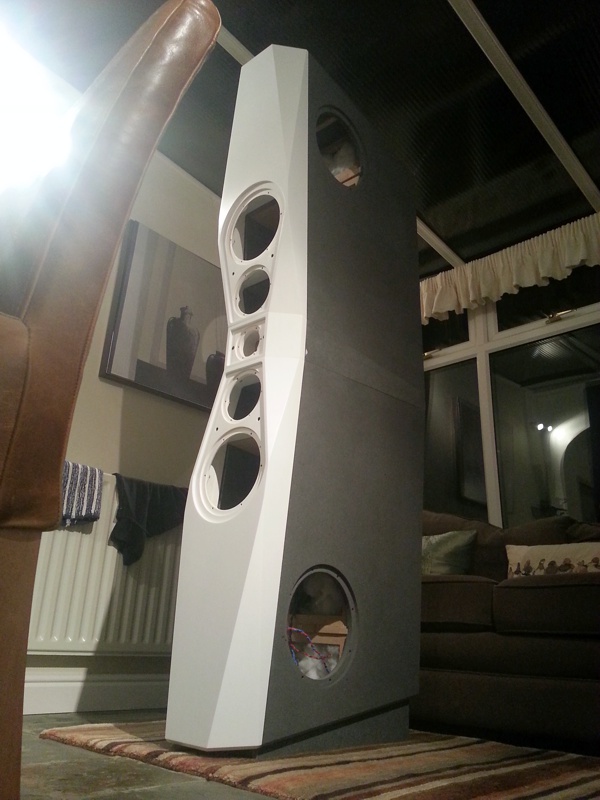
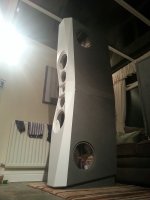
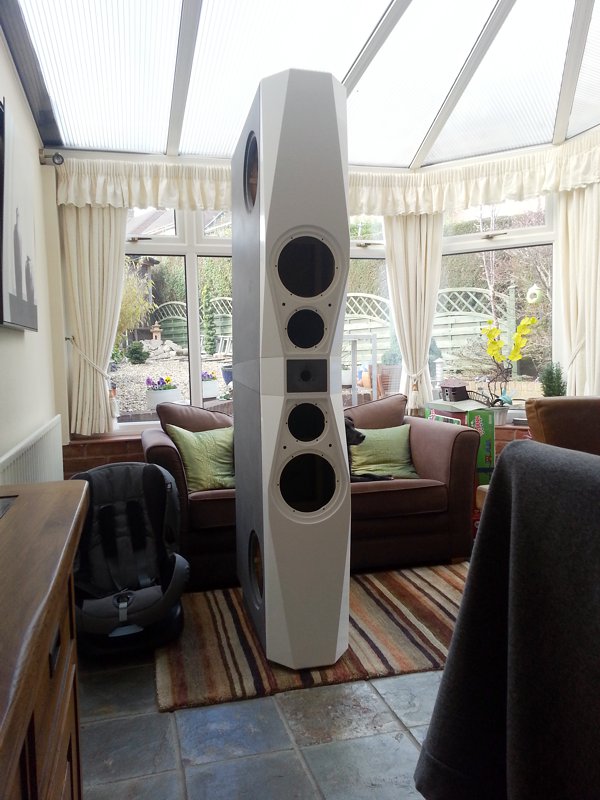
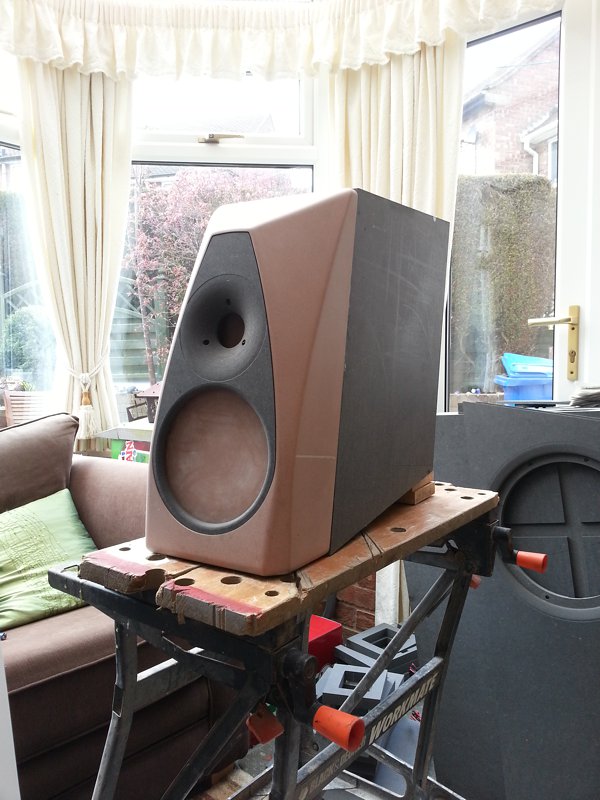
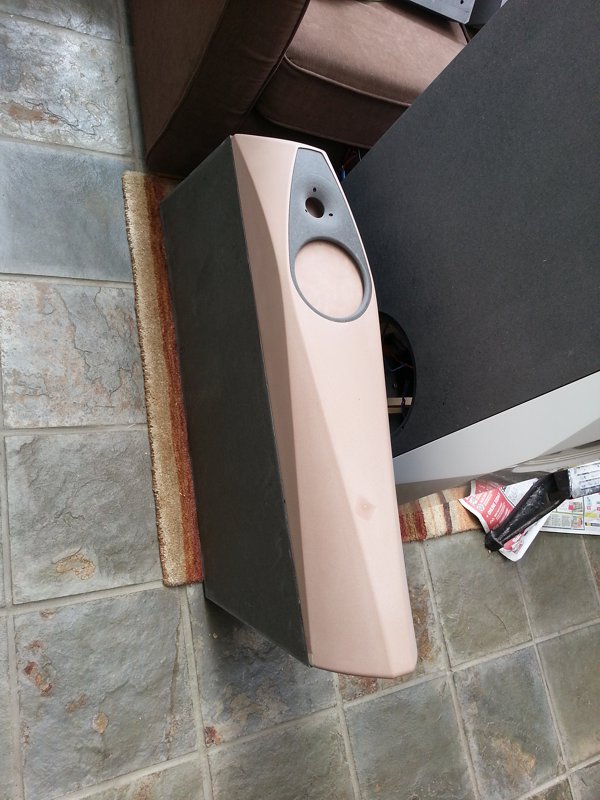
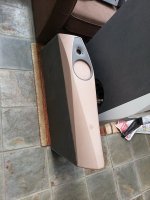
First off is a better shot of the Apollo in daylight. These things are just immense. Really, really glad I don't have to find a home for them to live because I certainly couldn't afford the mortgage. I'm mostly here doing this on my own and manoeuvring them around has become an art. If there's anyone around they certainly end up getting roped into 'shifting' them. When I do have to go solo I've found looking at how they the Egyptians moved materials for the pyramids has helped a lot 😀
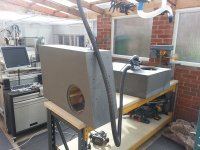
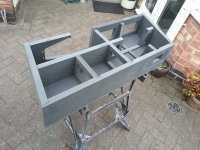
Moving on I've got the first set of cabinets done for the One.10 and One.20. Its taken a ton of hours testing, designing, listening, tearing it down and starting over to get to this point but its finally coming together. Really happy with how the code turned out on the CNC too, there's a few small tweaks I'd like to make but these are mostly to simplify and improve the repeatability of construction. I've already made the changes to the models and code so the next one's will go together even smoother. Absent is the larger One.30 but with all I've got going on right now I think those one's will have to wait till the Apollo are finished.
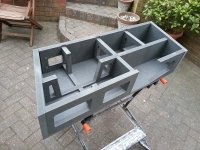
Even though the One.10 is small by most standards and could have forgone the bracing, especially with 25mm thick material I thought it could still definitely benefit from it.


Here's a quick test fit with the baffle pattern destined to be used to make the molds. Everything lines up so that's looking good too.
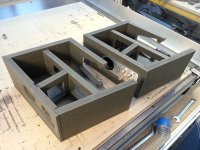
Next is the One.20. Cabinets turned out great and the baffle master is a perfect fit.

I've had a redesign of the foot for One.20 and 30 too. The old one was more hassle to construct and machine as it was really designed before I had the CNC and so was intended to be done with hand tools. I took the opportunity to beef it up a little at the same time. Its now 50mm rather than 36mm thick.
First off is a better shot of the Apollo in daylight. These things are just immense. Really, really glad I don't have to find a home for them to live because I certainly couldn't afford the mortgage. I'm mostly here doing this on my own and manoeuvring them around has become an art. If there's anyone around they certainly end up getting roped into 'shifting' them. When I do have to go solo I've found looking at how they the Egyptians moved materials for the pyramids has helped a lot 😀
Moving on I've got the first set of cabinets done for the One.10 and One.20. Its taken a ton of hours testing, designing, listening, tearing it down and starting over to get to this point but its finally coming together. Really happy with how the code turned out on the CNC too, there's a few small tweaks I'd like to make but these are mostly to simplify and improve the repeatability of construction. I've already made the changes to the models and code so the next one's will go together even smoother. Absent is the larger One.30 but with all I've got going on right now I think those one's will have to wait till the Apollo are finished.
Even though the One.10 is small by most standards and could have forgone the bracing, especially with 25mm thick material I thought it could still definitely benefit from it.
Here's a quick test fit with the baffle pattern destined to be used to make the molds. Everything lines up so that's looking good too.
Next is the One.20. Cabinets turned out great and the baffle master is a perfect fit.
I've had a redesign of the foot for One.20 and 30 too. The old one was more hassle to construct and machine as it was really designed before I had the CNC and so was intended to be done with hand tools. I took the opportunity to beef it up a little at the same time. Its now 50mm rather than 36mm thick.
Attachments
-
 20130503_132253.jpg100 KB · Views: 920
 -
 20130503_183708.jpg143.4 KB · Views: 925
 -
 20130503_183642.jpg147.3 KB · Views: 914
 -
 20130503_132138.jpg105.2 KB · Views: 930
 -
 20130503_201851.jpg99.1 KB · Views: 986
 -
 20130502_203014.jpg124.4 KB · Views: 969
 -
 20130502_202912.jpg103.2 KB · Views: 989
 -
 20130428_092148.jpg103.2 KB · Views: 928
 -
 Group Shot.83.jpg141.1 KB · Views: 1,248
- Status
- Not open for further replies.
- Home
- Loudspeakers
- Multi-Way
- Apollo Construction Diary