Is it the photo or me , picture one does look like the u shape is bending oitwards ?
Might be the picture , anyways that's a huge motor
Hello my friend. The bending is just in the pics. The reinforcements are still straight.
Thank you Bernt,Heatless (cold) Toner Transfer (for PCB)
https://www.youtube.com/watch?v=HBIxvwZ_0og
Another way of transfering print from laserprint.
Bernt
This is very interesting..
Well, after some serious listening sessions in this weekend i have finally decided. The best motor structure is the one with the wood wich has the cilinder partially closed. It seems that the ruban with the front and back separated seems to lack the roundness of the voices, giving me at some vocal trance music allot of hights and through some jazz the instruments like trompets and violins are abit too thin. The ideea is that in the case of the wood i would cut the frecv with filters at 200-250hz but in the case of closed back/front i would definetly cut them at 350-400hz because of the aspects discussed above. The presence and transparency are almost the same, with a plus of more airiness for the closed cilnders. I didnt use damping at all just to see how do they sound "naked". I would definetly use dampind in each situation because of the reflections..
Will measure them soon... 🙄
🙄

Will measure them soon...
🙄Attachments
-
 1.jpg465.4 KB · Views: 635
 -
 2.jpg440.8 KB · Views: 607
 -
 IMAG0516.jpg401.4 KB · Views: 603
 -
 IMAG0522.jpg394.2 KB · Views: 577
 -
 IMAG0517.jpg387.6 KB · Views: 572
 -
 IMAG0521.jpg324.2 KB · Views: 296
 -
 IMAG0525.jpg771.6 KB · Views: 397
 -
 IMAG0524.jpg790.9 KB · Views: 360
 -
 IMAG0523.jpg324.4 KB · Views: 357
I have a very important note to make:
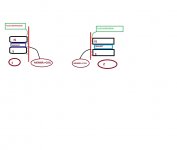
I made the painting bellow with just half of the magnet motor structure to show what i want to point out.
Now, remember that i sayed in my earlier posts (case 1 from the pic bellow) that the overhung coil is the best?
It seems that this was the case for my earlier motor structure.... Now with the actual rectified plates (straight edges plates) that i use now (case 2), with the jlh 69 amplifier (10w in 8 ohm and 15w into 4 ohms), both 4ohms overhung coil (@3.4cm wich was the best till now) and 8 ohms (@3cm-the classic version wich sounded very good in the past) has the same dB (subjectivelly speaking).
In the past the 4 ohms overhung coil had more dB's than the 8 ohms on the JLH if you know what i mean.
Now i suspect that is all about the flux dispersion in the gap as i pointed out in the painting bellow, case 1 and 2.
So, folks, all of you who wants to build these speakers, the overhung coils are best just for the case 1, with rounded edges for the plates. For case 2 , straight SQUARE edges plates, from bellow (wich i have now), i will research this week wich coil is best: underhung or 1:1. I kept the older coils and membranes (i still have about 15 pcs left from more than 20 different implementations).
If overhung coils are used on straight edges, you will definetly loose dB's
Cheers
Sergiu
Attachments
Happy new year to all of us!! 😀
I did almost nothing to my rubans... An aunt died and then hollidays.. 😡🙁
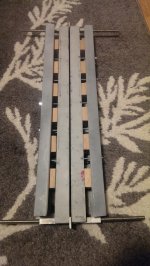
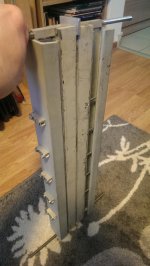
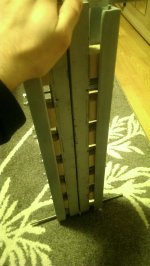
Anyway i just assembled them today with the oak wood. I will post soon why. 😉

I did almost nothing to my rubans... An aunt died and then hollidays.. 😡🙁
Anyway i just assembled them today with the oak wood. I will post soon why. 😉
Happy new year to all of us!! 😀
I did almost nothing to my rubans... An aunt died and then hollidays.. 😡🙁
Anyway i just assembled them today with the oak wood. I will post soon why. 😉
I am sorry to hear Serg!
Hopefully still a happy new year as far as possible.
I am ordereing samples of my beloved nomex410 paper since it is inert to moisture ( at least far less then regular paper) and because I can grow it in the etching tank without it dissolving . At the same time it is rather rigid. I hope to be able to make s big big version with weak magnets. Yep I always revisit designs until I am running into problems and give me some time to think about it 🙂
Yes my friend, fortunately i past that. Life goes on.
I cant wait to see your ideas. 😉
In the meantime i found out that the front of the cils doesnt have to be completely sealed from the back because you loose some of the presence of the singer and abit of the roundness in the male and female voices. Better damp the cils than seal the back to front.
Another important aspect wich i consider to be in the top is about the coil (look again at the pic bellow):
* for case 1 the best sound signature, presence, gain, clarity and overall details i found the overhung coil with large traces to be a real winner; going underhung makes the voices thinner like a tweeter and makes the inpression of rolling at aprox 1khz (strange!!) and a 1:1 coil makes a softer sound, i'll describe it like a good tube amp if you know what i mean and favorising abit the voices; this was one of the hardest decisions to make from this whole project because i had to choose between two speakers that where so close in some aspects and so far in other;
* for case 2 ( just listened today and made a couple of comparisons) to gain the same strong points as in the case 1, a 1:1 coil is recomended wich means a 10 mm thick plate => 10 mm width coil shoulder; going overhung wil definatelly loose dB wich is not an option, and going underhung will gain dB but the sound becames very thin, a definite sign that its favourising the upper spectrum.
I'm glad that i had the oportunity to test and listen to both magnetic motor structures, (i'm refering here to both round plate edges and straight edges), and want to report that if i had the oportunity to start all over again i will definetly choose case 1 with rounded edges because it leaves the oportunity for the diy'er to choose between two flavours.. The active area that i had in case 1 was about 8 mm from 10 mm with the edges rounded at about 45 degrees.
Now i have an active area of 10 mm from 10 mm with a straight flux dispersion as shown in case 2 from the pic bellow.
Cheers
Sergiu
Attachments

Picture 1 should have higher flux but shorter gap. In the picture it looks the opposite 🙂
There is not much much going on on the rounded part it will focus to the closest parts the flat part of the metal in this case. This is how they focus a high field without saturating the metal in ribbons
There is not much much going on on the rounded part it will focus to the closest parts the flat part of the metal in this case. This is how they focus a high field without saturating the metal in ribbons
Picture 1 should have higher flux but shorter gap. In the picture it looks the opposite 🙂
There is not much much going on on the rounded part it will focus to the closest parts the flat part of the metal in this case. This is how they focus a high field without saturating the metal in ribbons
Its annoing and hard to do the drawings in paint. 😀
You are right but it seems that the underhung structure from case 1 its not only concentrated on a smaller surface but it also disperses abit of flux on the rounded edges and thus covers the rest of the overhung coil wich is outside the gap, compared to the straight ones from case 2 where the flux is weaker because of the larger active surface and the straight flux dispersion caused by the straight edges.
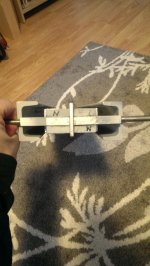
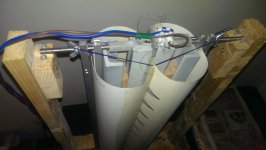
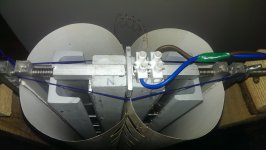
I tried to make the gap smaller today to 3mm from 4mm, but it seems that above 1T the plates bends like c***. It seems that if i want to go higher i will need a stronger/thicker U shaped steel and M5 or M6 high durity screws instead of my custom M4 screws wich are week. Anyway, it seems that its more confortable when using 4mm gap because i dont have to worry about centering the coil or bending. My humidity headacke and special measures taken for centering the coil has dissapeared now.
I also compared now the 91dB sealed speaker that i have to one pcs ruban and it seems that the ruban covers the speaker at the same input power and inpedance wich is sufficient for me. I got to try a three turn coil with fat traces to see how it sounds and then measure the 15" PA bass that i have to see how they harmonize together.
Today i buyed some gray pvc pipes (160mm int diam) for the sound reflection curved slots. Cant wait to see how they look at the end. The pvc pipes that i buyed are used as sewage pipes, have 4mm thickness or more and can be found in various diams at ceap prices. I buyed 1m long pipes at aprox 5$ each.
By the way Wrine my friend, how heavy is the nomex that you want to use?
Cheers
Sergiu
the nomex coming is 0.13 and 0.18 mm and is 115 grams and 174 grams for a m2
Can you please tell me where did you buyed these? I want to try the 115gr too.
Thanks in advance
I ordered samples at U.K. Insulations but I don't think they deliver to non companies , minimum order is 120meter and it's around 1,50 euro a meter... so rather expensive stuff
It's indeed expensive.
Can you please post your results with both of the dims (measurements and subjective)? If they measure ok, it would be good to find a cheaper source.
I cant wait to see your results.
Cheers
Sergiu
Can you please post your results with both of the dims (measurements and subjective)? If they measure ok, it would be good to find a cheaper source.
I cant wait to see your results.
Cheers
Sergiu
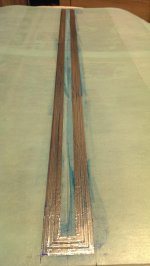
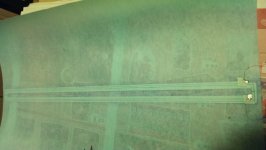
Helli my frien. I just made another coil today with fat traces, better contact and maybe a better overall one. The dc resistance is only 4 ohms from three turns. I will leave it dry for this night.
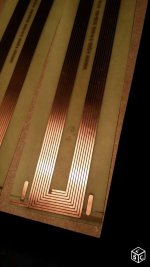
Tomorrow i want to try another type of coil. Like the one Deminiere uses. I found a pic from a pcb maker in France. In one of the pics bellow you will find the actual copper flex coil used in the Janus 50. It doesnt seem like a hard thing to do, i just have to look through my Al foils for a thicker foil and cut the traces smaller.. I allready have a pair of cutted membranes somewhere on the shell. Cant wait.
Cheers
Sergiu
Attachments
Helli my frien. I just made another coil today with fat traces, better contact and maybe a better overall one. The dc resistance is only 4 ohms from three turns. I will leave it dry for this night.
Tomorrow i want to try another type of coil. Like the one Deminiere uses. I found a pic from a pcb maker in France. In one of the pics bellow you will find the actual copper flex coil used in the Janus 50. It doesnt seem like a hard thing to do, i just have to look through my Al foils for a thicker foil and cut the traces smaller.. I allready have a pair of cutted membranes somewhere on the shell. Cant wait.
Cheers
Sergiu
nice, the ciols look like mine 🙂 but i really think you cant cut it that thin. get some proper polyester laminate clad. called duraflex get some photo resist spray etc , just teh normal crap you need for etching and some transparency. then print the coil in 2 parts. find a big UV light and develope the stuff. etch it and your done. it might be annoying to for small fast tests but the end result will be awesome. or go 2 separate coils. and i could print them for you. send me the copper clad ill print it for you and send it back and you can etch it as you wish.
ebay has the copper clad its 0.1mm thick even meter rolls
Nah, it takes too long to send it to you and received it back. I done some coils at the begining but with no more than 6 turns if i remember well... My wife sayed i'm crazy when i started cutting the traces that thin. I allready started cutting 4 traces with succes. I have four more to do but i leave it for next week cause my back hurts and i'm abit tired. It takes twice the time but hey its really fun. I hope i dont make a mistake next week and ruin it. 😉
If i fail, i will seriously search for what you sayed and try.
Thanks again.
Sergiu
Btw the price is really nice of the nomex, i asked a dutch company and they charged me 8 euro a meter. i told them i can get it myself for 5 times less. they wanted to know where i could get it so cheap. im playing around with the ruba's again.... and i noticed that a combination of low mass coil former and a few mm in the beginning of the throat then it is laminated with a heavy paper. the heavy paper has more controll in the low end, and the first few mm of the lighter paper emits the highs. it extends to 17-20khz. i used 4 cylinders, like a normal ruba, but i must say the insane dip at 1 khz of the opposing cylinders is crap. i only did a 4 cylinder this time because i wondered what happens in the distortion department since both sides are the same. the version i got now is not capable of measuring the difference at the moment. will come back on that subject 🙂 extensive measuring then cut the backside of , and see what happens.
Can you post some pics my friend,or a drawing to better understand what you did and what's happening?
If you can buy the 120m roll at 115gr/sqm i was wondering if you want to share some 20-30m with me; i will pay of course the material +transport fees and split the transport of the 120m roll to you.
If there is someone who is willing to buy a couple of metters, maybe we can do a group buy...
Cant wait to see what you have done.
Cheers
Sergiu
- Home
- Loudspeakers
- Planars & Exotics
- A DIY Ribbon Speaker of a different Kind