Hi Andy,
I like the look of the exposed plywood. I will just sand it from 100 to 220 and use a sealer varnish to protect it.
The finish will be like this:


thanks
Highef
I like the look of the exposed plywood. I will just sand it from 100 to 220 and use a sealer varnish to protect it.
The finish will be like this:
thanks
Highef
Crikey, varnish applied with a roller??? What varnish is that? It must be self levelling to some extent as the finish looks quite mirrored. Nice and simple if so 😉
It is amazing what a bit of sanding does to a piece of wood + suitable finish. Hopefully you'll bring out the beauty of the wood. When I varnish I find that the first coat locks in any wood nibs and spoils the finsih. I tend to apply 2 coats, v.lightly sanding back the first to remove the nibs. Finish is then far smoother. Is this what you do?
Anyway, good luck with that then,
Andy
Andy,
sorry. It was my mistake. It is not varnish, it is a concentrated sealant.
There is a specific process to do that finish. I can post here the steps if you want.
Thanks
Highef
sorry. It was my mistake. It is not varnish, it is a concentrated sealant.
There is a specific process to do that finish. I can post here the steps if you want.
Thanks
Highef
It would be good to know. Sounds interesting.... not heard of anything like that before. Is it some kind of epoxy?
TIA,
Andy
TIA,
Andy
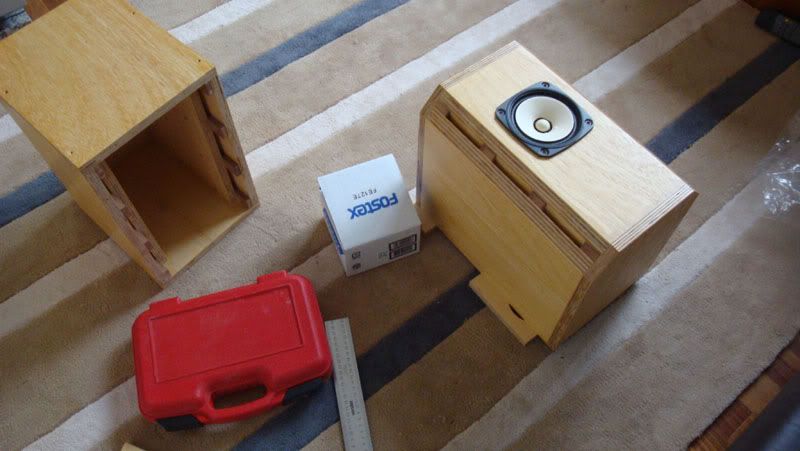
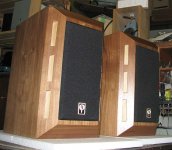
Here some updates and question of my fonkens
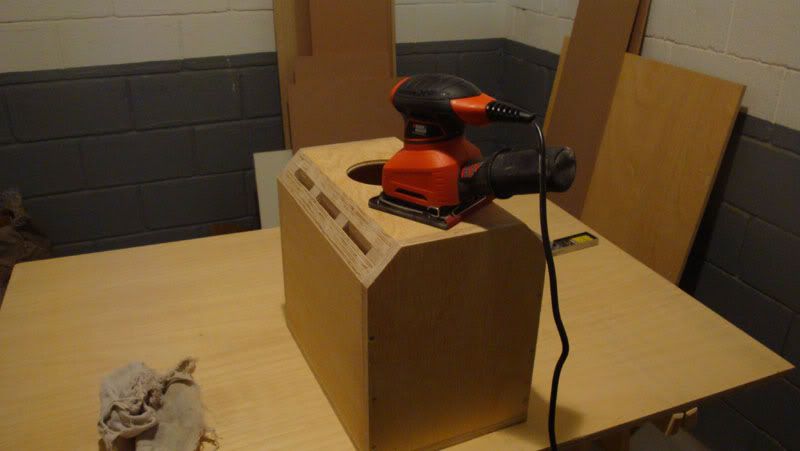
Sanding for finish
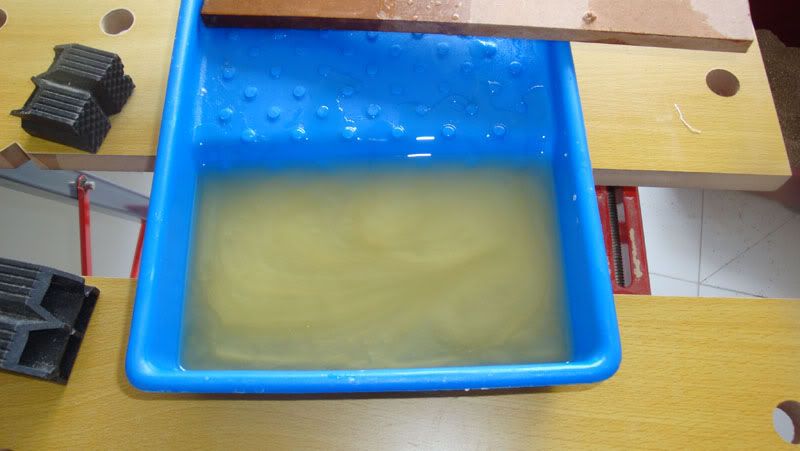
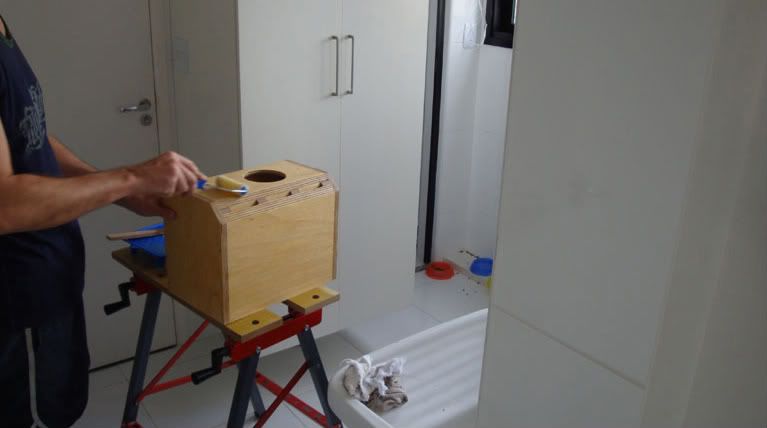
Sealant
CAT-5 soldering
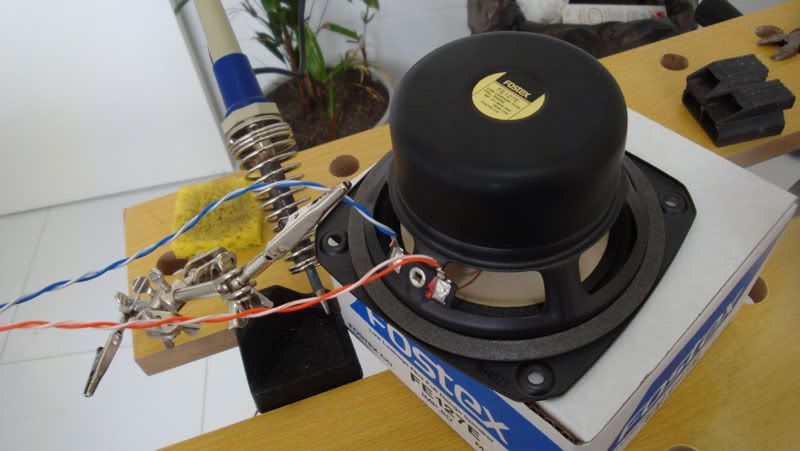
Testing the fitting
This is the internal stuffing. I have a question, is that enough? I have also added this felt in the back panel but avoided to put that too close to the vents. Is that correct? Anything you see that could be improved?


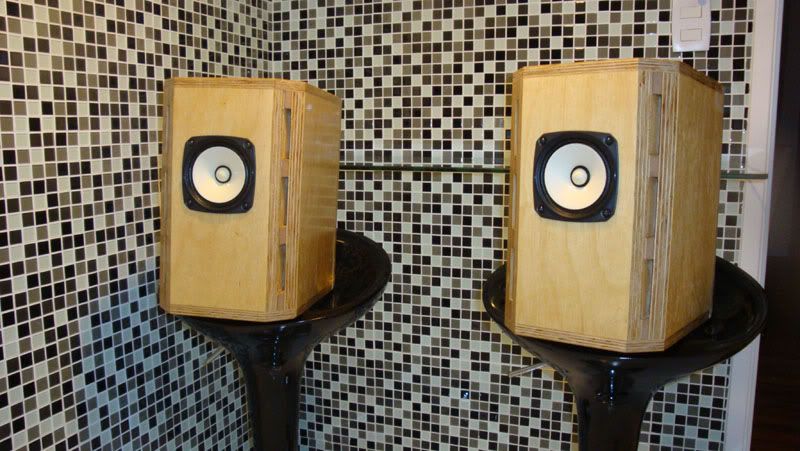
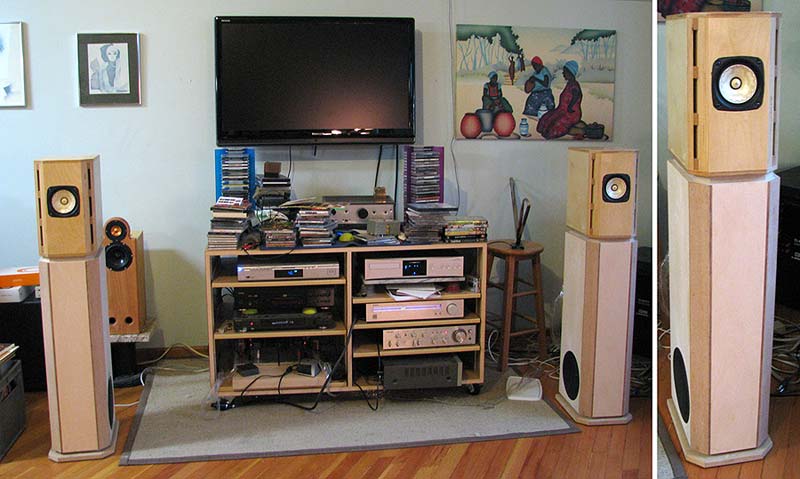
A last finished. See the mirrored effect of the left speaker. I will describe here soon how I did that without using varnish.
I didn't have time to listen, only 15 minutes and here my very first impressions:
- Highs: Unbelievable, they were there and I don't see the need of adding a tweeter at all.
- Medium frequency: Excelent.
- Medium low: I felt a lack of medium low frequencies. Maybe because it is stock driver, right? Also, I positioned the speakers without any criteria or test. Again, it was a very brief wife factor listening.
- Lows: More than I expected at this time.
The very fist overral impression was positive and I could see the value of this little speaker.
I would appreciate any help.
Thank you!
Highef
Sanding for finish
Sealant
CAT-5 soldering
Testing the fitting
This is the internal stuffing. I have a question, is that enough? I have also added this felt in the back panel but avoided to put that too close to the vents. Is that correct? Anything you see that could be improved?
A last finished. See the mirrored effect of the left speaker. I will describe here soon how I did that without using varnish.
I didn't have time to listen, only 15 minutes and here my very first impressions:
- Highs: Unbelievable, they were there and I don't see the need of adding a tweeter at all.
- Medium frequency: Excelent.
- Medium low: I felt a lack of medium low frequencies. Maybe because it is stock driver, right? Also, I positioned the speakers without any criteria or test. Again, it was a very brief wife factor listening.
- Lows: More than I expected at this time.
The very fist overral impression was positive and I could see the value of this little speaker.
I would appreciate any help.
Thank you!
Highef
Looking good.
That wool felt looks thin, how thick it it?
Before judging the bass/midbass you need to play them for at least 100 hrs.
dave
That wool felt looks thin, how thick it it?
Before judging the bass/midbass you need to play them for at least 100 hrs.
dave
Great piccies.
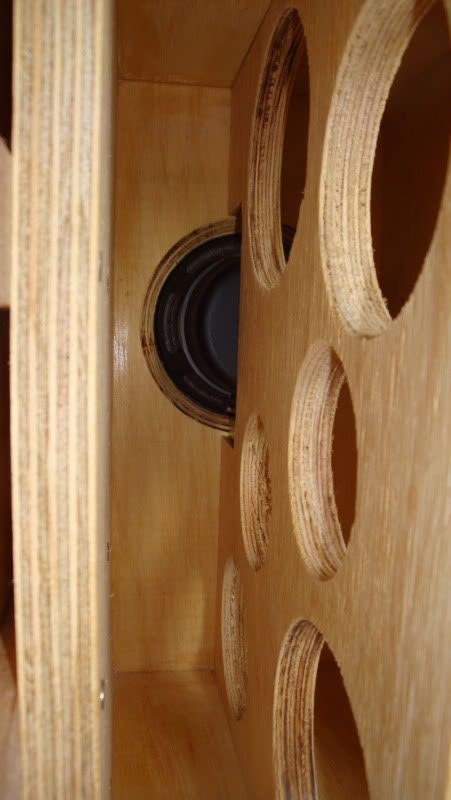
Have you put wedges between the speaker magnet and the wooden brace? I think there has to be a solid butt (unless of course you've cut the brace extremely accurately).
What is the name of the sealant you've used to finish the wood?
Cheers,
Andy
Have you put wedges between the speaker magnet and the wooden brace? I think there has to be a solid butt (unless of course you've cut the brace extremely accurately).
What is the name of the sealant you've used to finish the wood?
Cheers,
Andy
Looking good.
That wool felt looks thin, how thick it it?
Hi Dave, the wool felt is 5mm thick. Should I add another layer?
underwurlde said:Looking good.
Have you put wedges between the speaker magnet and the wooden brace? I think there has to be a solid butt (unless of course you've cut the brace extremely accurately).
What is the name of the sealant you've used to finish the wood?
Cheers,
Andy
I forgot to mention that there was a paper thickness space between the magnet and the wooden brace. I put a small piece of felt to couple them. Should I replace it to something solid?
thanks
Highef
Hi Dave, the wool felt is 5mm thick. Should I add another layer?
5mm is probably a bit thin - if you've made the back removable for access, another or thicker layer (we use 1/2") would be well worth a try.
that's probably fine - this is certainly one of those places were you're better off to err on the side of caution - the stamped mounting flange is thin enough that if the driver brace is not deep enough (by even a mm or less), you can easily warp the frame when tightening down the screws.I forgot to mention that there was a paper thickness space between the magnet and the wooden brace. I put a small piece of felt to couple them. Should I replace it to something solid?
thanks
Highef
As for lower frequencies, "treatment", etc will do a lot for other performance areas, but several hundred hours of playing time might really be a better break-in time to assess this area of performance.
then of course there's the amplifier speaker interface synergy merry go round 🙄
Last edited:
Hi Dave, the wool felt is 5mm thick. Should I add another layer?
Yes. The stuff we use is 12mm.
I forgot to mention that there was a paper thickness space between the magnet and the wooden brace. I put a small piece of felt to couple them. Should I replace it to something solid?
something solid would be better. At those thicknesses a piece of paper is pretty stiff.
dave
Thank you for the tips. I made the back panel removable and I will add another layer of felt using the glue gun.
I put pieces of PCV rubber (a very soft and isolating rubber. see the pics above) between the back panel and the cabinet back corners to avoid air leakage. Can I remove them and seal the cabinet after applying the additional felt layer? Maybe this rubber is working as a dumping for low frequencies (although that the screws are very tight).
Andy,
About the finish, I do the following: (I hope I made myself clear here. I'm not used to lumber technical terms in English)
I use concentrated Sayerlack wood sealant. I'm not sure if you have this brand out there in USA and I'm also not sure if this is the right name of this product for you. Maybe Forsham Wood sealer will work (I googled that 😀).
There are two thinned sealant proportions to use: Thin (70% thinner 30% sealant) and Thick (30% thinner 70% sealant).
1- Sand using 100, 120 and 220 grit in this order and remove the remaining powder using a piece of soft cotton fabric with a bit of thinner. (I do experiments using an additional 320 grit or more sanding sheet in this case don't get back to 220 grit in the next steps).
2- Apply (overlaying) the Thick sealant using a small short hair natural wool roller and let it dry following the sealant manufacturers instructions.
3- Sand again with 220 and remove the remaining powder.
4- Repeat process 1,2 and 3 (totally will be 2 coats of thick sealant)
5- Prepare the Doll (A funny name as we call here): A piece of soft cotton fabric with some amount of cotton balls inside it. Tight everything with a string. Basically it is an artifact like this:

6- Dip the Doll 🙂D) in the Thin sealant and remove the excess in a piece of wood

7- Pass the Doll (overlaying) towards the same direction of the wood veins applying a small pressure. Don't stop the process in the middle of the piece being treated.

(the images were extracted from a local wood working forum)
8- It will dry faster. You need to repeat the step 7 at least 3 times and you will see the shinning. As a last step, you can apply some thinner to the doll, squeeze it and rub it in faster movements (always in vein direction). It will give you more shinning.
Do this process before in a small piece of plywood to see if you can reach the same results.
thank you
Highef
I put pieces of PCV rubber (a very soft and isolating rubber. see the pics above) between the back panel and the cabinet back corners to avoid air leakage. Can I remove them and seal the cabinet after applying the additional felt layer? Maybe this rubber is working as a dumping for low frequencies (although that the screws are very tight).
Andy,
About the finish, I do the following: (I hope I made myself clear here. I'm not used to lumber technical terms in English)
I use concentrated Sayerlack wood sealant. I'm not sure if you have this brand out there in USA and I'm also not sure if this is the right name of this product for you. Maybe Forsham Wood sealer will work (I googled that 😀).
There are two thinned sealant proportions to use: Thin (70% thinner 30% sealant) and Thick (30% thinner 70% sealant).
1- Sand using 100, 120 and 220 grit in this order and remove the remaining powder using a piece of soft cotton fabric with a bit of thinner. (I do experiments using an additional 320 grit or more sanding sheet in this case don't get back to 220 grit in the next steps).
2- Apply (overlaying) the Thick sealant using a small short hair natural wool roller and let it dry following the sealant manufacturers instructions.
3- Sand again with 220 and remove the remaining powder.
4- Repeat process 1,2 and 3 (totally will be 2 coats of thick sealant)
5- Prepare the Doll (A funny name as we call here): A piece of soft cotton fabric with some amount of cotton balls inside it. Tight everything with a string. Basically it is an artifact like this:
6- Dip the Doll 🙂D) in the Thin sealant and remove the excess in a piece of wood
7- Pass the Doll (overlaying) towards the same direction of the wood veins applying a small pressure. Don't stop the process in the middle of the piece being treated.
(the images were extracted from a local wood working forum)
8- It will dry faster. You need to repeat the step 7 at least 3 times and you will see the shinning. As a last step, you can apply some thinner to the doll, squeeze it and rub it in faster movements (always in vein direction). It will give you more shinning.
Do this process before in a small piece of plywood to see if you can reach the same results.
thank you
Highef
The only downside to the strategy for a removable back panel on this design is - how tight is the coupling to the vertical driver brace?
After you give the drivers their requisite break-in and have settled on the levels of panel damping materials, I'd suggest one more leap of faith and gluing the back panel securely in place - if there's any question of loose fit to the driver brace, use moisture cured polyurethane glue and securely clamp for overnight curing.
French polishing - y'all got more patience than this hacker
Thanks Highref... (I'm in the UK, on the south coast BTW 😀).
I see, first sanding then you are grain filling (using the finish) then cutting back by light sanding before using the 'doll' to build up a thin finish. The only similarity to French Polishing is the use of the 'doll' for the final stage as far as I can see.
I would also recommend final gluing of all parts together - you'll never get as good as this by screwing the sections together really. Just gotta take the plunge I guess! 😱
For lining I used a wool based carpet underlay which I guess is about 12mm thick - damn stuff is awkward to cut properly and stinks to the high heavens of sheep. Spot-on stuff to use though..
Cheers,
Andy
Chris, the vertical brace is perfectly at the same level of other back corners so I think it will touch the back panel properly. I will put clamps at the time of the final glueing.The only downside to the strategy for a removable back panel on this design is - how tight is the coupling to the vertical driver brace?
underwurlde said:Thanks Highref... (I'm in the UK, on the south coast BTW ).
I see, first sanding then you are grain filling (using the finish) then cutting back by light sanding before using the 'doll' to build up a thin finish. The only similarity to French Polishing is the use of the 'doll' for the final stage as far as I can see.
Yes sorry I knew you are from UK. Do you use this "wood sealant"? That's the right name?
Interesting to know about the French Polishing. The name of this technical here is just Polishing ("lustração"). Very nice to learn with you guys, audio diy and also technical culture english.
Thanks!
Highef
I have not come across 'wood selant'. We do use something called 'sanding sealer' which contains soap & is meant as a first layer to lock in any wood nibs which can then be easily sanded out (as you've done) - the soap content aids progressive sanding of the surfaces and stops the sanding paper becoming clogged up (searated I think the term is) thus ruining the previous layer. But as far as I'm concerned any soap / wax content in finishes will weaken bonding to subsequent layers, so I don't tend to use it. People do however swear by such products.
French Polish is not a product, it is a technique. I have done this on my last pair of speakers. Shellac flakes are dissolved in alcohol (the ratio of which can be altered and then stated as being either 1lb, 2lb or 3lb 'cut shelllac' - I use 2lb). This thin liquid is then wiped onto the wood (after much sanding, and grain filling) using a pad or as you've called it a 'doll'. Oil is also used on the 'doll' to prevent the 'doll' sticking to previous layers which would otherwise spoil the previous layer (because it too is also being dissolved by the alcohol in the new application of shellac). The oil is then removed before further layers are very gradually built up to a mirror like finish before final buffing.
Heh, I used methylated spirit (i.e. denatured or undrinkable alcohol) for the 'alcohol', dewaxed blonde shellac flakes, baby oil🙂D) for the 'oil' and white spirit to remove the oil (as it doesn't readiliy dissolve shellac but does so for the baby oil).
Does that make sense?🙄
Cheers,
Andy
Last edited:
I'm planning to build stands to be part of the fonkens. I'm thinking something about the picture below, following the cabinet design to make a more imposing feel. Is that technically ok or fonkens need something different, like spikes?
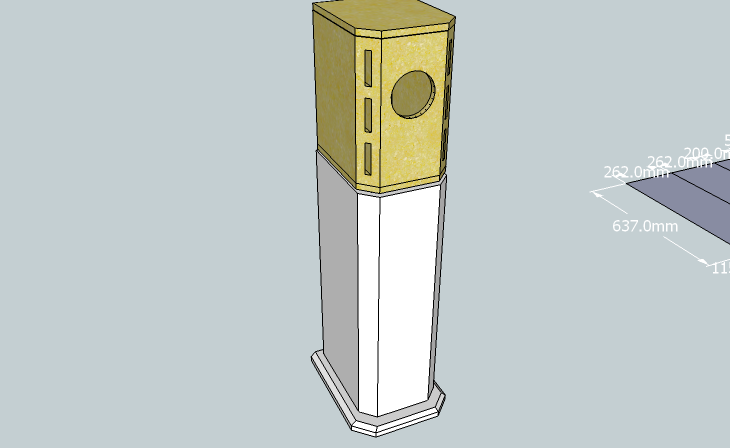
thanks!
Highef
thanks!
Highef
So far i only have felt feet (and a layer of MDF on top of the bass cabinets plywood) between mine, but have envisioned other methods, but not tried them.
dave
dave
Member
Joined 2002
So far i only have felt feet (and a layer of MDF on top of the bass cabinets plywood) between mine, but have envisioned other methods, but not tried them.
dave
Aww, no pretty orange speaker wires ? Not in use any more ?
- Home
- Loudspeakers
- Full Range
- New Fonken pair is born.