Long story short:
7x ROAR18 with different drivers tested, measured, used at a DJ gig in a 500-person venue with impressive results.
Pros: Lots of headroom, especially in the kick range, usable up to 120 Hz and possibly higher.
Cons: Needs EQ in the low end for a balanced sound, big and maybe a bit too heavy for one man to throw around.
The long story:
A friend of mine wanted "decent" sound everywhere in his big barn where he works on his hobby (cars) and asked me for help. It didn't have to be very loud, but it's a big place, about 20 m x 10 m x 11 m (LxBxH), so a single sub wasn't going to cut it. Knowing his taste in music a little, I knew he wasn't necessarily looking for the lowest possible notes, but a tight kick was definitely needed. Instead of designing something from scratch, I thought Martinsson's ROAR18 might do the trick. This was helped by the fact that I had already built and listened to the ROAR15 just to see how it would sound. Although it didn't get very loud in the low end, it responded pretty well to EQ at the expense of max SPL (40Hz was certainly doable).
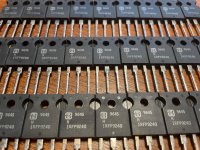
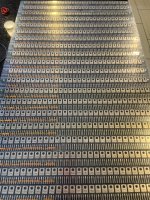
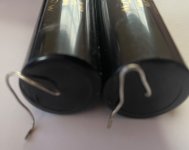
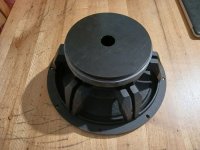
The ROAR18 seemed to dig a little deeper on paper, especially with a small "mod" that I did: use ALL the internal volume available (so the long channel is about 10 cm longer; this seemed to simulate fine: a bit less sensitivity in return for a little lower response). So I figured it would also do well with some rap music (also a prerequisite). And another big factor was that I had a couple of different 18's lying around, plus a bunch of broken and discarded 18's at work, where I was happy to pull them out of the trash (with permission)! They were Celestion CF1840JD's that needed their magnets realigned as the glue had failed, so it was quite an operation with a few recones involved.
They were not the best for the ROAR18 (not the biggest BL), but they simulated ok. So I decided to build a ROAR18 to evaluate. After listening to it, my friend approved and I set out to build 6 more, since that number matched the cut list of 15 sheets of plywood (244x122 cm) and the number of 18's I had on hand; hence the odd "7".
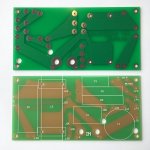
First one built:
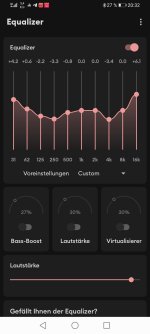
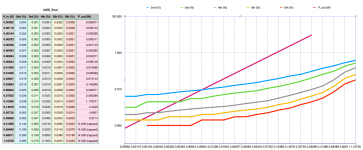
In-room measurements with and without EQ:
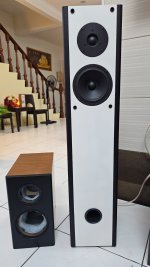
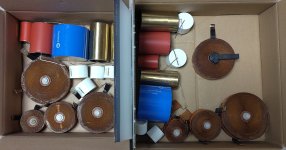
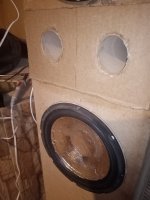
The large build:
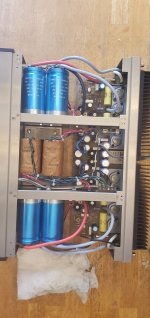
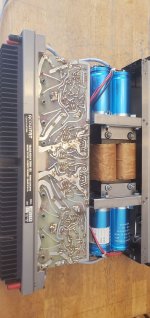
With wood prices through the roof, I opted for cheap underlays (32 Euro/sheet) because they were for a permanent installation and didn't need to be "road proof". The three that were for me (the white ones in the photos) I laminated with epoxy/fiberglass. These latter ones had wheels and weighed a whopping 84 kg.
I finished them a few weeks ago and asked another friend of mine at a place called "Landbouwbelang" in Maastricht, the Netherlands, if I could measure them there since they have an outdoor space with little interference from nearby walls and such. He went one better and asked me if I would like to try them out at a party that was going to take place there in two weeks. Yes, of course!
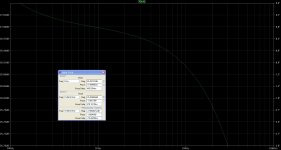
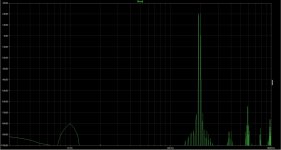
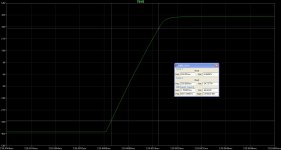
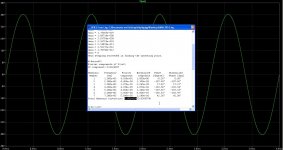
Measurements were taken at 2.83 V, no filters or EQ, with the mic at 1 m on the ground and the speaker facing the river, see photos. Everything seemed fine, although the 109 dB/W at 106 Hz seemed a bit high to me, but I double-checked my measurements and levels...
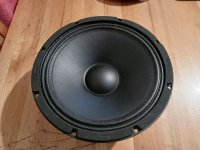
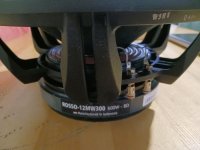
The drivers are:
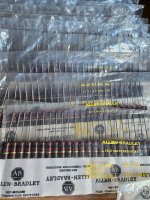
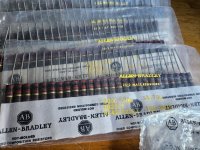
-5x Celestion CF1840JD (8 Ohm 1200 W RMS/2400 W program)
-1x Celestion CF18VJD (8 Ohm 1600 W RMS/3200 W program)
-1x Beyma 18P80Nd (8 Ohm 800 W RMS/1600 W program)
The measurements were done with Umik-1 and REW V5.20.13.
I think the measurements and photos speak for themselves 😊.
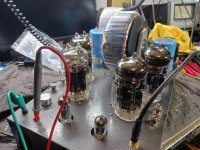
The gig:
(left and right of my setup are the in-house system speakers, Xtro + 186 Horn)
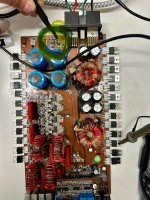
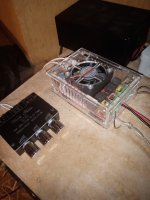
The setup for the gig was as follows:
1x Nova DC8000 processor
2x Powersoft D4002 bridged to 2x CF1840JD subs on left and right stereo channels, delayed to 45 cm -> 4000 W into 4 ohms (these are the black subs on both ends in the show setup)
1x Powersoft M50Q channels 1 and 2 bridged to the CF18VJD sub and channels 3 and 4 bridged to the 5th CF1840JD -> 2x 2500 W at 8 ohms (both mono summed)
1x Powersoft D2002 bridged to the Beyma 18P80Nd sub -> 1x 1200 W at 8 ohms (mono summed)
1x RAM Audio S6004 for my Synergy tops (build link here:
https://www.diyaudio.com/community/threads/synergy-horn-for-135-db.305852/) -> 2x 1480 W into 4 ohms.
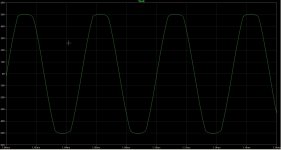
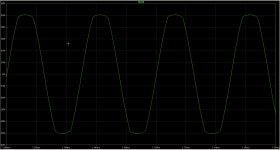
The HP for the Roars was set at 27 Hz and 48 dB/oct. I set the LP quite high at 120 Hz and 48 dB/oct because I wanted to hear how they would handle kick and sub duties.
I used a 6 dB low shelf at 50 Hz with 6 dB gain and a 3 dB bump at 40 Hz with a Q of 2.871 (or 0.5 octaves). To even out the room modes, I delayed the outer 4 subs by 1.31 ms (or 45 cm), which gave a nice even sound throughout the venue. The limiters were set conservatively on RMS, but allowed peaks to get through.
The headroom was kind of absurd (at least in my book), which is of course a good thing: all night long the -9dB lights on the amps were occasionally tickled, only during the VERY LAST song they turned it up to -6 dB peaks, which was still enjoyable, but not for much more than one or two songs.
There were many compliments on the quality and amount of bass, and apparently it was much more powerful than the in-house system consisting of two XTro tops and four 186 horn subs. I was also pleasantly surprised with my 2" Synergy horns, they easily kept up!
Here is a playlist with a few videos taken with my phone:
https://www.youtube.com/playlist?list=PLZ9IxQRaHpo8qlY31TOXkLRJ4tjH5XnTm
Now I have to figure out where to place the subs in this big barn I built them for in the first place...
But maybe there will be another gig before they are permanently installed😎.
Any questions, remarks, comments, suggestions, let me know 🙂