Neutrik PCB Mount/Solder Cup Termination Style Interchangeability?

Hello!

I spent a lot of time learning CAD so I could design my own backplate from the diyAudio store! I did, and my backplate/chassis has shipped and is on its way to me 🙂

I was planning on using these Neutrik XLR connectors for the back panel: https://www.neutrik.com/en/product/nc3fbv2-b

They feature a 22mm cutout. The popular 'D' style is 24mm, so I cannot use anything but the A and B style connectors (both of those are 22mm).

The problem I did not realize is that these 'A' and 'B' series connectors are PCB MOUNT ONLY. For reference, here are all their XLR connector lines: https://www.neutrik.com/en/neutrik/products/xlr-connectors/xlr-chassis-connectors

So I MUST use the 'A' or 'B' series OR spend another $66+shipping for a new backplate in order to use the standard 'Solder Cup' style of termination that I've used before...

Does anyone know if I can use what I have ordered? Can I solder the amp wires to these connectors and be okay or am I going to be in a world of hurt trying to solder wires to PCB-mount connectors?

For reference....
Solder cup:
1657844870379.png


PCB-Mount (Vertical):
1657845007267.png


THANK YOU IN ADVANCE!!

A Concise Guide to the Published Amplifier Circuits of Nelson Pass

I have read all of the articles by Nelson Pass, and then went back and tried to take notes on what topics were discussed in each. Here in the Pass forum, a few folks (myself included) are new, and hoping to find a decent starting point. For my part, I have compiled an index of the articles that I think are necessary for understanding the Pass amplifiers, including Zen Variations and First Watt.

The linked file is a first draft. If anyone has suggestions, please let me know. As I learn more, I hope to flesh out the guide and then make a final version before too long. At the moment, 4 pages (with two focused on the juicy bits) seems like a good length. I've included some very basic comments about some of the technology, but perhaps I could revise this to be more of an introductory tutorial which points to Papa's more in-depth coverage.

A Concise Guide to the Published Amplifier Circuits of Nelson Pass

Brian Willoughby

For Sale FS: Parts for M2 amp (pcb, jfet, mosfets)

I have the following parts for an M2 amp (not the store's M2x) for sale:

(The original M2 thread is here: https://www.diyaudio.com/community/threads/official-m2-schematic.281520/)

1) Tea-bag M2 clone pcbs for two channels. More info here:
https://www.diyaudio.com/community/...rds-with-120mm-ums-spacing-by-tea-bag.286699/
https://www.diyaudio.com/archive/blogs/tea-bag/203-m2clone-boards-120mm-ums-spacing.html

2) 2x FQA19N20C and 2x FQA12P20 output mosfets. I believe these devices were used in the factory M2 and F5.

3) 2x (2sk170BL + 2sj74BL) Toshiba jfets (4 jfets in total, ~7mA Idss).

4) 6x 1n4148, 2x 4n35, 4x LM385-1.2

Price is $80 CAD + shipping & paypal fees.

Please PM me if interested.

Thanks,
Dennis

Often not getting notifications for new posts on both forums I follow

It's happening again! After not changing any settings or setting any other email as spam, I will out of the blue just stop getting notified when there are new posts on either or both forums I follow, then it will resume after a period of time. This period of time can range anywhere from a few hours to several days. I always click the "view this thread" when I get a new notification. While writing this post, I just got a new notification on one of the forums, but there were 3 pages of new posts on the other forum for which I was not notified. They never go to the spam folder. I always keep the last post up so I can check on it when I don't have timely new posts, and routinely there will be new posts for which I was not notified. This is an on-going problem that has been happening for 2 years now. It would be a major disruption for me to have to change my email provider, and I don't have this problem with anyone else who emails to me.

LEAK 3090 Replacement Tweeters

Hello all!

I'm new to the forum. I've been snooping around for a while and there is some wicked geekery to be had! I'm looking forward to getting stuck in.

I am looking for a pair of replacement super-tweeters for my beautiful LEAK 3090s. I am told the original Isodynamic tweeters cant be fixed (although I couldn't even get anyone to look at them, so there is possibly hope in the future). I am a music producer and I use them as main monitors for referencing mixes so a flat response is pretty important (the LEAKs do +-3db 35hz-26khz), although I'm not looking for super harsh/revealing "monitor" speakers, as I have another pair for that. I also use them for general listening. I'm powering them with an old Soundmaster VF200 dual mono power amp, I can find any info on it but to my ears it sounds wicked and it has plenty of power.

Photo:

An externally hosted image should be here but it was not working when we last tested it.


Specs:

dsc07518.jpg


I originally replaced them with Monacor RBT-95 SQs, which are ok (especially for the price!) and incidentally fit perfectly when wedged under the faceplate. However, it seems they were a little underpowered for a speaker of this size and recently the right hand side has had an intermittent distortion problem, with some volume discrepancies. I haven't swapped them to check it is the driver so I could be wrong, but to me it sounds like a toasted tweeter.

So I'm looking for a ribbon or similar, with enough power to keep up with the LEAKs and I would love to get some recommendations. My budget is around £40-80 each (I'm a student!) but please tell me if that is stupidly low.

Many thanks,
Louis

Locked out from MacMini

Awhile back I bought a slightly used mac mini (2011 model updated to high sierra) to run roon, rew, and a minidsp, the feller i bought it from reset it and entered a new password for me…….problem is i can’t remember the password and he cannot be contacted (its been almost two years since i bought it) I’ve tried all the fixes recoed from googling but it won‘t even let me access a password change or default reset. Is there a workaround for this, i believe its gone into some kind of protection mode from entering wrong password too many times. Any help would be appreciated.

Unit ID and stats in below pics
Thanks, Bob

Attachments

  • F7B4E93E-BF27-4E5D-ABA0-293BE78AC11F.jpeg
    F7B4E93E-BF27-4E5D-ABA0-293BE78AC11F.jpeg
    313.7 KB · Views: 106
  • B87811E4-F866-4E6C-9DE9-94CD43D42895.jpeg
    B87811E4-F866-4E6C-9DE9-94CD43D42895.jpeg
    394.1 KB · Views: 103

NFB with Vbe Multiplier, Better Than CFP?

Vbe Multiplier has strong local negative feedback, and it is stable without extra compensation if the local loop involves only 2 or less components.
How about use its feedback to correct crossover distortion?

It looks pretty good.
1. Get DC feedback from Re. No more thermal runaway.
2. Get AC feedback from the output. Crossover distortion is minimized before global feedback is applied.

vbe mult opt.PNG
The output stage is biased at 83mA

Phono preamp: RIAA EQ using IIR digital filters

I was recently contacted by a fellow DIYer. He was interested in using a pro-audio recording interface plus digital filtering to create a phono preamp. Pro audio interfaces often have sufficient gain, and all the EQ can be done in the digital domain. It seemed like an interesting project, so I decided to try and produce the appropriate EQ curve.

I managed to track down a usable source of information about the RIAA EQ curve on Rod Elliot's web site:
Hi-Fi RIAA Phono Preamp
This was an invaluable source of information about the poles and SPL levels that made it very easy to reproduce the target curve.

After applying several filters I was able to get an excellent match to the RIAA EQ target. The attached figure shows the two curves, with the target in white and the IIR EQ in blue overlaid. It's an excellent match.

One point of note: I used a lowpass filter to implement the final roll off at high frequency. Unlike analog filters of this type for which there is a zero at infinity, the zero for an IIR filter is at the Nyquist frequency. This zero pulls down the response at high frequencies when the sample rate is not high. In the figure I have used 96kHz, and this shows very minimal deviation at 20kHz. In contrast, for a 48kHz sample rate there was a couple of dB of difference at 20kHz. Probably not critical but it should be kept in mind.

The filters that were used to obtain the fit to the RIAA target curve are:
1st order low-pass filter: Fp = 2100 Hz
1st order low-shelf filter: Fp = 155Hz, gain = +20 dB
PEQ band: Fp = 50 Hz, gain = +2.5dB
PEQ band: Fp = 500 Hz, gain = -2.5dB
PEQ band: Fp = 2100 Hz, gain = +2.5dB


The PEQ bands are used to bring the response to the target at the inflection points. To relax this a bit, you may reduce the gain for each PEQ band towards zero dB gain to suit your tastes.

I used my ACDf IIR LADSPA filter to implement the EQ curve, however, I believe that these values could also work on a miniDSP and correspond to their filter nomenclature.

This seems to be an interesting way to marry your vinyl gear with DSP, especially if you already do further processing using DSP e.g. for a loudspeaker crossover, etc.


.

Attachments

  • RIAA EQ via IIR filters at 96kHz.png
    RIAA EQ via IIR filters at 96kHz.png
    37.9 KB · Views: 894

JL Audio Slash 500.1 help

What's up friends? I have this amplifier with failure in both stages, it is my first jl to be repaired and I would like to know if you can tell me the part number of the driver transistors of the PS, the driver ic of the output stage and if it is that I can place it in the output irf540n? greetings and thank you very much.

Attachments

  • 20220612_174457.jpg
    20220612_174457.jpg
    343.2 KB · Views: 149
  • 20220612_174505.jpg
    20220612_174505.jpg
    333.6 KB · Views: 184

Mixer project.

Been designing a simple MIC/Line mixer for a mobile disco.
It has 2 inputs, a line level input and mic input.
The mic input has a extra gain stage to match the line input.
Output stage just mixes line and mic stages together.
Using a 12ax7.
Power comes from 12vac wall wart, into a reversed transformer to get up to around 200vDC.
Heaters run off 12vac input.
I have elevated heaters to DC 20v ish.
B+ goes into 100uf then I have split mic stage and mixer stages power supply into two parts with 4k7 and 100uf.
MIXER.JPG

100_0500.JPG

Is untreated MDF sufficiently 'airtight'?

Hi, everybody!

I've used MDF for years for subwoofer enclosures (as I'm sure many of you have), and I've never had any problems or complaints.

But I recently found a thread with folks talking about how porous MDF is... and how it's advisable to 'seal' the interior surfaces to prevent 'micro-leaking.'

Does anyone have any information or insight into this?

Is it a good idea to seal not only your seams but also the WALLS of your MDF enclosure?

If you do seal your MDF walls, what do you do it with?

Are there any downsides to a PERFECTLY sealed enclosure (I've heard that there can be--but that's a whole other thread, I'm sure.)?


I don't know... what do you think?

Thanks!

For Sale VMA-I-SL

Hi End 3Way floor standing speakers made by well established company in Europe. Light use, first owner. These speakers are available for pick up only. Asking $1400
Specifications:

twitter: Vifa BC25SC06-04
middle: mod. SB Acoustics SB15NRXC30-8
bass: Peerless SLS 10
cabinet: bassreflex Fb 30 Hz
FBW: 30 - 20 000 Hz
freq. ± 1,5dB: 50 - 18 000 Hz
freq. ± 3dB: 40 - 20 000 Hz
sensitivity: 87,5 dB/2,83V/1m
max. SPL: 108 dB/1m
power: 150 W ( 30 Vef )
impedance: 6 Ω (min. 4,85 Ω)
size: 272 x 380 x 1100 mm š h v
cabinet: MDF 22 + 25 mm
weight: 34 kg/pc
VMA.jpg

Help me diagnose tube preamp...

Hi,
I have a tube preamp that I've built 20 years ago. It recently developed a weird hum/ noise behavior on the right channel, after turning on for a while (sometimes, 5 mins, sometimes 2 hours after on). The noise is varied based on volume. I took it to the company that sold the kit but they also can't figure it out. They said that it is normal for tube since it is sensitive..... (they tried swapping the tubes but can't replicate the problem...)
I usually do not listen loud however I turn on volume quite a bit to about 12 o clock since I connect a dac with remote to it and use dac's remote for main volume control. It is quite annoying when the noise kicks in.
This is what I have done so far for diagnostic;
1. Check chassis ground and connect chassis ground to house's ground. Originally, the preamp is 2-prong so I change it to 3-prong.
2. There are three boards, source selector board -> balance & volume -> preamp board. I tried shorting signal to ground at the output of balance+volume board, the noise is gone.
3. I tried disconnect the preamp board from all inputs, the hum/noise is very loud. Then, I tried shorting signal to ground at the input of preamp board, the noise is gone.

Please suggest what else should I check.
Thanks,
AP

Attachments

  • IMG_20200524_180710.jpg
    IMG_20200524_180710.jpg
    183.9 KB · Views: 150

SE Stereo with 6DY7

I managed to get ahold of several 6DY7 tubes, which have two 15W beam tetrodes in one envelope, with a common cathode and screen. The datasheet says they can be used as independent class A amps with crosstalk down at -50dB. This is plenty for my purposes.

I've been working on a simple stereo design that uses one 6N2P per channel, because that's what I have on hand. In LTSpice, the design below yields 5.8WPC at 3% THD on a 1Vrms input. I'm running it pretty conservatively, because who knows if I'll ever be able to get any more of these!

I won't be able to build it for a few weeks still, but in the meantime I would love to hear any feedback from those with more expertise!

Z9Xq8TX.png

Naim CD-3 (NAC-D3) excessive laser power. Anyone with diagram?

Hello,
I am building a player from two cannibalised units that I have acquired.
After replacing clearly faulty parts in one with ones from the other, the player works and plays well.
I was almost ready to turn to the repair of the main board of the 2nd player, but decided to check laser power of my new creation.
Sadly, it was 1.3mW whereas most lasers in players emit around 0.1mW. Some I have seen with 0.2mW or even slightly more (Sony CDP-302ES with BU-1 head) and have been working fine for 30+ years.
But nothing as huge as 13 x the power, and it cannot be good for the longevity of it CDM-9. So I decided to take the swing drawer apart to look for the adjustment pot. There was none.

Does any of your find people have Service Manual for it or at least circuit diagram?
Also, anyone out there with Naim CD-3 (NAC D-3) player and laser power meter who would be able to confirm the laser power of a standard, good working unit?
Cheers
Roman

IXYS beasties and other possible surprises

Hi, friends!

I have too many parts I won’t be able to use in the near to mid term. Therefore putting some stuff up for sale.

First up is two pairs or IXYS beasties intended for an XA252 build I will need to postpone.

2 x IXFN140N30P (still available @ Mouser - SOLD
2 x IXTN40P50P (hard to find) - SOLD

Aleph J PCBs (from the store) - SOLD

Ready for sale now: F5 Turbo PCBs with four matched pairs of rare Fairchild MOSFETs.

More stuff might be put up for sale, in time.

Regards,
Andy

Attachments

  • 29B64249-0594-4EF3-A37F-EB5AAFE3AB0F.jpeg
    29B64249-0594-4EF3-A37F-EB5AAFE3AB0F.jpeg
    557.6 KB · Views: 126
  • Like
Reactions: nicoch58

Audiophile selling record collection

Hello All,

I am selling my vinyl record collection of about 290 records. Mostly classical, a bit of folk music (21), jazz (16), popular (34), and test records (11). In order to keep packaging and shipping costs under some semblance of control, I am only selling in batches of 5 records, and only in the continental US. I can only accept payment via personal check or PayPal. Shipping by Federal Express.

All of these records are single owner, and have always been played and stored with great care. A number have been treated with Last. Washing has never been attempted on any of these records. Many have been played in the last two years as I transferred to the digital format, and I have notes on the condition of these records. I believe the jackets would be considered to be in good to very good condition, except for a few where I note otherwise.

PM me with an e-mail address and I will send you a PDF list.

Cheers,
ceulrich

Need Help With CEC FR-808 Turntable Wiring

Hello all,

Expert electrician I am not. I am trying to refurbish this table and from pictures on the web and visual appearance I can see that someone has added a capacitor to the table. I can't find a schematic or service manual anywhere. I have attached pictures of the table with the piggybacked capacitor and also one from the web in original condition. I also drew a crude wiring diagram. The picture of the MP-H 4 (K) 150 shows the capacitor that was added. Any enlightenment as to why the capacitor was added, and what value/voltage, would be greatly appreciated. Also if someone could explain the purpose of three connections on the original capacitor. I thought there were three connections only if it was a dual capacitor internally. Is it a combined start/run capacitor? Thanks in advance for any help. Much appreciated.

Jim

Attachments

  • DSCF8189.JPG
    DSCF8189.JPG
    490.3 KB · Views: 220
  • DSCF8191.JPG
    DSCF8191.JPG
    499 KB · Views: 214
  • DSCF8211.JPG
    DSCF8211.JPG
    666.6 KB · Views: 221
  • DSCF8212.JPG
    DSCF8212.JPG
    356.3 KB · Views: 212
  • FR-808.jpeg
    FR-808.jpeg
    63.4 KB · Views: 219

Aleph P Noise issue

Hi All

I have an Aleph P (remote model) that have noise issue from one of the channel.
I’d sent it to a Pass Labs authorized distributor for servicing and was told the had done what the could and I am left to my own devices due to short availability with parts.
I really do not want to part with this lovely Preamp and hope that I can some how fix the issue.
I’ve recorded a short clip of the noise . A pair dummy load were inserted to the inputs to prevent and self noise from the input stages, the output was recorded through a AD/DA with a DAW. I’ve checked the tape out, there is no noise issue.
Hope to have someone here to point me to where I should start with the fault finding. I am not a tech but hopefully with the guidance here I may be able to somehow fix this wonderful Preamp.
Thanks all
Jason

Filter recommendation (using Hypex Software Design)

Dear forum members,

As I am pretty far outside my comfort zone, I hope to offend no one by asking. A forum search did not give me the answer I was looking for (if there is any).

My father-in-law and I have converted my B&W CM8 S2 speakers to active monitors by removing the filters, replacing cables and using two (one per speaker) Hypex FA123 modules.

B&W CM8 are three-way speakers, 4 Ohm (in contrast to what they market), have crossover frequencies at 350 and 4000 Hz and have two identical, parallel mounted bass drivers.

I've spend a whole day measuring using REW and and UMIK-1 microphone and building filters to get the hang of the REW software. The first results are promising. As I will embark on another day of measuring together with my father in law (who has deep knowledge on the physics of sound and the working of audio electronics but no experience in the software itself) I hope you can provide me with some tips.

My questions would be:
1. What would be the most logical order of building the filters/adjusting the timing? I have used this approach so far: Using REW to Determine Time Delays Between Drivers - Technical/Modifications - The Klipsch Audio Community.
2. What would be, given the type of speaker (B&W CM8 S2) be the most logial filter design. I have started with a fourth order Linkwitz-Riley filter but I had to delay th tweeter 40 microseconds for a proper frequency response curve.
3. What is the optimal microphone distance for designing the filters?
4. Does anyone have any general recommendations for this project?

Thanks in advance,

Geert

2SK133 temperature.

I´m currently working on a Nemesis-esque amp using a single 2SK133 lateral Fet per channel, mounted on a pair of questionable junkbox heatsinks. At 29,8V and 0,715A (~21W) I can put a finger on the TO3 "hat" but after ten seconds or so it´s not very comfortable. The thermal coupling seems ok, the heatsinks are almost as hot as the transistor casings.
Is this too hot for a good long-term reliability? The heatsinks in question would work well for the chassis design I have in mind.

I tried to measure the temp by applying some thermal grease on the sensor of a regular house thermometer and leaning it against one of the transistors, giving a 47,5 degrees C reading. Propably not the most trustworthy method...

Cyrus dAD1 repair

I am trying to restore Cyrus dAD1. Maybe it is not worth the effort - it really looks cheaply made - but I would like to add CD player to my Cyrus ONE line that matches the looks.
I have run into problem I need some help with: when I insert the CD and close the tray it does not mount the CD(00 is blinking) and CD drive does not engage. If I push PLAY the tray opens but nr. 1 is displayed on screen. However if I disconnect(unplug) the tray motor and close the the tray manually CD is recognised and will play normally.
The problem is somewhere on the PCB(I have Quattro that shares the identical mechanism and switching these the problem stay with dAD1). So I think that after closing the tray its motor should be switched off and only CD motor remain in the active circuit. There is a TDA7072 for tray motor control and TDA7073 for CD. Also there is a mechanical switch that engaged by rotation of tray gears that I don't know what it is doing.

B1 NuTube Preamp, accidentally inverted power, diode 1N4739 9.1V dead, can i use 1N4740 10V short term/long term?

Hi

As mentionned in the title, I accidentally inverted the power delivery while building the B1 Nutube Preamp. Lasted for 20/30sec, time for me to figure it out.
I remplaced the capacitors of the power supply section.
With the correct polarity, i get 24V across resistor (T1, 1st measurement)
But the 9.1V diode 1N4739 at T4 doesn't give me anything and the 270ohms resistor is warming up very fast.

So, i happen to have at disposal some 1N4740 which are the same family but would give 10V if not mistaken.
Hence my question
1) Can i remplace the 1N4739 by a 1N4740
-short term just to test if power is now OK and if this diode is the only thing to change
-even long term if it works and it doesn't impact too much the circuit
2) Should i remplace others components (resistors) because they might also have gone bad / have degraded ? (wouldn't think so, but since i will be changing components...)

Newbie question for sure, but if somebody has a quick answer, that would be very helpful.
(if not, would wait for the next online order of components to have the right remplacement)

Take care and have a nice day.

Absorption on outside of cabinet

HI, I searched for quite a bit but couldnt find any answer on this forum or others. I had the idea of what if you build a frame surround on the outside of the cabinet for the sides and rear of a speaker and simply used absorption say 4-6" thick.

Similar to a baffle mount except out in the room and of course frequencies below what the absorption material can absorb would still propagate. My question is has anyone else tried this to reduce side/rear wall reflections and how did it sound?

Seems like a way you could experiment without having to alter your speakers.

Regards,

Eli

Beolab 2 restoration

I picked up an old Beolab 2 that's been sitting in storage for some time. The radiator panels have become a bit melted and sticky, in fact I can scrape some goo off of them.
Is there any way to restore them without having to replace them (also a challenge to find the parts)?
Would solutions like Goo Gone work without damaging it?
If I keep taking the film off on the surface, will I actually reach a point where it is no longer sticky and looks good?
IMG_20220704_221355.jpg

Pics for reference, thank you!

Attachments

  • IMG_20220705_191233.jpg
    IMG_20220705_191233.jpg
    394.4 KB · Views: 296

Refreshing an inverted bearing thrust plate with diamond lapping paste

Hi all,


I wanted to share my experience with this in case the results are of value to anyone else. I am the second owner of a Townshend Rock MKIII turntable (see more info here if you aren't familiar with it Townshend Audio Rock Mark III Turntable), and I have had to do innumerable repairs to get this turntable back into tip top operating shape.


One of the most common needed repairs is refreshing the bearing - this deck uses an inverted bearing design. Most Max Townshend designs (maybe all?) have some variant of this, so he created a document that explains how to refresh bearings on his turntables that takes a 3 step process of using a fine engineers file, 1200 grit sandpaper, and a metal polish like autosol to remove the dimple at the top created by the ball bearing.


I noticed my turntable was starting to experience some speed issues - notably wow that could be heard on piano note decay and other long drawn out tones. I opened up the bearing and noted that mine had the dimple on the thrust plate and also my ball had several spots of corrosion or rust of some kind, so I figured it was time for a change.


I reached out to Max Townshend and he provided me with the document I mentioned above, so I proceeded to acquire all the components for the three step process. There ended up being a slight problem with his advised methodology: it didn't work at all. For one, the thrust plate (about 1/4 inch in diameter) on my turntable was sunken into the tip of the bearing about one millimeter deep, so running a file over the top to remove the dimple was impossible. Secondly, the plate is made of tungsten carbide, so the 1200 grit sandpaper and the Autosol polish simply dodn't work on it because the material is too hard. I noticed that the thrust pad just looked worse after I attempted to run the sandpaper over it because the aluminum rod I was using was scoring the material through the sandpaper. I asked a machinist and he said tungsten material moves around easier than the material being removed, so scratches show up but the sandpaper does nothing. Hours spent using the Autosol yielded no results.


Frustrated that the manufacturer instructions had failed me, I started to research how to polish tungsten carbide. There is so little information online I was afraid it was impossible, but what did keep popping up was diamond lapping pastes. I ordered a 7 piece set of mirror finish diamond lapping pastes from Amazon that began at 5 micron and went all the way up to .25 micron. Since Max's document recommended 1200 grit sandpaper for smoothing, I checked a comparison chart and decided to order an additional container of lapping paste that was 14 micron - the equivalent of 1500 grit sandpaper. I hoped this would work for the initial material removal since it was closer to the 5 micron starting point of the other pastes. I also ordered a set of 100 felt polishing tips for my Dremel tool.


This combination worked. Using the 14 micron paste on the dremel polishing tip I was able to remove the dimple in the thrust plate, and also all of the scoring damage that I had caused trying to use the sandpaper. After I finished with each grade of paste I would clean the thrust plate and surrounding area with white mineral spirits. I would then start with a new dremel tip and work on the plate with the next grade of lapping paste, going all the way up to .25 micron. At 1 micron the mirror finish was already evident. At the end, I had a thrust plate that looked as good as new.


I had ordered a tungsten carbide ball to replace the rusted steel one, Max Townshend told me it would work fine, although I'm not sure if I should trust that because now I have a super hard material rubbing against itself in the bearing. Regardless, once this process was done, I recharged the bearing fluid, dropped the subplatter on top, and hooked it up. What a marked improvement in sound - so much cleaner. The long tones don't wobble any more, and everything sounds so much better. It was hard work, but I'm glad I did it!


I hope that is helpful - I'm not sure if other turntables run into this issue, but I'm happy to answer any questions!


The attached picture is of one of the stages of lapping paste being applied with the dremel tip.

Discrete opamp RIAA preamps

Hi guys, (not sure it's the right forum)

i'm looking into building myself a new phono preamp, i'm in a recording studio environement and i'm looking for transformer balanced outputs circuits.

I often build mic preamps using discrete opamps like the Api 2520 and John Hardy's 990c, they are still very often used in studios for their sound and drive abilities.

The schematic are out there for phono preamps but i find very little info on people who have used or build them.

See attached pictures of a phono pre based around the Api 2520 and 990c opamps.


Has anybody has experience with them or what do you think of the topologies?

thanks,
John

Attachments

  • 20220712_112347.jpg
    20220712_112347.jpg
    187.9 KB · Views: 417
  • Screenshot_20220712-112417.jpg
    Screenshot_20220712-112417.jpg
    166.8 KB · Views: 419

For Sale K&K Audio pairs of Basic CCS, Cascode CCS and Cathode Current Sink kits

SOLD Asking $75 for all 6 kits, shipped to the Continental USA

I can provide pictures of the kits, but here is an old link to them

http://www.kandkaudio.com/other-kits/

I have 6 unbuilt kits from Kevin when he ran K&K Audio until recently. They are handy if you have a need for them. I will provide the kits as sold, and the original documentation for each kit from Kevin.

(2) Basic CCS kits using IXTP08N100D2 mosfet, up to 100mA capable

(2) Cascode CCS kits using IXTP08N50D2 AND IXTP08N100D2 mosfets, large on board heatsinks for up to 7W/100 mA

(2) Two Terminal Cathode Current sink kits using FQH8N100C mosfets on external sink you provide, up to 400VDC, 400mA

Aleph3 is very hot!

Hello colleagues! A clone of Aleph3 was brought to me. It was assembled by a master unknown to me. In a large aluminum case with large heatsinks. Chinese boards inside. The amplifier works and works very well! That is VERY good! However, it gets very hot. The temperature of the radiators is about 60 degrees Celsius! I have read that the circuit of this amplifier is designed in such a way that, with serviceable parts, it does not require adjustment. I admit that this is his normal mode of operation, but still it seems to me that he is excessively hot. Therefore, I have a question. Can I check the operating modes of the transistors and make sure that everything is in order or is there still a problem. It's still a Chinese assembly! Thank you!

Mixer architecture and postfade amps

I am trying to design a simple 4-channel DJ mixer using circuits from Douglas Self's Small Signal Audio Design exclusively. There are some extensive mixer architecture diagrams in that book that are very useful but much more complicated than what I am trying to make. In those diagrams one can see some "postfade amplifiers", such that the faders can provide some gain, usually up to +10dB. Attached are 2 diagrams I came up with for my system, the difference being the position of the postfade amp. The first diagram presents one postfade amp in each channel module, similar to what a traditional mixer would do according to the book. However, since the overall architecture is much simpler, I notice I can move the postfade amps down the signal path, namely after summing the channel outputs. Doing this would save me quite some components. Is there any reason why I shouldn't do this?

Attachments

  • mixer.png
    mixer.png
    31.3 KB · Views: 178
  • mixer_2.png
    mixer_2.png
    29.2 KB · Views: 170

Passive crossover for MA 7HD WAW?

Currently designing a bookshelf speaker with MA 7HD in sealed 9.5L chamber joined with a sealed woofer chamber (~7" wavecor) with woofer mounted on the side. Correct me if wrong, but a side-mounted woofer should ideally be limited to ~200hz max, so as not to have any potential voice content (in the 300-500hz range?) shooting sideways into nearby books.

I'm targeting a passive crossover and I've seen suggested that the natural rolloff in the sealed 7HD chamber is good enough to be left alone. This leaves just a crossover needed on the woofer itself, with low crossover in the 150-200 range being ideal, right? (Yes, I know components to achieve this are $$). Let me know if I'm thinking about the right way.

Thanks!

XLR balanced variable output > 2 unbalanced outputs (inverted and non-inverted?)

My Topping Pre90 is fully balanced differential with separately buffered XLR balanced and RCA outputs.

Current application for Pre90 variable outputs:
  1. RCA output 20-ohm > RCA IC > RCA input of main amp > main speakers
  2. XLR output 40-ohm > XLR/RCA adapter 20-ohm non-inverted pins 1-2 > RCA IC > RCA unbalanced input on 2 sub amps (one per L/R ch) > subs

I have a 3rd load, a separate integrated amp with RCA inputs only, to drive discrete reverberant field speakers, one behind each main speaker. Instead of a regular parallel 1 to 2 splitter for the RCA or XLR output, I propose the splitter described below:

Pre90 XLR output > XLR to dual RCA splitter/adapter (RCA #1 comprises pins 1-2 non-inverted, RCA #2 comprises pins 1-3 inverted):
  1. Non-inverted 20-ohm output > RCA IC > sub amps > subs
  2. Inverted 20-ohm output > RCA IC > Reverberant Field Integrated Amp > invert speaker cable polarity on reverberant field speakers

If there's a better option to derive a 3rd variable output, please describe it and state why it's better. I presume, maybe wrongly, that the above-described method is best because it employs a separately buffered source for each of the three loads. Any normal parallel splitter parallels the inputs of 2 loads, minimizing the input Z for no benefit.

Lab supply on a shoestring

Here is a small lab supply project.

It is very basic yet complete, and has many desirable features that simple projects based on 317 or 723 lack:

-Voltage and current variable from zero to the maximum without swiching.
-Uses very few and common discrete components: 4 small signal transistors, one medium power and the power ballast, plus two or three caps and a pinch of resistors.
-No auxiliary supply required
-Since it is discrete-based, voltage and current ranges can be chosen freely, without the voltage restrictions usually associated with ICs
-On/Standby switch, and visual indication of the current mode
-Low drop-out architecture meaning it's, ...well, low drop-out obviously, which is good for an effective utilization of the transformer, but also that it is inherently a current regulator servoed into voltage and it can react very quickly to overcurrents. This, coupled with a minimal output capacitance means a very good protection for the tested circuits.
-Stable to within millivolts for line and load regulation, and good temperature stability. Not metrology grade, obviously, but quite sufficient for workshop use, ideal for beginners.

Here is the schematic, dimensioned for a very classical 0-30V, 0-2A.


Some details and pics will follow.

Attachments

  • MicroLabGr.png
    MicroLabGr.png
    47.7 KB · Views: 1,070

Usher 8945P pair in usa

Sold.

In nearly new condition. Played for a few weeks hooked to subwoofers so no bass below 100 hertz. (Used Euphase KM-U2 crossover with Usher 9950 tweeters.) Bought from forum member that bought them new and stored them without playing.
Sound and look excellent. Have original boxes.
Shipping from California 95521. Please tell me your zip code so I can estimate shipping.
Asking 190 plus shipping charges.
Thanks, Don

Attachments

  • 03043E17-22D3-419D-971E-FE11EAE6E575.jpeg
    03043E17-22D3-419D-971E-FE11EAE6E575.jpeg
    1,022.3 KB · Views: 113
  • ECE5DBD1-A059-4B94-9CCE-933CF2EDBFED.jpeg
    ECE5DBD1-A059-4B94-9CCE-933CF2EDBFED.jpeg
    694.9 KB · Views: 98

Passive radiator out of phase issue.

I asked this question now and then.but never really got a definite answer. So far it seems to me that passive radiators are effective at their resonance frequency. But outside it they still add a little low end blurry background..muddying the sound. Plus they are moving 180 degrees out of phase or produce sound with 360 degree delay. Would it be safe to say that passive radiators are another way to cheat bass out of smaller volume. Bass is less composed and accurate than from a sealed box

Audio Research SP-11 MK2 Bloom powersupply

Hi,

What can possibly cause this mess?
Can this happen if the MC7812CK is faulty?
Both fuses are blown and the elcos leaked.
I Hope it‘s not a problem upstream in the amp Box.
I think I‘ll first desolder the cables from the power tranny and measure the secondaries. Although I don‘t think it‘s to blame; what do you think?

Thanks for your help
BR
Olaf

Attachments

  • 2E71A140-7DDD-4DB3-8333-B08157A35AA3.jpeg
    2E71A140-7DDD-4DB3-8333-B08157A35AA3.jpeg
    435.1 KB · Views: 258
  • E7CA3C6E-4971-42CE-9502-66E860CE845E.jpeg
    E7CA3C6E-4971-42CE-9502-66E860CE845E.jpeg
    477.6 KB · Views: 273
  • A48771FB-1127-4307-ABBF-80BAF9993239.jpeg
    A48771FB-1127-4307-ABBF-80BAF9993239.jpeg
    450.4 KB · Views: 236

Fake TPA3116D2 IC on amplifier board

Hi everyone,

Wow, I just received a 100W TPA3116D2 Subwoofer amplifier from Aliexpress, hooked it up and found the output was really low.

I took the heatsink and found a nice surprise! A 16 pin chip marked TPA3116D2 but the real thing is 32 pins. What the???

Here is the link to the item I purchased:
https://www.aliexpress.com/item/1005002966206658.html

Has anyone come across this?

Attachments

  • 20220712_225832_resized_1.jpg
    20220712_225832_resized_1.jpg
    308.3 KB · Views: 615
  • 20220712_232644.jpg
    20220712_232644.jpg
    315.1 KB · Views: 864

PS Audio IV preamp

Before i put it on ebay, i thought i will ask here. PS audio preamp, in great shape, working fine, all contacts clean. Have been used as phono preamp mainly. It has both mm and mc inputs, swith on the bottom. Great sounding phono section for vintage audio.
No power supply, it takes 2x24 VAC. I was powering it with regulated 2x28 VDC, and it was absolutely quiet. Cable to plug external supply is provided.
Since i made few standalone tube phono pre, and standalone tube line pre, this PS audio is sitting idle.
Cosmetics 8/10.
Yours for $280 plus $35 s/h in us.

Attachments

  • 20220706_164800.jpg
    20220706_164800.jpg
    435.6 KB · Views: 264
  • 20220706_164812.jpg
    20220706_164812.jpg
    439.5 KB · Views: 254

Germanium Headphone Amplifier from China (using Toshiba 2SB292)

Hello All,

Got this little amp to use with my Sennheiser HD599 headphones.
It came ready built and I just had to provide it with a proper power transformer and a power supply (using an LM337 reg at 20 VDC).
Will provide more details on the actual PSU I am using, in a following post.

The transistors are Toshiba PNP 2SB292 (https://www.web-bcs.com/transistor/tc/2sb/2SB292_cpl.php) and the output transformers are rated for 32Ohm.

Here is the schematic:

1657207454375.png


It seems that the 200kOhm resistor in parallel with the 200kOhm pot sets the bias on the device.
However, I am completely clueless on what to look for to set the right bias for this circuit.
Any help regarding proper bias, will be appreciated !!

Pics of the actual board with its output transformers:
1657207533850.png


1657207583329.png


The amplifier is working OK. Not any noticeable hum or noise.

However, compared to other headphone amps of mine (Lehmann BCL clone, OTL tube amp by Aren van Waarde, Zen-style amp by Tortello and other) it sounds pretty thin. It lacks beef at the lower end of the spectrum.
Otherwise it sounds OK mid-band and higher up.

So, I wonder if there is something to look for, in order to improve things there.

Thanks a lot for reading!
Nick.

Thought experiment on size of output stage....

Without going overkill… what’s the minimum number of output devices needed to run a 4 ohm resistive load close to clipping assuming….
  • +/-110vdc rails unloaded.
  • 1.6kva Toroids ( two 800va units with single 0-80vac taps unloaded)
  • 4x 33,000uF caps (160v)
  • Class AB Config
  • 0.47R emitter resistors with about 6-8mV across each device.
  • Assume adequate heatsinking and MJL4302/4281 Or MJL21193/94 devices…

Single voltage OCL amplifier

I plan to design some single power supply recently. Amplifier suitable for switching power supply.
The voltage range of power supply is DC12 - 60V. Use a single power supply. There is no negative voltage.
BTL structure is adopted. The output has no capacitance.
It is somewhat similar to the tda2005 structure. I think many people now only have some single voltage switching power supplies.
This makes them unable to DIY amplifier. Because dual voltage power supply cannot be purchased in many places.
Traditional transformers weigh a lot.
In fact, all analog amplifiers. CLASS AB。 Can use single power mode.
It can use the floating power supply of quad606.
Or use the BTL mode of tda2005.
https://www.diyaudio.com/community/...-scheme-class-ab-tda2005.388198/#post-7070292
It's easy. So that friends who only have a single power supply do not need to make class D amplifiers with poor performance. For example, tda3116. I think these things are a waste of time. DIY without sound quality has no meaning.

Best option for 9V rechargeable batteries

Hi !
i have taken the decision to try rechargeable batteries as power supply.
I decided this on the basis of a post of a great audio designer using a 9V battery to power a very low noise amp dealing with uV signals.
I need about 9-10V and possibly 4-5000 mAh
I have found Turnigy brand but i have no clue about which would be the best battery solution.
Do you have any suggestion ? anyone using batteries for low V and low A devices with success ?
Thanks a lot indeed. gino

Job listings

I remember as a kid when friends would try to make their job applications look like their current job was fancier than it was. The classic was "food services hostess" for working at a fast food place.
Now job listings are doing the same thing, the titles sound fancy but hidden in the job description is the truth that 99% of the job will be customer service or cashiering.

With great lines like "while empowering you to learn, grow and deliver" which means "we are going to suck the life out of you, while pretending to care"
"As an Inventory Specialist, you will be collaborative and inclusive in helping our customers while being part of a fun, team-oriented retail culture. " = "We are calling the job inventory specialist but you are mostly going to be customer service and we will just blame you for inventory issues"
"....maintaining accurate inventory controls within the store." = "try not to steal too much product and we appreciate it if you snitch on other employees if they steal stuff"
"You will also coach other team members to..." = "you get to bitch at other employees to make you feel better"
" and maintain a neat and clean store" = "as the new guy you get to clean the toilets"
"Understand and use basic selling skills to engage and present solutions" = "customers are going to yell you at"
"Be flexible in performing other duties as assigned" = "someone just threw up on isle 3"

How to stretch mylar and heat treatment!

Hi!

I started to refurbish QUAD ESL63 panels around 1999 and around 2001 it went more serious, a separate workshop was rented together with a friend.
Hostaphan of different thickness in big rolls was purchased and we developed a "perfect coating"... the coating lasted for approx 10 years, so it was not perfect after all. The Hostaphan film stayed stretched!
A lot of testing was done in a not so scientific way, also heat treatment was done with heat gun. But everything can be done slightly better so thats the background of the information in this tread.

This tread is about the properties of polyester film, BO-PET, and you will see that it is not that simple as you may think.
The film has different properties and tensile strength in X and Y direction.
And this is important if you want to stretch the membrane really hard since it will relax slightly over time....
A good stretched membrane will stay almost straight when there is no signal:
1655651903950.png


Too much relaxation means that the film will stick to one side and almost touch the stator:
1655487651947.png

And when the membrane is too relaxed you can get arcing and hiss noise, arcing is producing ozone, and ozone will make the film brittle and it will tear apart and get "rotten". The glue holding the membrane will also decompose or degrade in contact with ozone.

To measure the performance we need to do some testing of the tensile strength and the elongation.
When you apply tensile force to the film it will start to break at the weakest point which usually is where you fixate the film.... Over 20 pieces was tested and 6 of them "worked" by breaking somewhere close to the middle.
Some tape helps out a little bit.

1655487921660.png


Clamping force is crucial.. and many tests has to be done before you get one that breaks where you want it.
I have a MOV movie but could not download it here of the actual "happening" when it breaks...

So here is some snippings..
1655488358745.png


1655488466231.png

Some milliseconds before it breaks..

1655488537568.png

And finally it gives up.

The test jig is moving 50mm/minute and the force is monitored continuously.
There is a difference between X (width) and Y (length) direction but more sample has to be tested with carefully mounting to get better data.
It is also extremely important how you cut the test pieces. Even a small scratch on the surface introduces a force concentration and it will break long before it´s real maximum.

Here is a table with some more or less successful measurements. Test is performed at 21deg C.
1655488916682.png


Nr 2, 3, Is in the longest direction, the winding direction of the roll so to say.
Nr 4, 10, 11, and 12 is in the shortest direction, side to side. The spread of data is as you can see to big to draw any conclusions for now.
Wider pieces will be tested to reduce the influence of irregularities from cutting the film.
Here is a graph:
1655489509598.png


And on 6 samples we can theoretically do a calculation, even though we know that there was some issues when the sample was prepared.
The orange and green curve has a different slope compared to the others, that we can see clearly.

1655489666131.png


This is a good beginning. Or what do you think?
Next step is to measure the influence of heat, you know about the "heat gun" stretch and the "baking" of the film in an oven as we have seen QUAD is doing.
I do not find it but if you know you can post the reference further down, Thank you!
A little teaser for next experiment before bed time...
1655490413080.png

1655491019655.png

With this test jigg you can adjust the chamber temperature (chamber is not attached in this picture, but you get the point.
Same force diagram is plotted as previous, but here you can adjust temperature within +/- 0,2 deg C. Good enough.
After stretching at a certain force, you heat up the chamber/membrane to a certain very specific temperature where the polyester molecules actually starts to tensioning the diagram even harder! I will explain the physics later on.
And if you exceed this temperature point it will relax instead and then if you heat it even more it will break.... game over.
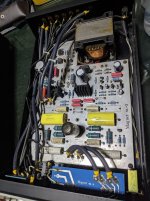
We need to characterize this better than the attempt above, and also better than the stretch jig i developed >20 years ago, and actually is still working very good by the way!
If you want to make a good long lasting electrostatic speaker, maybe you can learn something here.

Attachments

  • 1655486788762.png
    1655486788762.png
    3.2 KB · Views: 361

FS: E1DA Cosmos ADC grade A

For Sale: E1DA Cosmos ADC
Grade A, Almost new / looks and smells new. Never been disassembled.
Reason for selling: additional funds for audio interface.

Price is 140USD + 18USD shipping.

<ITEM SOLD>

Attachments

  • 288614677_982694128949669_2799685956958903083_n.jpg
    288614677_982694128949669_2799685956958903083_n.jpg
    435.2 KB · Views: 133
  • 288635929_419026336799067_3649694048512660636_n.jpg
    288635929_419026336799067_3649694048512660636_n.jpg
    379.5 KB · Views: 132

Coupling Caps Question

Controversial topic but I'll ask: In your experience, is it worth upgrading coupling caps? I'm debating this for a Bottlehead Moreplay, which sounds good built stock. But maybe we can make it a bit smoother, warmer, etc. sounding ... (?)

First question, what do orange drop caps sound like versus other caps you've compared them to?

From previous personal experience, there's a lot of expensive caps out there that aren't worth the cost or trouble (a lot of these caps are really big and heavy).

Second question: if it's worthwhile in your experience, any recommendations? Auricaps seem like a good bet for their sonics, light weight and small size, for example. I don't mind spending decent money on, say, Vcap Odams or Jupiters (which worked well for series on tweeters), but curious to know your experiences with tube coupling application

FS: Mini-me MM phono preamp

For sale fully populated PCBs (power supply and phono stage). PCBs are 2mm thickness, immersion gold and greater cooper thickness. All resistors are Vishay-Dale RN type and CMF. RIAA capacitors are polystyrene from LCR brand. Coupling capacitors Jantzen Audio Superior Z-Cap. Power transformer from Amplimo model: 2N1357.See attached pictures.
Beautiful sounding phono preamp. Bonus: 4 Tubes 6N16B NOS.
More info and schematic here:
Mini-Me phono preamp

Price reduced: 200 euro, shipping included in EU. PayPal fees included.

IMG_20210602_154753__01_copy_993x777.jpg
IMG_20210602_154802__01_copy_993x892.jpg
IMG_20210602_154815__01_copy_993x655.jpg
IMG_20210602_154829__01_copy_993x544.jpg
IMG_20210602_154640__01_copy_993x1525.jpg
IMG_20210602_154649__01_copy_993x825.jpg
IMG_20210602_154710__01_copy_993x599.jpg

TDA7498 no output

Not DIY but I need some assistance.
I purchased a Lepai LP-7498E with the TDA7498E amplifier board.
When I first connected it and powered it up it worked great.
After turning up the volume to higher levels the protection kicked in and it shut down.
I disconnected the power supply and checked my wiring but didn't notice any issues.
I tried it again and there was no sound output.
I thought perhaps it was because I ran it on a 4 ohm load, so I tried an 8 ohm load and there was still no output.
I swapped the power supply but that didn't work either.
I tried another set of speakers but still no sound output.
I opened up the case and didn't see any visible problems, no popped caps, no burn marks.
What troubleshooting steps should I perform to find the fault?


Any help would be greatly appreciated.

From AA 4/82 "A Tangential Tracking Tone Arm" Kit

This kit tone arm was published in Audio Amateur 4/82 and I got one in a trade
still in the box. I'm wondering if anyone has built it, seen it work, or heard
anything good/bad about it?

I looked over the documentation and remember reading the article when it came out.

What I like about it is that it has a pivot like a normal arm but with photo sensors for
when it goes even slightly off linear which are used to ramp up or down the servo
speed. This way if the servo fails it just works like a normal arm but with the usual
tracking error, the bearing also, sort of decouples the arm from the servo movement.
Clever, I like that aspect.

TDA7498E (ETR) strange clipping issue

Hello to everyone,
I'm Fabio, and I'm working on a personal layout of the TDA7498E circuit as described in the Evaluation Board Application Note by ST.
I will try to be brief but all-encompassing to explain you at better all the elements of my situation.

I was a record producer until 2020 with big live experience and a lot of passion in electronics and, latter discovered, in precision mechanics, especially in the audio field.
With my small and new enterprise (since october of the past year) in the south of Italy, I'm preparing a prototype of a special portable amplifier for travelling musicians, and this small class-D amp appeared to be the best choice for the purpose. Please consider that in the small enterprise I'm the only worker and the inventor of the product, and at the moment I'm facing substantially everything (general&administration, project R&D, patenting, CNC lathe and mill machining for any part, circuit designing and building), so I'm facing the last phases of a huge work started four years ago, when I made the first, very simple and basic version of this portable amplifier.
Also, I would ask sorry in advance for my poor english and for my limited competence in electronics because especially in this field I'm totally a self-taught.

The PCB I developed for this project is a single-supply unit powered via Li-ion battery pack with 36V and 10Ah (with BMS inside) and shares rails for auxiliaries voltage regulators, a class-AB power amplifier for the tweeter and finally the TDA7498ETR dedicated section.
The two channels of the TDA7498ETR are connected to a small dual-coil woofer (sell as subwoofer), STEREO mode and gain set to 35.6dB (directly connected to VDDS).
The signal comes from a BOSS preamplifier/compressor unit at the moment. The signal level, checked on the scope, doesn't reach more than 4Vp/p as requested from the TDA7498 data sheet.

Despite my layout is very compliant with the Application Note, starting from:
-decoupling and snubber filter in DUAL solution toward ground as SMT components positioned extremely close to the amp IC;
-same way for any other requested component near the TDA7498E in the input section;
-solid and simmetrical design on the board;
-signal ground isolated by ground and connected without vias directly to negative terminal of the 4700uF bulk capacitor dedicated to the amp (supporting another 2200uF for anything else); 15uH chokes with Isat 6.25A;
-in short: fully compliant to the Application Note;
and the whole board works like a charm (after three different revisions), I'm experiencing a strange clipping issue not discussed elsewhere, the reason why I ask the community help.

Next to the battery pack input connector on the board I provided a multimeter, set as Ammeter, to check the whole quiescent current of the entire circuit and everything's fine for my expectations: less than 200mA.
But what I noticed is a very very bad clipping from the speaker with high transients in the LF part of the signal, when the current measured in the circuit goes over 1A RMS.

Initially I tried different solutions, swapping the 4700uF bulk capacitor with a 10000uF, tried with different chokes and also chokes in parallel (reducing the inductance in the output filter to 7.5uH), changing capacitors in the output filter and also improving main switch cables and removing bleed resistors from the two bulk capacitors on the board, but with no luck.
Most importantly, this kind of clipping seems not due to some sort of built-in protection circuitry because its destructive behaviour (after different trials, the TDA7498ETR explodes).
Before it fatally reached this point, I was looking to the output pins of the IC on the scope, noticing a "strong compression (40-60%) with slight distortion" in the PWM train when my volume reaches the clipping margin.

The strange clip occurs when the total current of the circuit goes beyond 1A RMS... but it happens with transients only.
In example, turning fully counter-clockwise the volume and plucking the bass string, then rising the volume for the sustained note, the Ammeter can give up to 5A and more.

In the reference schematics, you can see the decoupling capacitors of 1uF on the positive input pins. With the floating input the circuit switches on/off very fine, but with the preamplifier connected directly, the sistem starts with a big oscillation under 2Hz, that stabilizes and disappears gradually, so I provided another 1uF in series between the preamplifier signal and the input capacitors, solving the oscillation trouble.
Then, while troubleshooting, I noticed an improvement (more potential headroom on the volume knob before clipping) changing this further decoupling capacitor from 1uF to 100nF before the two positive input pins (so in series with the 1uF decoupling caps described on the reference design).
Clearly lacking a bit of bass frequencies.
As the whole apparatus is intended to be a sealed box, and I was experimenting the functionality of the electronic boards with the speaker mounted into the opened box, I noticed a further improvement (quasi-full potential headroom on the volume knob) simply closing the box.

At this point, my suspects were pointing on the small woofer because its strange Thiele&Small characteristics, having measured a very small linear Xmax... something like 2mm.
My choice went on this specific speaker because I was looking for the best tradeoff between costs and performance for my project. And it was performing quite good, so I decided to work on it as project reference.
Could the solution be in the damping network, that must be redefined due to the electrical characteristic of this particular (abnormal kind of) woofer, commercially known as subwoofer? Clearly I'm expecting the best of its 100+100W output from this small ST monster... after so much work and expense on it.

Still sorry if I dwelt. Hoping and waiting for any hint or suggestion from You and thanking in advance, I wish you a good evening and a nice weekend
Fabio
Projects by fanatics, for fanatics
Get answers and advice for everyone wanting to learn the art of audio.
Join the Community
507,696
Members
7,884,526
Messages

Filter

Forum Statistics

Threads
406,055
Messages
7,884,526
Members
507,696
Latest member
fabianMM