And do we want air tight waveguides?")
Well.. In theory the individual walls of the construction should be completely solid with no micro perforation.
The theory behind this mental sidetrack. Lecture 21: Microperforated Panel Absorbers-1 - YouTube
Keep up the truly amazing work that’s being done here. Don’t loose any momentum because of my comments.
Well in theory you might get a tiny suck out/dip in the response of axis as the wall act as a helmholtz resonator absorbing around the tuning due to the tiny holes and the volume of air behind the holes.
But in reality.. probably not a problem.
Edit: the access to the paper I was trying to add was restricted but can be found here: https://researchrepository.rmit.edu...h&vid=61RMIT_INST:ResearchRepository&offset=0
But in reality.. probably not a problem.
Edit: the access to the paper I was trying to add was restricted but can be found here: https://researchrepository.rmit.edu...h&vid=61RMIT_INST:ResearchRepository&offset=0
Last edited:
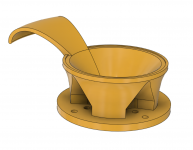
I think I will try to print and compare to the one I printed in one piece. And I will try to CNC the front part in one piece from XPS with 3D printed bottom since I finally got some MDF for a new spoil board. The flat back would be very easy to CNC in 3D with a ball mill. Thanks for the STEP file by the way, it is very nice to experiment with different manufacturing methods on this smaller scale first.
Best so far is a thin layer epoxy and sanding.
Like this product: XTC-3D™, High Performance 3D Print Coating | Smooth-On, Inc.
They only mention use for SLA or SLS, not FDM printers most of us are using. I can't see why that should matter, do you know?
I have used a slow setting epoxy used for casting that self levels pretty good on FDM prints.
It fills in the layer lines and it is easier to sand than PLA.
This video shows the process and summarize what you could expect.
Does Epoxy Resin Work for Smoothing 3D Print Lines? - YouTube
It fills in the layer lines and it is easier to sand than PLA.
This video shows the process and summarize what you could expect.
Does Epoxy Resin Work for Smoothing 3D Print Lines? - YouTube
So what happens with the performance of the waveguide if the walls are actually microperforated?
Just curious.
These kinds of things are difficult to do theoretically. The only real option is through testing, but this can also be problematic.
For example, fill a waveguide with foam and guess the wrong density and it is a disaster. Test a range of densities and you can find one that works well.
In your situation it might be difficult to control the porosity of the boundary and this may a very large effect. Some may work well others not so much.
Sure. I don't plan to do that, I was only curious.
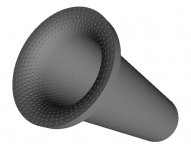
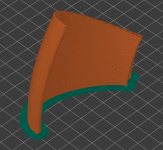
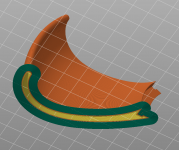
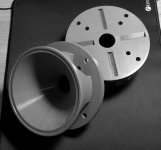
- ST260 kit. Anyone willing to try the concept?
STL files: https://at-horns.eu/ext/ST260-kit-v1.zip
- ST260 kit. Anyone willing to try the concept?
STL files: https://at-horns.eu/ext/ST260-kit-v1.zip
Attachments
As I asked for it I'll give it a try but I doubt I'll be the first to finish- ST260 kit. Anyone willing to try the concept?
ST260 kit. Anyone willing to try the concept?
Yes, I'll certainly give it a try!
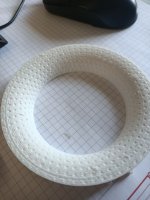
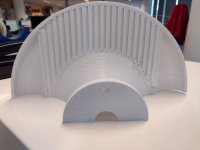
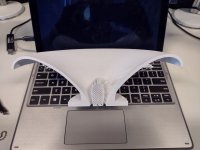
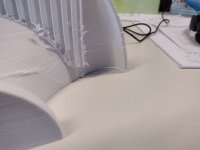
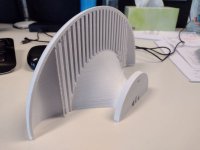
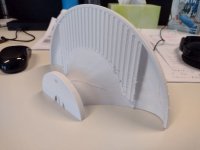
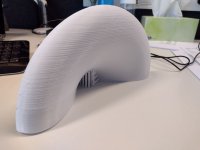
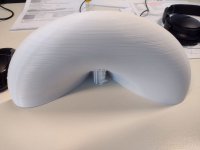
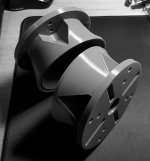
Hot off the printer, PLA 6 hours - first try fun.
Tiny bit of warping that I'll implement a minor change to try to overcome......
Attachments
Sure, print the base and try one petal and tell me, I'll add some tolerance
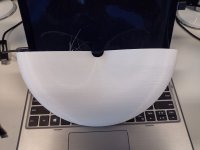
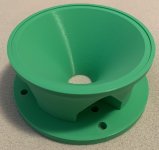
I printed the base overnight, unfortunately it detached from the bed at one side so I'll probably have to do it again. But it's quite strong even from PLA (20% infill). I'll upload a picture later, it's nice overall, I like it.
I printed the base overnight, unfortunately it detached from the bed at one side so I'll probably have to do it again. But it's quite strong even from PLA (20% infill). I'll upload a picture later, it's nice overall, I like it.
I guess one could easily print the petal without the bottom side completely. Then just pour some liquid. You could even leave the brim temporarily (the adhesion supporting layer around the wall) to easily level/trim the filling. The wall itself can be made as thick/strong as necessary.Could it be that the edge lacks the stripes / fill?
Those with better printers can print as many petals at once as their printer accommodates. I do it one by one. Maybe I could try more. One petal for ST260 should take around 50 minutes.
Attachments
Last edited:
Anyone smooth ABS printed horns in acetone or PVB in alcohol?
I have not, but I'd be curious what others' experiences are.
- Home
- Loudspeakers
- Multi-Way
- Acoustic Horn Design – The Easy Way (Ath4)