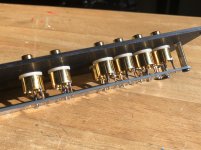
Yarra RCA sockets
He is correct! Audiophonics shorted me one socket, so I gave theses ago.
Taiwan-made gold-plated RCA turntable DAC decoder digital coaxial PCB board sock | eBay
I’m pretty sure they are the same. The pins are movable.
Also available on Ebay.
Taiwan-made gold-plated RCA turntable DAC decoder digital coaxial PCB board sock | eBay
I realize these are 90 degree. With a little elbow grease you can switch the positioning pins and bend the leads back straight. I've done it with success on my AKSA Lender Preamp board.
He is correct! Audiophonics shorted me one socket, so I gave theses ago.
Taiwan-made gold-plated RCA turntable DAC decoder digital coaxial PCB board sock | eBay
I’m pretty sure they are the same. The pins are movable.
That’s a great price. Make sure you get some skinny nuts to mount them to the back panel. link shown in thread earlier.
Thanks for tip on low cost source of these parts.
Thanks for tip on low cost source of these parts.
Yarra Preamp Update
Hello active and soon to be active Yarra builders 🙂
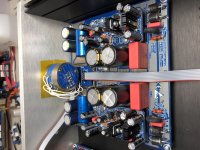
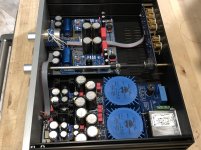
I thought I’d share some info and pics of my completed preamp (well, is any project really complete? 😀).
Over the past couple of weeks, I’ve been playing around with different Melbourne and PCA daughter board setups (WBA18 soon also), mixing and matching amplifiers. First of all, the possibilities seem endless!! So far, I like the max gain I get from the Melbs to drive my MoFo amplifier. The PCA’s mate perfect with the Alpha20 and V4H amps.
I’m not going down the standard “Audiophile Adjective” subjective description path. What I will say though is the only combinations I did not prefer were the lower gain PCA boards with the MoFo and the higher gain Melbs with the other two amplifiers. Other than that, all the combinations sound excellent with zero background noise and fantastic “toe tapping” mojo!
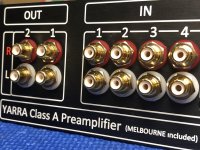
The Yarra psu utilizes the Talema 22v trafo’s and I decided to use the Manley Labs panel mounted RCA sockets. I robbed a P&G volume pot from an old preamp not used anymore.
Hello active and soon to be active Yarra builders 🙂
I thought I’d share some info and pics of my completed preamp (well, is any project really complete? 😀).
Over the past couple of weeks, I’ve been playing around with different Melbourne and PCA daughter board setups (WBA18 soon also), mixing and matching amplifiers. First of all, the possibilities seem endless!! So far, I like the max gain I get from the Melbs to drive my MoFo amplifier. The PCA’s mate perfect with the Alpha20 and V4H amps.
I’m not going down the standard “Audiophile Adjective” subjective description path. What I will say though is the only combinations I did not prefer were the lower gain PCA boards with the MoFo and the higher gain Melbs with the other two amplifiers. Other than that, all the combinations sound excellent with zero background noise and fantastic “toe tapping” mojo!
The Yarra psu utilizes the Talema 22v trafo’s and I decided to use the Manley Labs panel mounted RCA sockets. I robbed a P&G volume pot from an old preamp not used anymore.
Attachments
-
 EF9ACD76-DEBD-4CC6-B0A7-D144EEDA4886.jpg982.9 KB · Views: 503
 -
 C004A615-FE62-4666-AC51-525467481ADB.jpg921.2 KB · Views: 508
 -
 1FB55C10-B40E-460B-9287-EED949890FC8.jpg1 MB · Views: 512
 -
 D0814054-F431-4D9C-8B96-9D0F21AA3558.jpg1,004.2 KB · Views: 521
 -
 B56A54C0-A26D-47C8-A7EF-A7A3D6938C13.jpg788.4 KB · Views: 484
Hello Yarra PCA builders,
Vunce has done the hard work of verifying that the following resistor settings work well for the 2SK209GR and 2SK170BL JFETs.
YARRA PCA w/2SK209GR
R121 - 33R
R123 - 47R
This modification drops Yarra voltage from 29v to 21v on the PCA board.
R103 + R104 = 5k4
R105 = 440R
R106 = 1360R
R112 - R115 = 560R each
This setup gives 90mA bias
—————————————
AKSA LENDER w/2SK170BL
Voltage after capMx is 20.5vdc
R103 + R104 = 2K
R105 = 75R
R106 = 680R
R112 - R115 = 560R each
This set up gives 75mA bias
#### also note well, if you jumper the output coupler cap on the PCA board, you need to use the Yarra motherboard output coupling caps. The output bleed resistor needs to be reduced to 680R to prevent high output DC offset.
Change motherboard R126 and R136 to 680R (originally 47k).
On PCA:
C101 - replaced with jumper
C111 - eliminated
C112 - replaced with jumper
R101 - eliminated
I will be using Melbourne DB for my Yarra, the BOM listed 2 pcs 12v+12v transformer.
However, i kept seeing most of the build pictures here, uses 22v+22v transformers.
May i know which one i should use ?
However, i kept seeing most of the build pictures here, uses 22v+22v transformers.
May i know which one i should use ?
Hi Meanie,
If you intend to drive a 0dB gain amp like an F4 or MOFO, you should go with 22v in order to drive 40Vpp into the amp to make 25wrms. If you want to use it more like a traditional preamp with circa 10dB to 12dB gain, then use a 12v or 15v transformer. Note that for MOFO or F4, the gain will need be set around 29dB in order to get the maximum swing from the power amp. The Yarra is acting as the input stage and VAS stage basically.
If you intend to drive a 0dB gain amp like an F4 or MOFO, you should go with 22v in order to drive 40Vpp into the amp to make 25wrms. If you want to use it more like a traditional preamp with circa 10dB to 12dB gain, then use a 12v or 15v transformer. Note that for MOFO or F4, the gain will need be set around 29dB in order to get the maximum swing from the power amp. The Yarra is acting as the input stage and VAS stage basically.
Oh no, I bought the wrong transformer!
I should have double-checked instead of ordering blindly from the BOM list, my bad.
My intention was to be able to swing 40Vpp, so as to drive my M2X without a DB thru a DC coupling cap at the input.
Other than the transformer change,is there any other components that i need to change in the Melbourne DB for the 40vpp swing?
Here are some pics of my input RCA connectors, i machine the black delrin spacers to locate those connectors in place.


Nice work Meanie! I think you are ok if your intention is to drive the M2X without the input board, but still have the Edcor signal transformer. The Edcor is the sound signature DNA of the M2, if you take it out, it is no longer an M2.
The Edcor provides about 6x gain, so your preamp only needs to provide about 6.7Vpp. If it was your intention to bypass the Edcor and drive the amp output MOSFETs directly with the Yarra, then indeed you will need the higher voltage transformer for the Yarra.
The Edcor provides about 6x gain, so your preamp only needs to provide about 6.7Vpp. If it was your intention to bypass the Edcor and drive the amp output MOSFETs directly with the Yarra, then indeed you will need the higher voltage transformer for the Yarra.
Thanks X, for the great news.
My intention was to keep the Edcor line trans, and everything else driven by Yarra.
My intention was to keep the Edcor line trans, and everything else driven by Yarra.

Nice work, Meanie! You are going for the WBA18 right off the bat!? Good idea to use output coupling caps as that pre has some DC offset wandering. Nice sounding preamp though. Sometimes easier to check to make sure daughterboards work with bench supply. Verify that bias current across output transistors is all in order and DC offset adjusted to be close to zero. It’s very sensitive to local temperature - touching the TO92’s will drift the DC output hundreds of mV.
Have you verified the Yarra PSU is working? That’s the first thing to do. Don’t forget to connect earth GND from PSU board to a crimp ring terminal, screwed to the middle bolt home on the back of the main board.
Good luck!
Have you verified the Yarra PSU is working? That’s the first thing to do. Don’t forget to connect earth GND from PSU board to a crimp ring terminal, screwed to the middle bolt home on the back of the main board.
Good luck!
Meanie, nice work and those Wima caps look imposing 🙂.
Good luck with rest of the build, and hope you can start listening to music with this preamp soon.
Good luck with rest of the build, and hope you can start listening to music with this preamp soon.
Verified the power supply section works, max voltage I get was +/- 17.8Vdc from the 12+12V transformer setup. I brought the rail voltages back down to +/- 17.0 Vdc.
Next, I tested the BA18 DB on the bench supply, was able to set the output to about single-digit mV, can't do any better coz it drifts with just blowing some air on it, it is that sensitive.
Installed everything up into the chassis, upon power up, PS section produced Magic Smoke !!!
Took me all morning to troubleshoot the problem, finally found out those flanged nuts are not applicable in these situations, as the PCB pads are just a little small for them.
I usually uses them as they are very secure for earthing purposes.
Then finally it sings !


Pls, remember to jumper 2 connections on the Yarra mainboard, if not there will not have the signals at the rear RCA outputs.
Just sharing, good luck!
Next, I tested the BA18 DB on the bench supply, was able to set the output to about single-digit mV, can't do any better coz it drifts with just blowing some air on it, it is that sensitive.
Installed everything up into the chassis, upon power up, PS section produced Magic Smoke !!!
Took me all morning to troubleshoot the problem, finally found out those flanged nuts are not applicable in these situations, as the PCB pads are just a little small for them.
I usually uses them as they are very secure for earthing purposes.
Then finally it sings !
Pls, remember to jumper 2 connections on the Yarra mainboard, if not there will not have the signals at the rear RCA outputs.
Just sharing, good luck!

Installed everything up into the chassis, upon power up, PS section produced Magic Smoke !!!
Took me all morning to troubleshoot the problem, finally found out those flanged nuts are not applicable in these situations, as the PCB pads are just a little small for them.
I usually uses them as they are very secure for earthing purposes.
Then finally it
Just sharing, good luck!
Nice work meanie!
Your Yarra is singing away🙂
Just a suggestion for you, discard the nuts with toothed washers. They will cut into the solder mask and the exposed vias are too close and will create a short, as you found out. Use an M3 flat washer with an M3 nylon locknut.
Enjoy the music!!
Metric Nylon Insert Hex Lock Nuts - Stainless Steel DIN 985 18-8 / A2
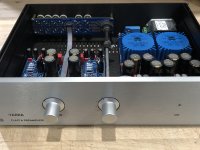
Korg 6P1 Preamp for Yarra
Now for something really cool!
For all you Yarra fans, the preamp that keeps on giving. 🙂
JPS64 has been busy and hard at work, so we now have this option to play with. A Korg 6P1 tube preamp!!! How cool is that?!
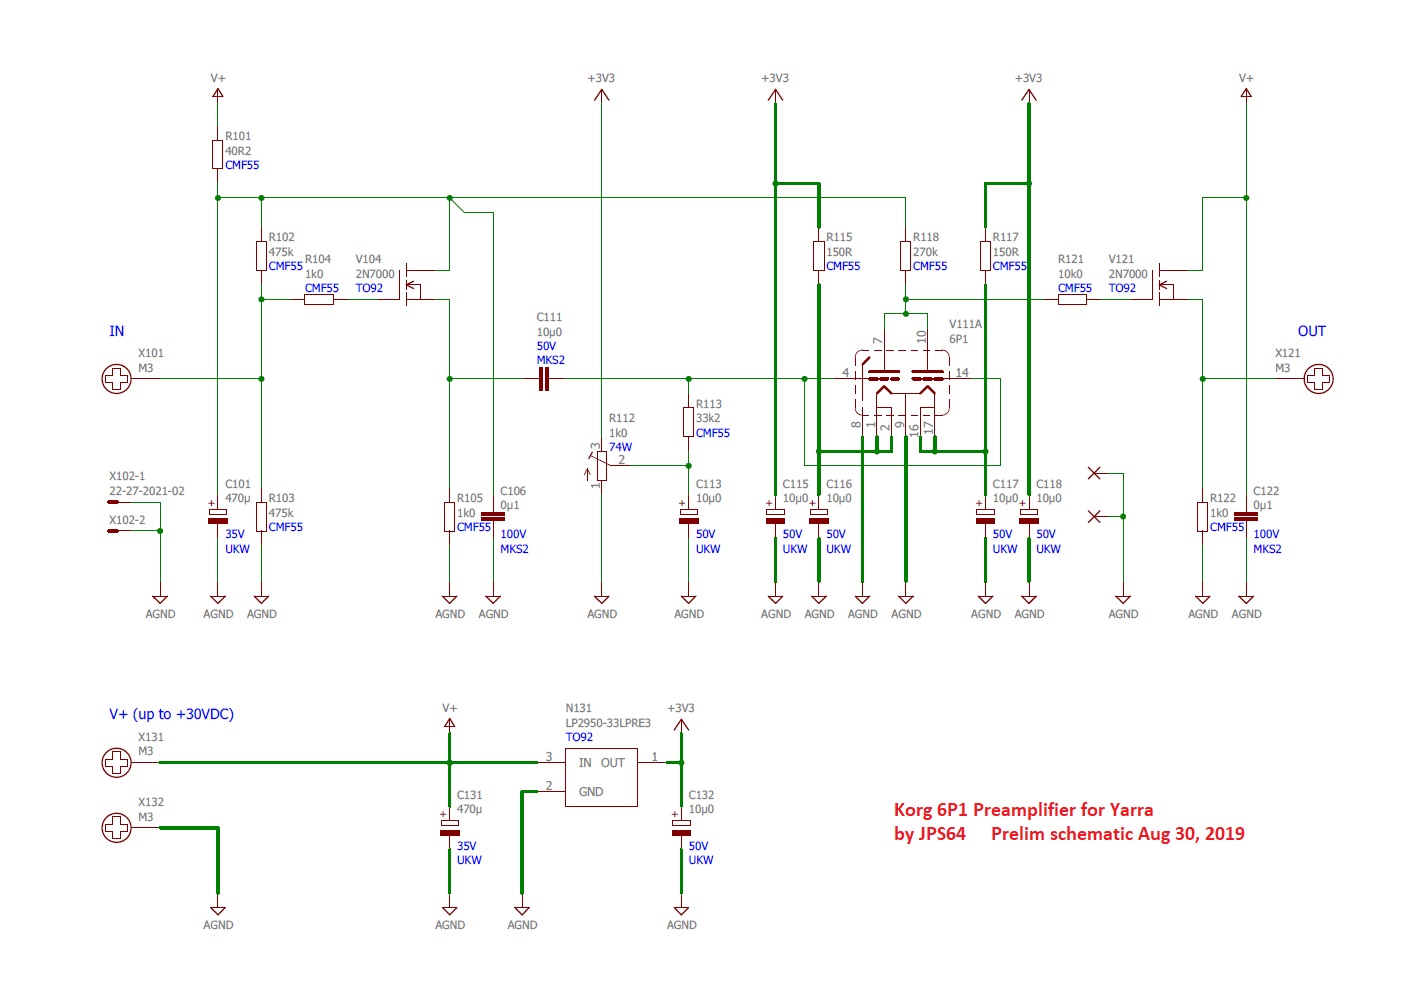
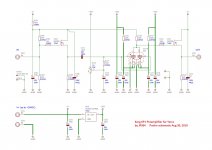
Schematic:
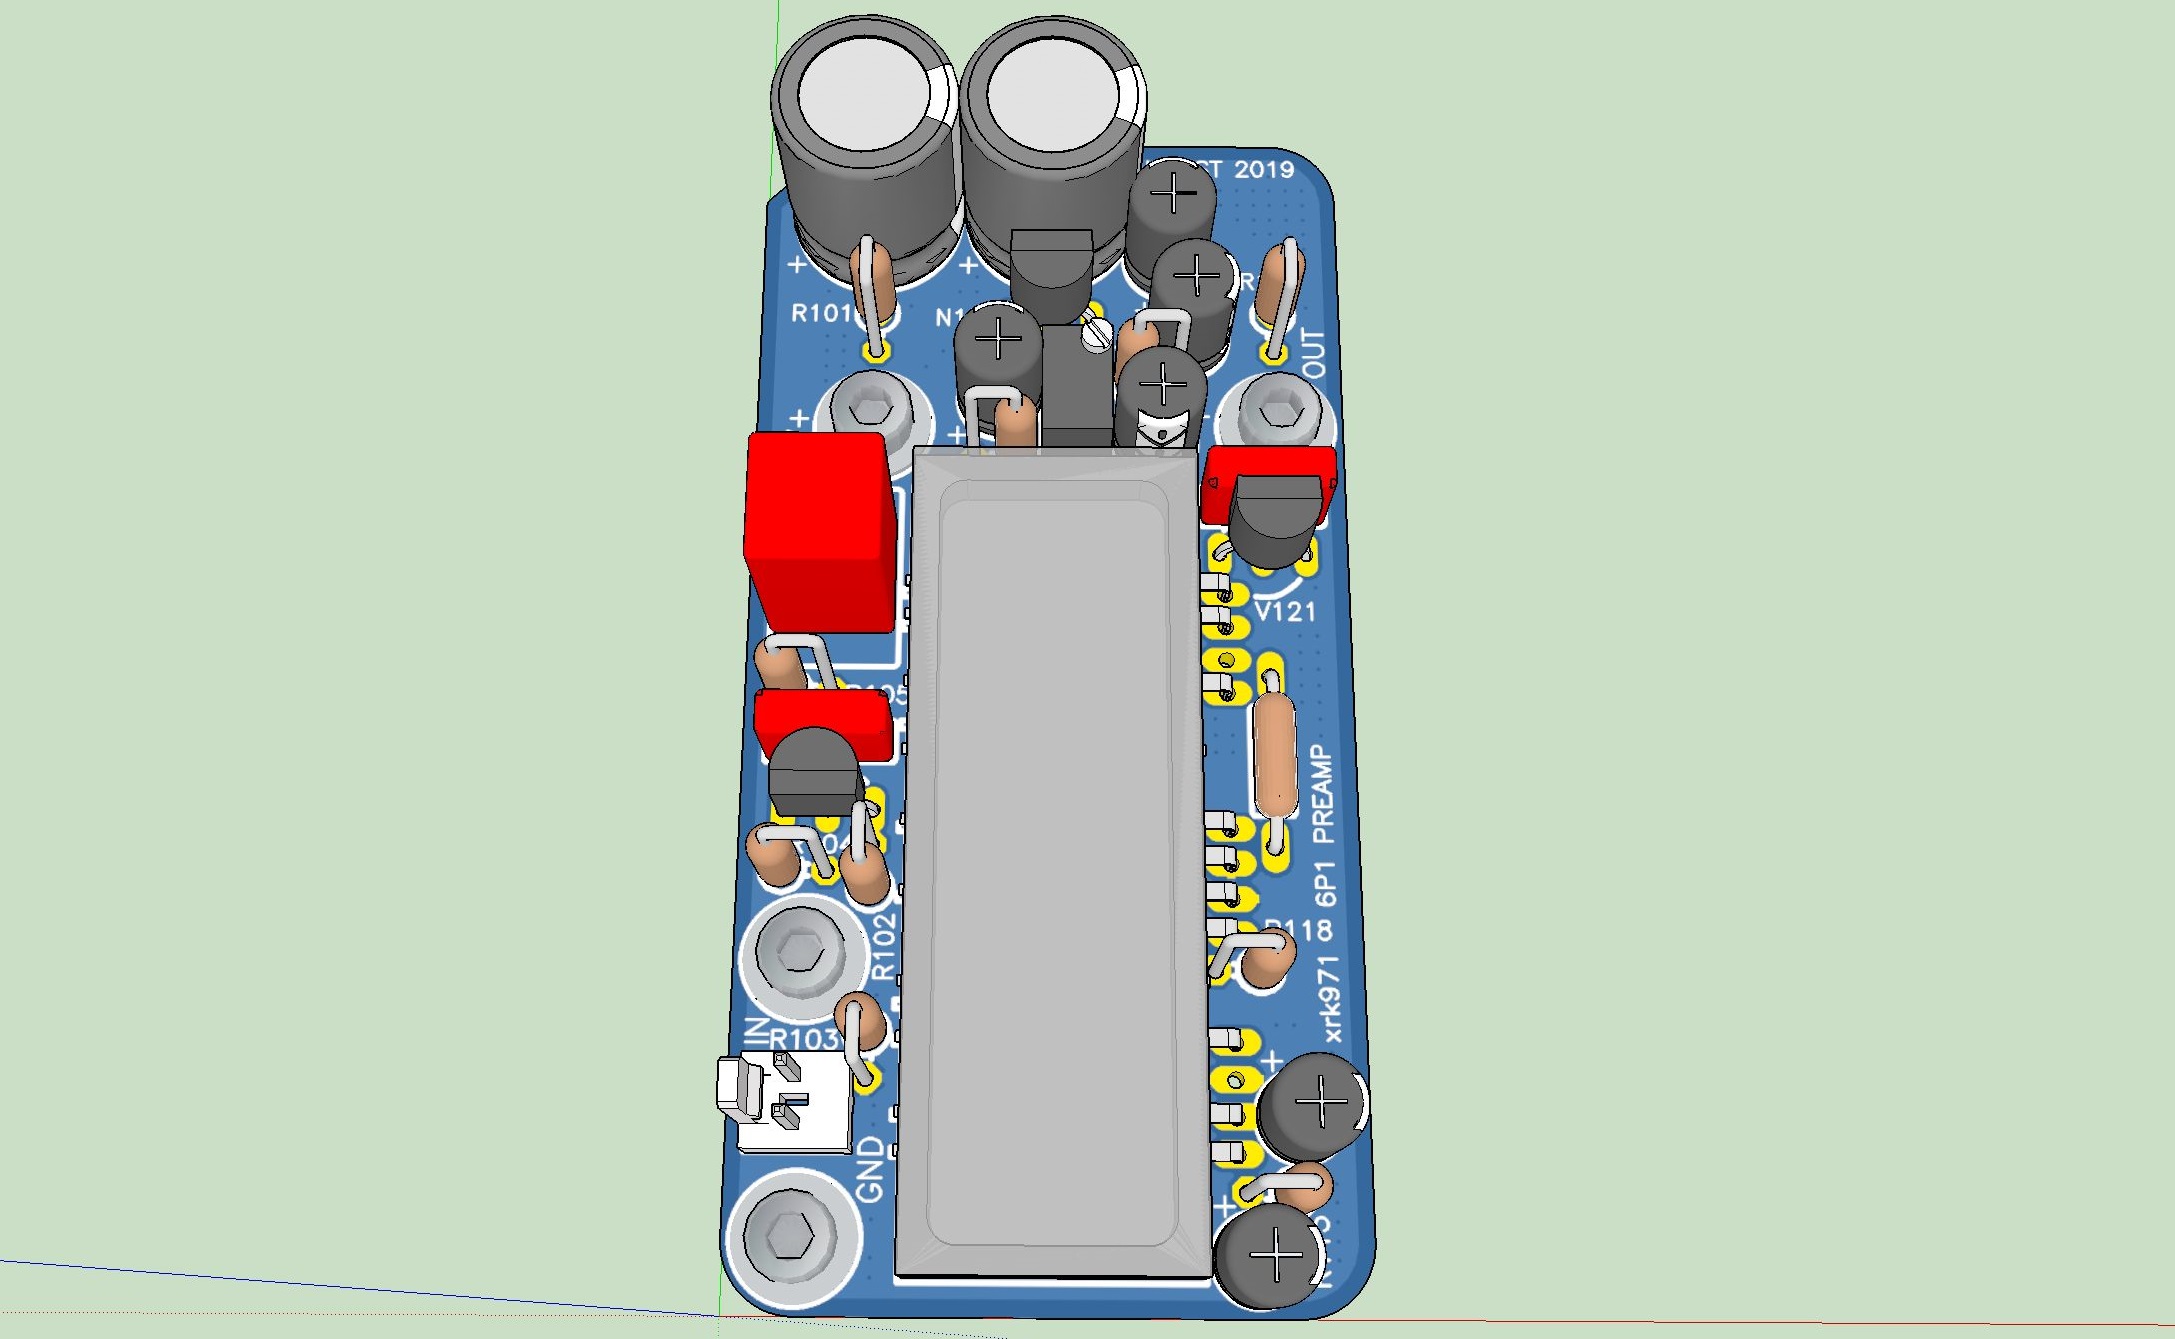
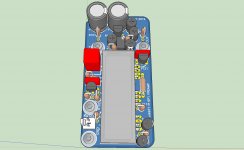
3D render with components:
PCB only render:
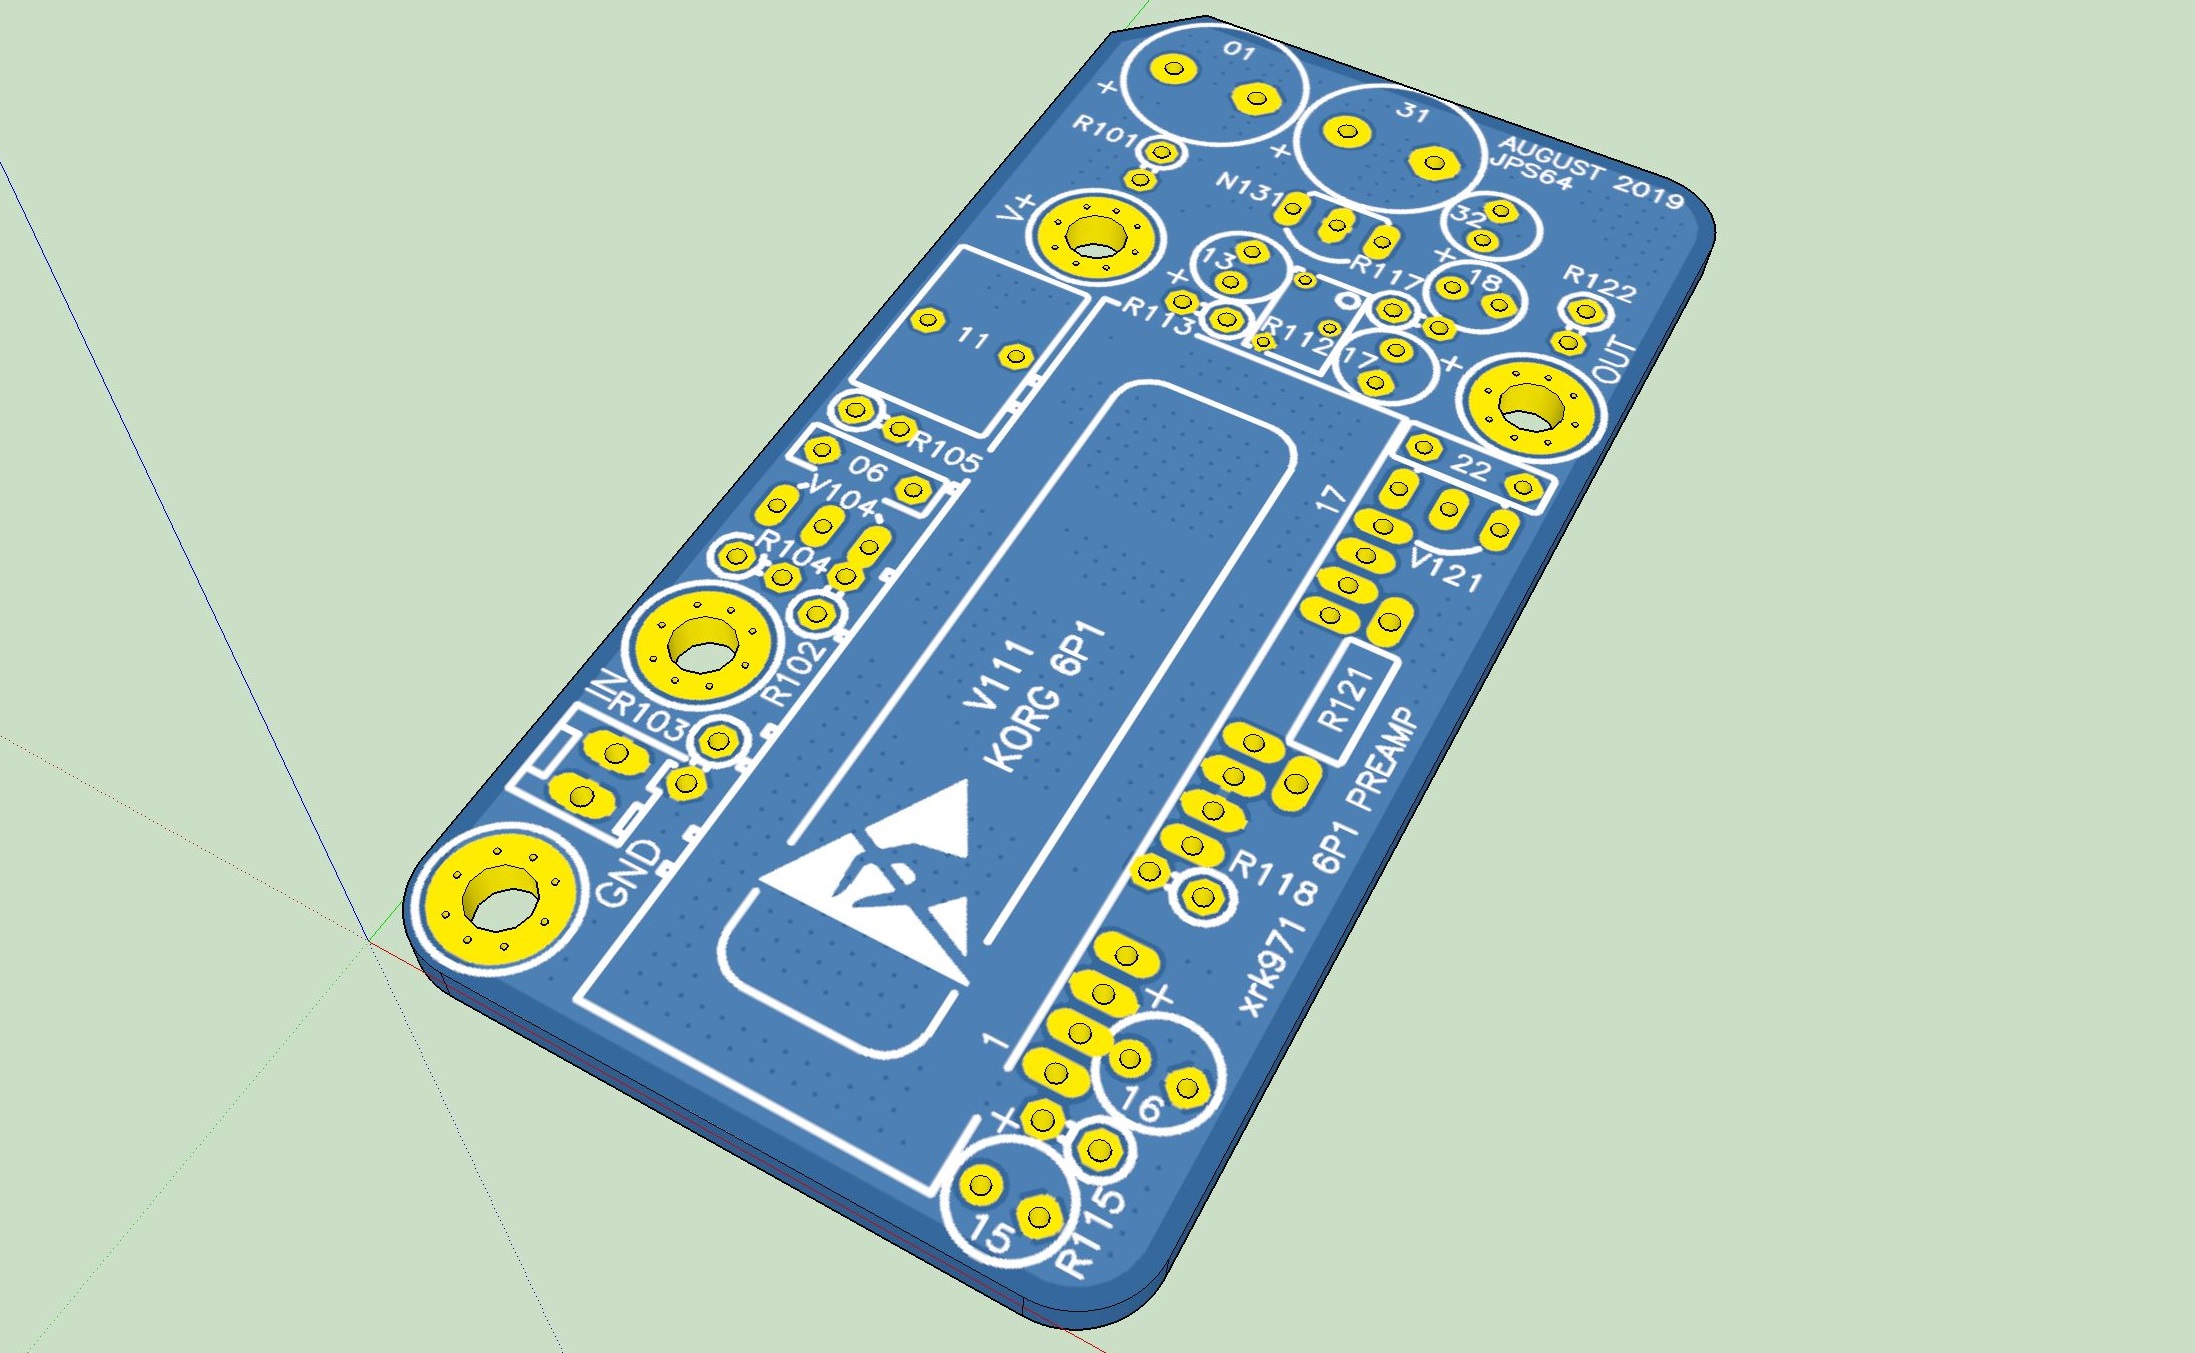
Top View Stuffing Guide:
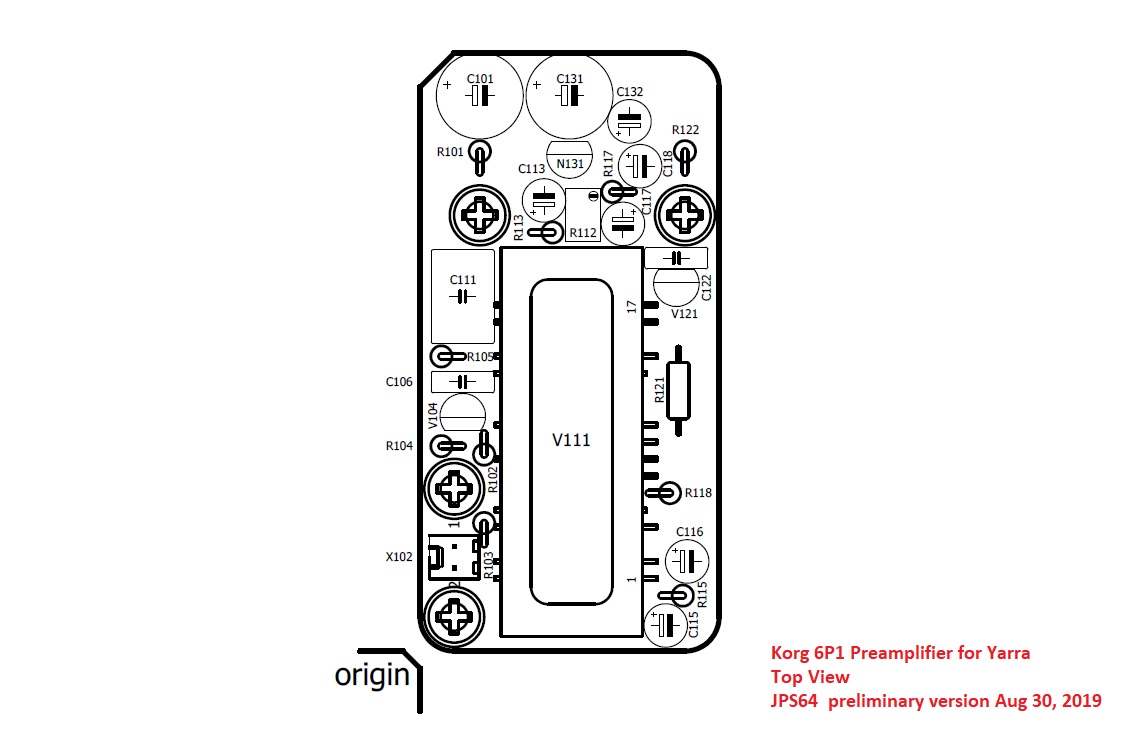
So what do y'all think?
Thank you, JPS64 for another beautiful gem!
Now for something really cool!
For all you Yarra fans, the preamp that keeps on giving. 🙂
JPS64 has been busy and hard at work, so we now have this option to play with. A Korg 6P1 tube preamp!!! How cool is that?!
Schematic:
3D render with components:
PCB only render:
Top View Stuffing Guide:
So what do y'all think?
Thank you, JPS64 for another beautiful gem!
Attachments


- Home
- Group Buys
- The YARRA Preamplifier/HPA for Melbourne DB Group Buy