Can’t say I’d take a flyer on a mystery box, especially from a seller who focuses on purple prose and gets the detail on the ‘tables the power supply is for wrong.
I've built the Mike Barney PSU and it works beautifully. I have a spare PCB . If you'd like it, send me a PM.
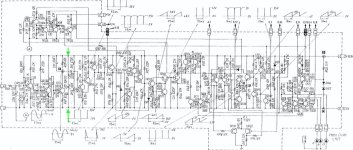
Hi, Thanks for the offer, have learnt a lot from reading more about the supply. But I would not use a 317 chip in any power supply, it's just to noisy. And obviously with only 5 & 35 VDC, It becomes an easy build be high end low noise components.
If fact with such a low power draw, you could run the thing of off batteries. Two 14 & one 8 VDC - 7 amp SLA batteries give you 36 VDC with a step down to 32.5.
Cheers
If fact with such a low power draw, you could run the thing of off batteries. Two 14 & one 8 VDC - 7 amp SLA batteries give you 36 VDC with a step down to 32.5.
Cheers
Why do you think the LM317 is noisy? Any component can be noisy if not implemented correctly. The Timestep PS uses LM317 regulators and if implemented correctly the LM317 can have a ripple rejection of up to 120dB.
Batteries for example have high thermal noise.
Batteries for example have high thermal noise.
Attachments
This is the paper I was looking for it shows how good the LM317 can be if implemented correctly. How many DIYers use low ESR electrolytic caps in the output and bypass which increases noise significantly, Tantlums or high ESR electro are what's needed.
Attachments
Trying to change thrust ball and the pearling cup. Unscrewed bottom metal cup and now facing 3 problems:
1) have no idea how to get the ball out.
2) have no idea how to pull the rotor out to get the the bearing cup
3) do I need to add any lube when I put new thrust ball in?
Could you please advise on these specific steps? As they are not described in details I assume it should be straightforward. Thank you!
Your reach out for further guidance is a good call.
Being patient and being very careful, it for the better, investigating all suggestions offered with a cautious approach, rather than acting in haste and ending up with situation that is not a easy fix.
I can assure you I make this suggestion from experiences I have had, the end result has not turned out as expected, due to my having put a few of my own ideas into practice without seeking a advice.

Hi, There is a bog on this site about how to make the 317 quieter (called the De-Nosier) which may make it acceptable.
My electronics work so far is with phono pre amps, You would never use the 317 in any respectable & high end Phono amp.
Just think beyond the square, possibly now thinking about it a little more a try a :ion 36V battery pack
https://www.aliexpress.com/item/100...id=2023050614535410128224301737680006681440_2
Cheers
Trying to change thrust ball and the pearling cup. Unscrewed bottom metal cup and now facing 3 problems:
1) have no idea how to get the ball out.
2) have no idea how to pull the rotor out to get the the bearing cup
3) do I need to add any lube when I put new thrust ball in?
Could you please advise on these specific steps? As they are not described in details I assume it should be straightforward. Thank you!
1. Hard wood dowel, soft brass drift, etc. Best to support the brass bushing - if the ball is stuck you could knock the bushing loose if you support it by the motor frame. Easy to fix if you do but best to avoid. However, you're won'e have access to pop the ball out if the rotor is still in place...
2. Pull the two rubber caps to access the screws for the retaining plate that prevents the rotor from lifting out. Once that's off just lift it out.
3. Of course. You should make sure the shaft and bore are very clean (lint-free wipes, etc.) and apply fresh oil. Technics oil or Anderol 465.
4. Reassembly: #69
Also it is not very clear if I need to remove the brake before I can get access to those rubber caps and screws for the rotor removal?
Thank you so much!
So does it supposed to go up or down (with respect to this orientation)?View attachment 1171797
I don't understand the question.
Also it is not very clear if I need to remove the brake before I can get access to those rubber caps and screws for the rotor removal?
Yes.
I'll chime in since I had a tight ball. I posted on the removal a while back but can't remember the thread #.
1. Your last post about the brake is confusing because it is assumed that you removed the motor in its entirety..
Start there. Take the entire motor out of the chassis. The 12 pin female connector will have to be unconnected from its male counterpart in the chassis.. You should have nothing but the entire motor with the motor wires and 12 pin female connector.
2. Remove the bearing cap. A whole different discussion
3. Remove the small plate on the mounting flange. It may or may not have rubber caps on it.
4. With the motor right side up, grab the spindle and pull the the rotor out. The dowel goes down the spindle hole.
5. The ball sometimes is very stiff in the hole. The motor should be rightside up for this.
a. Take a wood block and drill a hole in it a little larger than the 9/32in ball. That way you can rest the sleave on the block to take the load when you knock the ball out.
b. Make a hardwood dowel that goes down the spindle hole to the ball with enough length you can hit it with a hammer and not hit the motor. It should be a true hardwood. I used ipe.
c. Rest the motor on the block with the ball over the hole.
d. Hit the dowel with a hammer. You can start semi light and increase the "power' of the hit as you go. It will come out. Mine took a fairly good hit.
All this is discussed in the thread. I recommend you read it.
Don
It is looking like I have now got the Donor Model for the Kaneta Design.
It is quite a tatty chassis, but no great concern as this is no longer required.
It has a long journey before I get my hands on it.
I have had two offers with assistance to produce a Power Supply.
My Phosphor Bronze Platter will soon be in use on a SP10 MkII as well, so the experiences that have been planned are nearer their fruition.
Thank you everyone for the help! The job is completed. Now need to assembled my refreshed sp10II and adjust the speed. Pretty excited as it has been more than 7 years since its been seating in my queue of projects 🙂
- Home
- Source & Line
- Analogue Source
- The Incredible Technics SP-10 Thread