Would these devices work in place of 2SC2547E both are currently available and are low noise.
Fairchild KSC1845FTA or NTE199
Fairchild KSC1845FTA or NTE199
Sharif & Russell - great!! Thanks for letting me know!
@Hdonly - DIY Rye Stout eh? Looks certainly great to me! Would love to try that!
@Hdonly - DIY Rye Stout eh? Looks certainly great to me! Would love to try that!
@Hdonly - DIY Rye Stout eh? Looks certainly great to me! Would love to try that![/QUOTE]
It's always better when you "Do it Yourself" Right?
It's always better when you "Do it Yourself" Right?
Checking twice before plunking down $5 for this...
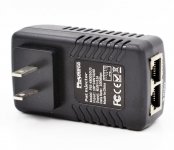
Hard to beat this wall-wart for the price - will .5A provide enough current to drive the High-Octane preamp?
Thanks! - Sixto
Hard to beat this wall-wart for the price - will .5A provide enough current to drive the High-Octane preamp?
Thanks! - Sixto
Oh, I actually really like wall warts.
The old ones have EI-cores with low capacitance between the windings which keeps high frequency line junk out.
In addition they're located far away from the phono circuit which prevents humm pickup.
The high octane comes with a strong regulator which eliminates any poor regulation that might come from the cheap wall wart. Just use an overkill unit with a 0.5-1A rating or so.
Attachments
Ha ha ha ha! I was doing great, till I looked at that dinky little THS4031CD. When I first grabbed the bag, I thought they forgot to put it in the bag. Then I saw it and the horror began to set in. To think I actually had to solder that to the board. I guess it just didn't register with me. being a newby to such things. I soldered some DIP components a while back, but this is untried territory for me. Now where did I put that magnifying visor I have around here some where? I need to tear some stuff apart and put it back together for practice before I touch this. Any suggestions for a new guy to surface mount soldering?
Use a magnifier, solder one pin to be sure the Ic îs well positioned after that solder all the other pins. If too much solder use solder wick
Sent from my Nexus 5 using Tapatalk
Sent from my Nexus 5 using Tapatalk
Will it take the heat without a heatsink while soldering using a Weller 40watt iron with controller and point tip?
You dont need to heat up too much as solder pads are small. 2-3 sec are plenty and please do not use lead free solder alloy. I set 280 centigrades on my soldering station when dealing with small smd parts.
Sent from my iPad using Tapatalk
Sent from my iPad using Tapatalk
Would it be OK to use a small spring clamp to hold it down on the board? I have used this to hold multi-pin DIP sockets down. It has fairly light pressure. My Weller 40 watt controller does not have temperature readout, but goes from 1 to 5. I normally use 3 to do circuit board soldering with 60/40 solder. I have a pin point tip on the iron. This clamp is small like ones on a low amperage motorcycle battery charger.
Attachments
If that clamp give you more confidence then use it. I never use something like this but i use a small rubber mat so my pcb stays still on the bench. Another personal technique is to put a little solder on one pad of the pcb and with help of tweezers i put a little pressure on ic body to keep it on position while heating up that small blop of solder. In this way one leg is soldered and the other ones is piece of cake. Dont worry if you have solder bridges in this first soldering phase, use solder wick to collect the extra solder. It;s easier than you imagine just exercise a little. The 60/40 soldering alloy is melting very fast than lead free.
That's a good tip: don't worry about shorts, only worry about correct position and that all pins are soldered.
Then afterwards take away excess solder with solder wick. Worker for me even with 40 pin quad packs!
Jan
Then afterwards take away excess solder with solder wick. Worker for me even with 40 pin quad packs!
Jan
For the small SMD-critter, I usually add a bit solder to the pads on the board first, put the SMD part on the board and heat one leg after the other shortly.
The position of the part is fixed right when the first leg is soldered, so it's easier then!
The position of the part is fixed right when the first leg is soldered, so it's easier then!
Thanks all for the tips. I think I am ready to give it a try,but I am having to replace the fuel tank in my truck today. It is leaking gas so it is high priority. If I get done with that project today, I will be back on this project.
Hello Hannes; FYI I received the PCB today before leaving on my trip, so thank you. It looks to be excellent quality.
Stuey
Stuey
- Home
- Source & Line
- Analogue Source
- The high octane phono preamp