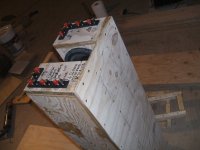
8 x slightly modified ES18's, ready to be painted and loaded with Fane Col's. Next up, finishing the Othorns =D

That stack looks AWESOME!
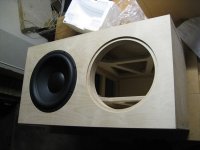
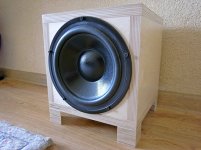
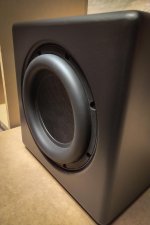
My 12" sub
Hi,
I occasionally wanted more thump to complement the Zaph ZRT 2 ways so I designed and built a 12" PR sub as below as an experiment and they sound OK.
I used 24mm baltic birch ply double thick baffle and shellaced it out of curiosity - worked OK.
I drive it with a PWR-ICE125 and shove a pair of socks into the Zaph ports when I run the Marchand 80Hz CO box to feed the subbie + Zaphs.
At other times I run the Zaphs alone (esp acoustic Jazz etc).
As you can see by the paucity of foam I don't know much but I like the sound... better buy more foam.
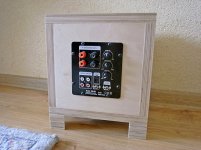
I blew up the crossovers and the two drivers in the left speaker when I drank too much and wondered if I could get the Scanspeak cones driven by the 250W amp (Holton Amps parts) to touch the opposite wall...they just fell short... so that's why I put a 10k log pot into the box with the Marchand Hi/Lo pass boards in it and cunningly made the knob silver like the front panel...
Clearly I have no idea what I am doing but it's fun and it sounds good...
Hi,
I occasionally wanted more thump to complement the Zaph ZRT 2 ways so I designed and built a 12" PR sub as below as an experiment and they sound OK.
I used 24mm baltic birch ply double thick baffle and shellaced it out of curiosity - worked OK.
I drive it with a PWR-ICE125 and shove a pair of socks into the Zaph ports when I run the Marchand 80Hz CO box to feed the subbie + Zaphs.
At other times I run the Zaphs alone (esp acoustic Jazz etc).
As you can see by the paucity of foam I don't know much but I like the sound... better buy more foam.
I blew up the crossovers and the two drivers in the left speaker when I drank too much and wondered if I could get the Scanspeak cones driven by the 250W amp (Holton Amps parts) to touch the opposite wall...they just fell short... so that's why I put a 10k log pot into the box with the Marchand Hi/Lo pass boards in it and cunningly made the knob silver like the front panel...
Clearly I have no idea what I am doing but it's fun and it sounds good...
Attachments
-
 m_IMG_20180310_164357539.jpg29.2 KB · Views: 2,115
 -
 m_IMG_4903.jpg34.5 KB · Views: 511
 -
 m_IMG_4906.jpg39.2 KB · Views: 463
 -
 m_IMG_4914.jpg31 KB · Views: 447
 -
 m_IMG_4922.jpg29.7 KB · Views: 467
 -
 m_IMG_4929.jpg35.8 KB · Views: 503
 -
 m_IMG_4932.jpg38 KB · Views: 477
 -
 m_IMG_4934.jpg44.6 KB · Views: 1,905
 -
 m_IMG_4942.jpg36.5 KB · Views: 1,930
 -
 m_IMG_4949.jpg29.4 KB · Views: 2,123

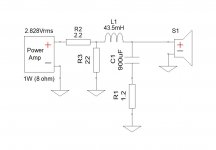
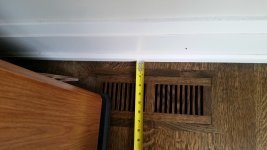
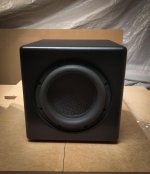
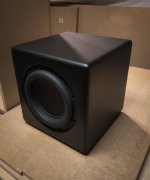
Prototype small room sub. 180ltr ported enclosure. Peerless 12" XXLS rear facing with a BK-300 plate amp.
It features a 12db/oct passive crossover as the amp's 'contour control' was exactly that and didn't roll off the upper bass enough. Response is -3db at 16hz and -6db at 14hz.
The bass is a bit soft for my liking, but, that's the price of using a cheap amp. That's something I need to fix.
As for music, Poulenc's Concerto in G minor for Organ, Strings and Timpani (Telarc CD-80643) is scary. I can play it at normal listening levels with little effort from the sub. Towards the end there's a sustained low note, well over a minute long, which bunged my ears up...
Attachments
Sub-thing to be seen
Latest sub project is a dual 12 with a backwards downward firing reverse phase woofer. Its cabinet is 1/2” MDF glued to cement board for constrained layer effect and that covered with mahogany and flame maple. I over did it with mortise and tenon construction. The butterfly is padauk. Notice the whiskey glass is not moving. It has a 1 Kw plate amp, mostly because it was on sale. It’s plenty loud without all that power.
Latest sub project is a dual 12 with a backwards downward firing reverse phase woofer. Its cabinet is 1/2” MDF glued to cement board for constrained layer effect and that covered with mahogany and flame maple. I over did it with mortise and tenon construction. The butterfly is padauk. Notice the whiskey glass is not moving. It has a 1 Kw plate amp, mostly because it was on sale. It’s plenty loud without all that power.
Attachments


Good evening!
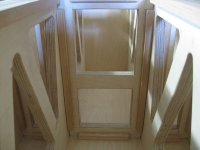
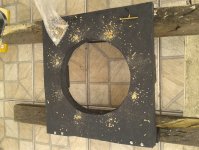
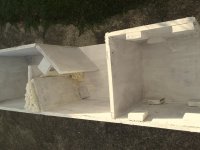
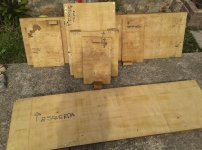
Here are some photos of my horned subwoofer enclosure project that Im making from scrap wood boards from old cabinets the neighborhood droped next to the place I live 😀
Here the fold pattern is deligned and some blocks of wood glued for later fixation of vertical walls of that will make up the horn
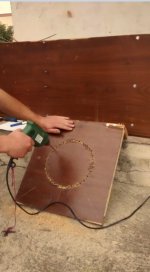
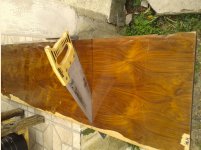
sawing... yes I used a handsaw. Its a good tool... a professional saw that's very sharp and trusty.
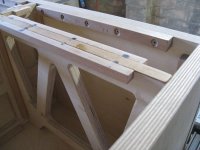
Then we have proceeded to remove the decorative foil of noble wood that was skinning off anyway... painted the boards with acrylic paint primer then acrylic paint (I was just testing the tone of this blue dye). Later refinents are currently being made on this subject of the finishing of the outsides.
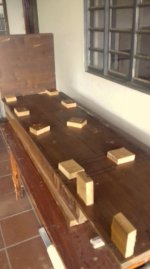
The box was reassembled and the void filled with poliurethane foam. All junctions were sealed with silicon rubber.
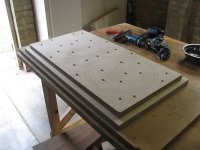
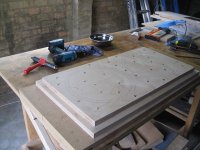
Subwoofer hole was cut (omgosh I missed the diameter about 3 times but in the final cut the sub did fit very tightly)
Finally sub was positioned and glued with silicon rubber. No, I can not take it off never and ever again 😱
The cable terminals extend out of the box as you can see, through 2 brass electrical grade screws so I don't really care what happens since everything left to be worked on is the amplifier connections
I didn't even test if the subwoofer is working yet 😎
And not last, but in memory of my friend who helped me with the chisel
Here are some photos of my horned subwoofer enclosure project that Im making from scrap wood boards from old cabinets the neighborhood droped next to the place I live 😀
Here the fold pattern is deligned and some blocks of wood glued for later fixation of vertical walls of that will make up the horn
sawing... yes I used a handsaw. Its a good tool... a professional saw that's very sharp and trusty.
Then we have proceeded to remove the decorative foil of noble wood that was skinning off anyway... painted the boards with acrylic paint primer then acrylic paint (I was just testing the tone of this blue dye). Later refinents are currently being made on this subject of the finishing of the outsides.
The box was reassembled and the void filled with poliurethane foam. All junctions were sealed with silicon rubber.
Subwoofer hole was cut (omgosh I missed the diameter about 3 times but in the final cut the sub did fit very tightly)
Finally sub was positioned and glued with silicon rubber. No, I can not take it off never and ever again 😱
The cable terminals extend out of the box as you can see, through 2 brass electrical grade screws so I don't really care what happens since everything left to be worked on is the amplifier connections
I didn't even test if the subwoofer is working yet 😎
And not last, but in memory of my friend who helped me with the chisel
Attachments


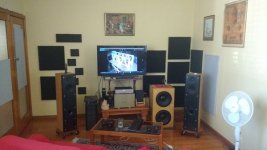
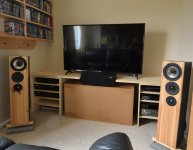
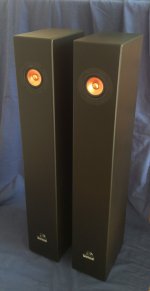
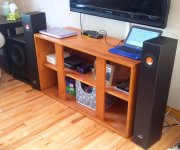
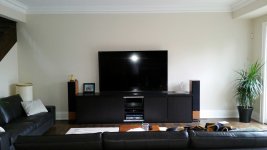
My current temporary living room setup. Mark Audio Alpair 5 bass reflex slim tower and SDX10 bass reflex crossed over at 125Hz. I have started building with the intention for local sales.
Attachments

It features a 12db/oct passive crossover as the amp's 'contour control' was exactly that and didn't roll off the upper bass enough. Response is -3db at 16hz and -6db at 14hz.
I'm going to recommend that you remove the series and parallel resistors on your subwoofer (2 ohm/22 ohm), as all they are doing is shedding heat and becoming a possible fire hazard. the L and CR circuits are okay, just make sure the R is high enough wattage for the current applied.
This is also a likely cause of your subwoofer being too soft because you are losing output just via those resistors alone.
Later,
Wolf
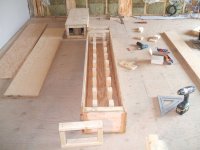
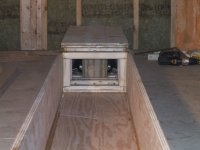
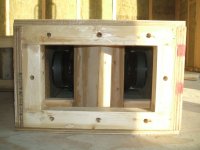
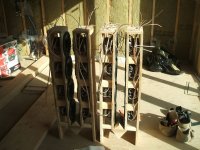
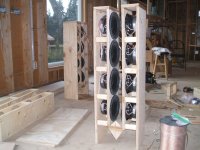
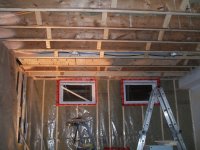
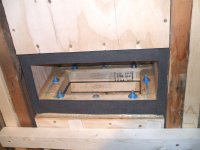
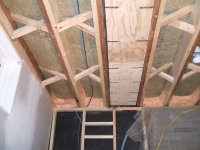
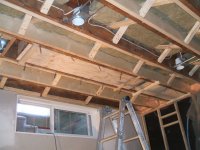
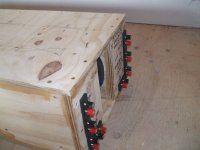
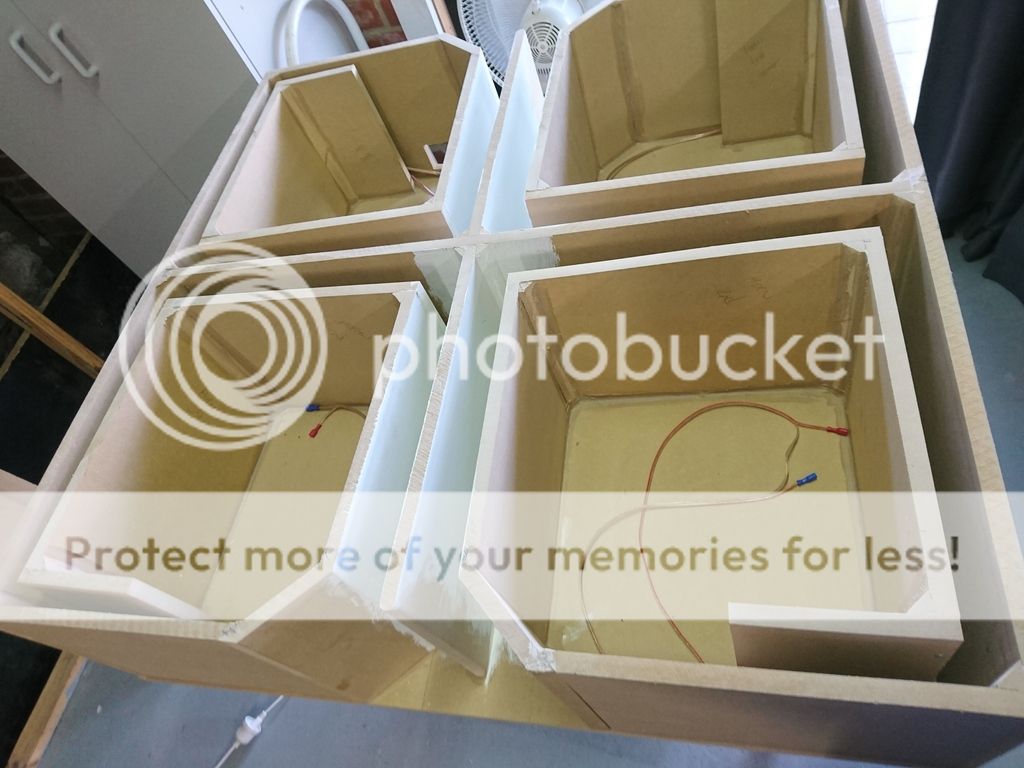
In-floor subwoofer - 8x8" drivers each, highest WAF factor
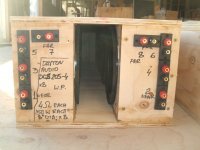
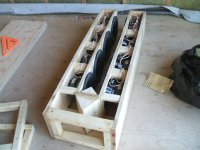
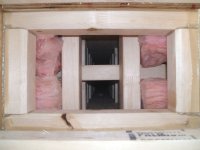
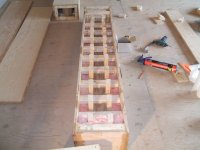
I built in-floor sealed subwoofers consisting of 8 x 8" drivers each (Dayton Audio DCS 205-4). Those were the only 8" drivers which I found to fit in the subfloor cavity with a box built around them. Each sub has the cone surface area of 2 x 15" subs and 1 x 15" sub displacement. The drivers were not the reference type but I had to compromise since they were the only ones which would fit. The whole build was designed around the subfloor cavity restriction.
The purpose of the subs was to use them below 40Hz. The box size gives each driver Qtc=0.9, Vb=5 Ltr, , Fb=82Hz .
When the house was still renovated and did not have the drywall installed yet I tested them both with 120Hz x-over at full displacement and they played really loud - I would say around 120dB at 120Hz. The garage floor concrete slab was shaking. 🙂
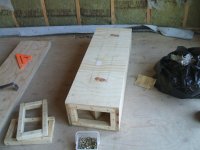
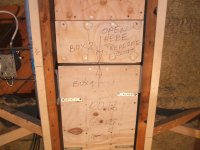
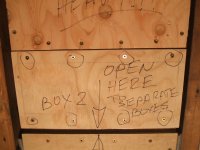
Each subwoofer has 2 boxes - the first one is the "drivers head", the second box is the "cavity box". Assembled total length is 10.5ft, height 9.25", width 14".
The subwoofer boxes are bolted together and have a removable cover for bolts access. They were installed in the basement ceiling - between the floor joists. The boxes are separated from the floor structure and don't transfer vibrations to the house. The drivers are mounted opposed to each other to cancel any vibrations too. The boxes are suspended by multiple metal straps (like a swing cradle). For safety there are aircraft cables spun across the bottom too (not tensioned, slightly loose and taped to the boxes to prevent rattling).
The subwoofer ports are covered with the same covers used for the heating ducts in the house and you can't tell that they are there.
When there was no furniture in the house yet you could feel the floor bending from the air pressure whenever the subs played.
Now when I have them set up below 40Hz they are enough for movie playing. For this open floor plan and the music levels I enjoy occasionally though I would need 4x that displacement. That's why there is another project on the go for few years already - but that's another topic altogether. 🙂
I did not go to IB since the room below is a functional one.
The drivers are wired to separate connector posts so I can bypass a driver in case one fails and continue using the rest (it's better than loosing the whole subwoofer).
Currently there are jumpers installed across the connector posts and only 1 wire goes to the amplifier.
Once the rooms were finished (main floor and basement) the subwoofers are not accessible anymore.
I built in-floor sealed subwoofers consisting of 8 x 8" drivers each (Dayton Audio DCS 205-4). Those were the only 8" drivers which I found to fit in the subfloor cavity with a box built around them. Each sub has the cone surface area of 2 x 15" subs and 1 x 15" sub displacement. The drivers were not the reference type but I had to compromise since they were the only ones which would fit. The whole build was designed around the subfloor cavity restriction.
The purpose of the subs was to use them below 40Hz. The box size gives each driver Qtc=0.9, Vb=5 Ltr, , Fb=82Hz .
When the house was still renovated and did not have the drywall installed yet I tested them both with 120Hz x-over at full displacement and they played really loud - I would say around 120dB at 120Hz. The garage floor concrete slab was shaking. 🙂
Each subwoofer has 2 boxes - the first one is the "drivers head", the second box is the "cavity box". Assembled total length is 10.5ft, height 9.25", width 14".
The subwoofer boxes are bolted together and have a removable cover for bolts access. They were installed in the basement ceiling - between the floor joists. The boxes are separated from the floor structure and don't transfer vibrations to the house. The drivers are mounted opposed to each other to cancel any vibrations too. The boxes are suspended by multiple metal straps (like a swing cradle). For safety there are aircraft cables spun across the bottom too (not tensioned, slightly loose and taped to the boxes to prevent rattling).
The subwoofer ports are covered with the same covers used for the heating ducts in the house and you can't tell that they are there.
When there was no furniture in the house yet you could feel the floor bending from the air pressure whenever the subs played.
Now when I have them set up below 40Hz they are enough for movie playing. For this open floor plan and the music levels I enjoy occasionally though I would need 4x that displacement. That's why there is another project on the go for few years already - but that's another topic altogether. 🙂
I did not go to IB since the room below is a functional one.
The drivers are wired to separate connector posts so I can bypass a driver in case one fails and continue using the rest (it's better than loosing the whole subwoofer).
Currently there are jumpers installed across the connector posts and only 1 wire goes to the amplifier.
Once the rooms were finished (main floor and basement) the subwoofers are not accessible anymore.
Attachments

In-floor subwoofer - 8x8" drivers each, highest WAF factor
more pictures..🙂
more pictures..🙂
Attachments


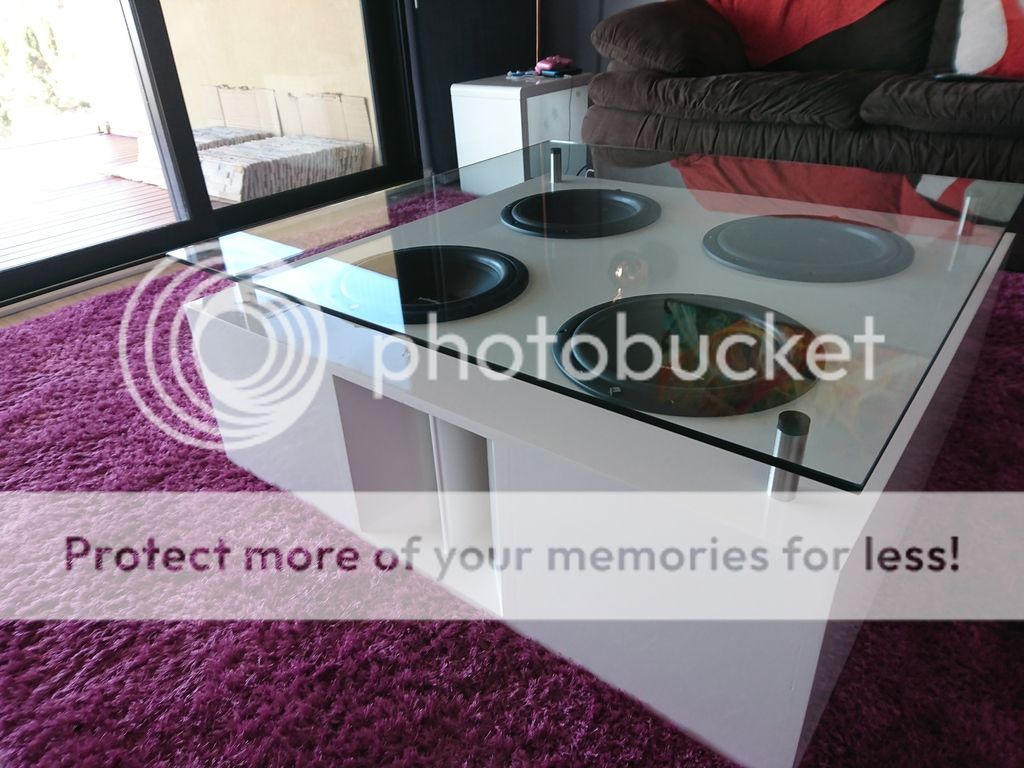
Been lurking around the forum for a while, but thought I'd finally join to share my build. Of course it could be better with unlimited funds for better drivers and amp., but you get the idea 🙂
That's really cool! Could I suggest a support in the middle of the glass though as well?
Later,
Wolf
Later,
Wolf
It seems to be doing ok without a centre post. The glass is about 10mm (3/8") thick, so I'm hoping it will cope, we're not planing on keeping anything on it.
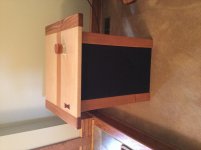
Wolf's inspired little sub for TV. Speakers used- TB w5-1138smf and 8" Dayton PR DS215-PR, cheap Chinese built no name plate amplifier. Box material 21mm birch plywood. Very good results, only amplifier could be more powerful, but for TV it's ok. I would like to say many thanks to Wolf for great idea and build plans.
Gytis
Gytis
Attachments

I would like to say many thanks to Wolf for great idea and build plans. Gytis
Oh- is that a Biumph? Cool!
You're very welcome!
Wolf
EBS Vented Monstrosity
I feel quite out of my league here, but decided to share anyway. This used to have an Adire Audio Tempest in it until some teenagers had a little too much fun with it and fried the voice coil. The current driver is a sturdier, but less "tuned in" Dayton Reference HO. The amp is Rythmik Audio A370SE (Not sure if I'm remembering the model number exactly right), I believe. I am actually hoping to move it into a tapped horn in the not too distant future. Even in it's current state, it produces useable output to 15 hz or lower. Not with the kind of authority I would like, but enough to scare the kids and pets! 😉😀
I feel quite out of my league here, but decided to share anyway. This used to have an Adire Audio Tempest in it until some teenagers had a little too much fun with it and fried the voice coil. The current driver is a sturdier, but less "tuned in" Dayton Reference HO. The amp is Rythmik Audio A370SE (Not sure if I'm remembering the model number exactly right), I believe. I am actually hoping to move it into a tapped horn in the not too distant future. Even in it's current state, it produces useable output to 15 hz or lower. Not with the kind of authority I would like, but enough to scare the kids and pets! 😉😀
Attachments

Last edited:
- Home
- Loudspeakers
- Subwoofers
- System Pictures & Description / Subwoofer Gallery