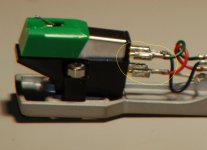
Definitely the biggest problem is lack of continuous GND plane... long thin GND traces/wires, especially in a futile attempt to make "star GND", are perfect antennas, as are RCA jack's GNDs not hard-bonded to a metal chassis.Curious how a 4 layer phono board looks. I never used 4 layers nor ground planes for a phono preamp and never seen any either. I grew up without design software and only single layer boards. About all phono preamps of the phono era were single layer and TH then. Main thing I notice besides their still fine performance is susceptibility to today's EMI.

Last edited:
Is their any serious advantage in using both halves of an opamp for 1 channel vs 2 channels per opamp?
That is in terms of noise or crosstalk etc?
I can think of layout advantages either way.
But are their technical advantages either way?
That is in terms of noise or crosstalk etc?
I can think of layout advantages either way.
But are their technical advantages either way?
Last edited:
For a specific project, see if there can be a layout advantage one way or the other. You have to learn to look at it and estimate efficient layout, layout to minimize unwanted coupling, etc. Sometimes layout can be much more efficient when similar processing functions are the same for both channels by using one dual opamp per stage of processing. In other cases, maybe more isolation between channels is better.
For a phono preamp, my friend would say don't use any opamps at all, and don't use a ground plane either. Sometimes you have experiment to be sure.
For a phono preamp, my friend would say don't use any opamps at all, and don't use a ground plane either. Sometimes you have experiment to be sure.
Last edited:
Is there a standard way to go about using 4 layers?
Eg: Gnd top and bottom
Signal inner 1
Power inner 2
Eg: Gnd top and bottom
Signal inner 1
Power inner 2
Short answer might be that its probably more common to make it like:
Top - signals and areas of Fill (aka Pour)
2 - Ground plane
3 - Power plane
Bottom - ground fill and signals
Part of the idea is to sandwich the power plane between two ground planes, or at least approximately.
Also, if there is more than one power rail, then the power plane might be split up into smaller areas.
Longer answer might be to start by reading Ott: https://www.amazon.com/Electromagnetic-Compatibility-Engineering-Henry-Ott/dp/0470189304
Also if any interest, there are some open source 4-layer Kicad projects you can look at in the thread at: https://www.diyaudio.com/community/threads/general-purpose-dac-clock-board.413001/
Last edited:
Well it took me a few evenings but here is a draft of a stereo version. 4 layers.
GND plane on top, inner 2 and bottom layers.
Power planes on inner 1.
Vias every 2.54mm as is practical. Surprisingly, JLC doesn't seem to mind how many vias there is. As long as their not too small a diameter.


Jumper at the top left to connect the signal and power grounds.
I'm not entirely happy with the layout. I suspect I can do better by using separate OPamps per channel instead of splitting them.
Give me probably another week and we'll see what I come up with.
Am I heading in the right direction?
GND plane on top, inner 2 and bottom layers.
Power planes on inner 1.
Vias every 2.54mm as is practical. Surprisingly, JLC doesn't seem to mind how many vias there is. As long as their not too small a diameter.
Jumper at the top left to connect the signal and power grounds.
I'm not entirely happy with the layout. I suspect I can do better by using separate OPamps per channel instead of splitting them.
Give me probably another week and we'll see what I come up with.
Am I heading in the right direction?
Progress!
Never got around (or needed) 4 layers and it also seems to complicate manual drawing so I admire the courage. Bravo!
Possibly suggested earlier but in case of nasty power on/off plops a muting circuit shorting the outputs to GND can be a nice addition. The pads are free and adding them gives that possibility. Also adds to a positive user experience as other sources possibly are silent too at power on/off.
And what about an anti rumble switch?
Last edited:
Coming to this thread late. But back in the day we were developing a digital preamp (this is early 90's, so pretty radical). The way we organised power distribution was to put the regulators on a piggy-under board, connected to the IC's (both digital and analogue) by using spring loaded contacts immediately local to the chips.
Anti rumble - how about a cross-feed? That mono's signals below a certain frequency - typically 100Hz. Recordings are mono under that sort of frequency anyway, so no stereo information is lost. And the ear's position sensitivity below that frequency is lousy. The idea is that rumble is a vertical movement of the stylus. So it is out of phase. Mono that frequency range, and the out of phase rumble cancels without cutting very low frequency music information.
Anyhow, there are commercial designs that do just that, such as by KAB RF1. A really good one is described in Douglas Self's AES presentation on the "Devyniliser" http://www.douglas-self.com/ampins/Paris 2016 devinyliser.ppt along with a critique of other cross-feed designs.
Did you post the schematic in this thread? If not, that could be helpful wrt any further tips about the layout.Am I heading in the right direction?
I haven't posted a schematic yet as the thread was simply about the regulators.
We are so far past the original question perhaps I should change the name or start a new thread.
We are so far past the original question perhaps I should change the name or start a new thread.
2-layer is considerably cheaper than 4-layer from the Chinese outfits. That said, the cost of either one of those will be swamped by the shipping cost, so overall I agree with you. If 4-layer will provide an advantage, just use it.4-layer is about as low cost as 2-layer.
You can do that with two layers as well. As @KSTR mentioned, start with ground pours on top and bottom and try to carve out as little of it as possible.With 4-layers you can start to make some power and ground planes/fills. Those can help a lot if used carefully.
The biggest advantage of four layers, in my view, is that you can go: SIG-VCC-GND-VEE or SIG-GND-VCC-VEE for the four layers depending on your current flows. That drastically simplifies the supply routing, which in turn simplifies the signal routing as the entire top layer is available for signal traces.
No. You'd be better off with a ground plane. If you're building a phono stage the opamps will be running in Class A unless you do something silly. So you won't have to worry about dirty signal currents or heavy supply currents corrupting the ground.Ignoring the rest of the layout and schematic for a moment. Is this a sensible way to do the ground when running 4 separate regulators?
Tom
Using both halves means half the cost per opamp.Is their any serious advantage in using both halves of an opamp for 1 channel vs 2 channels per opamp?
The channel separation in a modern opamp is typically on the order of 120 dB. Your PCB layout will likely degrade the channel separation more than that almost regardless of how hard you try. Heck, even the few mΩ of shared ground impedance in a 1/4" headphone jack will take an amp with -120 dB channel separation to around -95 dB (1 kHz).That is in terms of noise or crosstalk etc?
And if you're building a phono stage, note that the channel separation in a good cartridge is typically around 20 dB. 15 dB at 20 kHz. I think I once saw one with 40 dB channel separation, but the Ortofon ones I've looked at recently have 20 dB separation. Versus 120 dB (so 30000 times higher) for a dual opamp.
I like that the output is right next to the inverting input on a dual opamp. That makes for a nice and tight feedback loop, especially with SMD resistors.I can think of layout advantages either way.
Tom
I think you may be worrying too much about grounding. Keep in mind that current flows in loops so you need to worry just as much about VCC/VEE as you do about GND.GND plane on top, inner 2 and bottom layers.
Power planes on inner 1.
I tried multiple ground layers with VCC/VEE as pours on one layer in a power amp recently. That did not work as well as SIG-VCC-GND-VEE (top to bottom on the layer stack).
That's over-doing it in my view. You're not dealing with 40 GHz RF here. Also keep in mind that the hole removes quite a bit of copper, so you actually get a higher ground impedance with a perforated plane than you do with solid planes stitched at the ends. Now, for EMC stitching only at the ends may not be the greatest as it creates an antenna, but you can drop a few vias within the board and have the planes stitched pretty tightly together.Vias every 2.54mm as is practical. Surprisingly, JLC doesn't seem to mind how many vias there is. As long as their not too small a diameter.
Also be careful that the vias don't end up cutting through planes and pours not connected to GND.
Tom
I've kept the design under 100x100 so with a 4 layer pcb and green colour it was $8 AUD at JLC. $14 for black, blue was something like $11.2-layer is considerably cheaper than 4-layer from the Chinese outfits. That said, the cost of either one of those will be swamped by the shipping cost, so overall I agree with you. If 4-layer will provide an advantage, just use it.
Not too bad at all imo. Not including shipping of course. But I normally wait till I have a few boards to order at once to minimise shipping cost.
Good feedback thanks.That's over-doing it in my view. You're not dealing with 40 GHz RF here. Also keep in mind that the hole removes quite a bit of copper, so you actually get a higher ground impedance with a perforated plane than you do with solid planes stitched at the ends. Now, for EMC stitching only at the ends may not be the greatest as it creates an antenna, but you can drop a few vias within the board and have the planes stitched pretty tightly together.
Also be careful that the vias don't end up cutting through planes and pours not connected to GND.
I mean using 2 halves of an OPamp for one channel vs 1/2 for each channel.Using both halves means half the cost per opamp.
Very useful info thanks.The channel separation in a modern opamp is typically on the order of 120 dB. Your PCB layout will likely degrade the channel separation more than that almost regardless of how hard you try. Heck, even the few mΩ of shared ground impedance in a 1/4" headphone jack will take an amp with -120 dB channel separation to around -95 dB (1 kHz).
And if you're building a phono stage, note that the channel separation in a good cartridge is typically around 20 dB. 15 dB at 20 kHz. I think I once saw one with 40 dB channel separation, but the Ortofon ones I've looked at recently have 20 dB separation. Versus 120 dB (so 30000 times higher) for a dual opamp.
Since a schematic has been requested. Here we go:

This is a Rod Eliot P06 phono + a P99 Rumble filter. Not state of the art.
However Rod's stuff normally works and performs well.
I would use Rod's boards but he makes annoying choices for caps and terminals which force me to make me own.
I also love designing pcbs. A new design normally keeps me busy for weeks playing Tetris and speccing the various parts.
Next up I will move the OPamps around and see if I can make a better layout with each channel having its own 2 opamps instead of 4 shared ones as above.
One more question, @Sadface , what is your power source? The usual transformer + bridge rectifier + reservoir caps? And where is it located, mechanically?
Point is, the moment you have ripple on the incoming supply, this ripple is injected into the GND by the regulators' input bypass caps and this can ruin everything, given the very high gain at mains frequencies.
And IMHO there is no benefit from using separate regulators at each opamp for circuit like this. One global set would do.
As for topology, are you sure the rumble filters are at the right location, before the actual input? That isn't a good idea IMHO, for a number of reasons. I'd place them in between the two main stages.
More later....
Looks OK but the square angles on tracks make the trace unnecessary long & susceptible to pickup.Well it took me a few evenings but here is a draft of a stereo version. 4 layers.
GND plane on top, inner 2 and bottom layers.
Power planes on inner 1.
Vias every 2.54mm as is practical. Surprisingly, JLC doesn't seem to mind how many vias there is. As long as their not too small a diameter.
View attachment 1364242View attachment 1364243View attachment 1364244View attachment 1364245
Jumper at the top left to connect the signal and power grounds.
I'm not entirely happy with the layout. I suspect I can do better by using separate OPamps per channel instead of splitting them.
Give me probably another week and we'll see what I come up with.
Am I heading in the right direction?
You can also get some very good inspiration from the demo project at the end of this article:
https://www.hypex.nl/media/fa/d8/a3/1682342122/The G word.pdf
Jan
- Home
- Amplifiers
- Power Supplies
- Regulators right beside OPamps pins