Some nice stuff being posted here! 🙂
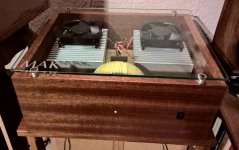
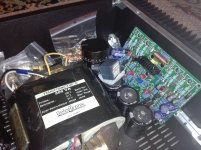
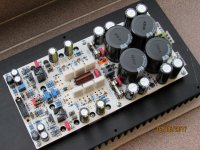
I've finally gotten my glass top sand-blasted. Very happy. For future reference, I should have had the letters a little more up, but otherwise it looks cool. I'll take decent photos sometime. This amp needs a different DC protection and control board, maybe a soft-start, and a DC filter module, then it will be complete and the wiring will be neater. But I have other more important projects at the moment. It's working just fine!
I've finally gotten my glass top sand-blasted. Very happy. For future reference, I should have had the letters a little more up, but otherwise it looks cool. I'll take decent photos sometime. This amp needs a different DC protection and control board, maybe a soft-start, and a DC filter module, then it will be complete and the wiring will be neater. But I have other more important projects at the moment. It's working just fine!
Attachments
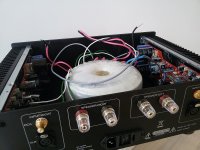
Finished with this nipper, now I can tend to the things that had to be fixed long ago.🙂
Good looking.
Very cool. Excellent build.
Some nice stuff being posted here! 🙂
I've finally gotten my glass top sand-blasted. Very happy. For future reference, I should have had the letters a little more up, but otherwise it looks cool. I'll take decent photos sometime. This amp needs a different DC protection and control board, maybe a soft-start, and a DC filter module, then it will be complete and the wiring will be neater. But I have other more important projects at the moment. It's working just fine!

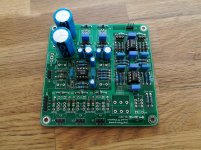
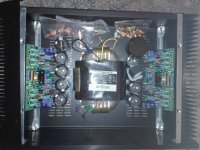
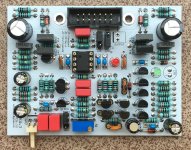
PCB with power supply, phono preamp, line preamp, volume control and input switching.
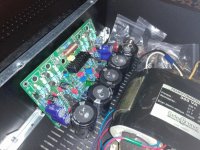
Just arrived, now starting to assemble the board.
It's a minor point, but potentially significant, where the board properly includes a name and date in text, the inclusion of the word "copyright" or the © symbol would insure IP protection on the layout itself and the silkscreen including component indication.
Omitting the proper marks doesn't necessarily prevent IP protection, but it might take a trip to a court to establish it. Including it negates the need to take that step.
greierasul - Looks great. How were the front and rear panels made?The work in progress
At the advertising firm in my city. They have a lot of routers: laser, CNC, engraving. I've sent them a CorelDraw files.
PCB with power supply, phono preamp, line preamp, volume control and input switching.
Just arrived, now starting to assemble the board.
Most parts assembled.
Attachments
Attachments
Last edited:
Nice work 😀 ! My work at the present. 😀
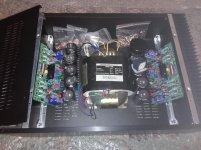
Ohoo...you are very serious...over 80.000uF/80v, R-Core transformer,thermal coupling of the input stage transistors,etc,etc... You want to hit the hi-end class 🙂 Big ambitions, good luck!
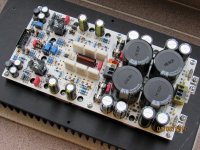
my mosfet buffer (voltage amplification =1), 180W@4R, thd 20kHz < 0.01% (at any power level into 4R)
What a superb build!! Attention to détails is second to none, congrats!
Please give us some listening impressions
Do
thanks ... this is a prototype, no listening experiences yet, only measurements were performed
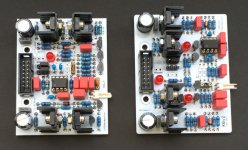
some front ends (voltage amplification stages)
some front ends (voltage amplification stages)
Attachments
Last edited:
What a superb build!! Attention to détails is second to none, congrats!
Please give us some listening impressions
Do
Indeed, that's my oppinion too.
Awesome build!!!!

my mosfet buffer (voltage amplification =1), 180W@4R, thd 20kHz < 0.01% (at any power level into 4R)
wow!! almost looks like an exotic dessert waiting for a connoisseur!
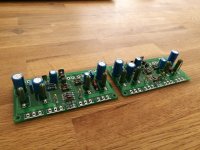
my mosfet buffer (voltage amplification =1), 180W@4R, thd 20kHz < 0.01% (at any power level into 4R)
LKA, great build!
What are these wire connector blocks you are using?
They look good.
Can you please provide name, part number, 'where to get' them info?
Thanks
LKA, great build!
What are these wire connector blocks you are using?
They look good.
Can you please provide name, part number, 'where to get' them info?
Thanks
Wago 255 series
NCE.Wago
Series 255 :: Printed Circuit :: WAGO :: On-Line Electronics
Attachments
Thanks!!
- Home
- Amplifiers
- Solid State
- Post your Solid State pics here