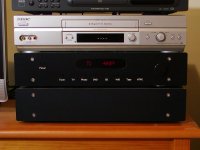
That happend during the testing, (Accidently) now`s all ok🙂
Sounds very neutral, I`m listeninh John Coltrane right now, but still mono🙂
Sounds very neutral, I`m listeninh John Coltrane right now, but still mono🙂
Oughhhtt.....
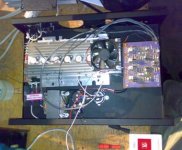
How about thiss one...?!
Nordic said:Bee, you need to use the attach function, for us to see the picture, or upload it to an online host....if you want to use the tags like you did.
At the moment only you can see that picture, because it points to a file on your PC...
The rest of us only see
[IMG]D:\My documents\Warehouse\Novri_yadi\Personal Files\Project PIC\My unfinished 300W OCL.htm
How about thiss one...?!
Re: Oughhhtt.....
How can I do that ?!.....
Bee C. said:
How about thiss one...?!
How can I do that ?!.....
Attachments
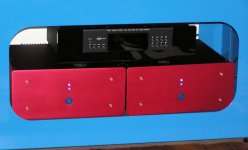
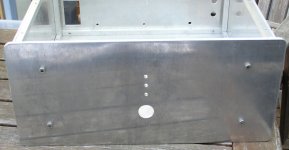
Got my front panels today
Yeah, I know. I've been building this damned amp for ages. Well today I got my front panels, courtesy of front panel express. I cut a piece of red acrylic to go in the window (turning my VFD red), and took a photo...
Yeah, I know. I've been building this damned amp for ages. Well today I got my front panels, courtesy of front panel express. I cut a piece of red acrylic to go in the window (turning my VFD red), and took a photo...
Attachments
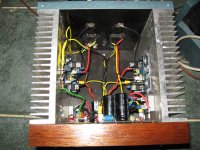
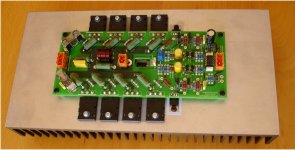
Wow!smithy666 said:Here are my finished Stochino amps. Hand built aluminium cases, anodised red. Great sounding amps...
Smithy666 can you inform me please further for the constructional details of the cases ?
Fotios
Fotios
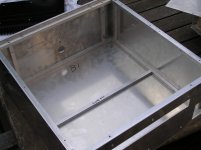
I made the cases to fit the unit they were going in. Inside is an aluminium frame made from 10mmx10mm aluminium bar. I cut these to size and then drilled and tapped them so the frame all connects together and is rigid. Then I cut the side, top, bottom and back panels from 3mm thick aluminium sheet. The front panel was cut from 6mm thick aluminium plate. The frame was also drilled and tapped so the side & other panels would screw to the frame (countersunk all external holes). I put a sub panel in the bottom for everything to mount on, so no screws that hold anything are visible from the outside, only the screws which hold the panels to the frame (the screws are stainless countersunk socket screws). The rear panel holes were cut with a jigsaw.
Once it all came together (carefully calculating the sizes of everything to the nearest 0.5mm), I then sanded all panels with very fine al oxide paper/scrubbing sheets until I had a smooth uniform finish and no scratches. Then I sent the finished panels off to the anodisers.
Here a few photos of construction along the way.
Attachments
smithy666 said:Fotios
I made the cases to fit the unit they were going in. Inside is an aluminium frame made from 10mmx10mm aluminium bar. I cut these to size and then drilled and tapped them so the frame all connects together and is rigid. Then I cut the side, top, bottom and back panels from 3mm thick aluminium sheet. The front panel was cut from 6mm thick aluminium plate. The frame was also drilled and tapped so the side & other panels would screw to the frame (countersunk all external holes). I put a sub panel in the bottom for everything to mount on, so no screws that hold anything are visible from the outside, only the screws which hold the panels to the frame (the screws are stainless countersunk socket screws). The rear panel holes were cut with a jigsaw.
Once it all came together (carefully calculating the sizes of everything to the nearest 0.5mm), I then sanded all panels with very fine al oxide paper/scrubbing sheets until I had a smooth uniform finish and no scratches. Then I sent the finished panels off to the anodisers.
Here a few photos of construction along the way.
Bravo smithy666!
You are a big craftsman! And thus you are by default a companion to me. Also SandyK. Also Anatech. Also Nordic. And some other persons (i apologise if i don't forget this moment their names) which make except the labour on the paper also the labour to implementing their idea in the workbench and in workshop. The theory it is one thing and the implementation in practice it is other thing. Under this thought i am working in all of my life. You can request from me anything you wish.
Fotios


 Post was rejected, but was online anyway...
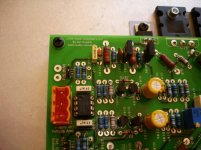
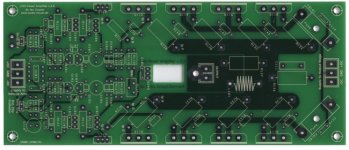
ACD said:My new LYNX v3.0 😉
Hi colleague Jan in the battle of audio.
Except than your PCB it is very tidy (for anyone which don't know that, a tidy PCB it requires enough hours or enough days for her designing) and beautifull, it is also obvious his high quality of manufacture. I don't know in Denmark but in Greece, the PCB workshop owners are speculators
 and thus they accept orders from 100 pieces and above. If you request from them one or two or four samples, the most likely that you will hear it is "hey boy went to your house" and in the worst case "for one piece or for one hundred pieces you will pay the same amount". Thus i am in the difficult position to make the dirty work of PCB making in my home when they are of samples. Tell me your experience about this subject, in your country it happens the same?
Regards
Fotios
Hi fotios
Thanks for the kind words.....
And yes it takes many hours a days for many weeks to make a good looking layout 😉 But no problem here, as I just love making layouts.....
There will always be big difference in unit price ordering a few sample PCB's compare to ordering 100's or 1000's PCB's.
However I normally orders 10 to 25 pcs. and get some fair prices by allowing long delivery time... And then I sell or trade the PCB's I don't need. You may concider that solution 😉
ACD said:Hi fotios
Thanks for the kind words.....
And yes it takes many hours a days for many weeks to make a good looking layout 😉 But no problem here, as I just love making layouts.....
There will always be big difference in unit price ordering a few sample PCB's compare to ordering 100's or 1000's PCB's.
However I normally orders 10 to 25 pcs. and get some fair prices by allowing long delivery time... And then I sell or trade the PCB's I don't need. You may concider that solution 😉
Hi again Jan
Thanks for reply. In order to I make a direct comparison in prices between Greece and Denmark workshops can you tell me for example the dimensions and the cost per piece (for 10 to 25 pcs order as you refer) of your double sided PCB presented in the photo?
Fotios
Prices per board (standard FR-4) are like follows:
10 pcs. €28,60 per board
25 pcs. €13.43 per board
Both allowing long deliver time....
Working on a supplier, that seems to make it 1/3 cheaper at 25 pcs.
10 pcs. €28,60 per board
25 pcs. €13.43 per board
Both allowing long deliver time....
Working on a supplier, that seems to make it 1/3 cheaper at 25 pcs.
ACD said:Prices per board (standard FR-4) are like follows:
10 pcs. €28,60 per board
25 pcs. €13.43 per board
Both allowing long deliver time....
Working on a supplier, that seems to make it 1/3 cheaper at 25 pcs.
Thanks Jan for the informations. Indeed and in Denmark PCBs are expensive
as in Greece Fotios
- Home
- Amplifiers
- Solid State
- Post your Solid State pics here