checkin' bias :
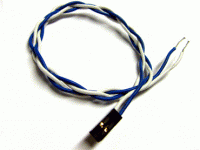
most convenient way is to have 2pin connector ( as on picture ) , so you can route wires out from case , with lid on ;
having lid on while checking is not exactly crucial , but handy ..... because you're not disturbing temp. equilibrium .
for channel 1 - connect 2pin connector either on header A or B ( no need for checking both positions , at least as long amp is operational and output offset is near zero) , connect voltmeter between wires ; goal is to have 0V94 +/-10% there when amp is on working temperature ..... as Papa sez
repeat procedure for channel 2 , using either header C or D
while you are there - with DVM in hands - check voltage (offset ) between outputs ......... and between any output and gnd ; so regarding output offset - you have 2 measurements per channel - one for absolute , and one for relative offset , because both (channel's) outputs are hot - floating ......
Attachments

yes, i noticed the 'checking not setting' part 😉
sooooo, do you, (or anyone else) have a guide to 'setting' the bias and offsets ??
Or will i have to ask 'the mighty grey bearded one'.
because i REALLY want to replace those sad looking trimmers with something more in keeping with this amplifiers pedigree.. 😉
Im also thinking about a re-cap while its apart, just to make sure there ok..
id probably use panasonic fc or the like..
as i understand, there are no caps in the signal path, so it shouldnt be that critical then...
don't fix if isn't broken 😉
but if you insist - you need to know that there isn't written guide , at least to my knowledge
entire procedure is even covered in two different SMs , one for amp/output stage , and another one specifically for UGS input stage ;
only Pa can give you these , but even in that case , because txt is written for someone with serious mileage - you'll need help for clarification of procedure
anyway - it's possible - buy trimpots of your choice then change them one by one ; desolder pot , let it cool , measure it's resistance ( taking care about orientation!! ) , set new one to same resistance , solder it back on pcb
for work like this - you need variac for initial powering up ; that's a must ;
it is possible to complete entire procedure without it , but only if you have already mentioned mileage
so - if you're still for that re-do , I can help and write down that procedure for you .... even if I know that my fingertips will be hurt
but how do i know it isnt broken, unless i fix it 😀
the desolder, measure, adjust, insert method is what i was going to use to get me into the ballpark.
But the heat stress of soldering will drift the trimmers, so it would absolutely need re checking and adjusting afterwards at any rate.
variac, check, got that.
serious mileage, hmmm, im 'over the hill' in age, and started when i was 15, does that count 😉
so, please, 😀, pound that keyboard, 😀
yup - you're old'n'cranky .......
ok - when you have all parts needed - just buzz here
in a meantime , you can check UGS amp of CHefDeGaar : http://www.diyaudio.com/forums/pass-labs/108683-ugs-power-its-u-p.html
it's similar enough , so you can grasp some info regarding operation
old n cranky n dont you forget it.
blasted young whipper snappers think they know everything.
mumble mumble grumble
😀
I'll put the amp on my bench on the week end, so should have parts early next week.
you better start typing 😉
blasted young whipper snappers think they know everything.
mumble mumble grumble
😀
I'll put the amp on my bench on the week end, so should have parts early next week.
you better start typing 😉
Doh *slaps forehead hard* why didnt i think of that.
sooooo simple even i might be able to do it....
😛
sooooo simple even i might be able to do it....
😛
I'm still waiting for this 'wall of text' about offset and biasing. 😉
ZM, i did read that entire thread, didnt see much to do with its basic design theory, what i did read didn't strike me as scary or untouchable..
As for the transformer buzz, the idea of a dc component on the mains is, under doubt, as the buzz is 100% constant, 24/7.
never changes no matter what time, load, power state.
so i shall (at some stage) bench the unit, play with the transformer mounting and failing that, i will build a quicky 'dc blocker' and make my next move from there.
oh ...... wall of text
probably tonight , after I finish today's to-does and also enjoying in first proper snow in my neck' o' wood
you can imagine me as big moose , pulling those sleds ... 😉
you got all the parts ?
probably tonight , after I finish today's to-does and also enjoying in first proper snow in my neck' o' wood
you can imagine me as big moose , pulling those sleds ... 😉
you got all the parts ?
Well.
Interesting facts time......
From Pass Labs, amp was originally sold to hong kong in 03.
in 06 they supplied some output trannies to the same hk dealer....
They have no idea how or when it got to Australia.
never mind, i can handle that bomb shell...
Now, measurements.
amp has been on for several hours in use to warm it up and let it stabilise.
no load or input connected.
All done with a fluke 179.
measuring those jumpers (prev labeled a/b/c/d)
gives 0v071 and 0v069
nothing like the 0v94 ZM suggested..
total dc offset - - - - - - - - - - - - - offset ref chassis gnd.
good side, 0v05 - - - - - - - - - - - - 1v9 - both 'pos/neg' outputs so close.
repaired side, 0v001 - - - - - - - - -- 10v67 - both 'pos/neg' outputs so close.
yes, thats right, one side is 1.9 v other side is 10.67 v.
just a wee tiny difference. NOT.
so, I reallllllly do think it needs a damn good reset....
I did retest the numbers several times, even grabed a second f179. exact same numbers...
Sooooo, wheres that 'wall of text' 😀
I think i might just need it......... 😱
Parts, no not yet, was waiting till i can see whats involved in resetting them first.
will start doing a shopping list tmrw. will include some electro's and trimmers.

just for a giggle
turn it off , wait 5 mins ( to be sure that caps are bled down) and measure resistance between pins on each header A, B , C ,D
while you're there - inspect visually values of those 3W Pana source resistors ;you can check them with DMM if you can't see the value
something is highly illogical - amp is hot , even if DVM says it's seriously underbiased
edit : just in case - I hope you measure voltage at headers when amp was fully ON , not in stand by
Last edited:
ok.
each header pin is 1.2ohms
source resistors look untouched, labeled as 0.47ohm and measured (in circuit) 0.6ohm, well, the ones i can get easy access to anyway.
same on both sides.
each header pin is 1.2ohms
source resistors look untouched, labeled as 0.47ohm and measured (in circuit) 0.6ohm, well, the ones i can get easy access to anyway.
same on both sides.
that's completely logical and in line with each info I have
please confirm voltages at headers when amp is fully on ; point is that in stand by mode output stages are exactly non/under-biased as you measured
please confirm voltages at headers when amp is fully on ; point is that in stand by mode output stages are exactly non/under-biased as you measured
ok, just plugged it back in (power that is)
filter caps are sitting at ~40vdc.
in standby the jumpers are 0v000
powered up the jumpers are 0v06
but that is within a few minutes of it being 'turned on' so till cold.
filter caps are sitting at ~40vdc.
in standby the jumpers are 0v000
powered up the jumpers are 0v06
but that is within a few minutes of it being 'turned on' so till cold.
wall of text : at UGS pcbs :
P1 is for absolute offset ( offset between each/any output and gnd) ; must be 0V
P2 is for differential offset (offset between outputs) ; must be 0V
fiddling any of these will influence operation of previous one ; so - setting is iterative - in small increments - alternative fiddles of P1 and P2
at Motherboard :
P1 and P3 are pots for biasing adjacent output sides of one channel
P2 and P4 are pots for biasing adjacent output sides of second channel
reference measuring points are nearby 2pin headers ;
I need to confirm which pot is connected with which 2 pin header -will edit post later
OK - that's sort of explanation ;
do you need exact procedure written down ?
edit :
P4 - header A
P3 - header B
P2 - header C
P1 - header D
Last edited:
- Status
- Not open for further replies.
- Home
- Amplifiers
- Pass Labs
- Pass X150 Where does it sit in the overall line up ??