
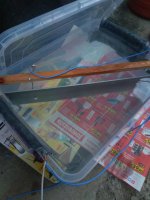
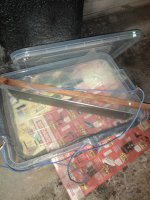
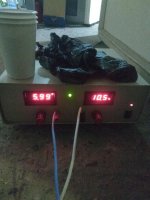
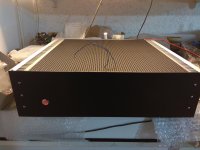
Anodizing the front end.
Attachments
Last edited:
Hi thimios,
This is real DIY! My friend also does his own anodizing, it is quite a nice process.
Do
This is real DIY! My friend also does his own anodizing, it is quite a nice process.
Do
Jeff,
I've set an 8" distance between the SMPS and amp module and nothing changed. So the noise seems to be picked up through the AC line (light dimmers) and generated by the SMPS in some parts (frequency caught on the speaker terminals).
Cresnet asked me to run some tests, which one of them made a difference. I don't want to post it here since it is just testing and I don't know how safe it is. I'll let Cresnet do some more testing on his side. You can PM me though.
Do
Let us know, if you are able to find a solution. I'am interessted too using an SMPS.Jeff,
I've set an 8" distance between the SMPS and amp module and nothing changed. So the noise seems to be picked up through the AC line (light dimmers) and generated by the SMPS in some parts (frequency caught on the speaker terminals).
Cresnet asked me to run some tests, which one of them made a difference. I don't want to post it here since it is just testing and I don't know how safe it is. I'll let Cresnet do some more testing on his side. You can PM me though.
Do
First paint layer.
Looking good so far! Are you painting or dying the metal?
Looking good so far! Are you painting or dying the metal?
I haven't a way for dying, just painting.
Anodised surface works as primer. The paint is deeply moistened.
Finally is strong enough and scratch resistant.
Dye is easy, just warm the dye bath up a but (60C) and dunk the part for 20 minutes. Rit dye for clothing works if it's not going to see any sun and it's cheaper than paint. Proper black anodizing dye is expensive though. Any other colour is cheap.
Paint on the heatsinks isn't great for cooling, but black dye actually improves it.
Paint on the heatsinks isn't great for cooling, but black dye actually improves it.
Thanks jeff, i has tried this once but without good results.Dye is easy, just warm the dye bath up a but (60C) and dunk the part for 20 minutes. Rit dye for clothing works if it's not going to see any sun and it's cheaper than paint. Proper black anodizing dye is expensive though. Any other colour is cheap.
Paint on the heatsinks isn't great for cooling, but black dye actually improves it.
I will post a picture latter.I don't know what the problem was.
I will try again.
BTW i will not paint the heatshinks.
Last edited:
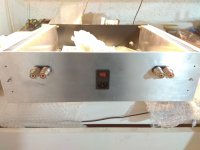
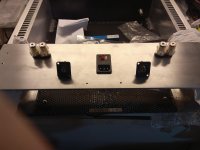
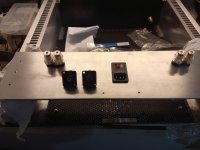
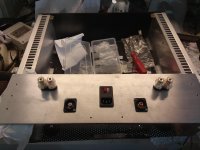
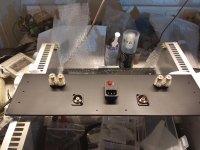
What is better RCA position ?
Like picture 1 or picture 2?
I see commercial amplifiers putting, R&L RCA closed each other.
Short common GNG.
This can eliminate the hum.
Like picture 1 or picture 2?
I see commercial amplifiers putting, R&L RCA closed each other.
Short common GNG.
This can eliminate the hum.
Attachments
Last edited:
Thimios, I prefer the 1st option, build all my amps like that, never had hum.🙂
That is my way too but let's wait for a while.🙂
Last edited:
In place and ready for anodazing.
Attachments

Last edited:
Thanks Valery!Great job man!
After the final layer willbe the lettering procedure like this.
Attachments
Last edited:
- Home
- Amplifiers
- Solid State
- No-global-loop amplification