Hello folks!
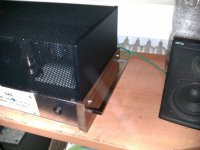
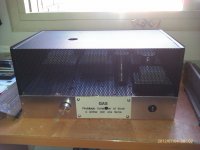
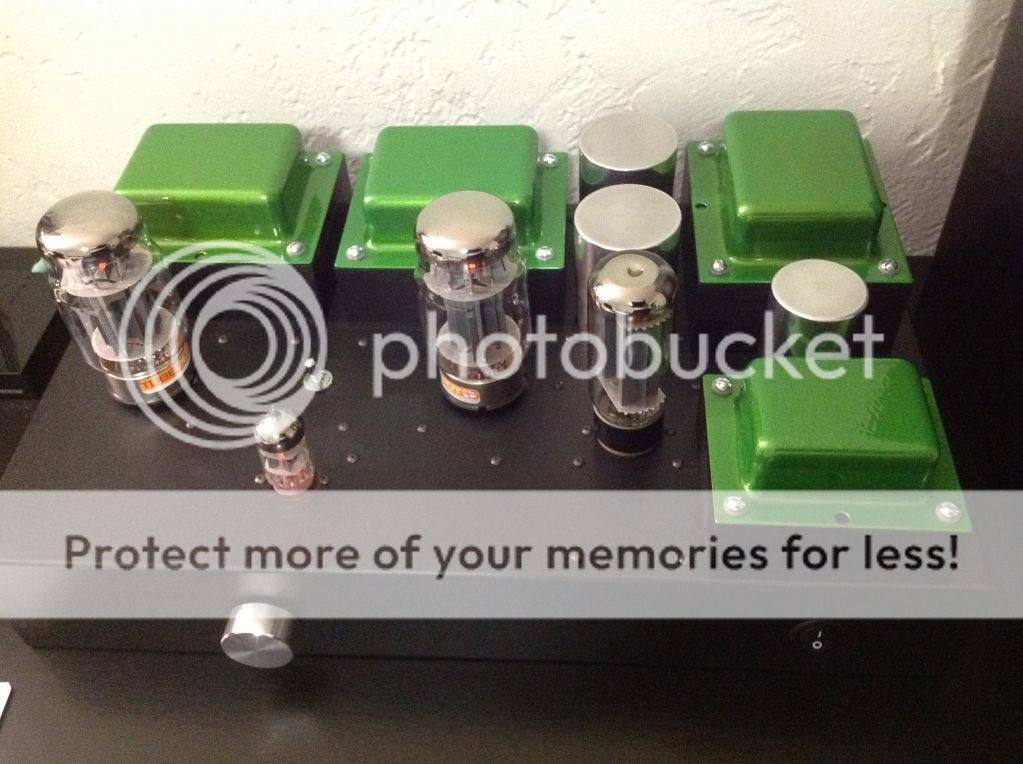
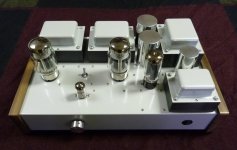
As I previously said, my plan was to mount the cover cage on this enclosure. The manufacturer advises that it is not compatible with the wood side panels, but after some careful planning I devised a way to achieve it. Suming it up, you have to mount upside-downthe wood side panels, then you break (or cut) a bit of the prominent wood that otherwise wouldn't allow you to screw down the bottom cover.
In fact, it provides more stability, as by default each panel is hold with only two screws. Now it has those two screws, plus 2 screws to the metal holder,s plus the two screws that hold the top mesh cover. I am really happy on how the result ended 😛
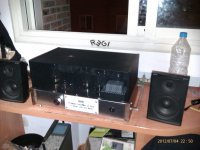
The front sign sais something like "GAS - It's forbidden to smoke inside, or get inside with a flame". I thought the amp was a little boring, and had that plate lying around my bedroom, so why not?
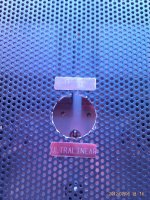
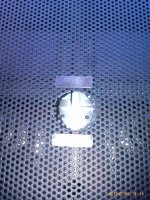
To allow to switch between Triode and Ultralineal mode, I have drilled a hole that allows you to switch if aided by a pencil or whatever stick-shaped object you may have around.
As I previously said, my plan was to mount the cover cage on this enclosure. The manufacturer advises that it is not compatible with the wood side panels, but after some careful planning I devised a way to achieve it. Suming it up, you have to mount upside-downthe wood side panels, then you break (or cut) a bit of the prominent wood that otherwise wouldn't allow you to screw down the bottom cover.
In fact, it provides more stability, as by default each panel is hold with only two screws. Now it has those two screws, plus 2 screws to the metal holder,s plus the two screws that hold the top mesh cover. I am really happy on how the result ended 😛
The front sign sais something like "GAS - It's forbidden to smoke inside, or get inside with a flame". I thought the amp was a little boring, and had that plate lying around my bedroom, so why not?
To allow to switch between Triode and Ultralineal mode, I have drilled a hole that allows you to switch if aided by a pencil or whatever stick-shaped object you may have around.
Attachments
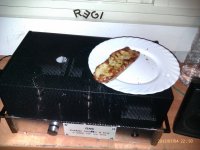
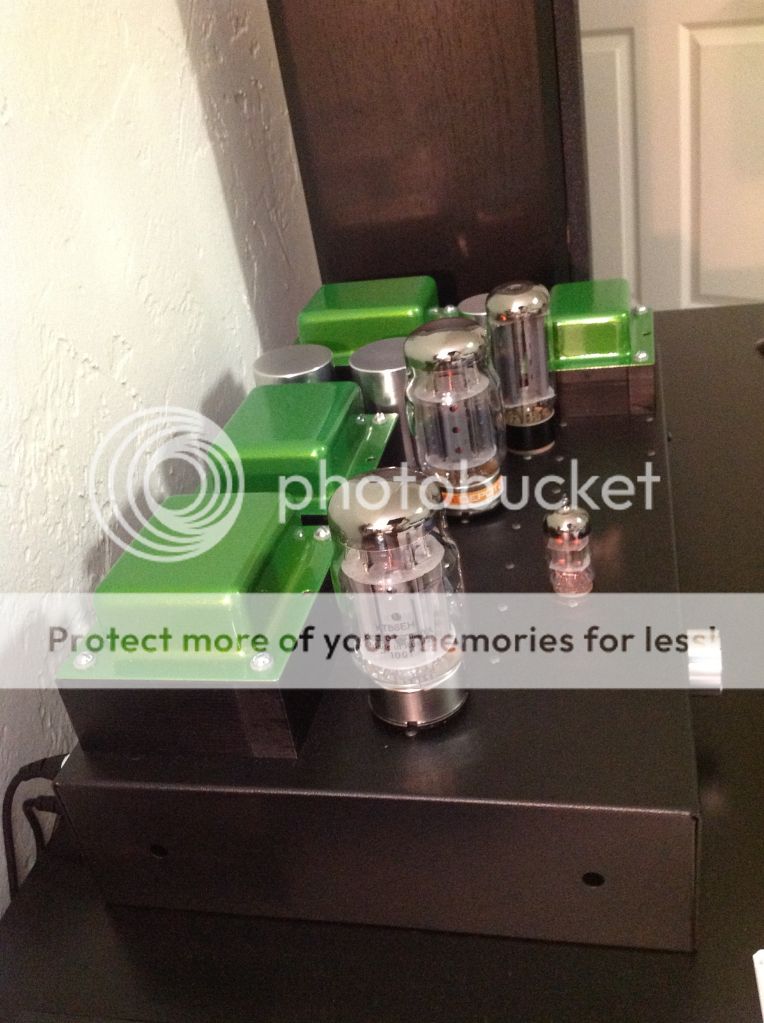
Before this mesh cover, this amp was so dangerous that you had to be aware of not touching the hot valves or whatever casual accident may happen (kids, pets).
Now you can let you kids have lunch on top of it 😀
Now you can let you kids have lunch on top of it 😀
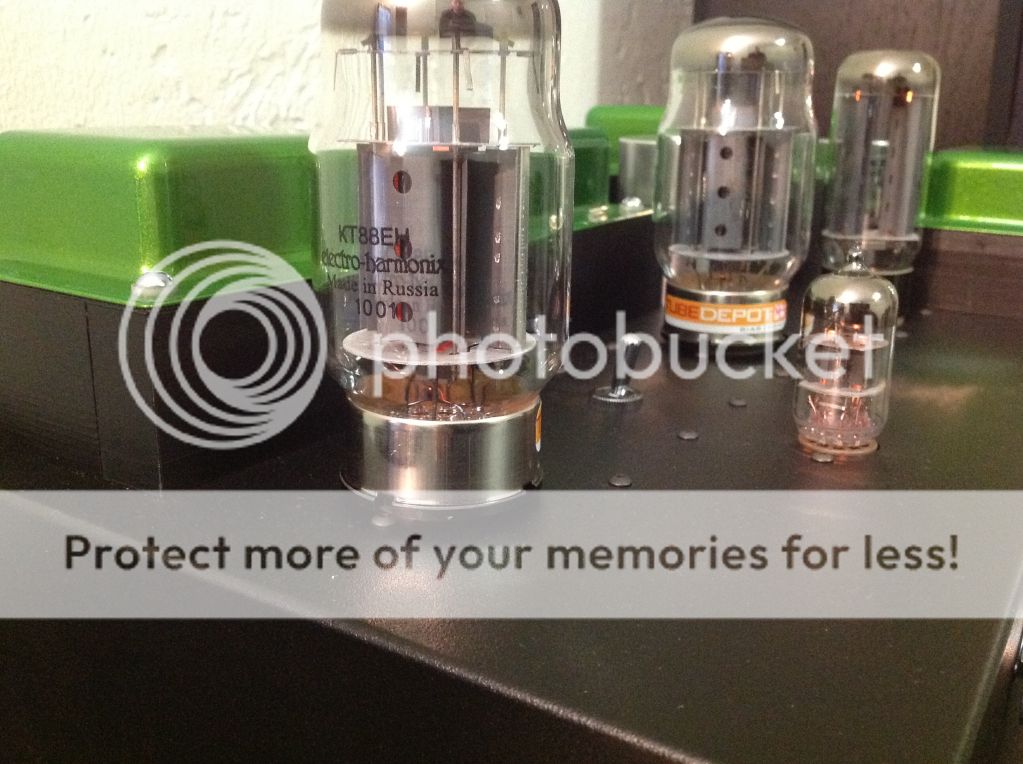
I am currently drunk, but I am sure I have seen a flashover inside the rectifier tube as soon as I switched on the amplifier. Is that something to care about? Should I expect it to repeat any other times?
Best regards!
Best regards!
Great kit, It is just the amp I want to build,(I should modify it to a 4/8ohm versionn to fit my speakers thouu,,,)
The main problem will be to convince my wife that I need yet another amp,,,,. are more master kits available ? will the kit be availabe some time from now also also??
Best regards
Balle Clorin
The main problem will be to convince my wife that I need yet another amp,,,,. are more master kits available ? will the kit be availabe some time from now also also??
Best regards
Balle Clorin
Yes, I have 12 more kits available. The only problem is the shipping cost, insurance, and VAT if shipping outside the United States.
Despite that fact, I highly recommend this kit as a pretty satisfied customer 🙂Yes, I have 12 more kits available. The only problem is the shipping cost, insurance, and VAT if shipping outside the United States.
Hello all,
After much searching and browsing, this is my first actual post to the forum. My main reason for posting is that I have recently completed my cousin's (Scott) KT88 SE Master Kit build. Me being quite the youngster I haven't prior spent much time around vacuum tube amplification. Until the last few years when Scott began engineering this kit. The first time I had the opportunity to listen to and demo the prototype of this amplifier, I was immediately drawn in. I had always been interested in all facets of music reproduction, but this was beyond anything I had experienced.
As the amplifier progressed from the engineering to prototype and now the production stage Scott suggested that with me being interested in electronics/audio, and pursuing an engineering degree that building a kit would be a great project and learning experience. Plus, I was looking to put together an amplifier/speaker setup for listening in my bedroom. So what better kit than this one?
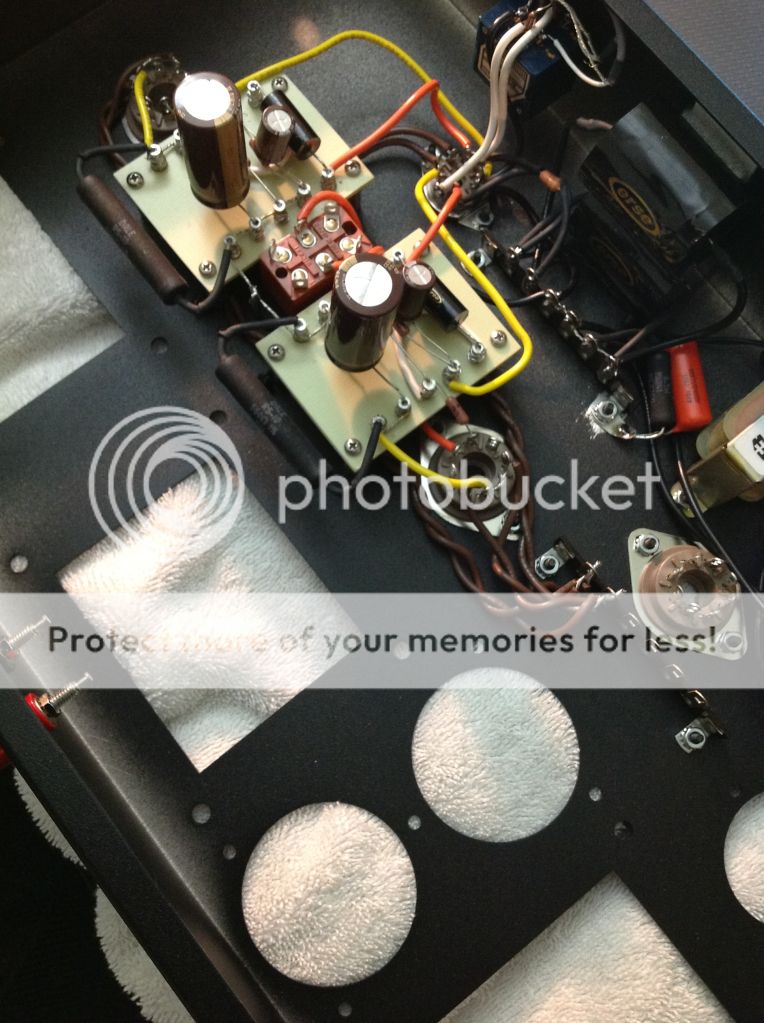
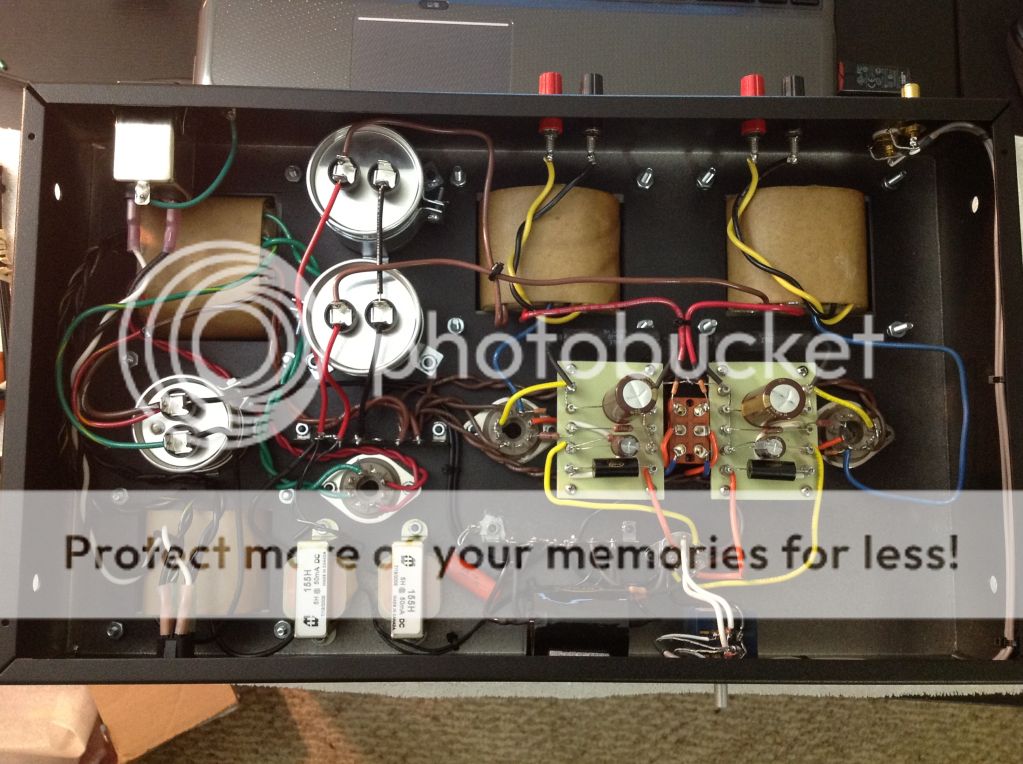
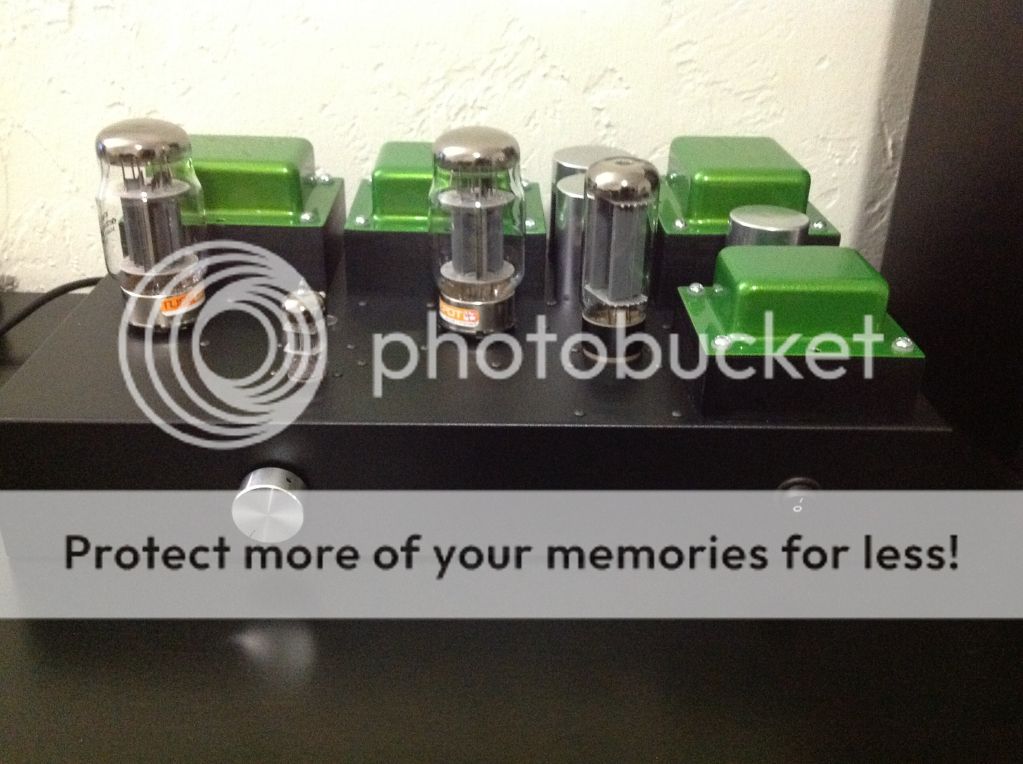
After receiving the kit I decided I wanted to get a nice finish and give it a little flair. So I had the chassis powder coated a textured black since this would fair better than a matte black when it came to cleaning. I then sanded and painted the transformers a satin black. As for the end bells, I wanted a bright green, after discussion with the powder coat shop we agreed granny smith green would be a cool color to go with.
Then began the build. When it comes to building an amplifier of any kind, I am for lack of a better term a complete newb. However doing car and home audio installation and other various audio and electronics related projects, I was very familiar with soldering and also had all of the tools required for the build. I found the manual to be very detail oriented leaving very little to the imagination, which for a beginner as myself this made the build very straight forward. I followed step by step, photo by photo with a few questions here and there. Overall I spent around 20 hours on the build, broken up in small sessions.
Now after completing the amp, I feel as though I've learned quite a bit about how the circuit works. As well as some new techniques with soldering, and testing circuitry. Let me say that for any of you that are interested in a beginners project look no further as this kit is not just for the tube-gurus but also caters to the beginners. However I do recommend doing some reading and research as with anything to become familiarized with what it is that your building.
As for the sound, I'm using a set of BIC Formula FH-65B bookshelf speakers (great sounding inexpensive bookshelf's). They are high sensitivity speakers which work well with the amplifier. The sound is very warm, full, and detailed. I'm hearing all the music I love in such a way that I didn't know was possible. What I'm also extremely impressed with is the low end reproduction with this setup. It's plenty enough low end for any listening situation. Probably the most impressive aspect of my listening experience thus far is the imaging. It's incredible. I can't see the speakers, even if I purposely try to.
Scott has very diligently engineered a truly beautiful piece of audio art here. This amplifier combined with a nice set of speakers in my opinion is capable of the most accurate musical reproduction. I have no doubt that any person, audio enthusiast or not would find this amplifier to be aesthetically pleasing to both the eyes and the ears.
Below I've attached a few photos:
After much searching and browsing, this is my first actual post to the forum. My main reason for posting is that I have recently completed my cousin's (Scott) KT88 SE Master Kit build. Me being quite the youngster I haven't prior spent much time around vacuum tube amplification. Until the last few years when Scott began engineering this kit. The first time I had the opportunity to listen to and demo the prototype of this amplifier, I was immediately drawn in. I had always been interested in all facets of music reproduction, but this was beyond anything I had experienced.
As the amplifier progressed from the engineering to prototype and now the production stage Scott suggested that with me being interested in electronics/audio, and pursuing an engineering degree that building a kit would be a great project and learning experience. Plus, I was looking to put together an amplifier/speaker setup for listening in my bedroom. So what better kit than this one?
After receiving the kit I decided I wanted to get a nice finish and give it a little flair. So I had the chassis powder coated a textured black since this would fair better than a matte black when it came to cleaning. I then sanded and painted the transformers a satin black. As for the end bells, I wanted a bright green, after discussion with the powder coat shop we agreed granny smith green would be a cool color to go with.
Then began the build. When it comes to building an amplifier of any kind, I am for lack of a better term a complete newb. However doing car and home audio installation and other various audio and electronics related projects, I was very familiar with soldering and also had all of the tools required for the build. I found the manual to be very detail oriented leaving very little to the imagination, which for a beginner as myself this made the build very straight forward. I followed step by step, photo by photo with a few questions here and there. Overall I spent around 20 hours on the build, broken up in small sessions.
Now after completing the amp, I feel as though I've learned quite a bit about how the circuit works. As well as some new techniques with soldering, and testing circuitry. Let me say that for any of you that are interested in a beginners project look no further as this kit is not just for the tube-gurus but also caters to the beginners. However I do recommend doing some reading and research as with anything to become familiarized with what it is that your building.
As for the sound, I'm using a set of BIC Formula FH-65B bookshelf speakers (great sounding inexpensive bookshelf's). They are high sensitivity speakers which work well with the amplifier. The sound is very warm, full, and detailed. I'm hearing all the music I love in such a way that I didn't know was possible. What I'm also extremely impressed with is the low end reproduction with this setup. It's plenty enough low end for any listening situation. Probably the most impressive aspect of my listening experience thus far is the imaging. It's incredible. I can't see the speakers, even if I purposely try to.
Scott has very diligently engineered a truly beautiful piece of audio art here. This amplifier combined with a nice set of speakers in my opinion is capable of the most accurate musical reproduction. I have no doubt that any person, audio enthusiast or not would find this amplifier to be aesthetically pleasing to both the eyes and the ears.
Below I've attached a few photos:
Congratulations on your completed project. That truly is exemplary work!
Welcome to the world of tube audio.
Scott
Welcome to the world of tube audio.
Scott
amp kit offer
I have 11 Master Kits available for sale.
I have adjusted the price from $849.00 to $825.00.
You can calculate the shipping cost yourself from US zip code 11430 on this site: Postage Price Calculator
Shipment to the US:
Box 1: 20" x 12" x 5", 11 lbs., insured for $500.00 with tracking.
Box 2: USPS Large Flat Rate Box, insured for $325.00 with tracking.
International Shipping:
Box 1: 20" x 12" x 5", 11 lbs., insured for $500.00 with tracking.
Box 2: USPS Medium Flat Rate Box, insured for $175.00 with tracking.
Box 3: USPS Medium Flat Rate Box, insured for $150.00 with tracking.
Import duty/VAT is your responsibility.
The next 3 orders will receive (2) Ampohm 0.22uF/630V, Paper-in-Oil/Tin Foil coupling capacitors free of charge (as well as the Erse 0.22uF/630V caps that come with the kit).
Attachments
Last edited:
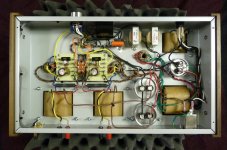
I've have a few (maybe 3 or 4) chassis left that are powder coated RAL9006. I'll sell for the same price until they are gone. The attached photos show what it will look like when built. You will have to refinish the transformer laminations as they can be somewhat rough. To achieve the mirror finish on the caps use automotive chrome/aluminum polish.
Attachments

I have been using this kit for 6 months and all I got to say is that I recommend it alot, top quality components used everywhere and a clean layout. Sound is... just awesome!
How much for shipping will a master kit cost for Australia?
Where can I shoot off an email so I can give you my personal details and get a quote on the master kit.
Does the chassis come in a black finish at all from you? I would be interested in a black powdercoat finish too, and would even prefer it over the classic looking gray.
If it doesnt then I will just purchase the grey powdercoat finish and paint over the top plate with my own colour.
Do the wood panels come in any walnut finish? if not then leave it bare and I will do it myself.
Last edited:
I sent you a PM with the shipping details.
I don't have the chassis in black, but since you are going to recoat, I would send a raw aluminum chassis instead of powder coated.
The wood end panels supplied are solid walnut. They have a light smooth finish. They look good.
I don't have the chassis in black, but since you are going to recoat, I would send a raw aluminum chassis instead of powder coated.
The wood end panels supplied are solid walnut. They have a light smooth finish. They look good.
How much for shipping will a master kit cost for Australia?
Where can I shoot off an email so I can give you my personal details and get a quote on the master kit.
Does the chassis come in a black finish at all from you? I would be interested in a black powdercoat finish too, and would even prefer it over the classic looking gray.
If it doesnt then I will just purchase the grey powdercoat finish and paint over the top plate with my own colour.
Do the wood panels come in any walnut finish? if not then leave it bare and I will do it myself.
Yes I got that, thank you very much.
I will be getting it in a raw aluminium chassis.
I will fill you in with further information via email when funds are available and will request a paypal invoice upon that day.
I will be getting it in a raw aluminium chassis.
I will fill you in with further information via email when funds are available and will request a paypal invoice upon that day.
Last edited:
Hello folks!
As I previously said, my plan was to mount the cover cage on this enclosure. The manufacturer advises that it is not compatible with the wood side panels, but after some careful planning I devised a way to achieve it. Suming it up, you have to mount upside-downthe wood side panels, then you break (or cut) a bit of the prominent wood that otherwise wouldn't allow you to screw down the bottom cover.
To allow to switch between Triode and Ultralineal mode, I have drilled a hole that allows you to switch if aided by a pencil or whatever stick-shaped object you may have around.
where is this cover from? I would also like to purchase one, simply for peace of mind when transporting my amplifier.
where is this cover from? I would also like to purchase one, simply for peace of mind when transporting my amplifier.
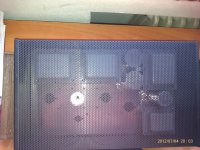
This is the cover that Regi is talking about, 1451-30:
Hammond Mfg. - Perforated Chassis Covers (1451 Series)
It will not work if using the walnut side panels, as you can see, without some major modification.
Hey, get that, I got some small aluminium plates lasser written to show both UL and Triode connections.
Regarding how to install the mesh cover, it's a matter of compromises. You have to choose between easily installing ONLY the mesh cover, easily installing the wood panels, or installing both of them involving a bit of trouble as I did.
First, you take the wood panels and turn them upside down. That way you put upside the carved side of it, what will allow you to place the mesh at the same time that the panels. Then, you have to cut the wood in order to allow the bottom plate to be installed. You can not do it, but it may pose a safety problem. You make some extra holes to properly screw and nut the mesh. I made a hollow hole on the wood panel to allocate the screw's head.
Have a look at the mesh and enclosure pictures from Hammond's website and you will visually realize what I have explanied that bad (I'm sorry!).
Please do not hesitate asking any doubt,
Best regards!
Attachments
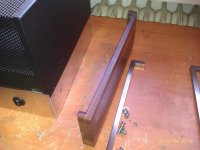
And, yes, it has a total of 6x screws per side supporting everything. Two for each handle, two on each side of the mesh and two dedicated for each wood panel. Feels quite sturdy when lifthing the ~16 Kg. 🙂
- Status
- Not open for further replies.
- Home
- Vendor's Bazaar
- KT88 SE Basic or Master Kit