one can always make a cease of cutting boards
"cease" should be "case"
though, if enough cases are made, that's probably proper cause for cease


That was sole reason for building another!!
Every proper House must have even number of Iron Pre's
LEDless or LEDded, irrelevant

^ Wait... is that number of boards ... or total... Hmmm?
I think there's a "case" to be made for me building another.
@Russellc - Glad you're taking it all in good stride. Yeah, the F6 schematic only showing the LED on one rail and the boards having one LED on one rail, and one on the other confuses A LOT of people. Most important... build a balanced... then, you can have another and still keep the number of boards (and total) even.
Good. I have two as soon as a led swap can be done!Every proper House must have even number of Iron Pre's
LEDless or LEDded, irrelevant
Good stride is only way. This place is easy compared to at work, sheesh I get death threats there!
LED solved. Such a simple circuit. Carefully removed LEDs, cleaned pads, cleaned legs of resistors. Installed in opposite orientation. Did not solder in place, yet. Just everything tightly mounted to faceplate. Still no lighting.
Got out list of parts, assembly notes. On parts list that came with kit, was a single resistor that fit the description of what build guide said should be used for twister board, so I installed it on twister board.
Then during assembly I discovered that no, that lone resistor had a place on the board! So I removed it from Twister board and put it where it belonged.
Then they lived happily ever after except the LEDs wouldn't light with no resistor. The end.
Oh, and one other thing. The pic in build of twister showing led orientation IS correct for that twister board, well my version.
Wait... you didn't have the LED resistor in place?Then they lived happily ever after except the LEDs wouldn't light with no resistor. The end.
All's well that ends well.
Correct. I updated that post with an edited note just after originally posting it. I couldn't remember if he had 2021 or 2023 boards. I thought I had sent him 2023 boards for the guide. I had to do a double take and reset my brain. Besides, 6L6 would never get that incorrect. 🙂Oh, and one other thing. The pic in build of twister showing led orientation IS correct for that twister board, well my version.
Wooooo Hoooo!
Ok it's up and running with no issues. LEDs operate correctly. I'm going to use the front panel power LED hole above switch for precisely that. I think I would really like the on/off switch hole to be a way to unlight the LEDs when switched, while still operating. Dark room mode.
Two power switches is redundant, but I guess the rear one could remain on, and use front panel switch for on/off duty. Still redundant unnecessary wiring.
Lastly, I guess I could put a switch that did nothing in there. Wait a minute, with car battery it could switch on those replacement car horns that plays either "Lachicaracha" or "Theme from the Godfather."
What's everyone doing with switch hole? Maybe second redundant switch is best with rear always on?
Russellc
btw. I always leave at least one peep-hole in my gadgets, so I can stare at goats whenever I feel the urge
I am working on a custom front panel. The Alps RK27 has a 300º rotational angle. Just wondering what volume amounts the IP allows.

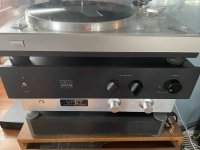
After a LONG time of doing a little here and a little there, I made the final push and 2 Iron Pre Balanced units are now completed. They are quite similar with one key difference. Both have 3 SE + 2 BAL input, 1 SE and 1 BAL output, and Cyan LEDs. Unit one has 10k EIZZ stepped attenuators. Unit 2 has 10k Alps blue pots.
What I notice is that the Alps pots are much "hotter" or aggressive in their taper profile. In other words, the taper of the Alps pot gets louder much faster. 9 O'Clock on the Alps is MUCH louder than the EIZZ. I'm more used to the taper of the EIZZ because it is similar steps to my Slagle Autoformer / VFET B1 preamp.
Naturally the sound is great from both setups, they just behave a little differently. They're both getting some test time today.
This project made me add XLR's to my Aleph 30 monoblocks, and it's letting me test my DAC and Pearl 3 balanced outputs.
 to MZM, @ItsAllInMyHead, @Gianluca, and of course to NP!
What I notice is that the Alps pots are much "hotter" or aggressive in their taper profile. In other words, the taper of the Alps pot gets louder much faster. 9 O'Clock on the Alps is MUCH louder than the EIZZ. I'm more used to the taper of the EIZZ because it is similar steps to my Slagle Autoformer / VFET B1 preamp.
Naturally the sound is great from both setups, they just behave a little differently. They're both getting some test time today.
This project made me add XLR's to my Aleph 30 monoblocks, and it's letting me test my DAC and Pearl 3 balanced outputs.
to MZM, @ItsAllInMyHead, @Gianluca, and of course to NP!Attachments

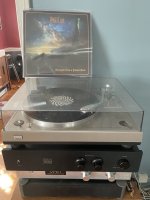
Took a while for me but fired up perfectly and sounds the same. Going through library again as if the first time. Thanks everyone
- Home
- Amplifiers
- Pass Labs
- Iron Pre Essentials Kits For The DIYA Store - Register Your Interest