Here is another couple of questions that needs to be answered soon for me. I plan to remove the dust cap of the Pioneer B20, and set up a phase plug, which will have the small PE tweeter mounted on the end.
First, Is there a certain amount of length that the phase plug must have in order to add to the value of the sound, thus causing the tweeter to stick out further? I am ignorant as to how the setup would work out in theory and practice. In other words, never done this before. Also, this will make a big difference as to how I am going to have to place the driver ANd the diffusion lense since it will be working with the B20 and the tweeter together.
And Second, since the B20 does not have a vented pole piece, is it possible that a hole can be drilled in the midle of the magnet structure and use it the tweeter wire. I am pretty sure that the center portion of the magnet assembly is not really the magnet, as the magnet is round and donut shaped, correct?
Let's say a hole was drilled and the wiring for the tweeter was run through the hole, and then the hole was resealed by something like eposy or hot glue, would that work without changing the T/S parameters? Or should I just route the wire through two holes in the cone that have been re-sealed. I would really like to try the former process if there is no real trouble there.
Does anyone have any knowledge they can put forward here?
Thanks.
John L said:Does anyone have any knowledge they can put forward here?
Drill swarf and VC gaps don't mix well. 😉
pinkmouse said:
Drill swarf and VC gaps don't mix well. 😉
You are right, and I have thought of this. I had planned to take plastic, or paper and completely cover the area around the voice coil and then tape it down so only the center of the magnet assembly would be exposed. if I drill from the back of the speaker, all the swarf would come out of the rear, where it could be cleared away.
Then carefully inching my way through to the front would be slow and determined, to insure all the shavings from getting loose and into trouble. Also, a large bit would not be necessary, would it? The less you drill out, the less swarf you would have.
Does this make sense?
pinkmouse said:
Drill swarf and VC gaps don't mix well. 😉
Isn't that the truth.
However, from a DIY perspective, this can be avoided with precaution. First, do the dustcapectomy (great word). Then mask off the VC gap (all the way from the pole piece (including the entire pole piece itself to be safe) to just past the edge where the dustcap used to be. Masking tape is what i'd use. Drill your hole. Before removing the tape, make sure the entire area including the hole itself is completely flushed of swarf. I would see if using a stronger magnet thats small enough to root around in there would work, but odds are you'll be picking it out manually with tweezers.
or theres the safe route, which is to not do it at all, but that's no fun
-Jared
*edit* you posted as i was writing. guess you already thought of it, John 😀
defect9 said:
or theres the safe route, which is to not do it at all, but that's no fun
-Jared
*edit* you posted as i was writing. guess you already thought of it, John 😀
You are correct, the safe way is never any fun. Besides, it's not as if the B20 is a king's ransom. They do have more that are for sale. 😉
Also, like minds must think alike too.
 😀
😀If you must drill through the pole ( not my thing either, I'd mount the tweet on a "bridge" across the width of the woofer) use what they do for re-threading a cylinder head spark plug hole without taking the head off - grease. Grease will catch the cuttings. Go slow, clean often.
MJL21193 said:If you must drill through the pole ( not my thing either, I'd mount the tweet on a "bridge" across the width of the woofer) use what they do for re-threading a cylinder head spark plug hole without taking the head off - grease. Grease will catch the cuttings. Go slow, clean often.
That's a great idea.!
Try this. Suppose I deposit a small glob of grease where the drill bit will come out, and cover that grease with some tape that traps the entire grease spot. Then when I drill through the pole piece, I will know when I am out the other end, and then quickly back out again without breaking the tape seal. Then remove the tape, clean away the grease. Then feed the wire through the pole piece, going from front to rear, so as not to pull any possible shavings out the front. And finally sealing the drilled hole with epoxy or hot glue, keeping any more shavings from having a chance to escape and possibly foul up the voice coil.
Is that being careful enough?
I have a problem with mounting the tweeter on a bridge because I fear that I am going to be in a pinch trying to get the diffusion lense to fit nicely over the drivers and look like they naturally fit there. The diffraction lense lower half is going to be exactly 5 inches high, and the upper half will be about 2.5-2.75 inches. If I am forced to set it up too high, it will look out of place.
Also, I had asked earlier today if there would be a problem lowering the B20 down a bit, perhaps mounting it underneath the upper lid, instead of on top of it. Does anyone have any thoughts there? Normally that would cause trouble on a conventioal driver mounted to the rear of the baffle. But in this case, I would not think there to be any problem since the diffuser will be reflecting the sound evenly.
John L said:Here is another couple of questions that needs to be answered soon for me. I plan to remove the dust cap of the Pioneer B20, and set up a phase plug, which will have the small PE tweeter mounted on the end.
I haven't gotten any more work done on the tweeter on the phase plug. I feel that the top of the tweeter should be at about the top edge of the whizzer cone. My approach is to take 1.25" dowel. Trim to length. Fit the tweeter on the end, glue it in place, then shrink wrap the entire structure, then EnABL that (i believe Kensai has his B20s back and is preparing to comment on them). I figure screws/magnetic attachment won't be sufficient, so the assembly will probably need to be glued in place.
I would forget any notion of drilling a hole thru the polepiece, This is hardened steel and for the cost to get it done you might as well just start with something more suitable. Further the proper way to do it is to remove the charge from the magnet, drill the hole and then recharge it (the heat & vibration might cause you to have to recharge it anyway). This is best done with the cone removed. I have seen it done, but the guy had a recharger and he started with a coneless driver assembly.
GM's suggestion of a pair of twisted magnet wires strung across the front makes way more sense.
dave
John L said:
Suppose I deposit a small glob of grease where the drill bit will come out, and cover that grease with some tape that traps the entire grease spot.
Do you have a drill press? I don't - I do my drilling free hand. I've never tried to drill through a speakers pole before though.
I think a 3/16" bit would be a good size to try. Even if starting at the back, I'd still slather the bit with grease. Lubricates the cutting action. For that matter, they used bacon grease for cutting lube in the old days, so you might give that a try if you have any kicking around.
A thimble (for sewing?) full of grease would stick to the pole magnet on it's own, without tape.
John L said:And here is what a cap looks like with the hole routed out and a reinforcement underneath the cap.
You need to open that hole up on the back side so the driver can breath. We use a 45 degree champher.
dave
MJL21193 said:
Do you have a drill press? I don't - I do my drilling free hand. I've never tried to drill through a speakers pole before though.
I do. I also have lots of sewing machine oil, And grease. 🙂
planet10 said:
You need to open that hole up on the back side so the driver can breath. We use a 45 degree champher.
dave
You're right on that. I had forgotten about it. Thanks Dave. I'll probably do like John Krupke does, and route the champher on the areas other than where the bolt holes go. That way it can breath And bolting is more secure.
Hi John,
Maybe you could try something like this. You could attach the tweeter to the diffuser above, using screws and some spacers (perhaps aluminum tubing over the screws) or like a bridge from the edges of the driver frame (with spacers to allow for cone movement).
It might be simpler and less risky than modifying the driver. Just a thought.
Attachments
dlneubec said:Hi John,
Maybe you could try something like this. You could attach the tweeter to the diffuser above, using screws and some spacers (perhaps aluminum tubing over the screws) or like a bridge from the edges of the driver frame (with spacers to allow for cone movement).
It might be simpler and less risky than modifying the driver. Just a thought.
It's worth a consideration Dan. Let's see how things work with my drill press.
BTY, what you have on your pdf attachment is EXACTLY what I have had in mind all along. I would rather attempt that first, and fall back if it becomes unacceptagle.
Incidentially, I have gone back and looked at the Jupiter and Bella Luna and noted the slopes on the top piece. However, the Venus, which is the hexagon, is flat across the top. I just thought I would pass that along.
John L said:
Incidentially, I have gone back and looked at the Jupiter and Bella Luna and noted the slopes on the top piece. However, the Venus, which is the hexagon, is flat across the top. I just thought I would pass that along.
I realized that, but assumed it was simply a cost cutting method for the lower line of speaker. My humble, unsolicited opinion is that the FR would most likely be flatter, due to less diffraction signature with the chamfering. That's been my measurement experience on the ones I've built. My guess would be that the hex shape would be even more susceptable to diffraction issues because more of the baffle edge is the same distance from the driver than a square or rectangular shape.
I would also guess that the shaped baffle that they use on the higher end units is designed to continue the horn flare on both sides of the horn, the baffle side and the diffuser side.
YMMV.
dlneubec said:
I would also guess that the shaped baffle that they use on the higher end units is designed to continue the horn flare on both sides of the horn, the baffle side and the diffuser side.
YMMV.
If that was the case, then why do that on the four edges, where the support tubes are placed and can partially block the sound wave? why not do that all around on the sides too?
They are doing what they can, I guess. The driver shape allows for the most radical chamfering in the corners. It also appears that there is some small chamfering on the front and back, but hard to tell.
I don't recall their crossover points, but they are probably in the 1.5-2khz range to the compression tweeter. The tweeter is in a different housing and has a constant flare in their systems. Not so in your case. You will have all frequencies coming out at this location, so both your woofer and tweeter will be affected by the baffle shape and its edges.
BTW, I don't think the posts will be a problem for you, but I would keep them round and make them as small as is practical since you have all frequencies passing by them on your design.


I agree Dan, it's much lighter than the Better Bond. I'll go with either Titebond II or III in the future.
Thanks. 🙂
Thanks. 🙂
I had meant to report on my second class in wood lathe instruction, in which I started into shaping the diffraction lenses, but things did not work out all that well. I was a little discouraged over it, and just didn't report my progress, because I was not in the mood. But here I am.
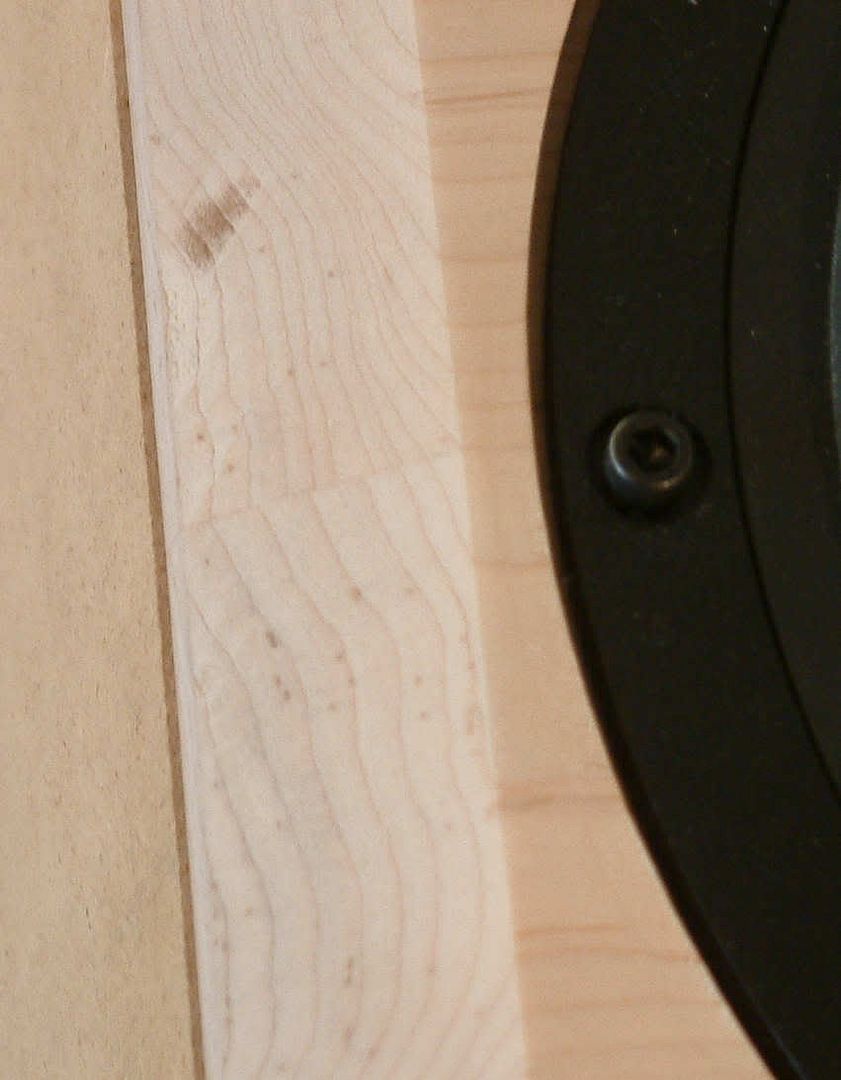
Last Tuesday I had made a little foul-up in trimming off the excess Plastic laminate to the top of one of the speaker enclosures. Rather than use my old stand-by trim bit, which is a single solid piece of carbide steel,

I decided to use my other, better known one.

I have not used this bit in years, because the former one works so well, but worried that the solid piece bit would cause a burning of the veneer as it passed along the top of the cabinet, while I trimmed off the P/L. Unfortunately, I forgot to check the tightness of the locking screw at the bottom, and while trimming off the P/L, the ball bearing guide came loose, and the bit cut into the veneer. Now I am forced to either sand down the cabinet about 1/2", or attach a black trim to the outer tops.
And as if that was not enough headache, the blanks I made for the lathe class did not work properly. But I will get to that in a minute.
After my mistake with the router, I took out one of my cabinet grade 'seconds' plywood, and made the four blanks I would need for the lathe class. Wednesday, I took one of the cabinets, and the blanks over to the class, and practiced more on smaller pieces of wood, before beginning on the glued blanks.
I started out with the convex shape, which is the hardest, and then worked on the concave shape once I felt comfortable with the former. As you can see, I managed to get better as I went along.
Here is the instructor teaching the other student how to make spindle candlesticks. He makes it look sooooo easy,...........and fast.
The instructing process actually took about ten minutes, but if he actually did it without showing the student how he went about the process, he could have completed this in perhaps two minutes maximum. He is very skilled.
finally, the time came around for me to start on what I entered the class to do. We took one of the concave blanks and attached it to the "In Line" lathe, and my instructor began to show me how this would be started. As he began, I could see visions of finishing up my first set then and there. This was exciting.
but some things are not to be. In the picture above, the instructor is just about to turn on the lathe, and demonstrated the position I should take when I start out cutting down the excess wood. Unfortunately when he began working the blank, his cutting tool quickly went dull. So he tried another, and the same thing happened. So he tried a third, and the same story.
Then he sharpened all three tools, and tried again, but they quickly went dull. WTF was going on here? He called his friend and partner to ask why this was happening. The two of them publish together, and he had never seen anything like this before. But his partner recognized the issue immediately. The plywood was obviously from the orient, and the type of wood, plus the resins in the glue were of the sort that wrecked havoc on turning tools. The upshot was that the plywood was not economically turnable, because the turning tools were being dulled just as fast as they were applied. What a bummer!
The obvious lesson here is that if you are a wood turner, be very leary what plywood you purchase, should you decide to laminate it and then turn the stuff. Back to the drawing board here.
Friday I went to Lowes and for the sake of arguement compared the costs of using poplar, pine, and MDF for the next blanks. I quickly saw that using poplar and pine would cost me in the range of $100 or more for the blanks, while the MDF is only about $22. And I was assured that MDF would work, so I have decided to go with MDF to start. I consider this to be the most practical, because it is much cheaper, AND if I make any mistakes while I am still learning, the cost will be less for me, money wise.
So that is where I am currently standing. I need to remake a new set of blanks, using MDF, and attend another class where I will again attempt to make a set of diffusion lenses. This is new ground for me, so I should have known better and expected obstacles, such as this.
Last Tuesday I had made a little foul-up in trimming off the excess Plastic laminate to the top of one of the speaker enclosures. Rather than use my old stand-by trim bit, which is a single solid piece of carbide steel,
I decided to use my other, better known one.
I have not used this bit in years, because the former one works so well, but worried that the solid piece bit would cause a burning of the veneer as it passed along the top of the cabinet, while I trimmed off the P/L. Unfortunately, I forgot to check the tightness of the locking screw at the bottom, and while trimming off the P/L, the ball bearing guide came loose, and the bit cut into the veneer. Now I am forced to either sand down the cabinet about 1/2", or attach a black trim to the outer tops.
And as if that was not enough headache, the blanks I made for the lathe class did not work properly. But I will get to that in a minute.
After my mistake with the router, I took out one of my cabinet grade 'seconds' plywood, and made the four blanks I would need for the lathe class. Wednesday, I took one of the cabinets, and the blanks over to the class, and practiced more on smaller pieces of wood, before beginning on the glued blanks.
An externally hosted image should be here but it was not working when we last tested it.
An externally hosted image should be here but it was not working when we last tested it.
I started out with the convex shape, which is the hardest, and then worked on the concave shape once I felt comfortable with the former. As you can see, I managed to get better as I went along.
Here is the instructor teaching the other student how to make spindle candlesticks. He makes it look sooooo easy,...........and fast.
An externally hosted image should be here but it was not working when we last tested it.
An externally hosted image should be here but it was not working when we last tested it.
An externally hosted image should be here but it was not working when we last tested it.
The instructing process actually took about ten minutes, but if he actually did it without showing the student how he went about the process, he could have completed this in perhaps two minutes maximum. He is very skilled.
finally, the time came around for me to start on what I entered the class to do. We took one of the concave blanks and attached it to the "In Line" lathe, and my instructor began to show me how this would be started. As he began, I could see visions of finishing up my first set then and there. This was exciting.
An externally hosted image should be here but it was not working when we last tested it.
but some things are not to be. In the picture above, the instructor is just about to turn on the lathe, and demonstrated the position I should take when I start out cutting down the excess wood. Unfortunately when he began working the blank, his cutting tool quickly went dull. So he tried another, and the same thing happened. So he tried a third, and the same story.
Then he sharpened all three tools, and tried again, but they quickly went dull. WTF was going on here? He called his friend and partner to ask why this was happening. The two of them publish together, and he had never seen anything like this before. But his partner recognized the issue immediately. The plywood was obviously from the orient, and the type of wood, plus the resins in the glue were of the sort that wrecked havoc on turning tools. The upshot was that the plywood was not economically turnable, because the turning tools were being dulled just as fast as they were applied. What a bummer!
The obvious lesson here is that if you are a wood turner, be very leary what plywood you purchase, should you decide to laminate it and then turn the stuff. Back to the drawing board here.
Friday I went to Lowes and for the sake of arguement compared the costs of using poplar, pine, and MDF for the next blanks. I quickly saw that using poplar and pine would cost me in the range of $100 or more for the blanks, while the MDF is only about $22. And I was assured that MDF would work, so I have decided to go with MDF to start. I consider this to be the most practical, because it is much cheaper, AND if I make any mistakes while I am still learning, the cost will be less for me, money wise.
So that is where I am currently standing. I need to remake a new set of blanks, using MDF, and attend another class where I will again attempt to make a set of diffusion lenses. This is new ground for me, so I should have known better and expected obstacles, such as this.
- Status
- Not open for further replies.
- Home
- Loudspeakers
- Full Range
- Hexagon Pioneer B20FU20 Enclosure