I bought the Bugle 2 PCB several months ago but the board I received had all provisions to make a Bugle 3 which has gain select switches from 40 to 64 dB.
Phil
Was the BOM updated to include the switches ?
The Bugle 3 is different from the 2 in this - " It improves on the Bugle2 by adding small internal switches to select various Gain and Loading options, easily accommodating any MM or MC cartridge."
You could add some switches to the 2, or some header pins as I did in the guide - honestly, how often are you switching cartridges?
Great idea 6L6! 😎 Much better SQ than switches ... and, as you said, how often do you swap carts/gain?
Where do I buy the receptacles that take the res leads?
Andy
A mate of mine has both - although his Bugle only has MM gain. So we were able to directly compare Bugle with Cornet 2 - and the Cornet sounds better!
I have both a Cornet 2 and a Bugle3. I also believe the Cornet sounds better -- perhaps just my bias, but it is what it is. I also have a Broskie Tetra and I prefer the Cornet 2 over it as well.
Back in the day when JH was still a feature on ac.com, he seemed like a great guy as well.
Bugle is dead :-(
I electrocuted my Bugle 3! A couple of days ago I ordered a 24V linear power supply for my Bugle from AliExpress. Received it after just a couple of days.
When I had it at home I immediately connected it to mains and then to the Bugle 3.
Then smoke...
Turns out that + and - were exchanged - plus was on the outside of the connector. Also the power supply does not have safety earth connected at all. I should probably connect that to the case, what do you think?
Unfortunately everything on the phono pcb looks fine so I cannot really tell which parts are damaged. I hope I can revive Bugle for cheap by just exchanging the TLE2426 rail splitter.
I'm building a headphone amplifier that's powered by an external DC (that's important to the story: DC) wall wart. The first component on the PCB after the barrel jack, is a four diode bridge rectifier, one of these nice little compact beauties. Now it doesn't matter whether I use a positive-tip, negative-sleeve wall wart OR a negative-tip, positive-sleeve wall wart. Either one works equally well, without damage. It only cost $0.29 to implement this feature.
Thanks Mark, thats a good idea - especially for the price...
I still hope to resuscitate Bugle later today
I still hope to resuscitate Bugle later today
There are two standards "center-negative" and "center-positive" for the DC wall-wart supplies. Which calls for extra caution. I also recently over-killed a device I had in repair; by mistakenly applying a wrong polarity PSU that blew the crossbar protection diode and made a few caps to vomit their juice.
A B80R "button type" bridge (Diotec) is my favorite add-on protection to retrofit to externally powered gadgets. You can also use DIP bridges like B80D when your circuit is lower-power, because of their lower current rating. DIP bridges are also easier to "insert" into existing wiring, because of their pinout (+/- on one side and both AC inputs on the other); just cut the cable, straighen the bridge pins and solder the damn thing, perhaps add a heatshrink. It can be made to look "professional".
A B80R "button type" bridge (Diotec) is my favorite add-on protection to retrofit to externally powered gadgets. You can also use DIP bridges like B80D when your circuit is lower-power, because of their lower current rating. DIP bridges are also easier to "insert" into existing wiring, because of their pinout (+/- on one side and both AC inputs on the other); just cut the cable, straighen the bridge pins and solder the damn thing, perhaps add a heatshrink. It can be made to look "professional".
@ianp -- The BOM was for the Bugle 2. The DIP switches I used are Mouser 611-SPA02B. The resistor values are shown in the Bugle 3 documentation.
Phil
Phil
Bugle is alive again!
All I did was change the TLE2426 rail splitter and it was working again. Also opened the new power supply and exchanged + and - going to the barrel connector; as a result, Bugle is running with the new power supply now.
Wanted to put in a socket for the TLE2426 (make it easy to echange it) and a B80R protection diode (thanks, anti), but space constraints and heat damage from unsoldering the damaged rail splitter kept me from doing it for now. I'll have to find another way to implement that.
I was sort of hoping that some of the opamps were damaged so I could swap them out because I have always been wondering if I would be able to hear a difference in sound. Well, they're all fine so maybe in a few weeks I'll just change them for fun.
@ianp -- The BOM was for the Bugle 2. The DIP switches I used are Mouser 611-SPA02B. The resistor values are shown in the Bugle 3 documentation.
Phil
Thanks, I was looking at the B3 circuit diagrams last night. I think i'll order a board, see what turns up and then order the components.
Order placed. Fingers crossed for the flexibility of B3 board, but as has been shown there are easy (and cheap) alternatives to achieve the same.
Looking forward to another DIY project. I love the smell of melted flux in the morning !
Looking forward to another DIY project. I love the smell of melted flux in the morning !
The Bugle has landed. I repeat the Bugle has landed
Looks like I'll be ordering myself some bugle 2 components tonight.

Looks like I'll be ordering myself some bugle 2 components tonight.
Quick question. I'm looking at buying the screws and & nuts locally and just realised that the sizes for the screws differ between the BOM and page 6 of the instructions:
BOM #4 x 3/16 vs Instructions #4 x 3/8
BOM #6 x 5/8 vs Instruction #6 x 1/2
Safe to assume the BOM is correct ?
BOM #4 x 3/16 vs Instructions #4 x 3/8
BOM #6 x 5/8 vs Instruction #6 x 1/2
Safe to assume the BOM is correct ?
That entirely depends on what enclosure you are going to build it into...
The one given in the BOM - 635-A-27-B
So, I checked with hagtech.com and the BOM is correct - 3/16 and 5/8 - for the case given in the BOM.
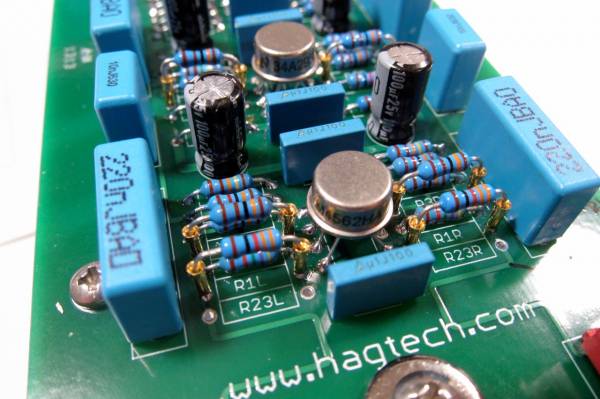
Finished the board build last night, just have to drill the cover plates. Quite a straightforward build. I ordered the break off pins as shown in the 6L6 photos, but didn't like the connection I was getting, so i pulled them all out and soldered the resistores direct to the board.
Very impressed with the sound so far, clearly better than the 640P that I was using previously.
Very impressed with the sound so far, clearly better than the 640P that I was using previously.
My Bugle2 is mostly done and the build was relatively uneventful, aside from
my silly mess up with the LED. Don't yet have the #4-40 3/16" screws
so the PCB is held by the end plates. I built it using the pin sockets like 6L6
did and configured it for 40dB. I only tested the opamp voltages and that
the dc offset was minimal.
I had the Bugle2 sitting on top of a plugged in (but not powered up) Creek MM
phono and some hum was leaking into the Bugle2. This was noticeable with
the preamp turned up high. Unplugging the Creek solved that.
I had a quick listen to the Bugle2 with an Ortofon 2M bronze and found it
superior to the Creek. Will play to more LPs this weekend.
The Bugle2 is a fun and simple build and my initial impression is very positive.
My plan is to up the gain and change the loading later and try it with a LOMC.
Dennis
Don't yet have the #4-40 3/16" screws
so the PCB is held by the end plates.
FWIW I couldn't find the correct length screws locally, so I just bought longer and took a dremel to them.
- Home
- Source & Line
- Analogue Source
- Hagerman Bugle 2