This looks like a very nice candidate for powering my dac output stage. I'm looking for 35-40V out so the 78xx types are out of scope.
Post 1 has an example of running 48vdc output, how is that done? I found
LM137 type regulators that can output 36V but then I'd need 2 extra resistors as those are adjustable regs.
Post 1 has an example of running 48vdc output, how is that done? I found
LM137 type regulators that can output 36V but then I'd need 2 extra resistors as those are adjustable regs.
There is LM317HV that can work to make 48v. You will need to make a small helper board with a few resistors to make it 78XX compatible pinout.
Hi X,
Looking building NP's 6-24 Xover from the store. I'd like to skip using a wall wart. I need 24vdc, and have a Antek AS-0515 tranfo that I was going to use for a B1. Well I have a spectacular Yarra rolling now, and was hoping I can use it for this 6-24 xo project. If I connect the secondaries in series to sum 30vac, what do I need to do other than put a bridge rectifier between it and the Cap-Mx?
30vac is too much for making 24vdc as that is 42vdc after bridge rectifier. You ideally want 4v drop across cap multiplier and about 3v drop across the linear regulator. So add 7v to 24v and you get 31v. If you put 42v into the cap multiplier you get 38v out which is 2-3v higher than a standard LM7824 would like to see. You could use an LM317HV with a small helper board.
Or use a bunch of 1A10 diodes (big fat ones used in solar cell charger projects) in series to drop 3v. Each is 0.7v or about 4 diodes gets you 2.8v drop. Use 5 for 3.5v drop if you really want to be safe. Put those in series with the output of the bridge and smoothing bulk cap (4700uF) and that should give you what you need going into the cap multiplier. Then use standard 7824 or nice TPS7A4xxx set to 24v.
Last edited:
Thanks X!
I also have a AS-0520, dual 20v secondaries. If I use only one 20v leg, that gives me 28v after the rectifier, but that falls 3v short of the 31v target. You have shown in your examples the use of a step-up board to get the input voltage you want. If I put one in between the rectifier/bulk cap and the CapMx would that work?
I need to build a 5vdc supply for a RPi based DAC too. I could use the other 20v leg to do so, correct?
Yes and Yes. But adding the DCDC step up introduces a “non-linear” or switch mode aspect to your PSU. For those afflicted with linearitus, that’s a non-starter. 🙂
You need two of them and connect in series. The wall supplies need to be electrically isolated. That is, 2prong and not 3 prong with earth ground connected to negative.
Most wall warts are isolated but check.
The series common is the new 0V and ground on one is -ve and positive on other is +ve.
Alternatively, you can get the Yarra preamp main board and PSU. It is dual monoblock with +/- output that has linear trafos, diodes, to CRC, cap multiplier.
Or gen 2 is trafo to active bridges to CRCLC filter then to 78XX/79xx format regulators or TPS7A4XXX LDOs.
https://www.diyaudio.com/forums/gro...ier-hpa-melbourne-db-buy-127.html#post6155523
IMO, this is the finest preamp/headphone amp dual monoblock regulated PSU one can have for projects requiring the best of the best power supplies.
Miniature active bridges eliminate diode switch noise:
TPS7A4XXX LDO’s have 4uV rms noise:
Last edited:
Thanks X. I have 2 of your Simw Cap mx at 5v and thought about using them for the +/- 5v rails for my AD1862 dac. For my setup I shall use separate windings and bridges.
Thanks for making me aware of the Yarra psu...interesting.
I wanted some more of those Aliexpress tps7a4701 3 pin regs in various voltages but they are NLA at the moment atleast.
Thanks for making me aware of the Yarra psu...interesting.
I wanted some more of those Aliexpress tps7a4701 3 pin regs in various voltages but they are NLA at the moment atleast.
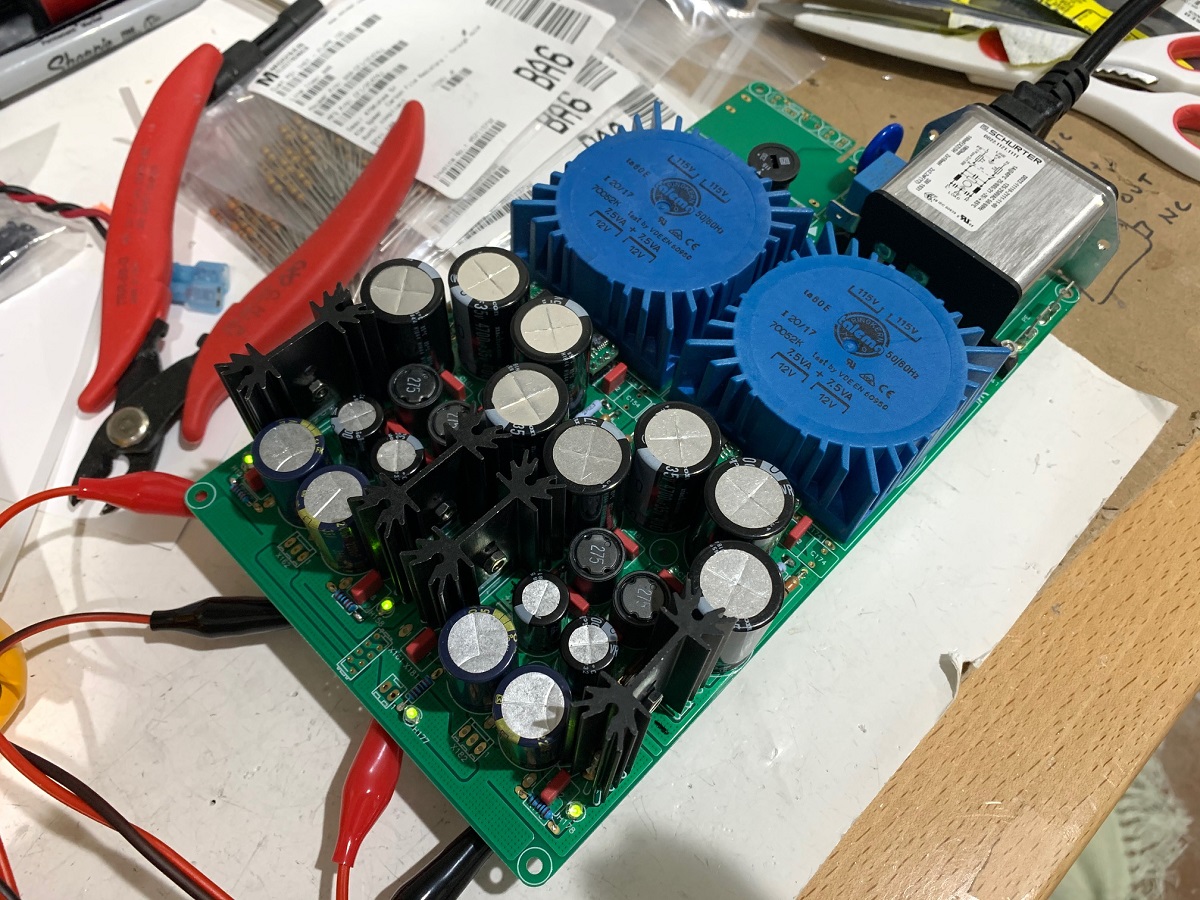
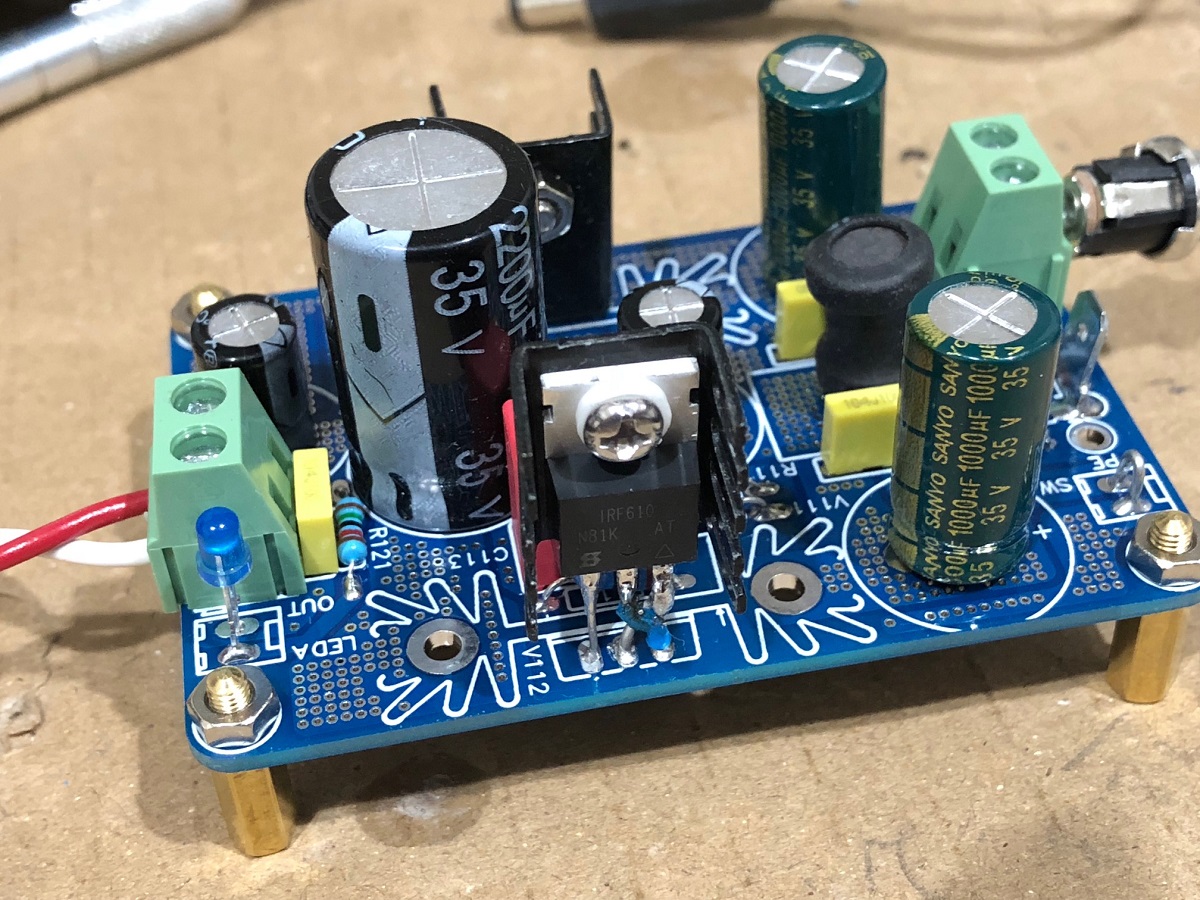
Can use IRF640N instead of IRF610Have you ever found yourself making a basic circuit that is so simple, that you say to yourself, "it's so simple I will just make it from scratch on veroboard..." It works so well and is so useful, it becomes an integral part of many of your future projects. Before you know it, you have hand-assembled on veroboard the same circuit a dozen times. Well that's what I have been doing whenever I needed a source of ultra quiet (battery-like) single-rail DC power in the range of 5v to about 32v and current under 1amp. I use this countless times for low noise headphone projects, DACs, etc. Well, I sort of got tired of making them from scratch and worked with JPS64 to put it on a simple 50mm x 75mm board the following: a CLC filter, an Easy-Peasy Juma cap multiplier, and a 78xx regulator, and throw in some smoothing caps, snubbers, output bypass caps, and LED power indicator, and input/output terminal blocks. I typically use a 12v 1000mA Class 2 transformer wall-wart ubiquitous with routers and switches that we accumulate over the years. That then powers a clean DC-DC step up converter to about 4v+ regulator dropout (circa 2v) above our needed voltage. So for example, if you need a clean 18v supply, add 5v or 23v as the DC-DC stepup output. Put that into this unit, and let its cap CLC filter, cap multiplier, and voltage regulator give you a clean source of 18v with ripple as low as 4uVrms (if you use a TO-220 formatted TPS7A4xxx LDO regulator). If you can live with 50uV noise,a simple 7818 regulator will work fine. I have used this on countless headphone amps and the noise floor measures flat like a battery. Absolutely no mains hum gets through.
Thanks to JPS64 for a great layout with all the customary via stitching and double planes of copper for low impedance current paths.
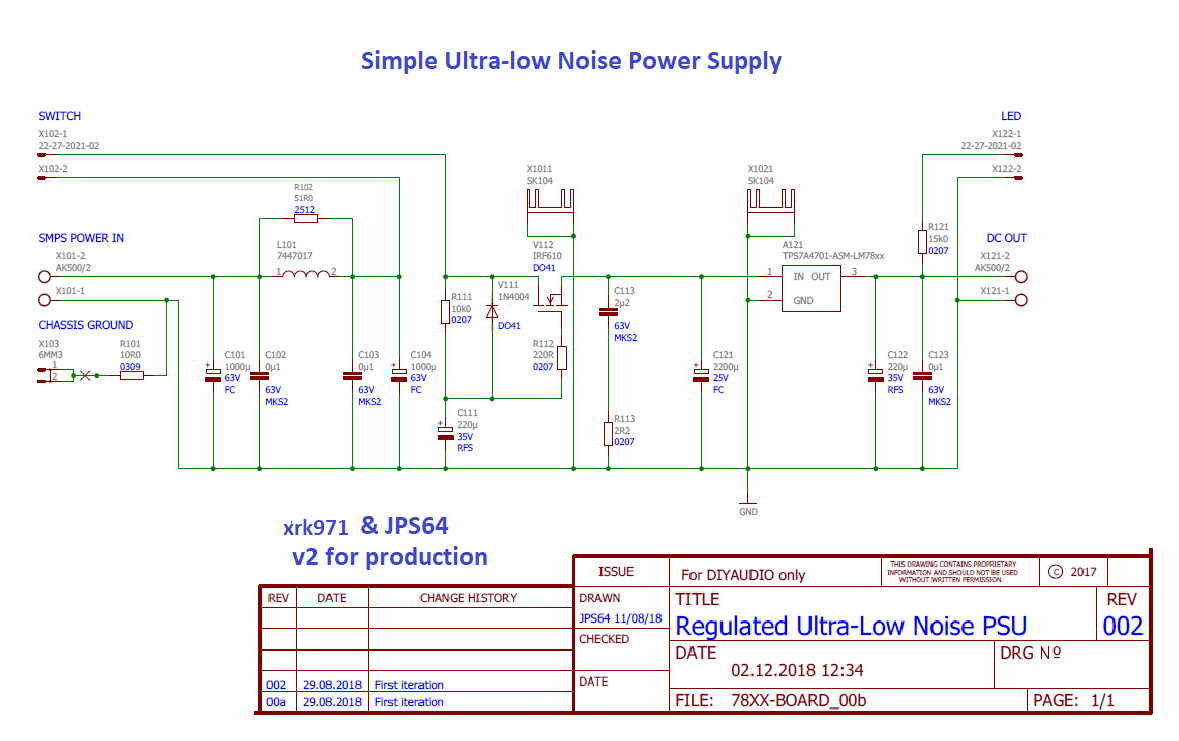
So here is the circuit:
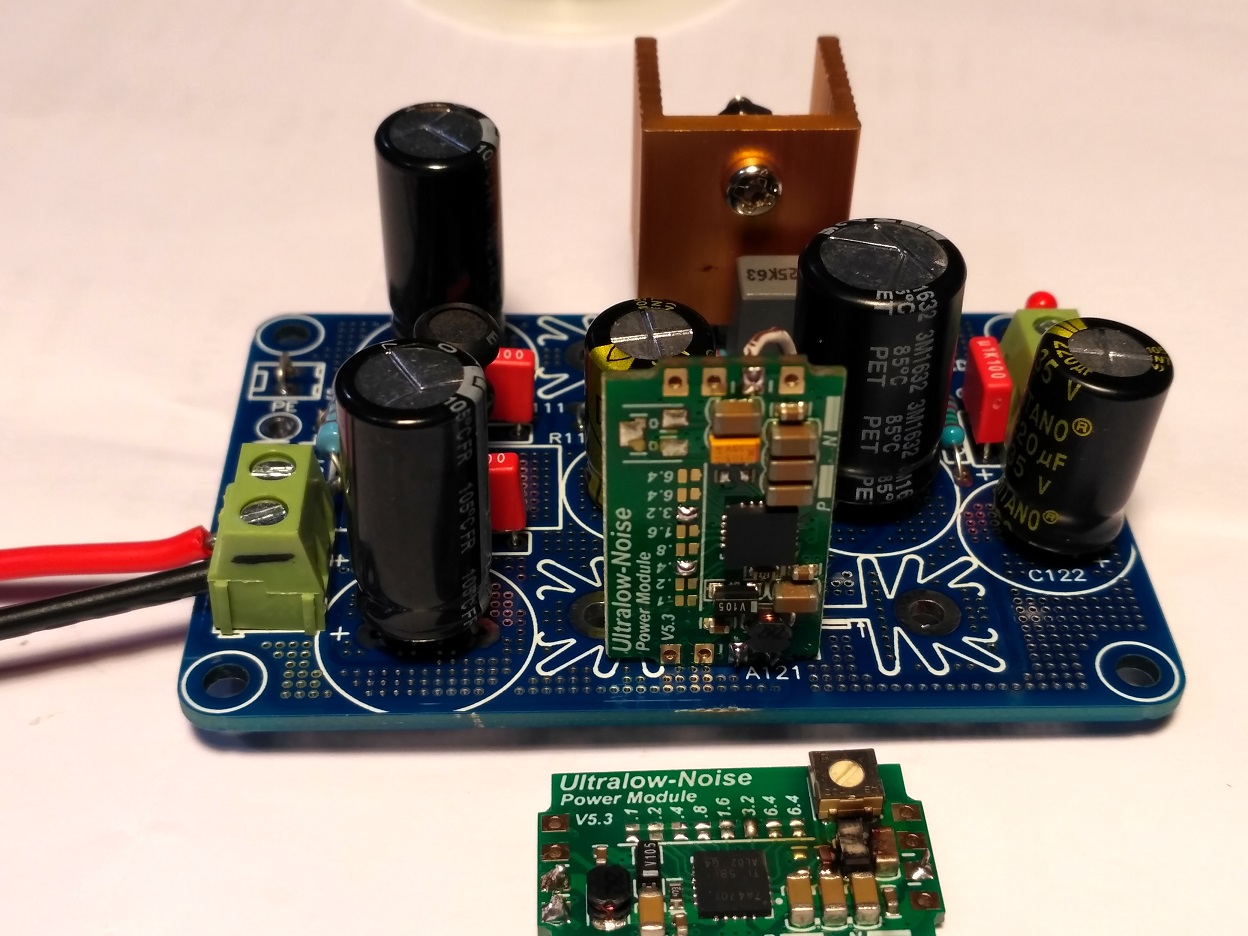
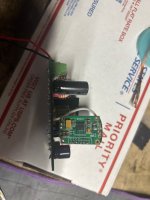
This is what it looks like built up in prototype stage v1:
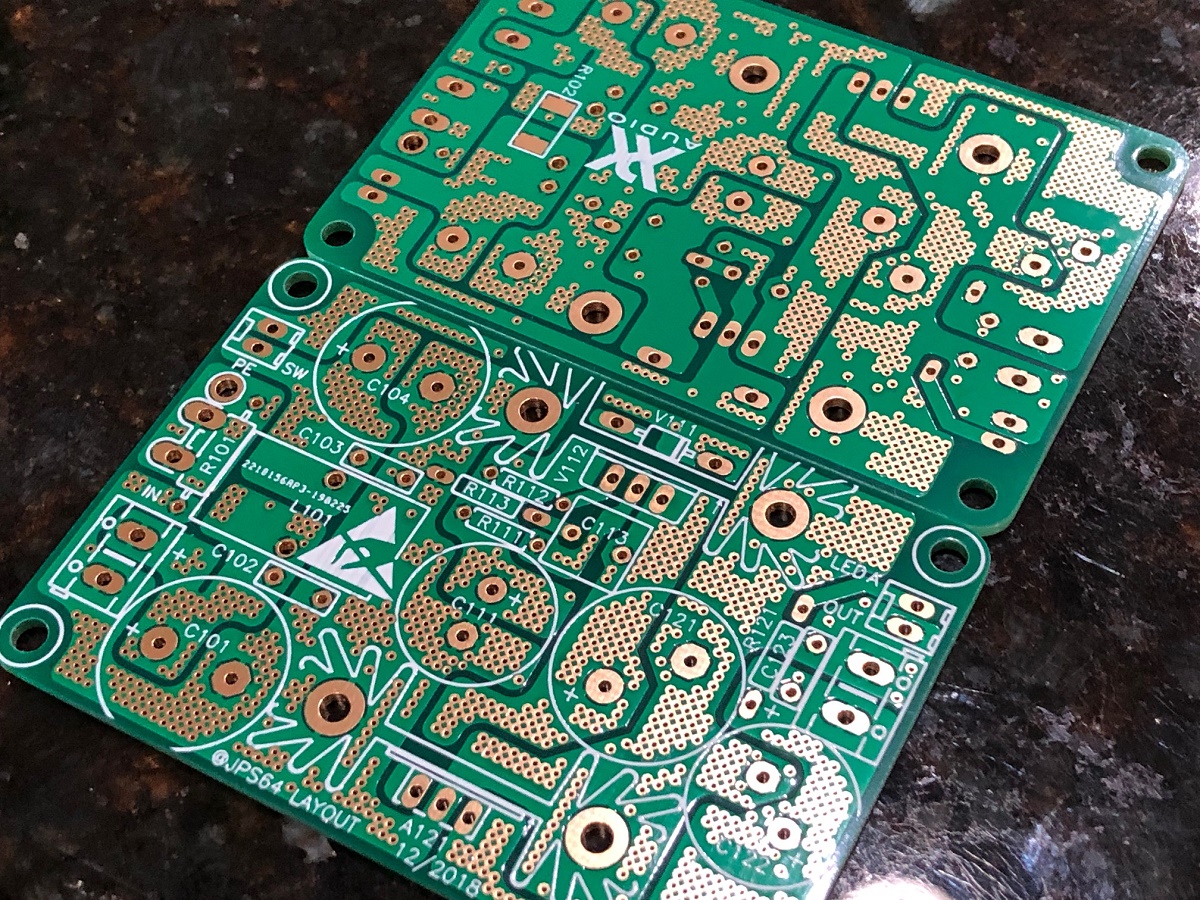
And here is the board will look like for the v2 (will be 1.6mm thick, 1oz copper, green mask, and ENIG finish):
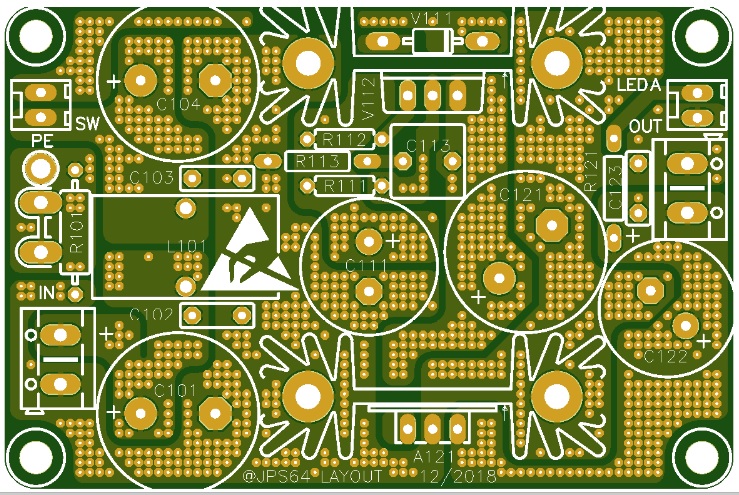
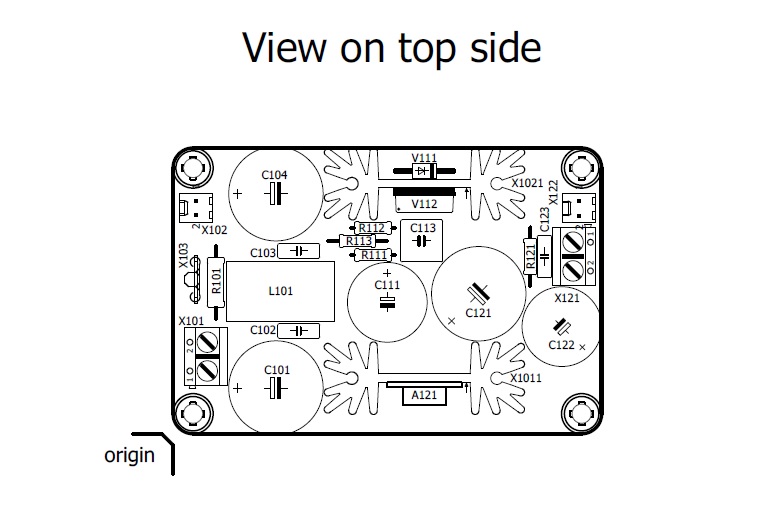
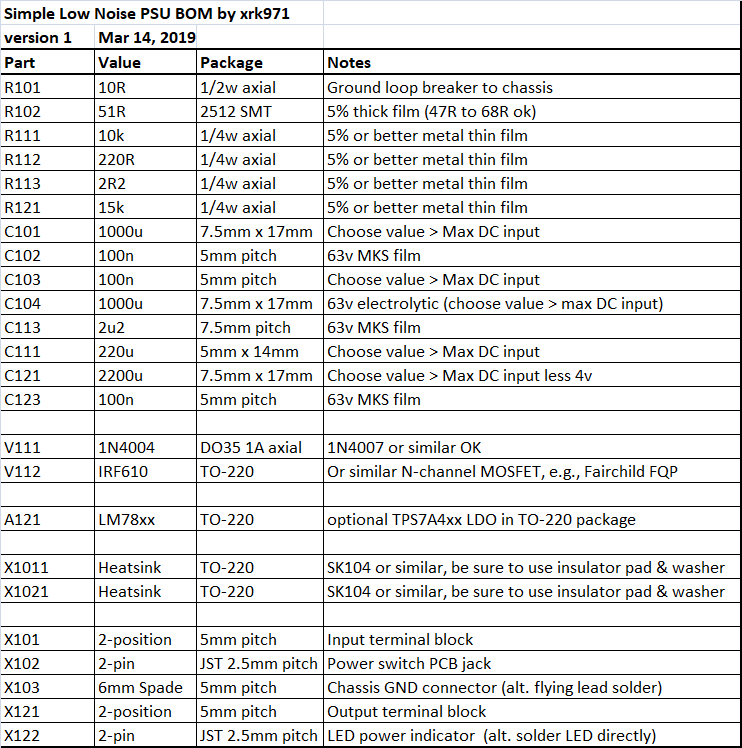
Here is the top view of the parts placement. BOM for the board is relatively cheap if you are going with just a 78xx. You need an N-channel TO-220 MOSFET such as an IRF610 or the Fairchild equivalent. IRF510 etc works well too. A few caps and resistors, some connectors, and a basic inductor to keep the DC-DC noise even more isolated.
If interested in this little PSU board as a GB, please add your name, number of boards, and country to ship to below.
Like this:
DIYJohnDoe - 2 boards - USA
Pricing will be about $10 ea and tracked shipping in a padded bubble envelope mailer is the usual $5 in US, $10 for CAN, and $15 everywhere else. Maximum 8 boards per order for the above shipping prices.
Thanks,
X
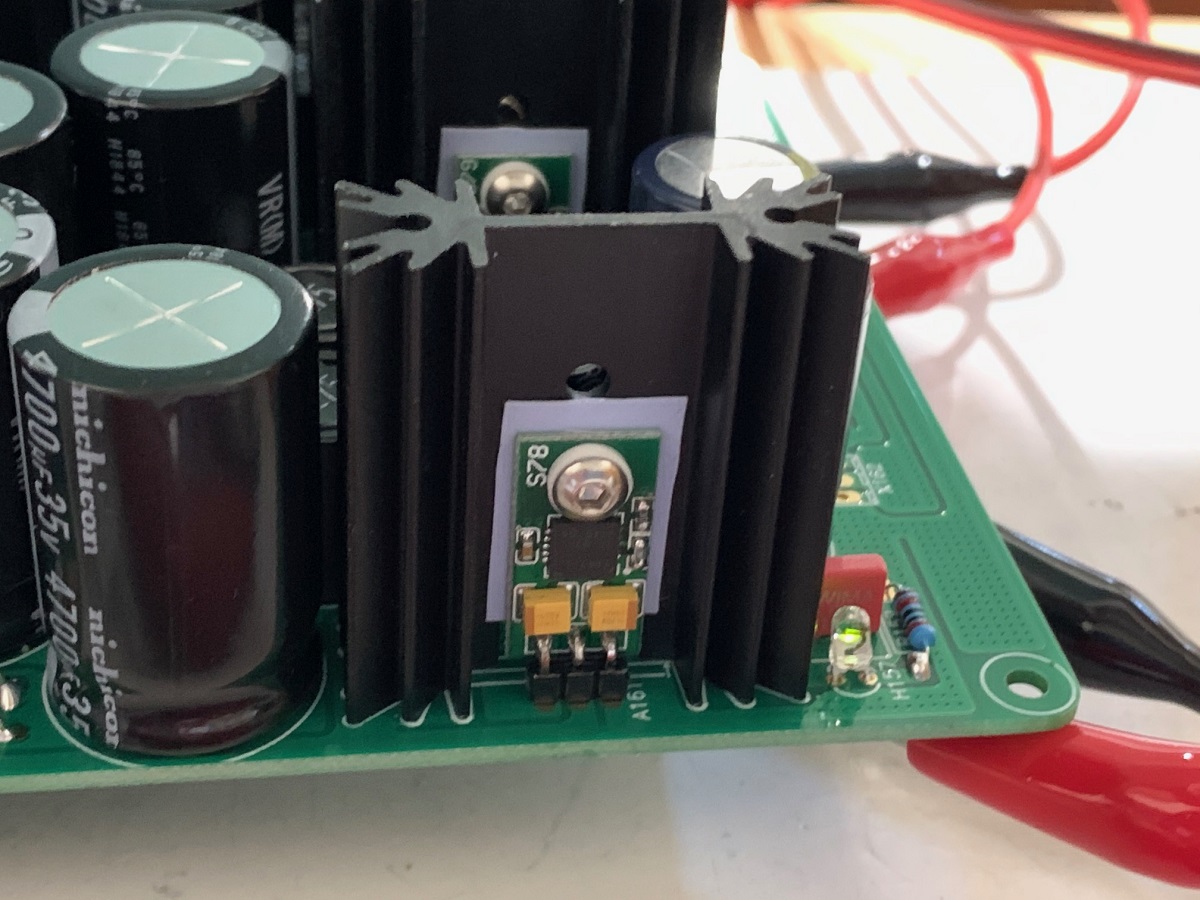
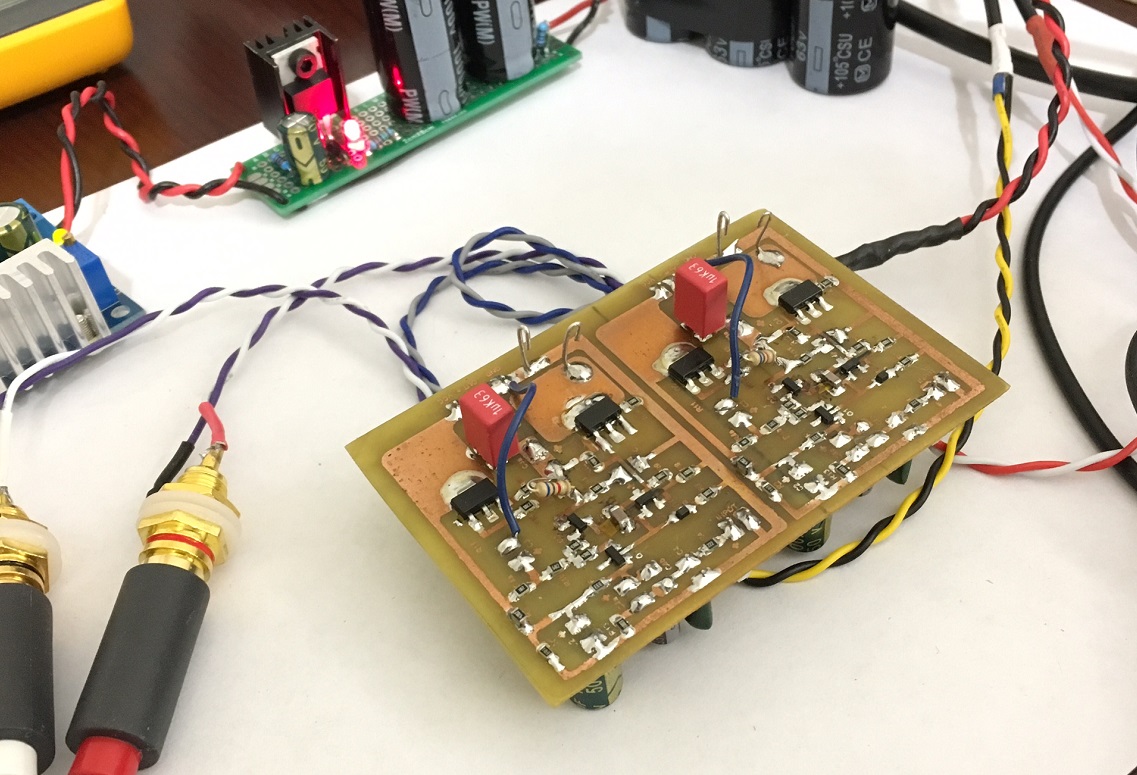
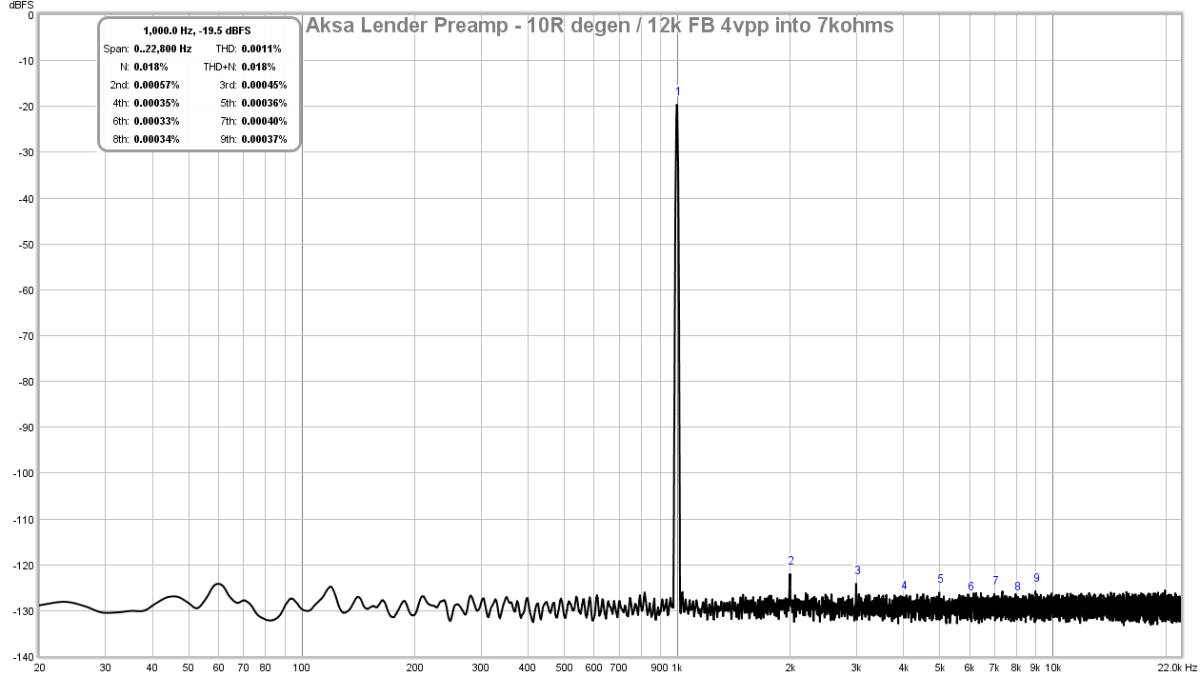
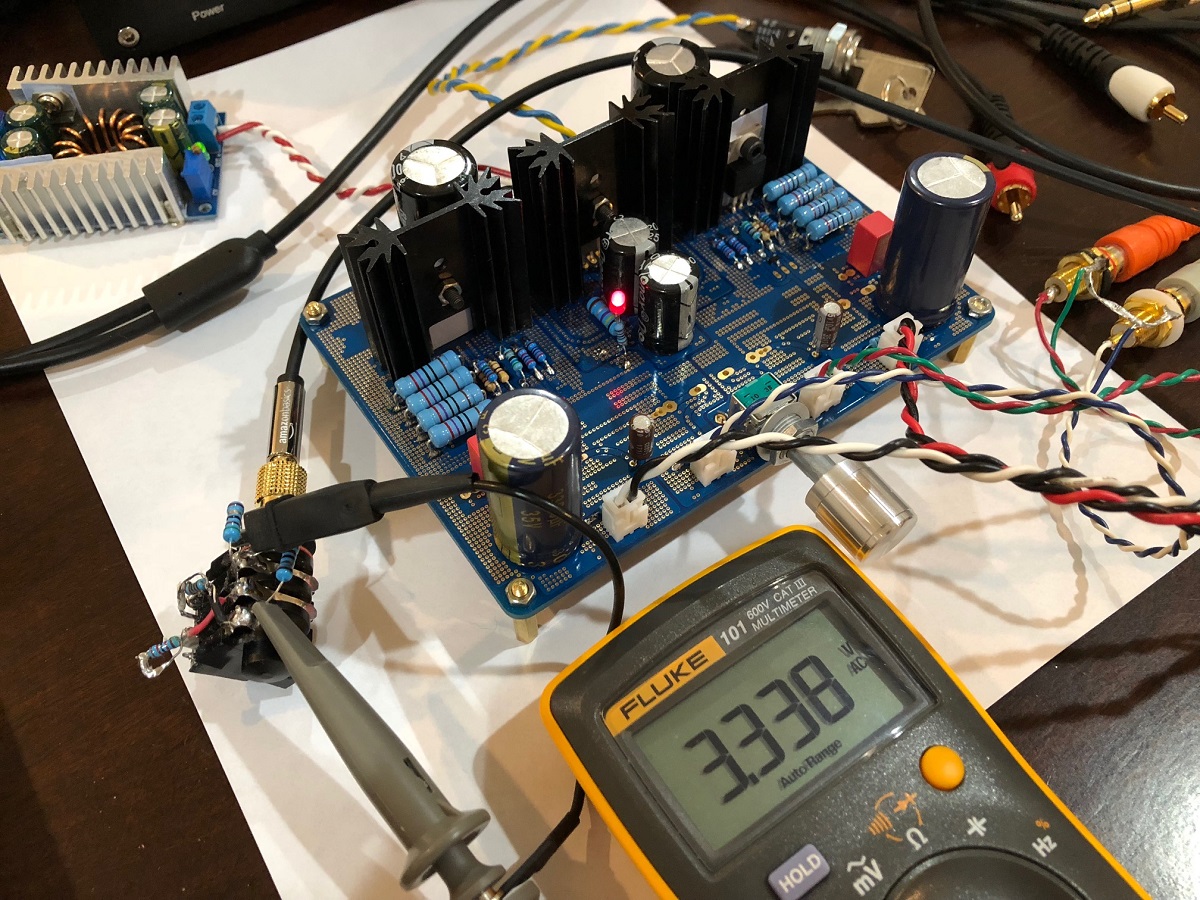
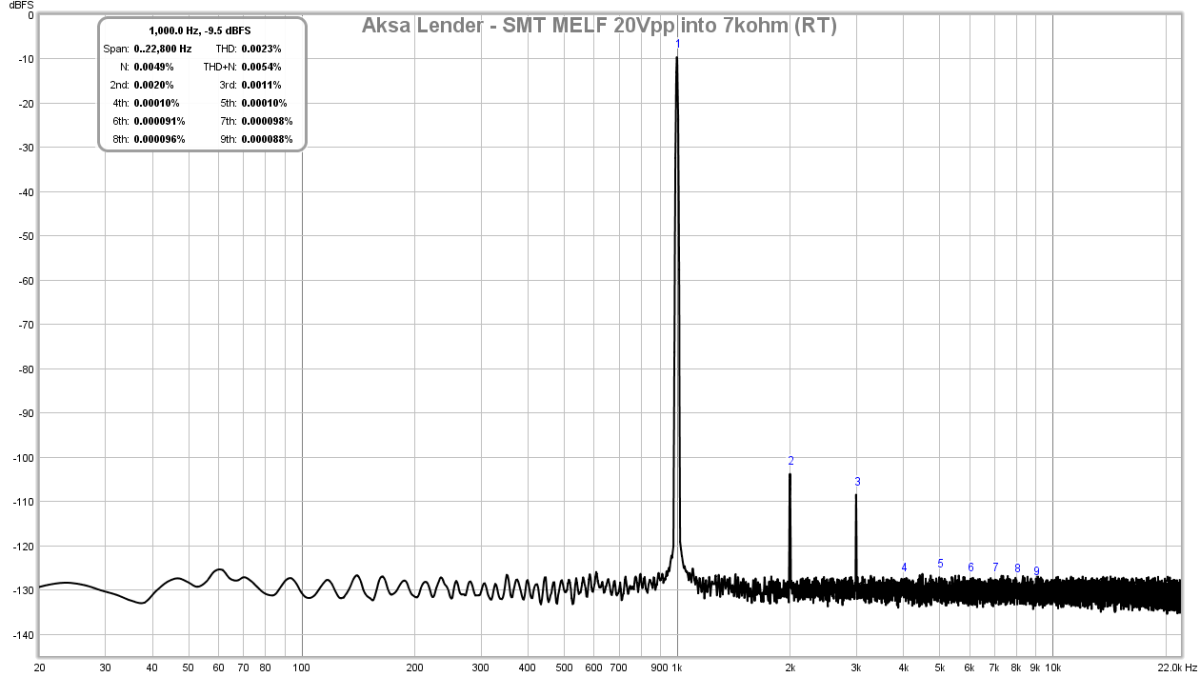
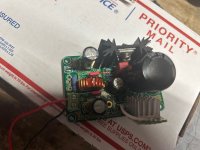
Some supporting info, you can see in the photo below, a hand-made variant of this PSU (without a voltage regulator) powering my Aksa Lender preamp, the DC-DC step up is visible as well. Here I was running 48vdc output so a 78xx regulator could not have been used as they max out at 35vdc input:
Here is the FFT from the Aksa Lender showing the typical clean battery like noise floor:
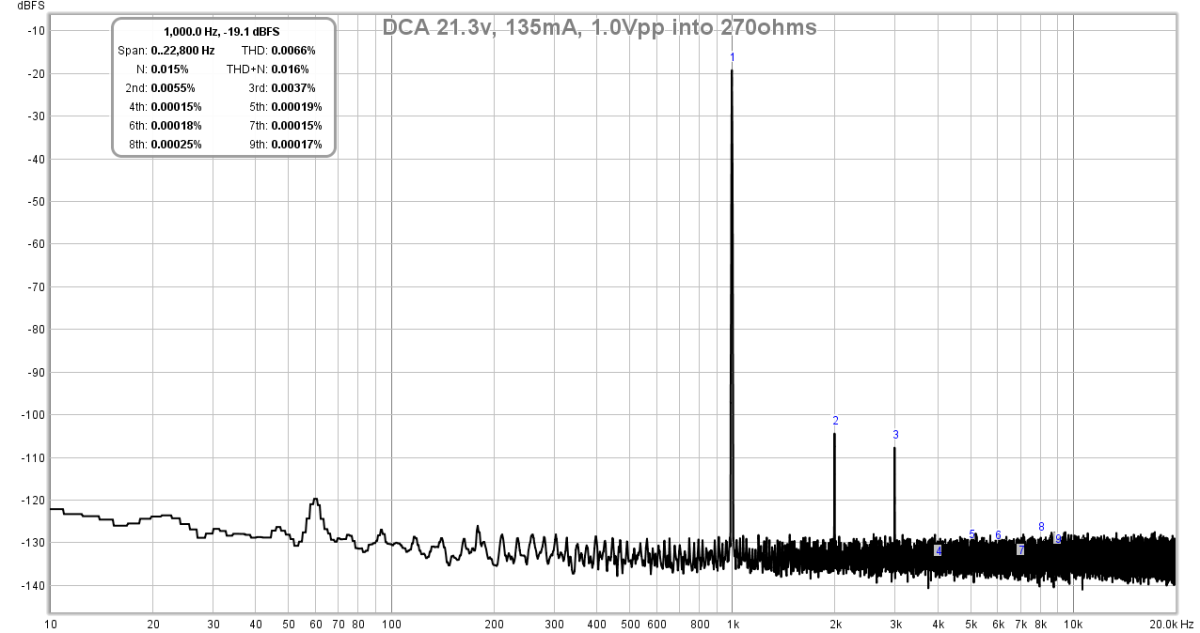
Another example is the PSU that is built into the DCA Single ended Class A HPA (also without a VR):
Here is the typical FFT from the DCA:
Finally, another example is the similar PSU built into the Aksa-Lender preamp GB:
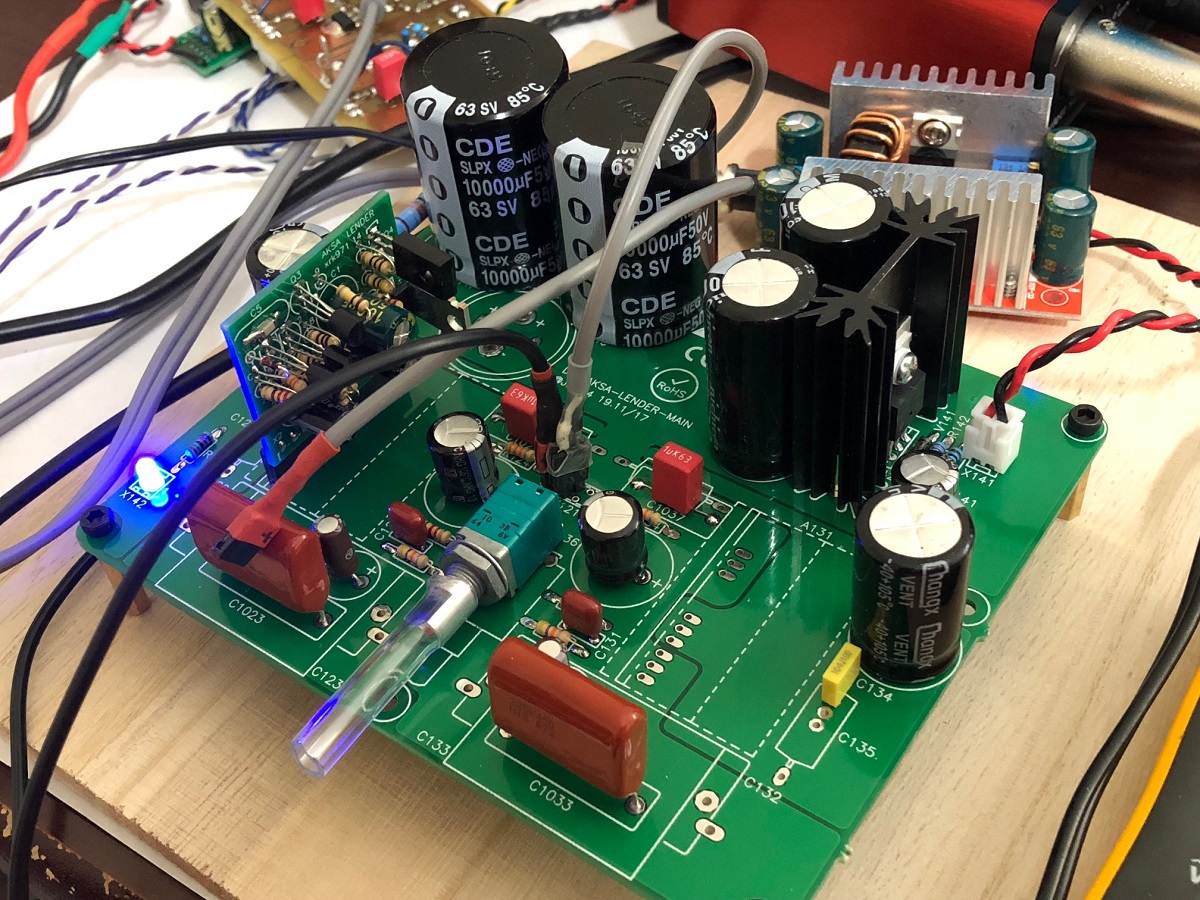
And typical FFT of the Aksa Lender putting out 20vpp into 7kohms:
So you can see how well this supply works in general and how I keep coming back to it. Just use a $4 to $7 DC-DC step up to get whatever voltage you need.
These types of DC-DC work well, for example:
DC DC 250w Boost Converter Step-up 10a Constant Current Power Supply LED Driver | eBay
400W 15A DC Step-up Constant Current Power Supply LED Driver Boost Converter | eBay
400W 15A DC Step-up Constant Current Power Supply LED Driver Boost Converter | eBay
DC-DC Step-up Boost Converter Constant Current Power Supply 10A 250W LED Driver 6472005271954 | eBay
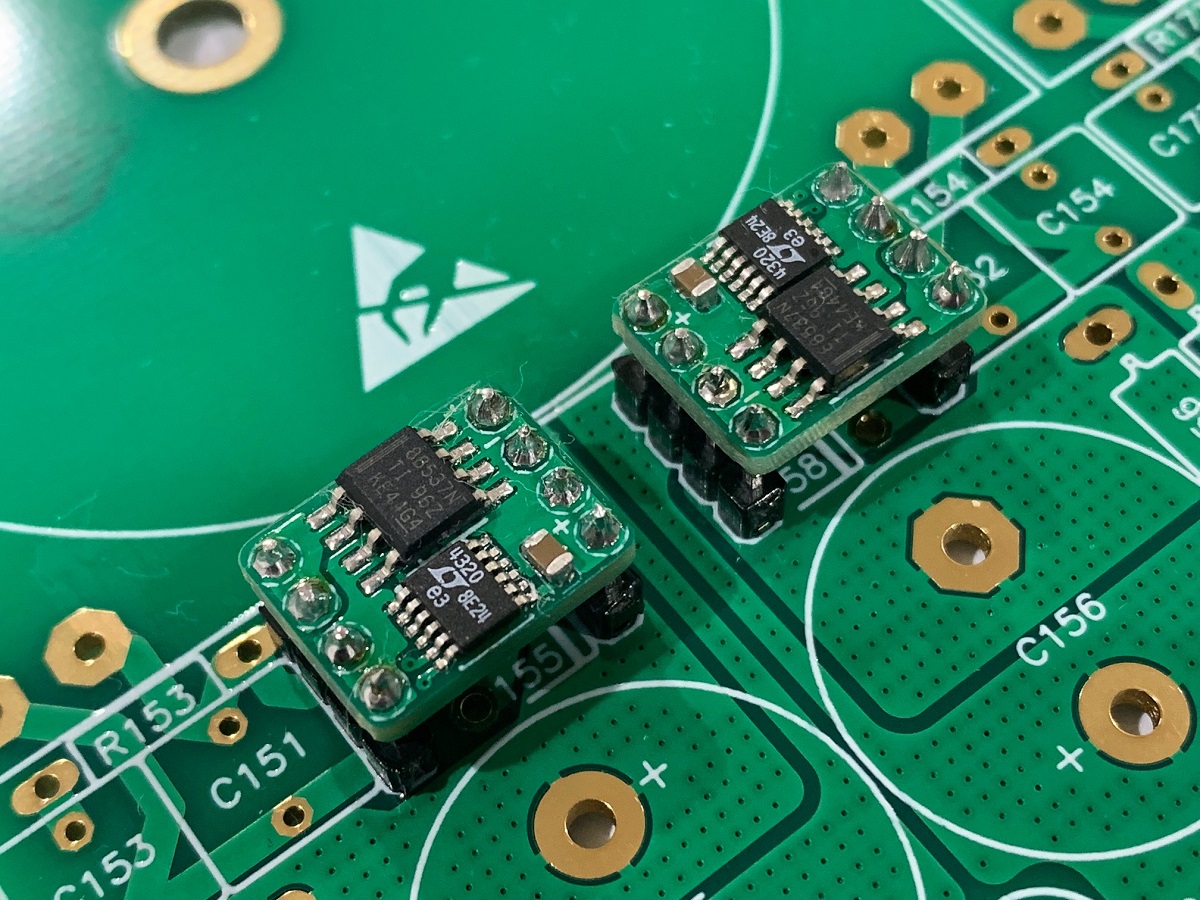
Edit Feb 25, 2019: Member Twocents was a beta tester for v1 and he installed an eBay 5v TPS7A4xx LDO board on it - nice work!
And use a 12v 1000mA Class 2 Wall wart like this, for example:

Class 2 Power Supply Unit FL41A20U120V120A1000 Adapter 12V 1000mA Charger | eBay
Edit Mar. 14, 2019:
You can use the Wurth 774701 Choke:
https://www.digikey.com/product-detail/en/7447017/732-1418-ND/1638823/?itemSeq=289294179
https://katalog.we-online.de/pbs/datasheet/7447017.pdf
Version 2 of the board:

ThanksAlmost any N channel enhancement mode MOSFET in TO220 package can work if the voltage rating is good.
I just bought a couple of these to experiment with and I am going to add one to my ACP+ Preamp with Academy Audio Muses volume control.
I want to use a Wall Wart into the Capmx board but realize a 24V DC will not be big enough. Should i get a DC-DC step up for the desired voltage or find a 30VDC Wall wart to try instead (understanding the voltage will drop)?
The ACP would take 24V off the Capmx but the Academy Audio has to operate from 12-15V and requires a 15V regulator mentioned in the APP Notes from Academy Audio.
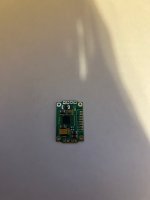
recently stuffed my Capmx board and it works nice at 12V and 5V.
I’m trying to find the easiest way to change it to 24V. Couldn’t find a 32V meanwell psu.
I’ll probably build a 32VAC basic PSU. But need to find a way to add the resistors. I don’t think I can solder ones that small.
I’m trying to find the easiest way to change it to 24V. Couldn’t find a 32V meanwell psu.
I’ll probably build a 32VAC basic PSU. But need to find a way to add the resistors. I don’t think I can solder ones that small.
Attachments
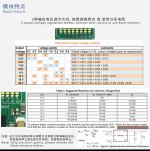

Those programmable jumpers on the side set the voltage. Their sum = 24v. But it might be that these only make 18v max as the sum of all of them is no more than about that.
You can try a LM7824 in TO220.
You can try a LM7824 in TO220.
- Home
- Group Buys
- GB for Simple Cap-Mx Regulated Low-Noise PSU