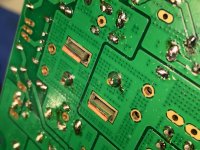
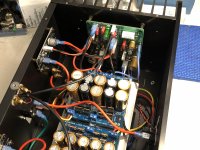
FH9HVX boards are completed! Soldering those Würth inductors was not for the faint of heart. The massive rectangular conductor required my iron and hot air pencil for SMD work at the same time to get enough heat for the solder to flow nicely. I’d recommend winding your own inductor if you don’t have the heating capability.
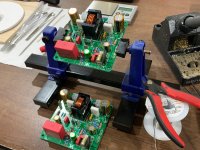
The step is making the flying lead Mosfet harnesses and powering up 🙂
The step is making the flying lead Mosfet harnesses and powering up 🙂
Attachments

Very nice work, Vunce! Thanks for warning us about the heating requirements to flow solder on 2 gauge rectangular copper wire! 🙂
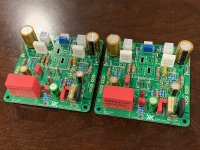
FH9HVX boards are completed! Soldering those Würth inductors was not for the faint of heart. The massive rectangular conductor required my iron and hot air pencil for SMD work at the same time to get enough heat for the solder to flow nicely. I’d recommend winding your own inductor if you don’t have the heating capability.
The step is making the flying lead Mosfet harnesses and powering up 🙂
How about one of those small kitchen blowtorches? The flame can be adjusted to a fine point....
Sorry if this has already been discussed - if the flying lead MOSFET connections are chosen, shouldn't the gate stop resistors be soldered directly to the gate terminals to avoid oscillation?
Thanks
Thanks
How about one of those small kitchen blowtorches? The flame can be adjusted to a fine point....
Good idea!
I would have tried that if I had one.
We will find out if moving/adding parts directly to the remote mounted Mosfets is needed when we power up.
You pulled an overnight shift
Aye, and paying for it!!! 😀
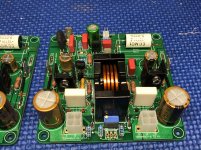
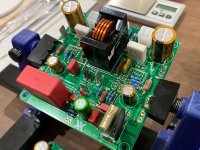
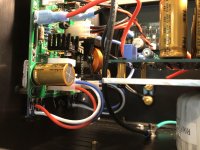
Could not resist some glamor shots with the big Wurth! I have a new desk level workbench with lots of space now - much nicer to work on. Also in same room as my 10F/RS225 TL's.
Attachments
Last edited:
FH9HVX boards are completed! Soldering those Würth inductors was not for the faint of heart. .... I’d recommend winding your own inductor if you don’t have the heating capability.
Could someone with the ability to measure such low inductances provide specs for how to wind the 1.5 uH (micro Henry, right?) inductor? I checked the “Basic BOM” and did not see the inductor referenced there.
What I've done for other projects is to wind 12 turns or so of 18AWG magnet wire around a AA battery. That's about a 14mm diameter.
Yes, Jhofland has it right. I did mention it in Note 3 at the bottom of the schematic. We will be sure to add the note to the official BOM later.
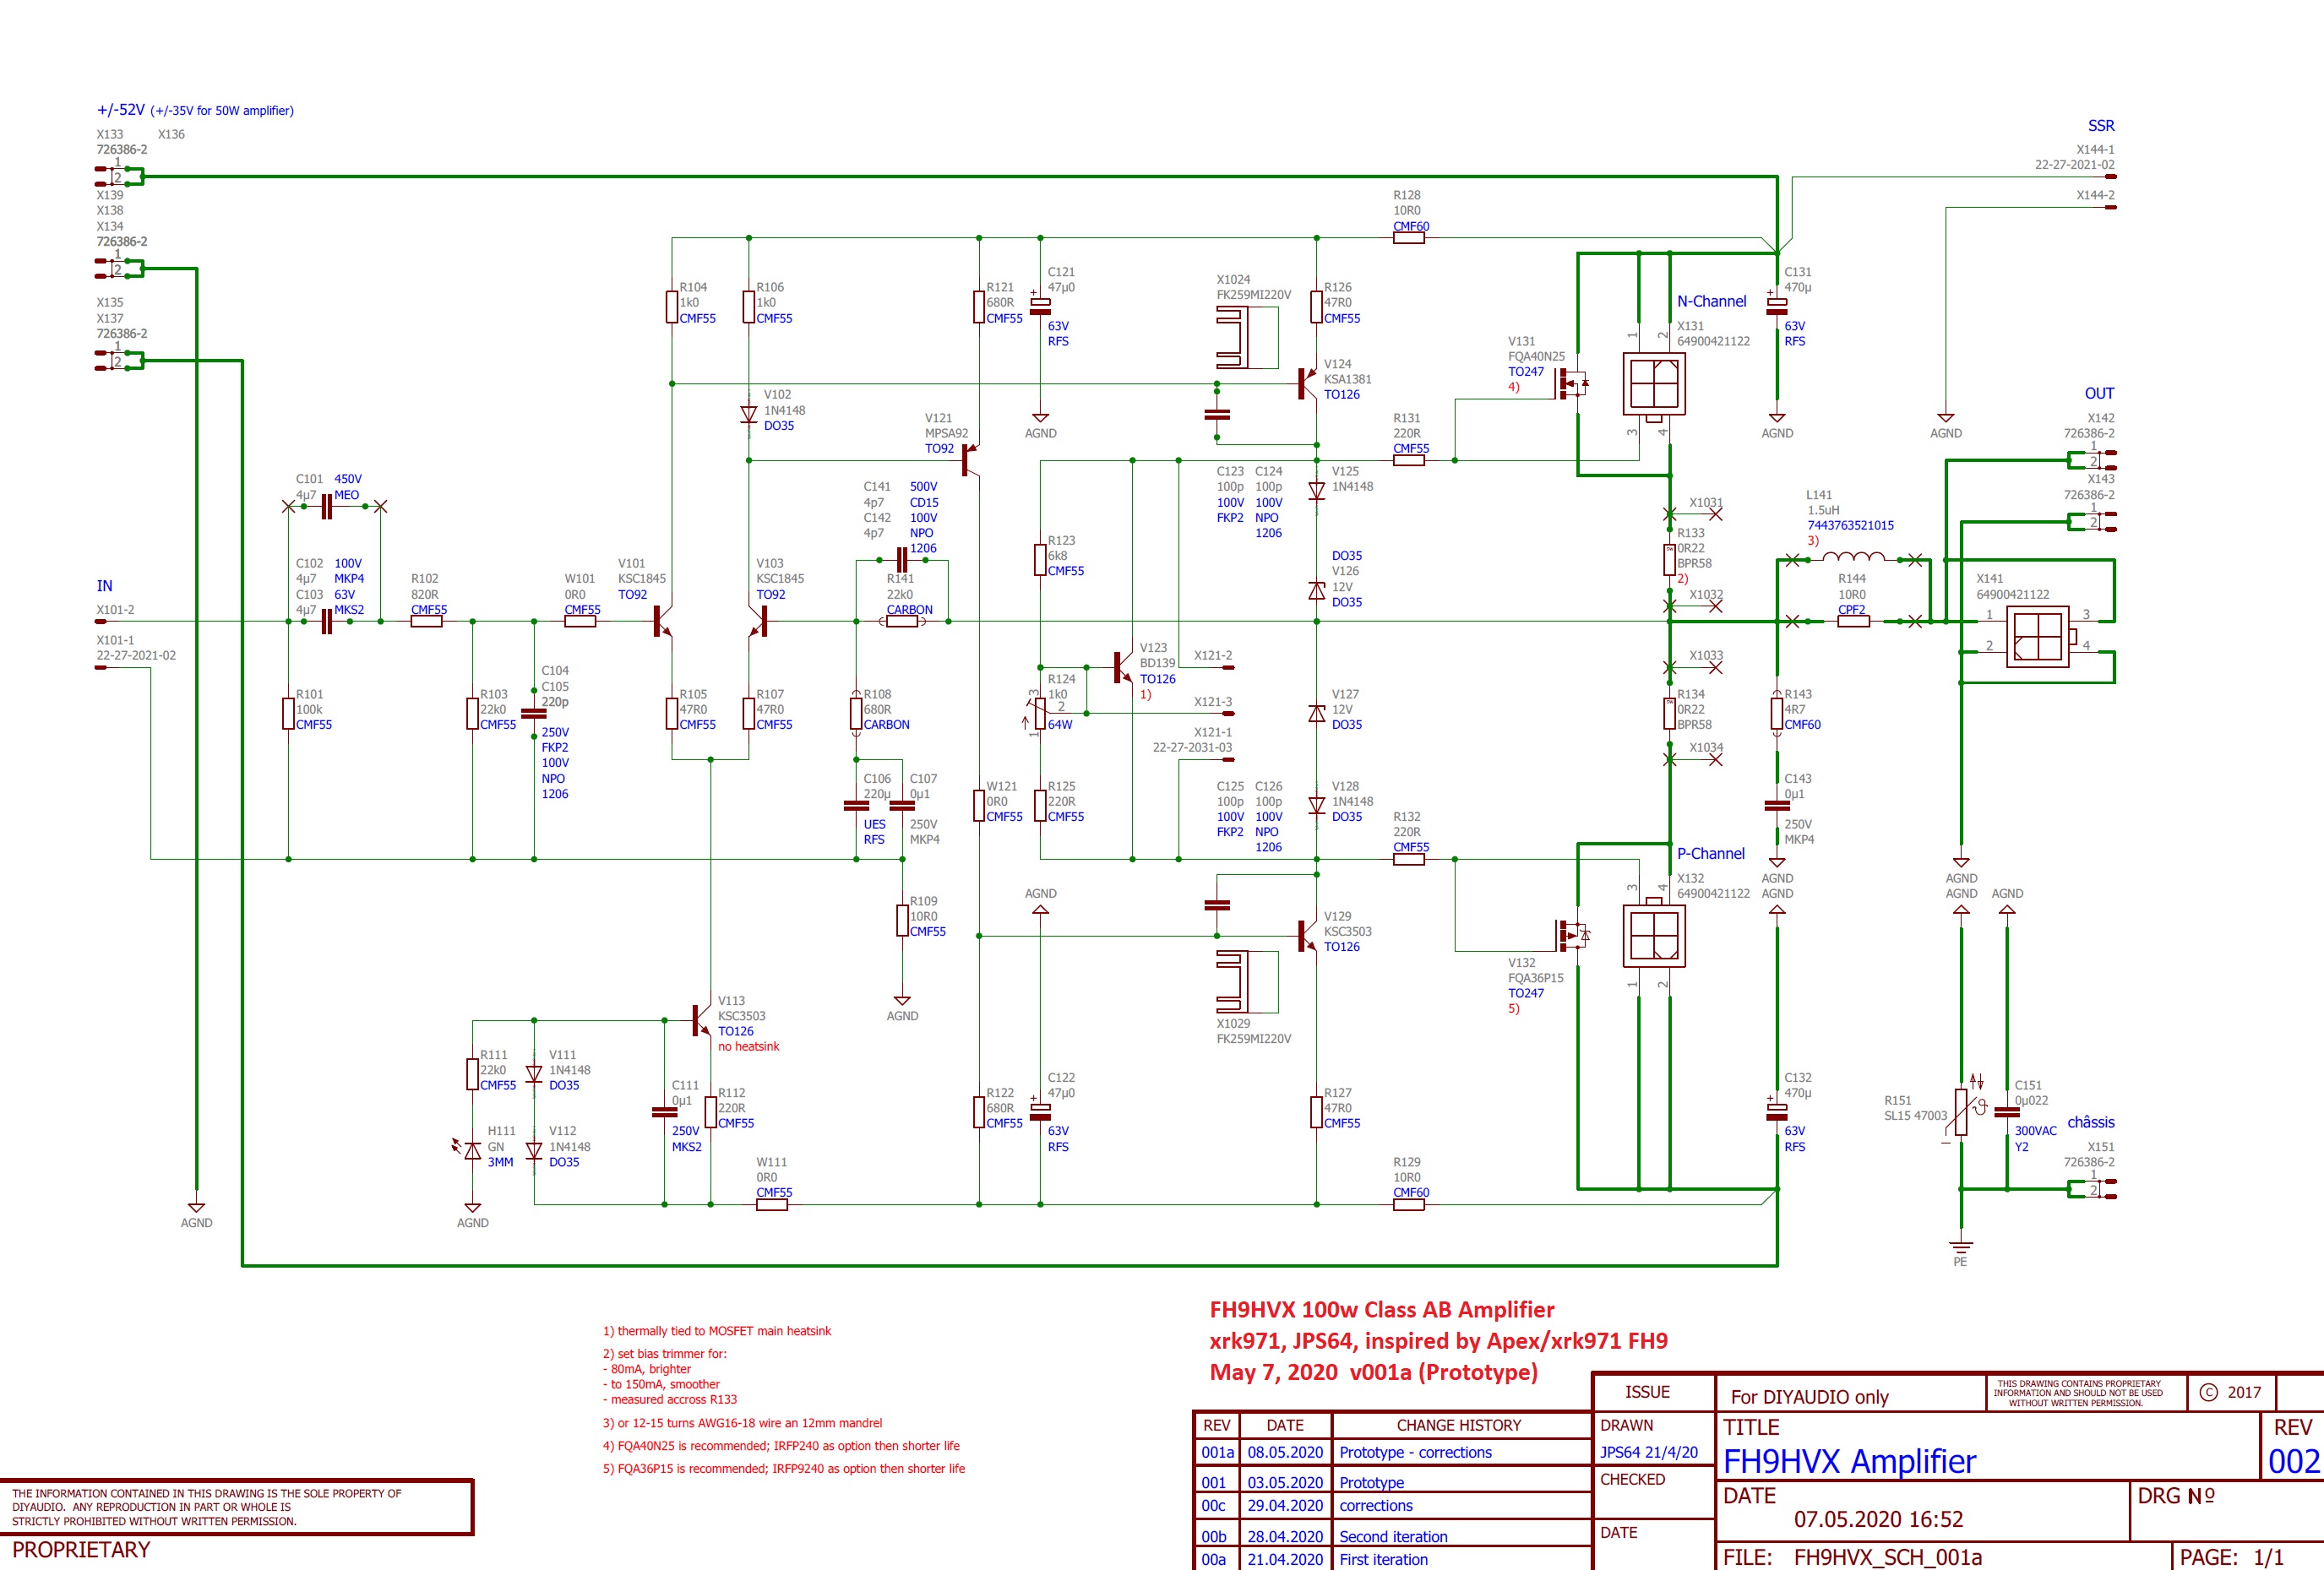
Excellent and thanks for the quick replies. Sorry, X, I missed the note on the schematic. I will wind inductors while I await the PCBs and collect other parts.
One further question, what are the heatsink requirements for the 100w version with ~50 Vdc rails? (Sorry if I missed that too).
One further question, what are the heatsink requirements for the 100w version with ~50 Vdc rails? (Sorry if I missed that too).
The 1381 can be found as 1381estu while KSC3503 can be found as KSC3503DSTU.
Do you recommend Ksc3503Estu or it will not make any difference?
What would be the absolute max voltage for 4 ohms speakers?
Thanks
Do you recommend Ksc3503Estu or it will not make any difference?
What would be the absolute max voltage for 4 ohms speakers?
Thanks
Assuming you run sine waves and put out 100wrms continuously, we can assume about 60% efficiency for Class AB, so that is 40% thermal output or 40w per channel. About 150mm deep x 4U H x 25mm long fins heatsink will handle this fine.
Regarding actives 1381/3503 ESTU vs DSTU - I don't think it matters, D vs E refers to lead length. The E being about 2x long as the D. You may not get it to stand "proud" to clear the local heatsinks but, I don't think that is an issue here. Note that the heatsinks spec'd by JPS64 are available in EU only, you can use any basic bolt on serrated fin or "C" channel aluminum fins. It is not a lot of heat (750mW) so anything can work.
Regarding actives 1381/3503 ESTU vs DSTU - I don't think it matters, D vs E refers to lead length. The E being about 2x long as the D. You may not get it to stand "proud" to clear the local heatsinks but, I don't think that is an issue here. Note that the heatsinks spec'd by JPS64 are available in EU only, you can use any basic bolt on serrated fin or "C" channel aluminum fins. It is not a lot of heat (750mW) so anything can work.
Assuming you run sine waves and put out 100wrms continuously, we can assume about 60% efficiency for Class AB, so that is 40% thermal output or 40w per channel. About 150mm deep x 4U H x 25mm long fins heatsink will handle this fine.
Thanks, X. Let me make sure I understand correctly - is this ONE heatsink of 150mm x 4U x 25 mm fins for BOTH channels?
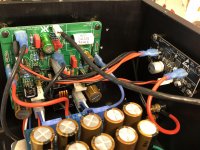
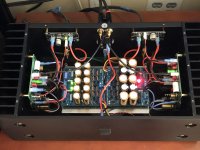
More FH9HVX progress!
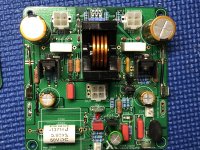
Boards were successfully powered up without any puffs of the dreaded black smoke 😀
I used the same chassis I had the FH9 development boards in so the install went smoothly. Just needed to drill/tap 12 holes and reconfigure some wiring.
Biased at 150mA and dc offset is a minuscule 0mV - 4mV for both channels.
The amplifier behaves very nicely so far, just want to check with the Oscope for any behind the scene “nasties”.
Thanks for revisiting this project XRK971! And the fantastic layout work JPS64!!
Attachments
Nice work, Vunce! Very tidy and neat. Glad that there was no smoke. I am about to power mine up for the first time.
- Home
- Group Buys
- FH9HVX - Budget Conscious 100w Class AB for Lean Times