Now all you need to do is incorporate some type of temperature sensor which controls the fan speed. Spin the fan at high speed when temperature is high, and gradually slow down the fan as the temperature gradually drops. Some fans may not start-up and operate reliably at very slow speeds; these might need to include a cut-off fan speed (thus a cut-off temperature) to avoid failures or misbehaviors.
It is, after all, a variable speed, temperature controlled fan apparatus.
It is, after all, a variable speed, temperature controlled fan apparatus.

I did this 20 years back on an Aksa 100 amp that I build on a special chassis. Due to its small heat sink, I had to use a 2 inch fan that was control by a thermister with variable speed which was mounted on the heat sink. Still works till today.Many diyAudio projects generate significant amounts of heat, particularly the ones which operate in Class A. Builders work very hard to get rid of this heat, most often by using the largest heatsinks they can find. However, this approach only cools the exterior of the chassis; the air within the box is usually not cooled by active means. Builders simply select a chassis with ventilation holes, and hope the arrangement will be adequate.
On the other hand, there are many DIYers who believe: why build it safe when you can instead build it extra safe? "More cooler is more better"; you can never have too much heat removal.
I decided it would be a fun project to create an active cooling fan for the interior of an audio chassis. A sensor (NTC thermistor) measures the temperature of the air inside the box, and this continuously varies the speed of a DC fan. When the interior air is very hot, the fan spins at its maximum speed, cooling the interior as much as possible. On the other hand, when the interior air is quite cool, the fan spins at its minimum speed, since no cooling is needed. At in-between temperatures, fan speed smoothly varies from slowest to fastest. It's a continuous, analog, quantity.
Since fans also create unwanted acoustic noise, this scheme keeps the fan as quiet as possible while still doing its necessary job. When the interior air is cold there is no need for cooling and no need for fan noise; this circuit slows down the fan to minimum speed. When the interior air is hot, the fan speeds up and makes more noise, while preventing the electronics inside from damage due to overheating. It's only loud when it's preventing disaster.
A fan control circuit using a 24V DC power supply seemed like a reasonable choice. 24 volts is a good match to quite a number of Class A amplifier projects here on diyAudio, which all run on ~ 24V supplies, including several First Watt designs such as ACA, F5, Aleph J, M2, etc. The 24V DC fans themselves are plentiful and cheap: not only does Mouser carry them, so do DigiKey, AliExpress, eBay, and Amazon. You can use a "2 wire" or a "3 wire" or a "4 wire" fan with this all-analog circuit. It only connects to two of the fan wires: red and black. All other fan wires are left unconnected and floating.
For experimental purposes, I bought three 24V DC fans from Mouser.com, shown in Figure 1 below. Connecting them to a lab power supply, I measured the minimum voltage required to guarantee each fan would start spinning from a dead stop. Below that voltage, a stationary fan "stalls", and fails to begin spinning:
Thus it seems that many 24V fans will be happy as long as the analog control circuit never gives them less than 8.1V (34% of their 24V nominal supply). I decided to add a little margin-of-safety and so I set the Vmin to 37% of the supply. If you hate this decision you can redesign as discussed below (zener diode section).
- 40mm fan: starts reliably at VCC >= 6.3V
- 60mm fan: starts reliably at VCC >= 8.1V
- 92mm fan: starts reliably at VCC >= 7.9V
My answer to the question "How Hot Is Too Hot" is shown in Figure 2. This is the design target I chose, shown in red. I've tried to make an analog fan controller circuit which actually implements the red curve in Fig 2, as closely as possible
The fan voltage hits 100% when the thermistor reaches 45 degrees C. In my circuit design the fan voltage cannot exceed 100% of the supply, so further increases in temperature do not cause further increases in fan voltage. This is shown by the dotted blue horizontal line at top right.
At about 30 degrees C the fan voltage has fallen to 37% of the supply voltage. Then a zener diode in the circuit prevents it from falling any further, so the fan voltage remains at 37% even when the temperature falls well below 30C. The horizontal blue line at bottom left shows this effect. The zener diode's spec is (100-37 = 63%) of 24V, namely, 15.1V. Buy a 1N5929B and be happy.
If you remember algebra from school, you know there are several ways to define the red straight line on Figure 2. I choose to define it this way:
- The line MUST pass through the Anchor Point at (39 degrees C, 75% fan voltage)
- The slope of the line is 4.2% per degree C
Other designers might choose other ways to define the red line, and that's okay with me. This is just the definition I happen to prefer.
For the temperature sensor, I chose an NTC thermistor made by Vishay. Mouser.com has tens of thousands of these in stock, even in Portugal and Finland. It is Vishay part number NTCLE100E3104JB0 . Resistance at 25C is 100 Kohms, a relatively high resistance, chosen to reduce self-heating. Vishay's datasheet presents the (nonlinear) equation of the thermistor's (nonlinear) resistance vs temperature response. Here is a summary:
Code:Temp R_thmstr Temp R_thmstr ==================================== 19 132200 40 51750 20 126100 41 49610 21 120300 42 47580 22 114800 43 45640 23 109600 44 43790 24 104700 45 42020 25 100000 46 40330 26 95540 47 38720 27 91310 48 37180 28 87280 49 35710 29 83450 50 34310 30 79810 51 32960 31 76340 52 31680 32 73050 53 30450 33 69910 54 29280 34 66920 55 28160 35 64080 56 27080 36 61370 57 26050 37 58790 58 25070 38 56330 59 24130 39 53980 60 23220
A circuit schematic is presented in Figure 3. The thermistor and resistor R2 form a voltage divider at node BBB. When the temperature goes up, thermistor resistance goes down {it has a NEGATIVE temperature coefficient}, and so the voltage at BBB goes up. The rest of the circuit amplifies and offsets this temperature dependent voltage, then applies it to the fan. When temperature goes up, fan voltage goes up, and so do fan speed and airflow.
The fan is driven by a P-channel MOSFET called "U1". This allows the circuit to apply all 24 volts of supply across the fan when it's really hot, without any voltage loss due to VCEsat or emitter/source follower drops. Capacitor C1 filters the fan voltage and absorbs any "spikes" that may occur as the fan motor rotates. I selected a special electrolytic capacitor rated for more than 1 ampere of ripple current (Panasonic EEU-FS1V331LB), yet it's in a modest 8mm diameter package. C1 also provides frequency compensation for the negative feedback control loop as a whole.
Adjusting the trimpot R3: let's hit the Anchor Point!
The goal in setting R3 is to make sure the temperature versus voltage curve does in fact pass through the Anchor Point: (39 deg C && 75% of VCC). See Figure 2. To get 39C, a resistor is needed whose value is 53.98 Kohms according to the table above. However instead of 53.98 Kohms, I found very it convenient to simply connect two 27K 1% resistors in series. 54.0K, close enough.
Then I temporarily remove the thermistor, terminal block screw connectors make this easy. I replace it with my 54.0K fixed resistor. To adjust the fan controller's R3 for actual field use, connect the circuit board (and the fan itself!) to the internal 24V power supply network of the audio equipment to be cooled. The adjustment can be performed with the chassis open and its top plate & bottom plate removed, we're not measuring stagnant air temperature just yet.
MEASURE the supply voltage inside the audio gear. It's probably a little bit above or below 24.00 volts. Then switch the voltmeter probes to measure the voltage directly across the fan, and dial R3 up and down. Stop dialling when the fan voltage is exactly 75% of the supply. Done! R3 is now set to the correct value for this power supply voltage, and for the device parameters of this particular Pchannel MOSFET, on this specific fan controller board. Yes, Virginia, two MOSFETS of the same part number really CAN have threshold voltages that differ by two thousand millivolts, just as the datasheets warn. Replace the fixed 54K resistor by the thermistor and its umbilical cable, job done.
A word of caution: this circuit contains so few parts, that each individual part has an effect upon several different aspects of circuit behavior. In other words, everything interacts. Strongly. When designing or redesigning a circuit like this one, it takes a lot of tweaking and adjusting and juggling to get the circuit to work well. Fortunately for you, I have already performed this miserable job; it took me about a half a day to get it completely dialled in. The schematic in Figure 3 works nicely ... but only for THIS supply voltage (24V), and only for THIS choice of thermistor, and it only implements one specific design target curve of Temperature-versus-FanVoltage (shown in Figure 2).
If you want to modify the circuit to operate at a very different supply voltage, or to use a different thermistor, or to hit a different design target T-vs-F curve ... then you will need to tweak and adjust and iterate and juggle component values, to get your new circuit working and meeting your new specifications. It will take effort. Do I know of any time saving procedure(s) for this? Not really; all I can suggest is to thoroughly explore and experiment and keep good notes. And don't forget to have fun!
Fortunately, if all you want to do is change the supply voltage a little bit (for example: use this analog fan controller inside an Aleph J which runs on a 22V power supply instead of 24V), and if you leave all other design goals alone, then you will only need to adjust R3 using the procedure above. Just hit the Anchor Point. I haven't personally tested every single possibility but I do think a simple R3 adjustment is probably all you need, if you keep the power supply voltage within plus or minus 15% of the design value, 24V. That is, (20.4V <= VCC <= 27.6V) only requires a simple twist of R3 to make it work. If you go outside this range, adjusting R3 might be all you need to do, but honestly I would be a little surprised.
To test out the circuit, I bought some fixed resistors in the range (40K < Rfixed < 80K) and labeled each one with its corresponding Thermistor temperature from the table above. This let me measure the data shown in Figure 4. Eyeballing Fig 4 and Fig 2, it seems to me this design hits the target reasonably well.
I built the circuit on "Stripboard" sometimes called "Veroboard"; Figure 5 shows a photo. The MOSFET's heatsink is from Tayda, 17mm x 17mm x 25mm, to give me the option of connecting a really high current, high power, high airflow fan ... someday, if I feel like it. The puny little fans in Figure 1 don't actually need an aggressively heatsinked power transistor to drive them. VeeCad cuts-and-jumps CAD drawings of the Stripboard are shown in Figures 6 and 7.
Finally, I suppose I owe readers an answer to the question "Why on earth build this as an analog circuit?" After all there already are LOTS of temperature controlled fan PCBs for sale on eBay and AliExpress and Amazon, at super cheap prices. There are also four hundred budjillion Arduino projects to make a temperature controlled fan.
It's true. There are. Unfortunately, all of these use PWM (pulse width modulation) which commutates the fan between 100% ON and 100% OFF, using digital circuitry. The relatively high-current, relatively fast-risetime digital pulses driving the fan, can couple into other nondigital circuits, creating electromagnetic noise which corrupts low level music signals. Indeed many diyAudio members refuse to include any digital circuitry of any kind, inside their all-analog audio equipment. For them a PWM fan controller is utterly forbidden, therefore an all-analog solution is required. Additionally, some fan manufacturers explicitly state that PWM control of their fans results in greater acoustic noise than analog control, at certain speed settings. Who wants a noisier fan? Nobody.
I should mention that Microchip sells a wonderful family of embarrassingly simplistic non-PWM chips, called MC620/MC621. These implement a bang-bang control system for thermal control of a DC fan, exactly like the HVAC heating and cooling system in office buildings. It's digital, but not PWM. Also, Maxim makes the MAX31740 chip which is a full featured, ultra simple, thermal fan controller using PWM. If you don't hate PWM, check it out. If you are both ambitions and a little masochistic, you could figure out a way to do it with a pair of NE555 timer ICs. Those chips were literally made for PWM.
If you despise PWM, but for some reason don't like the 3 transistor discrete circuit in this message, you could consider designing yourself a new circuit using opamp chips. It's an ambitious project but diyAudio members are brave souls. You'll want ICs that work on 24V supplies, such as LM324 or OP07 or even uA741. Oh and you'll need to pay careful attention to frequency compensation / instability / unwanted oscillation, since opamps have lots of gain while common source power transistors have lots of phase shift. Especially when you decide to keep the deluxe 330uF smoother outer capacitor! You win extra bragging rights if your design does not require or use "single supply" opamps, "rail to rail" opamps, or "over the top" opamps. When you're all done be sure to compare the parts list of your opamp design, against the parts list of this discrete design. I bet you'll find that both need a fan-driving transistor, so the difference becomes (opamps + resistors) versus (two NPNs + resistors). Which is cheaper? However perhaps a circuit with opamps can eliminate the trimmer pot, whose cost is surprisingly high for its mundane function. Have some fun with it!!
_
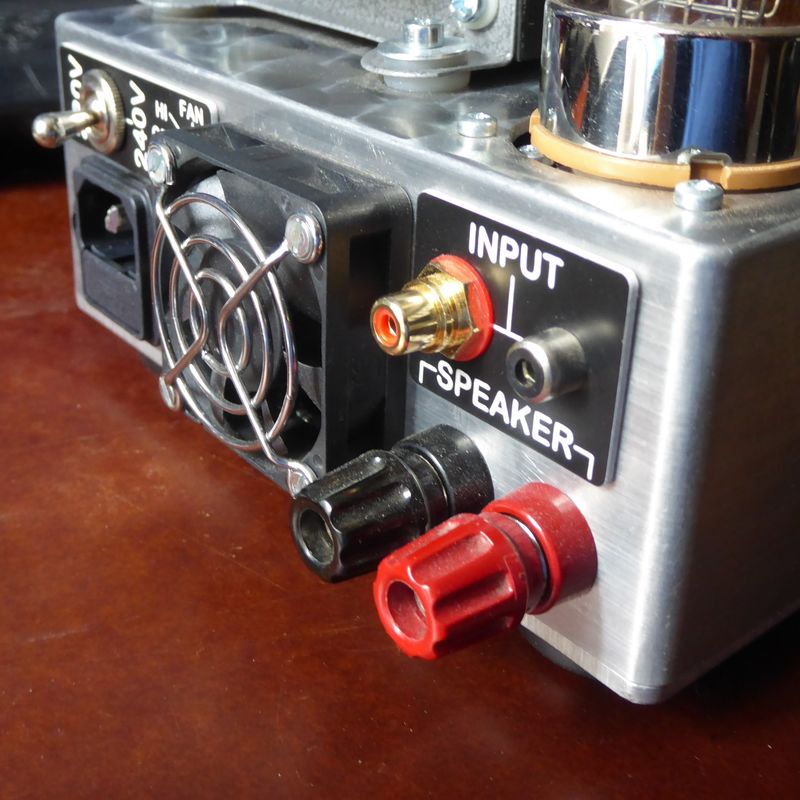
The only use case I have is with the tubed guitar amps, especially the combo type with the tubes upside down. I use a repurposed 12V PC fan fed off the heater supply with a rectifier. The fan is mounted at an angle as to force the hot air to the outside.
Hi Mark,
May I confirm that the orientation of D1 zener's cathode is indeed pointing downward (fig.6) because from board image in fig.5 this is reverse or on the side of source pin of U1 Mosfet. Also, in fig.6 D1's anode connects to drain while fig. 5 D1's cathode connect to source of U1 Mosfet.
May I confirm that the orientation of D1 zener's cathode is indeed pointing downward (fig.6) because from board image in fig.5 this is reverse or on the side of source pin of U1 Mosfet. Also, in fig.6 D1's anode connects to drain while fig. 5 D1's cathode connect to source of U1 Mosfet.
I have another cheap solution...
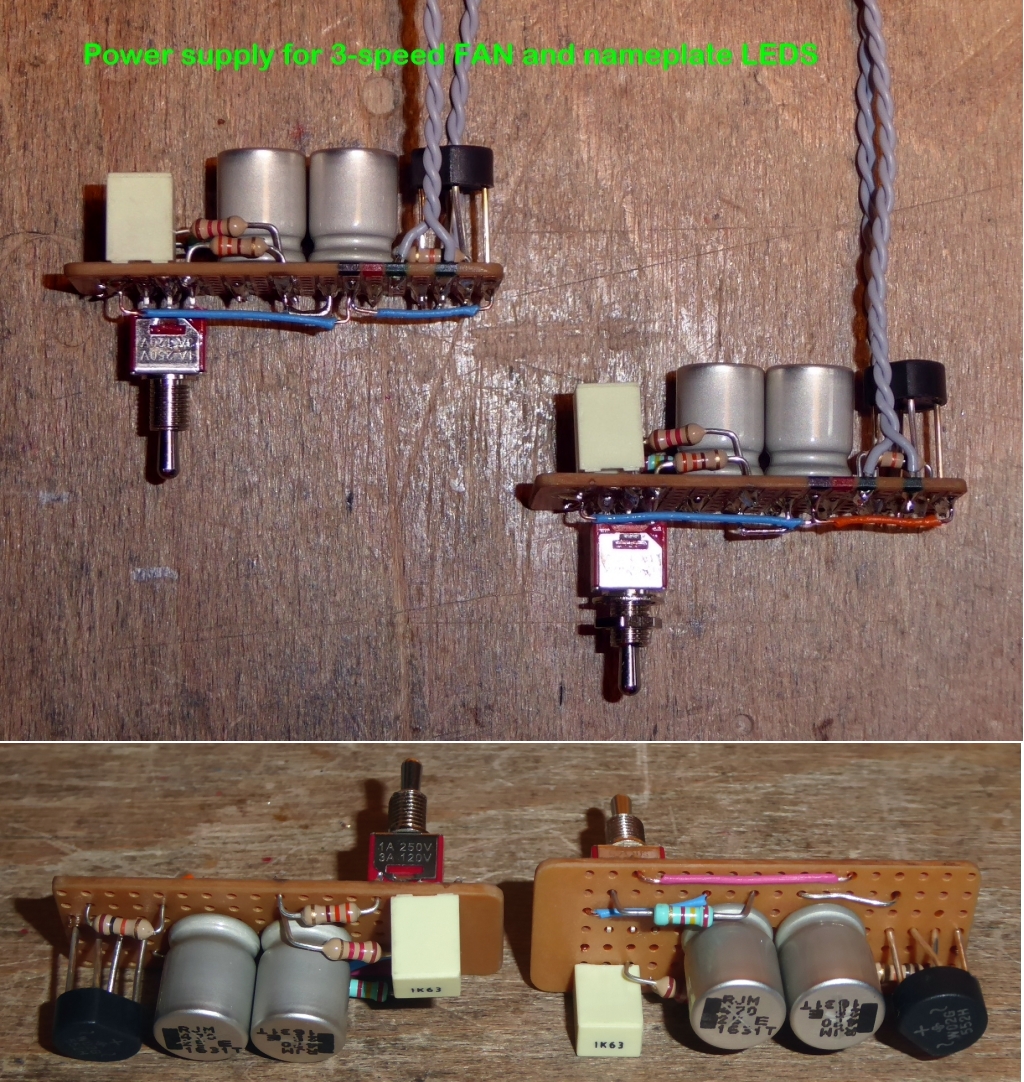
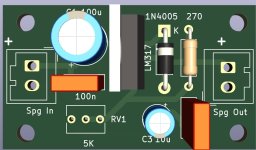
I am using two mini pcb's with LM317 on it. One for the temperatureswitch 12 Volt, one for the noctua 40mm fan, 9,5 volt. The temperature is set to 50 degrees celcius. The 10k resistor is placed on the heatsink with thermal glue.The switch https://de.aliexpress.com/i/1005005390866435.html
You can not hear the fan, it is quiet. There is a little space to the backplate to get air in...
Its only for more safety. The fan has to cool down the heatsinks of the smps. I never reached the temperature until now...
Peter
Attachments
(Sorry if my reply is to a post from a few years ago, but perhaps the topic itself is still current.)If you decide that you want to have a smaller heat sink with forced cooling, then you need to blow at the fins.
It's an interesting statement, but... why?
I mean, is there a technical reason for this or is it just your preference?
I believe there are two opposing schools of thought, but my preference is to pull the hot air out of the heatsinks rather than blowing it over because that way does seem more rational to me.
I also noticed that no one (I guess, since I haven't read all the posts) has raised the problem of dust, which also should exist.
FWIW I did this back in 1982 using an analogue control system and thermistor. This was a piece of kit that had to be installed in a helicopter, and had to deal with a very wide ambient temperature range, so the fan speed had to be controlled according to a law that I worked out.
Don't ask me for details - this is well over four decades ago!
Don't ask me for details - this is well over four decades ago!
I'd read a bit on this and it appears that there's little to choose. If you have room and plenty of free air, then pushing air onto the heatsink works well. In a tight space where airflow is restricted, pulling off the heatsink can be more effective. Or do both as most PCs do...is to pull the hot air out of the heatsinks rather than blowing it over because that way does seem more rational to me
Has anyone tried a push+pull using a tunnel heatsink? Various lengths and dimensions are available and there are alternatives on the various Chinese sites...
Well, if you blow at the heat sink, you have better control of the airflow (being blown at the heatsink). Forcing the air out of the chassis of course results in the same amount being sucked in, but you don’t know the path it takes.
Since air is not a particularly good temp conductor, you get better results if you push as much as possible along the area needing a chill…
Since air is not a particularly good temp conductor, you get better results if you push as much as possible along the area needing a chill…
As far as I know the turbulent airflow directly on the sink surface in case of fast blown airflow is beneficial for heat transfer.It's an interesting statement, but... why?
compare it to the "wind chill factor".
Sucking air out of the heat sink can and will allow slower air layers in the direct vicinty of the surface to thermally isolate it.
Pushing or pulling air has been discussed couple of times. Pushing fresh air into the HS fins is more direct as pulling it out there could be other holes/vents on your chassis where air gets in.
This is exactly my point. 👍Or do both as most PCs do...
I meant: pull out the hot air from closely heatsink fins (just as I guess it is just closely to fins when the fan blow air onto fins itself).Forcing the air out of the chassis
How to extract hot air from the chassis is just my next point. 😉
Regarding the airflow directions it's only a matter of point of views in my opinion, the absolute amount does not change or if it does change then it does change just a bit, maybe.As far as I know the turbulent airflow directly on the sink surface in case of fast blown airflow is beneficial for heat transfer.
compare it to the "wind chill factor".
But everything really changes if you think about the fact that we are not talking about heat sinks and heat sink fins located in open air, but inside a case/cabinet, and this changes everything.
I mean, at what "medium" temperature is the hot air inside the cabinet, let's say relatively far from the heat sinks?
In other words, what temperature is the air that you want to blow on the heat sinks?
That's, where do you get your fresh air from?
This is the priority point, in my view.
This is the whole point: those holes have just to be there.Pushing or pulling air has been discussed couple of times. Pushing fresh air into the HS fins is more direct as pulling it out there could be other holes/vents on your chassis where air gets in.
In my opinion the calculation of their area cannot be left to chance: the more you pull out the more you have to put in the case/cabinet.
Only then, perhaps, will you be able to consider that air truly "fresh", in my opinion.
Last edited:
@nigelwright7557, what did you use for the fan switch? A low side FET? Please share the part number, hell, how about the whole schematci? PM if you like rather than hijacking this thread. Thanks!I created my own using a small PIC micro that had PWM and A2D.
The A2d reads the thermistor and the PIC converters reading to a PWM value.
With this method I can use cheap pc fans.
I added ports for two PWM connectors to drive two fans.
May I confirm that the orientation of D1 zener's cathode is indeed pointing downward (fig.6) because from board image in fig.5 this is reverse or on the side of source pin of U1 Mosfet. ...
You're right, great catch!! I guess this mistake probably happened when I removed zener D1 to make the temperature-vs-fanspeed measurements plotted in Figure 4, and then reinstalled the zener. I don't remember whether the photo (Figure 5) was snapped before, or after, the diode was removed and replaced.
Summary: Figures 3, 6, 7 are correct (schematic + layout). Figure 5 has diode installed backwards (photo). My apologies.
Posts #23, 38, 40, and 54 all discuss different cooling approaches which are not continuously variable speed, temperature controlled, analog. No PWM. -- the topic (and title!) of the current thread.
I recommend that members who are passionately interested in those other approaches, start a new Forum thread with a new title that accurately describes the approach to be discussed. Alternative ideas might include the MC620 chip, the MAX31740, the NE555, Arduino, and things you can buy on eBay or AliExpress.
I recommend that members who are passionately interested in those other approaches, start a new Forum thread with a new title that accurately describes the approach to be discussed. Alternative ideas might include the MC620 chip, the MAX31740, the NE555, Arduino, and things you can buy on eBay or AliExpress.
- Home
- Amplifiers
- Solid State
- Fan inside audio chassis: variable speed, temperature controlled, analog - No PWM