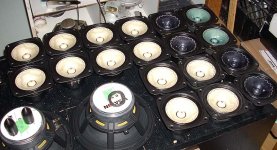
Gerrit Boers.
What a neat, practical and orderly approach. I am delighted with your tale of treatment and want to thank you for your courage. You will encourage many more people to do this, to everyone's benefit.
As for proceeding. Wait for about 48 hours after the first gloss coat application. Then dig up some very dense, complex and strongly transient music. The Romero's playing anything, Gershwins Rhapsody in Blue , conducted by Levine and played by the Chicago Symphony Orchestra, the Ferde Groff arrangement, or anything that submerges a piano in an ocean of violins.
You wll be listening for notes that seem to go flat or become ghostly, with just the bare bones of the transients remaining. If this condition is found you need to do something completely wierd.... find two 6 inch pieces of lamp power cord and strip about 1/2 of the insulation off of them.
Bend them into loops and attach them to the return side of your driver or the input connectors on your speaker cabinet. Play some music of any variety, without paying a lot of attention, for about two hours or so.
Then, revisit the pieces that exposed the lack of full information content, under duress. If the problem has been addressed, you are almost done with the drivers and must now begin to plan on the rest of your system.
On the other hand, if the difficult music produces a short, sharp bark or a garble of corrupted sounds for just a split second and then returns to clarity you will need another, 50 % cut, coating of Gloss on just the main cone. Do nothing more to the whizzer, ever again please.
After the barking is controlled or if no losses or corruptions have been discovered, with the wire loops in place, listen very closely to the juncture between whizzer and phase plug, while a female alto singer is putting all she has into a lament of one sort or another. If, within an inch or so, you hear what sounds like small amounts of shrieking coming from this area, you will need to re coat your phase plug with one full strength gloss coat. This is an IM distortion created by differing speeds of propagation between phase plug and whizzer, Once controlled, mass vocal arrangements will open up with an unbelievably lush and detailed quality. At this point your drivers are finished.
Further benefits in loss of localization can be found by treating the cabinet boundary edges with the EnABL patterns. This is best done with the clear flat Poly S material and a single gloss coat over the patterns only, for finished wood cabinets. The patterns will work under thin layers of almost any material used in fine furniture finishing and are basically invisible. Or, you could go for the fully spotted look.....
Do be aware that you have in hand an extremely useful tool for system analysis. Everything you do upstream will be clearly revealed as an improvement in information content or a loss or masking of the same. You can obtain prettier loops of wire, that are specifically aimed at your driver and also pieces for ground plane remediation in the other pieces of gear you own. These appear to provide a subset of what a true poured instrumentation ground plane will provide, for retention of micro dynamic color and detail. Just the things your EnABL'd driver have become so good at displaying.
As for what to call it, perhaps something to do with mad hatters would be appropriate.
Do enjoy your journey, you really have just begun the second leg.
Bud
VERY nice work Gerrit... are you interested in doing other people's drivers? (for a fee of course)
Thanks very much for the compliment. As I was working on the phase plugs I realised how much work you put into it already. I found the ring on the sloping part of the phase plugs to be the most difficult.
As for doing this for others, I must respectfully decline. Doing this for yourself is fun, for others it is work (which I like to avoid because it interferes with the fun part).
Any chance of getting those CSDs all in the same scale -- i can then overlay them for easier comparison.
I will try to get at least the timescale correct for the CDSs and see if I can get the levels to match more closely. Nevertheless, the effect of the phase plugs is quite obvious.
BTW Is it ok for me to use your picture on my page?
Gerrit:
take Bud's advice regarding the GSEP (loops) seriously - not as stunning an improvement as EnABL &/or phase plugs, but once it's dialed in, the removal of same is quite enlightening..
take Bud's advice regarding the GSEP (loops) seriously - not as stunning an improvement as EnABL &/or phase plugs, but once it's dialed in, the removal of same is quite enlightening..
Bud,
Thanks for the compliment, my training as a pharmacist comes in very handy in cases like this.
I had already planned to give the loops a try, was the next thing on my list. Thank you for the elaborate explanation on how to proceed, I will have to let this sink in before I go any further. Guess it was already a close call with coating the whizzer.
As for the rest of my system, if you're interested, there is a lot of info on my site on my amp
Gerrit
Gerrit Boers said:BTW Is it ok for me to use your picture on my page?
Yes, of course 🙂
dave
Gerrit,
Great work on the Fostex and Planet10's phase plug! 😀
Your website is outstanding and informative. 😎
Thank you for sharing your thoughts and experience.
Great work on the Fostex and Planet10's phase plug! 😀
Your website is outstanding and informative. 😎
Thank you for sharing your thoughts and experience.
Gerrit,
I have seen that amplifier pictured in other places. Quite a bauhaus statement and quite a graceful one at that.
Since I am unsure how you used your copper chassis for ground plane activities I will only suggest you try the loops on the return side ground for input output, if they are connected, and on the input only if they are not. The noise floor seems to indicate you are actually using the chassis as full ground plane and so the loops may make no difference at all. That has been my and one other persons experience any way.
Do not hesitate to apply one 50% coating of gloss on the whizzer. If and only if, the phase seems to lag a bit, with reference to the main cone signals. You can also apply a 50% coat on just the backside of the ledge on the whizzer. Not the rest of the backside though. This will unlock some greater dynamic emphasis and should not interfere with anything else. But, be sur eyou find a lack before applying gloss in either place.
Lagging HF phase sounds swallowed, as if the notes are there, but the transient peaks are not right where they should be. Most easily found in the initial strike of chimes and reverberant bell sounds. If you find this to be so apply the gloss sparingly, with a fairly small, well tamped brush and wait at least 48 hours before applying more.
Bud
Great work on the Fostex and Planet10's phase plug!
Your website is outstanding and informative.
Thank you for sharing your thoughts and experience.
Thanks very much for the kind words. Please be aware that I do not have a formal education in audio engineering so there may be some mistakes in my calculations / approach. I do not follow a rigorous scientifc protocol because that would be very tedious. I'm just trying to improve my system, it is not my intention to write a scientifc paper.
Bud,
The basic idea behind the layout of my amp was to totally separate the power supply from the amp. Signal ground and chassis ground are connected at one point only (2nd cap of the HV supply). The mains ground is connected to the chassis at the AC inlet.
The low noise floor is for the most part the result of the 'over the top' power supply, I went to great lengths to get the noise spectrum as clean as possible.
Have you had a look at my mains distribution block ? This measurement shows the difference for the output noise of the DAC1 for a normal mains outlet (red) vs my mains block (blue). This really showed me the benifits of proper grounding. Now that I think of it, the star gound inside the mains block is connected to the chassis. Could all this copper add to the 'ground pool'?
On a more general note. Did you demonstrate the effect of the EnABL pattern to musicians?
Based on what I hear it would seem that treating the cone of a (bass)guitar amp could very interesting.
One more question: Would be ok if I put the EnABL templates on my page?
Gerrit
BudP said:If this condition is found you need to do something completely wierd.... find two 6 inch pieces of lamp power cord and strip about 1/2 of the insulation off of them.
Bend them into loops and attach them to the return side of your driver or the input connectors on your speaker cabinet.
Bud
Hi Bud,
I don't know if this was explained somewhere earlier in the thread but could you (or somebody else) perhaps post a little sketch? I am not sure I understand what goes where and how😕
Peter
nice work and very interesting website
Gerrit,
You do very nice work, indeed. The amps, loudspeakers, etc are a work of audio art. I briefly surfed your site and it, too, is very impressive. My 300B monoblocks are not nearly as impressive as your beautiful examples, but using BudPs 'electron pools' in the amps and on my EnABLed drivers, along with assorted 'tweaks' (such as BudPs output transformers), I am hearing much more deeply into the music and enjoying it more...a worthy goal to me.
I will avail myself of your musings, as they are very enlightening...keep up the good work...and thank you for sharing parts your life with us.
Richard
peterr
The concepts and some actual applications are discussed here. It is a short thread, with interesting implications for ground side electron support of components in a point to point or PCB circuit.
http://www.diyaudio.com/forums/showthread.php?s=&threadid=102180
Gerrit,
I did demonstrate the EnABL'd speakers to guitarists and the comment was that they would be perfect for studio work, in a single or multiple driver box. This was through one of our long time guitar out put transformer customers, THD.
Interestingly, it caused THD to take their cabinet/speaker design up three or four notches and their latest 2X12 cabinet is a real gem. I have one and Andy Marshall, from THD, asked me if I was going to EnABL the drivers. I told him no, that I thought they were more than capable of music production untreated. He just smiled and I could tell he was somewhat releaved. It only took him 12 years to get to this level of performance.
If you have friends, with normal guitar cabinets, you could certainly benefit them with EnABL. Whether they would like what the end product is, that is a moot point. Typically musical instrument players are a couple of magnitudes pickier than audiophiles, maybe more....
Please feel free to put any pictures, from the picassa picture gallery or driver cut out treatment templates from the thread on your web site http://picasaweb.google.com/home?tab=mq
I am quite certain that your copper chasis is providing poured ground plane to your amplifier. Hence the low noise and , I will assume, quite colorful and tuneful signal provided to the speakers.
I will look over your mains distribution block in a day or so.
Bud
BudP said:peterr
.......
Bud


Bud ....... you wanna share (here or with PM or wherever you like) your comments and insights in Mile Nestorovic's winding sheet for his 20W Lab amp OPT ?
I'm curious what you have to say .....
just take your time ........ whenever you feel .....
Zen,
Looking at the document you supplied, I am going to need page 27 and 28 translated, to make sure of the wire sizes and also to find out if all of the primary sections are in series or in parallel. This is a two well bobbin winding and if a core size or perimeter dimensions, the series or parallel primary / secondary and wire dimensions can be discovered, then the transformer is quite straight forward. Not especially inexpensive but produce able.
Certainly the OPT from the Alpha One is much more complex than this one, unless, hidden within this text is a description of how the feedback is handled.
In the Alpha One, the primary and secondary were both series additive winding sectors. Both were 5 wires "in hand" windings with four of those wires, from each, primary and secondary and a tertiary feed back winding of four in hand, going to feed back points throughout the amplifier. I am not even sure all of those points are documented in the schematic drawings, but, we do still have our manufacturing drawings for the power and OPT.
Do you know someone who can translate the text on the transformer and also look for feed back descriptions?
Bud
BudP said:Zen,
Looking at the document you supplied, .............../B]
you already asked for that translation ;
I believe that you can find it as last two pages in pdf I send you
😉
if not - I'll send it again
Zen,
I found a translation in an email from you, but no PDF. Likely lost in the 400 gigs of data I have accumulated for "future research".... obviously long after my death.
The scheme diclosed is useful for dropping capacitance's and leakage inductances within the primary to very low levels, though there is a further optimization for the capacitance, which I will be exploring shortly.
This is a maximum coupling surface to volume ratio design, so I would expect low signal level coherency to be very good. I would not use flax oil saturated paper and phenolic for the dielectric though, there are much more stable, low dielectric constant materials available now and they have excellent characteristics stability, unlike electrical grade kraft paper plus any other material.
All of the cross well connecting of wires, to series the primary to 5k will be expensive in time, just as were the Alpha One OPT's, but I suspect the resulting sonics would be well worth listening to.
Is there a section in the original document about negative feedback applied to various grids, etc through out the circuit?
Bud
BudP said:Zen,
....
Is there a section in the original document about negative feedback applied to various grids, etc through out the circuit?
Bud
tnx Bud ;
I'll look that for you ,say, tomorrow .
Honestly, it looks like fun to me. I'm sick like that. It's the only time I can really focus, it's why I really like to solder.
Illusus said:Honestly, it looks like fun to me. I'm sick like that. It's the only time I can really focus, it's why I really like to solder.
Watch out. This takes off like Bud predicts you'll have to immigrate to the island and work in a speaker factory 🙂
dave
I'm seeing spots... almost 3500 spots added today... so many i'm high from spots...
jeez Dave, I only averaged about 4200 spots..... A YEAR.... for 34 years or so...best abduct this cwazy wabbit from the whistling wastelands, before someone else does.
Bud
- Status
- Not open for further replies.
- Home
- Loudspeakers
- Multi-Way
- EnABL Processes