Once the drivers start delivering good clear music, one thing to test listen for is whether absolute polarity makes a difference. I've been playing around with some chip amps, and even with these, the music detail can be very good. Some piano recordings have the mics right in the piano, and it's possible to hear a very distinct ring of the strings inside as the drivers get better.
just to let know BudP that his good will isn't spent for nothing :
http://www.diyaudio.com/forums/showthread.php?postid=1364507#post1364507
and
http://www.diyaudio.com/forums/showthread.php?postid=1364527#post1364527
besides few things more , Yunick sez :
😉
tide fence is nice thing
http://www.diyaudio.com/forums/showthread.php?postid=1364507#post1364507
and
http://www.diyaudio.com/forums/showthread.php?postid=1364527#post1364527
besides few things more , Yunick sez :
I have a hard time going back to my old box spks.. I even rebuild them to this specs.. HFLS-1
Scroll down to to see XO and graphs..
The EnABl thingie is really cool.. I was kinda sceptic in the beginning but I'm a true beliver now..
😉
tide fence is nice thing
Re: Re: FE206E EnABL Question for Dave
Dave - Thank you for the tips. One more quick question, the Puzzlecoat goes just on the top side of the main cone and on the inside of the whizzer cone, is that correct??
I'm using a 50/50 mix of Puzzlecoat and water.
Thanks Bud!! I'm putting Puzzlecoat on the 206s now and will wait a day or two so they will be good and dry then I'm doing the real thing. I've got another pair of practice cones to do till then.
Thanks Dave and Bud for your help!
Bruce
planet10 said:
I have started working on the text of a Fostex EnABL webpage, here is the short form:
1/ light coat of thinned puzzlecoat (this kills some of the driver coloration and gives some error recovery -- blow a spot and with a wet q-tip (and a dry to follow) you can remove a bad spot if you act fast)
Dave - Thank you for the tips. One more quick question, the Puzzlecoat goes just on the top side of the main cone and on the inside of the whizzer cone, is that correct??
I'm using a 50/50 mix of Puzzlecoat and water.
BudP said:abpea,
You should be able to use various paper doll cutouts from the earlier treatment posts, perhaps scaled slightly, to provide adequate patterns for treating these drivers. I have attached some that I think will help you to plan.
Also wander off to the pic library and down load the matching pictures to these files for added guidance. They are high rez files so you can look pretty closely.
Just don't clench, you can get away with some fairly poor practice and still reap the benefits.
As for the soongsc pattern rings and back side rings, ignore them for now, both can be added later with some careful gloss over coating, just on the pattern blocks and spaces. A single coat of 50 % gloss/water will do for this, when you get around to it.
For now apply the patterns as shown in the pic link. Notice that the whizzer uses triple rings in place of four at both ends of the cone, and yes, those will be really tiny dots on the dome. Feel free to download the picture.
http://picasaweb.google.com/hpurvine/Fostex206ERev/photo#5138741727456026706
Bud
Thanks Bud!! I'm putting Puzzlecoat on the 206s now and will wait a day or two so they will be good and dry then I'm doing the real thing. I've got another pair of practice cones to do till then.
Thanks Dave and Bud for your help!
Bruce
Re: Re: Re: FE206E EnABL Question for Dave
One side only on a FR. Doing both sides creates a constrained sandwich which will stiffeb things up more than you'd like... on a woofer used only for LF i will do both sides.
Keep in mind that the consistency of the puzzlecoat will vary from bottle to bottle, brand-to-brand so 50/50 isn't a very good qualitative description. I am still struggling to figure out how to describe how much i thin it (never as much as 50/50, since my goal is not to have it sink too far into the paper, too runny is as bad as too thick). Fortunately like EnABL there is significant latitude.
dave
abpea said:Dave - Thank you for the tips. One more quick question, the Puzzlecoat goes just on the top side of the main cone and on the inside of the whizzer cone, is that correct??
I'm using a 50/50 mix of Puzzlecoat and water.
One side only on a FR. Doing both sides creates a constrained sandwich which will stiffeb things up more than you'd like... on a woofer used only for LF i will do both sides.
Keep in mind that the consistency of the puzzlecoat will vary from bottle to bottle, brand-to-brand so 50/50 isn't a very good qualitative description. I am still struggling to figure out how to describe how much i thin it (never as much as 50/50, since my goal is not to have it sink too far into the paper, too runny is as bad as too thick). Fortunately like EnABL there is significant latitude.
dave
For those of you who lurk here, hoping for an easy, quick tutorial on how to EnABL, go here, to Hawthorne Audio's web site. Join, so you can use their forum to find the thread on EnABL, under speakers. The tutorials are in the 7th through ? th pages, though not all are posted yet. A very nice group of people, devoted to the Iris speaker.
http://www.hawthorneaudio.com/forum...opic.php?t=1429
Bud
http://www.hawthorneaudio.com/forum...opic.php?t=1429
Bud
Dave,
One possible idea for measuring and standardizing the viscosity of puzzlecoat would be to use the same method we used to use for getting the viscosity of gravure printing inks to the desired value, and uniform between the colors... a Zahn cup.
My guess would be to start with a #1 or #2 Zahn cup, and when you have the puzzlecoat to the desired consistency, dip the Zahn cup in to the liquid and time how long it takes for the cup to empty. The drawback is that you need at least enough volume to fill the cup -- which is not huge, but is way more than enough for a job.
Here's a wikipedia link:
http://en.wikipedia.org/wiki/Zahn_cup
These should be easily available from any printing ink and supplies distributor. Wherever there is a large litho, gravure, or flexo printing operation (newspaper) there will be a Zahn cup.
-- Jim
Thanx Jim,
Just after posting, i realized what i needed was someway to measure viscosity. And as it turns out, in a previous lifetime, i was Macintosh support person for a number of printing establishments to finding this device shouldn't be too hard.
dave
Just after posting, i realized what i needed was someway to measure viscosity. And as it turns out, in a previous lifetime, i was Macintosh support person for a number of printing establishments to finding this device shouldn't be too hard.
dave
scott_m,
I got a message thru the forum from you, but comcast says that the email adfrss you have attched to the forum "Diagnostic-code: smtp;550 5.1.1 Not our Customer"
email me with a current address amd i can get you my reply.
dave
I got a message thru the forum from you, but comcast says that the email adfrss you have attched to the forum "Diagnostic-code: smtp;550 5.1.1 Not our Customer"
email me with a current address amd i can get you my reply.
dave
It took me a while to find out about this EnABL process everyone's talking about it. I suppose just nothing gathered my interest until I talked to planet10 about it.
I was about to try EnABL-ing one of my sets of speakers until I took one apart and realized I'd already done something else to it which sort of makes the process difficult.
....Then I noticed something interesting going on. The sound of these speakers after I modified them was absolutely astounding(still is). They cleaned right up, all through the band, and are so dynamic and well-detailed.
This is a big change because as original, they sounded like absolute garbage, not even worthy of intercom use in my opinion.
I wonder if what I did had a similar effect to the EnABL process, along with increasing the driver's compliance as I expected. My endeavor was entirely to increase the compliance of the driver's suspension to allow for some low-end use. This worked out extremely well, however I noticed a great improvement in the mid-hi area.
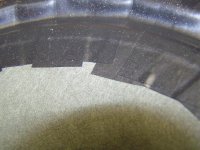
Here's a picture of what I did to change them. The original surrounds were barbarically cut out with a sharp box cutter, and replaced with my rather un-neat application of electrical tape.
I wonder if the tape, and its pattern of application, is effectually reducing standing waves in the way the EnABL process does.
I was about to try EnABL-ing one of my sets of speakers until I took one apart and realized I'd already done something else to it which sort of makes the process difficult.
....Then I noticed something interesting going on. The sound of these speakers after I modified them was absolutely astounding(still is). They cleaned right up, all through the band, and are so dynamic and well-detailed.
This is a big change because as original, they sounded like absolute garbage, not even worthy of intercom use in my opinion.
I wonder if what I did had a similar effect to the EnABL process, along with increasing the driver's compliance as I expected. My endeavor was entirely to increase the compliance of the driver's suspension to allow for some low-end use. This worked out extremely well, however I noticed a great improvement in the mid-hi area.
Here's a picture of what I did to change them. The original surrounds were barbarically cut out with a sharp box cutter, and replaced with my rather un-neat application of electrical tape.
I wonder if the tape, and its pattern of application, is effectually reducing standing waves in the way the EnABL process does.
Attachments
Hi Duo,
Maybe not in the same format as EnABL, but certainly with the same general aim, to break up standing waves, before they can become so. Go here and read from post # 20.
http://www.diyaudio.com/forums/showthread.php?s=&threadid=100390&perpage=25&pagenumber=1
I think what you are doing is closer to what Dr Mamboni discovered. We do discuss it pretty thoroughly, along with EnABL.
Lynn Olson chimed in with a hint about using Fibonacci numbers to develop an "irregular" edge treatment out of the Mamboni devices.
I suggest you obtain some of Planet 10's neat Fonkens and FE 126 or 127 drivers so you know what the EnABL baseline is. And also because they just flat reproduce an engaging musical event. Then begin to really experiment on your own, with your tape idea, maybe crossed with some Mambon and Fibonacci.
We would all be interested in you finding out if there is an even better way to do this task. But, until you have a baseline we all know, well, an increasing number of us anyway, as Dave gets his work out into the world, none of us can judge your relative progress, nor can you.
Soongsc noted, a few hundred posts back that virtually any form of displacement will perform some of the EnABL functions, just because it creates turmoil rather than ringing, which is a very structured event.
So, read about Mamboni and see what happens in your head. We will all be interested.
And welcome to the clan.
Bud
Yes, I will continue to study your work and that of others here.
My intentions with the tape were nothing even remotely similar to your work. Just to increase compliance and lower Fs.
My intentions with the tape were nothing even remotely similar to your work. Just to increase compliance and lower Fs.
And don't forget that improvements in one register often lead to (subjective) improvements in another. It's the way our hearing works.
Improve the bass, the treble gets better too. And visa-versa. We tend to think that we hear in frequency bands or sections. But they all effect one another, subjectively.
Improve the bass, the treble gets better too. And visa-versa. We tend to think that we hear in frequency bands or sections. But they all effect one another, subjectively.
Just a side note,
Theil Audio uses foam "backers" on their aluminum diaphragm mid-range coaxial drivers. They appear to be precast styrofoam.
I presume this is to acheive some of the same results in damping that the above do.
Theil Audio uses foam "backers" on their aluminum diaphragm mid-range coaxial drivers. They appear to be precast styrofoam.
I presume this is to acheive some of the same results in damping that the above do.
I recall that ELAC used paper backings.
These are different ways to dissipate residual energy on the cone. The EnABL pattern adds the less mass which is desireable in driver design.
These are different ways to dissipate residual energy on the cone. The EnABL pattern adds the less mass which is desireable in driver design.
Hi,
I would like to enABL a pair of 126E speakers I built. I am having a tough time getting a clear step by step picture of this process even after reading much of these threads. Can someone direct me to one of the printable patterns for this driver? Also is there a nice step by step description with materials needed?
thanks
Kris
Kris,
In a post above, Bud noted a consolidation of directions given in the Hawthorne thread. See page ~7 on...
http://www.hawthorneaudio.com/forum...opic.php?t=1429
In a post above, Bud noted a consolidation of directions given in the Hawthorne thread. See page ~7 on...
http://www.hawthorneaudio.com/forum...opic.php?t=1429
Kris,
Here are the steps I'm following to EnABL my FE206Es. Some steps may not apply to your driver:
Step 1 - Order phase plugs for driver from Dave at Planet10 HiFi and carefully remove dustcaps.
Step 2 - Paint the - top side only - of the main cone and - inside only - of the whizzer cone with Puzzle Coat (aka ModPodge) cut with water and let dry for a couple of days.
Step 3 - Apply the EnABL pattern with acrylic paint to your drivers using an appropriate pattern. Let dry.
Step 4 - Apply a 50/50 Micro Gloss/water mixture to your main cone and whizzer. Let dry, listen, decide to apply more Micro Gloss/water.
That is the process as I understand it. Hopefully Dave or Bud will jump in and correct me if I'm giving bad advice but I believe that's the way to do it step-by-step.
Good luck -
Bruce
abpea said:Kris,
Here are the steps I'm following to EnABL my FE206Es. Some steps may not apply to your driver:
Step 1 - Order phase plugs for driver from Dave at Planet10 HiFi and carefully remove dustcaps.
Step 2 - Paint the - top side only - of the main cone and - inside only - of the whizzer cone with Puzzle Coat (aka ModPodge) cut with water and let dry for a couple of days.
Step 3 - Apply the EnABL pattern with acrylic paint to your drivers using an appropriate pattern. Let dry.
Step 4 - Apply a 50/50 Micro Gloss/water mixture to your main cone and whizzer. Let dry, listen, decide to apply more Micro Gloss/water.
That is the process as I understand it. Hopefully Dave or Bud will jump in and correct me if I'm giving bad advice but I believe that's the way to do it step-by-step.
Good luck -
Bruce
I'm setting up to do this too - but will probably leave the dust cap on till I've finished the painting bits.
Re measurements - will THD at higher listening levels be reduced ? (Sorry couldn't face searching back) ...
abpea said:That is the process as I understand it. Hopefully Dave or Bud will jump in and correct me if I'm giving bad advice but I believe that's the way to do it step-by-step.
Pretty much... you don't need to wait that long for the PK to dry thou.
And don't forget to EnABL the plugs (i'd also wait till you have plugs in hand before cutting). Also if you are EnABLing the longer FE206eSR plugs are a better bet (and once i am out if the few sets of short ones i have, that is all i'll be supplying)
dave
- Status
- Not open for further replies.
- Home
- Loudspeakers
- Multi-Way
- EnABL Processes