Wow! Great!
I have a very good feeling: a project completion before this X'mas (navidad)! 🙂
I'm glad you approve the job ! 😉
Yes, I will rediscover listening to the Christmas carols !🙂
And... I also don't believe in spikes or similar things. Will sound the same with wheels etc, if don't change the relative height to ground too much, since this is a kind of "load" to the D/TQWT, if I recall correctly.
Indeed, we need an air charge at the mouth outlet, (this is equivalent to the tuning tube in a bass reflex design) I had thought of a base with adjustable height, but I have discarded it, too complicated and I do not think it is a very audible difference ....
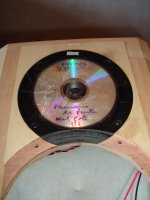
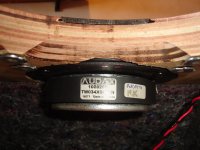
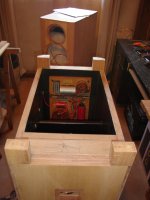
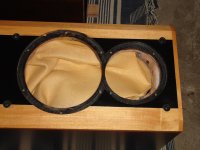
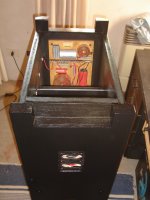
The tweeter set - waveguide seen from within. I have tried to adjust the housing as much as possible, the two upper nuts have somewhat complicated the setting, but with the router was fixed.
The protection of the dome is very important, the cd fits right here....😀
The protection of the dome is very important, the cd fits right here....😀
Attachments
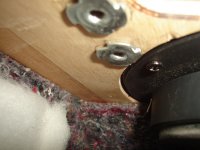
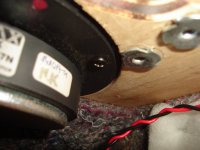
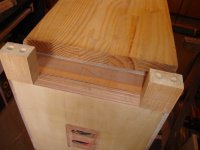
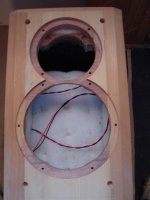
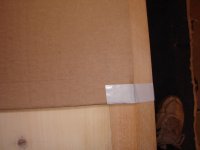
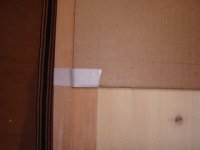
The alignment of the baffle step will be adjusted with the joints I have made. The material is excellent, these are "under carpet" folders.😉
Allows an exact adjustment by varying the adjustment pressure of the screws. When you reach the desired depth for a perfect alignment (it's about millimeters) do not press it any more...😀
Allows an exact adjustment by varying the adjustment pressure of the screws. When you reach the desired depth for a perfect alignment (it's about millimeters) do not press it any more...😀
Attachments

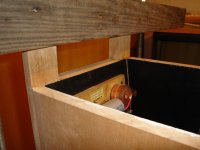
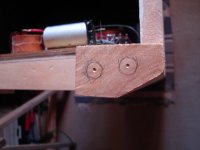
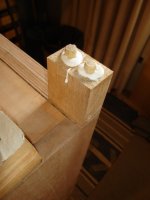
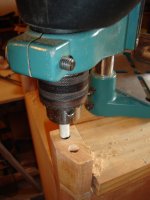
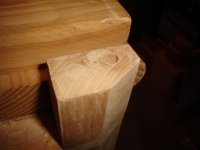
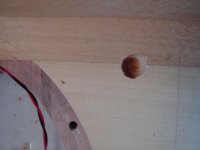
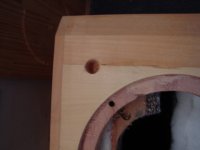
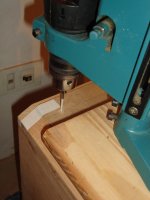
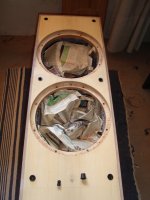
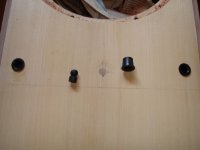
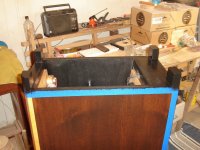
Gluing the cabinet feet.
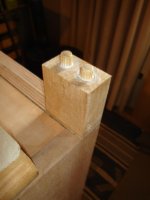
Once the vinyl glue is dry, the feet will be reinforced with dowels...🙂
I could have used screws and then removed them, but doing it using my home presses seemed more fun .....😀
Remember that I promised myself not to use screws throughout the building. I only accept those who squeeze the speakers. 😱
Question of principles !
Attachments
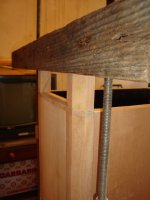

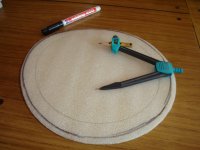
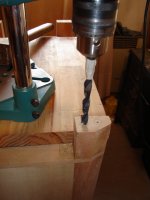
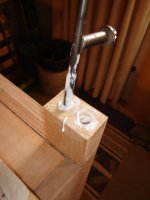
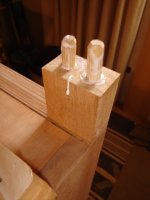
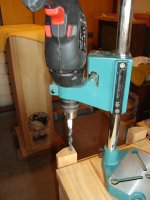
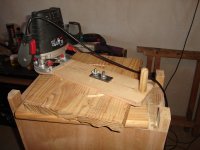
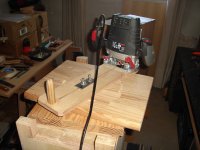
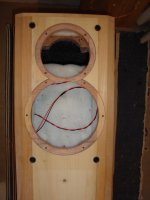
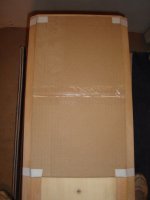
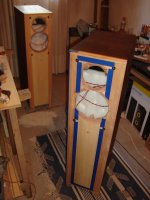
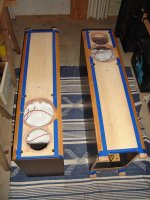
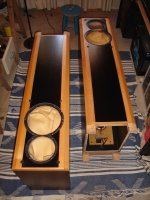
Each foot will be trimmed to 50 mm, 10 mm will be inserted into the table that will base as wheels.
This frees the recommended 40 mm of charge at the mouth of the horn...😉
Each hole carried three billets. The tool to introduce them one at a time is very difficult to find...😀
Today there is a photo festival !! 😛
This frees the recommended 40 mm of charge at the mouth of the horn...😉
Each hole carried three billets. The tool to introduce them one at a time is very difficult to find...😀
Today there is a photo festival !! 😛
Attachments

Follow the photos ....😉
Any comments are welcome ! 🙂
Any comments are welcome ! 🙂
Attachments
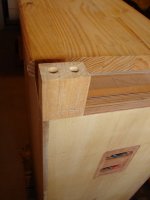


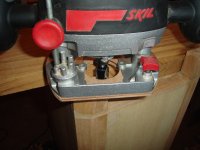
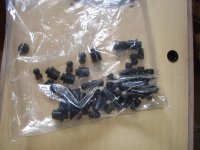
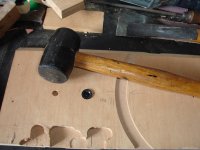
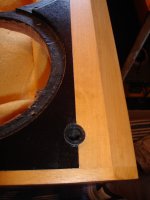
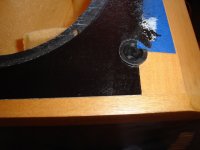
Installation of the grid locks .
Make the hole accurate , use a rubber hammer, try before on a wood trim.
The template will serve to match the female parts with the male parts then ...😱
Make the hole accurate , use a rubber hammer, try before on a wood trim.
The template will serve to match the female parts with the male parts then ...😱
Attachments


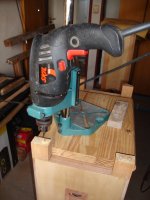
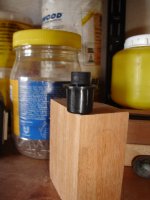
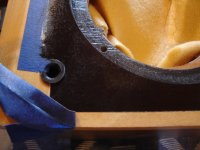
Use various drills from minor to major, use a rubber hammer, try before on a wood trim.
Attachments
Last edited:
¡Qué laburo de preso, hermano!
What a job as a prisoner, my brother!
And yes, but this is the best therapy for me, and much more economical !

Lastima que no llego a ponerlo al lado del arbolito ......😀
Truly Great Project you have going here !!
I've wanted to hit the "LIKE" Button many many times when reading your detailed progress reports.
Alas, this forum doesn't have a like button ( very retro I suppose ).
Thanks for the many pictures, it'll help take away the fear of doing something similar.
Anyways, I'm really looking forward to reading your impressions about this interesting design.
Merry Christmas 🙂
Truly Great Project you have going here !!
I've wanted to hit the "LIKE" Button many many times when reading your detailed progress reports.
Alas, this forum doesn't have a like button ( very retro I suppose ).
Thanks for the many pictures, it'll help take away the fear of doing something similar.
Anyways, I'm really looking forward to reading your impressions about this interesting design.
Merry Christmas 🙂
Thanks friend, your words are worth more than thousands of "I like"

There is little left and I will be able to listen to the cabinets, I am currently in the painting stage, and then the installation and wiring of the drivers. Finally, I will build the base with wheels, these beasts are not easy to move and I can not leave them permanently in the sweet spot of the living.
Merry Christmas to you, too 🙂
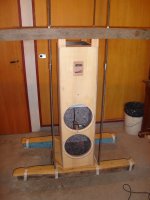
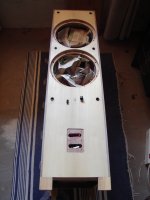
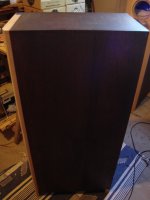
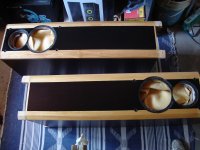
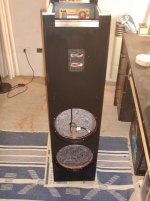
Stage of cosmetics.
Each of us will have a finish that pleases you more, I chose:
Bafle (front panel) black center, angled side slats of natural wood.
Top panel and side panels semi dark wood (walnut)
The back panel will be all black, little work here, thankfully ...
Each of us will have a finish that pleases you more, I chose:
Bafle (front panel) black center, angled side slats of natural wood.
Top panel and side panels semi dark wood (walnut)
The back panel will be all black, little work here, thankfully ...
Attachments
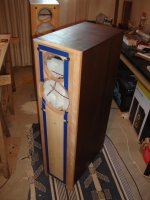

I applied a wooden base hand and 3 black enamel hands, remember to sanding smoothly (fine sandpaper) between hands !


The front panel is already ready for the last coat of varnish, - I have chosen a semi-gloss coat - now paint the back panel and the feet in black. I will not apply varnish on it. 
Attachments

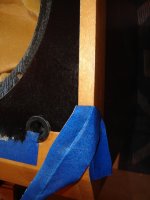
I have not applied white wood base paint to these surfaces.
Use black paint diluted with 10% turpentine as a base and then another pure coat.
Humm, there are change of plans .... I think that once dry (it takes 12 hours to take its correct tone) apply varnish to all surfaces, including the back panel and feet. It will be easier because it will not be necessary to protect with masking tape.
Attachments

Many online chess games have not let me see clear in the last post .....🙄
It seems to lie ..... with the simplest things sometimes we become too complicated .... analytical excess of certainty ....😱
In the current state of painting, if I apply (I have already done so today) a third layer of black, then I will remove the masking tape, I will put up the cabinets up front and I will give the last coat of varnish only to the surfaces with wood finish.😀
Remember the beginning on this thread? Good news !!🙂
My lizard has not been electrocuted and has had a child! 😱
Attachments

- Home
- Loudspeakers
- Multi-Way
- DTQWTII from Argentina