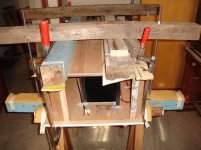
Now, the last step before gluing the sarcophagus lid .....😀
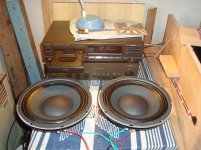
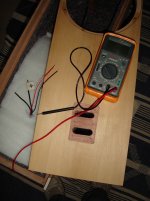
I tried the crossover dedicated to the area of low frequencies. And everything works fine again.🙂
Apparently provides only a correction to flatten the peak impedance Deltalite 2510 Eminence II, and there is a cutoff frequency specified, at least I have not found in the description of the page.😕
But I remember having tried these speakers when acquired, directly to the amplifier output without any filter and the middle area is clearly heard.
The upper limit declared by the manufacturer is approximately 4000 Hz.
Well, that middle I hear now highly attenuated, and the treble control of NAD3020 appears to be no ..🙄
So I conclude that this is consistent with the role of these two speakers, which are in theory an additional TQWTII subwofer.😉 The lower zone extends as measured by Troels up to 40 hz. In short, it is a topic for experts crossover network topologies, and I'm not ....😱
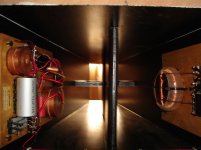
DTQWT-mkII mkII crossover
" Crossover topology:
For the two bass drivers we have a textbook 1st order crossover. Impedance correction is provided by R3031 and C3031."
I tried the crossover dedicated to the area of low frequencies. And everything works fine again.🙂
Apparently provides only a correction to flatten the peak impedance Deltalite 2510 Eminence II, and there is a cutoff frequency specified, at least I have not found in the description of the page.😕
But I remember having tried these speakers when acquired, directly to the amplifier output without any filter and the middle area is clearly heard.
The upper limit declared by the manufacturer is approximately 4000 Hz.
Well, that middle I hear now highly attenuated, and the treble control of NAD3020 appears to be no ..🙄
So I conclude that this is consistent with the role of these two speakers, which are in theory an additional TQWTII subwofer.😉 The lower zone extends as measured by Troels up to 40 hz. In short, it is a topic for experts crossover network topologies, and I'm not ....😱
DTQWT-mkII mkII crossover
" Crossover topology:
For the two bass drivers we have a textbook 1st order crossover. Impedance correction is provided by R3031 and C3031."
Attachments

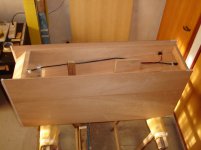
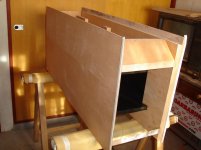
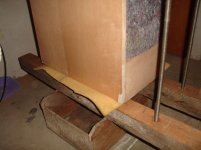
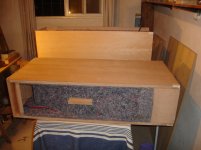
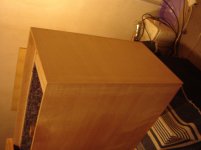
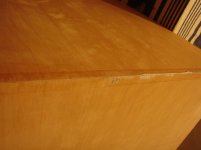
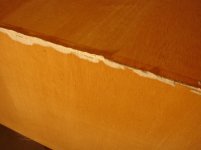
I finished gluing one of the two cabinets. Which manufactures presses worked well, distributing the pressure evenly.🙂
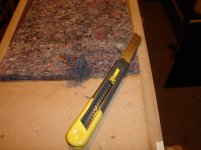
I used cuts "under carpet" to avoid damaging the veneer. But then retighten it takes a while because crushed. Humm, for the other cabinet I think that will use my traditional system, old newspapers. But is no longer left me many, now the people read newspapers online ....😀
I used cuts "under carpet" to avoid damaging the veneer. But then retighten it takes a while because crushed. Humm, for the other cabinet I think that will use my traditional system, old newspapers. But is no longer left me many, now the people read newspapers online ....😀
Attachments


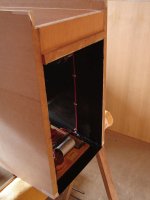
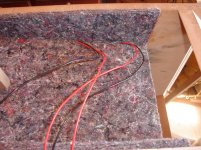
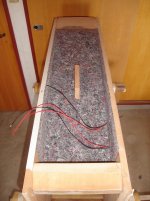
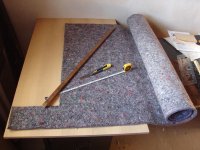
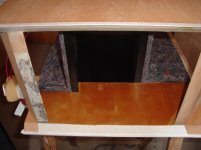
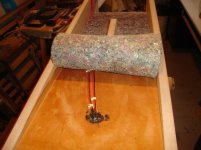
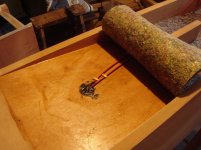
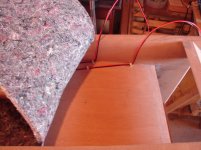
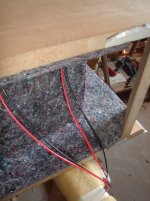
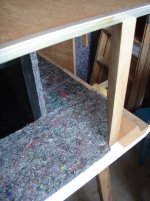
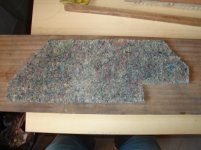
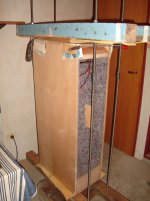
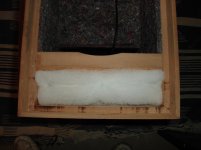
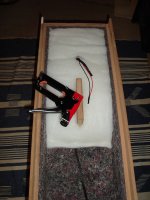
I have begun to place the absorbent material.....🙂
Attachments
-
 Side panel.JPG675 KB · Views: 108
 -
 Rear felt.JPG497.5 KB · Views: 91
 -
 Pegamento aplicado.JPG465.3 KB · Views: 105
 -
 cortes felt 011.JPG359.4 KB · Views: 87
 -
 cortes felt 015.JPG480.2 KB · Views: 92
 -
 cortes felt 008.JPG363.8 KB · Views: 93
 -
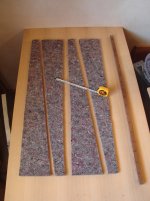 cortes felt 005.JPG471.5 KB · Views: 105
 -
 cortes felt 003.JPG689.5 KB · Views: 103
 -
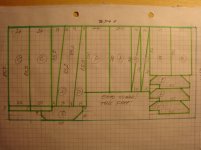 Plano de cortes.JPG438.3 KB · Views: 121
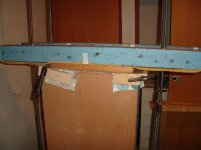
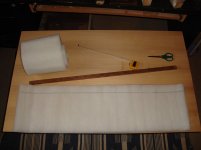
New developments:
I have almost finished gluing the felt, absorbent material.
Before gluing the cloth top panel must glue it. Binding to 45 degrees is one of the most important and sensitive points for a good finish of the box ...... we'll see how it looks .....
I have almost finished gluing the felt, absorbent material.
Before gluing the cloth top panel must glue it. Binding to 45 degrees is one of the most important and sensitive points for a good finish of the box ...... we'll see how it looks .....
Attachments
-
 pegado felt detalles 017.JPG358.1 KB · Views: 82
 -
 pegado felt detalles 016.JPG367.1 KB · Views: 79
 -
 pegado felt detalles 015.JPG314.1 KB · Views: 85
 -
 pegado felt detalles 014.JPG373.6 KB · Views: 80
 -
 pegado felt detalles 013.JPG430.6 KB · Views: 77
 -
 pegado felt detalles 011.JPG441.3 KB · Views: 82
 -
 pegado felt detalles 007.JPG450 KB · Views: 80
 -
 pegado felt detalles 004.JPG452.6 KB · Views: 79
 -
 pegado felt detalles 001B.JPG565.9 KB · Views: 76
 -
 pegado felt detalles 001A.JPG466.6 KB · Views: 85

Lots of tools... Are you carpenter?
Osvaldo:
Sí, trabajé en carpinteria naval mucho tiempo atras, me quedó el oficio y algunas herramientas manuales viejas.
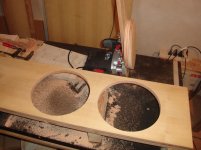
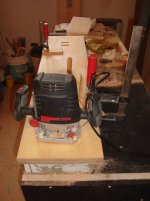
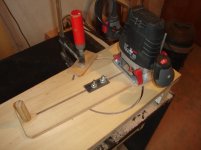
También he comprado algunas nuevas del tipo de mano electricas, el router por ejemplo, muy útil para los agujeros de los parlantes, aunque no imprescindible. Se pueden hacer manualmente, pero , claro, es mucho más trabajo.
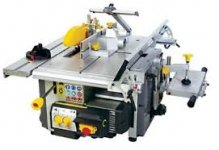
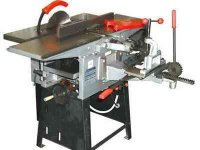
El punto mas delicado en este trabajo es lograr buenos cortes en 45 grados para la tapa superior. Con la sierra circular de mano ha sido muy difícil. ( el disco, por ejemplo, tenía mucho " juego " lateral en su eje, lo que hacia muy inexactos los cortes. Tuve que eliminar ese problema. Es una herramienta para trozar, no para trabajos de precisión.Lo ideal es un banco de carpintero como los de las fotos, pero eso cuesta mucho dinero si uno no se dedica exclusivamente a trabajar de carpintero. Y ni hablar del problema con los vecinos !
Saludos !
Osvaldo:
If, naval carpentry work on a long time ago, I left the office and some old hand tools.
I also bought some new type of electric hand router for example, very useful for the holes in the speakers, but not essential. They can be done manually, but, of course, is much more work.
The most delicate point in this work is to achieve good cuts at 45 degrees to the upper cover. With the circular saw has been very difficult. (Disk, for example, had much lateral "play" on its axis, which made very inaccurate cuts. I had to eliminate that problem. It is a tool for cutting up, not to work precisión.Lo ideally is a workbench like the photo, but that's a lot of money if one is not dedicated solely to work as a carpenter. not to mention the problem with the neighbors ! 😀
Regards !
Attachments
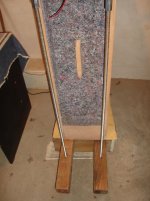
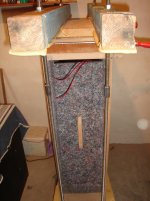
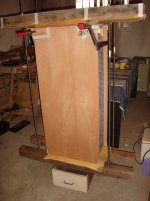
The process of bonding the top cover. Presses the extensible have made for this job .... They have a good extension! 🙂
Attachments
-
 encolado de tapa superior 013.JPG357.3 KB · Views: 85
 -
 encolado de tapa superior 012.JPG445.2 KB · Views: 78
 -
 encolado de tapa superior 011.JPG515.9 KB · Views: 72
 -
 encolado de tapa superior 009.JPG503 KB · Views: 72
 -
 encolado de tapa superior 007.JPG315.9 KB · Views: 70
 -
 encolado de tapa superior 006.JPG362.5 KB · Views: 89
 -
 encolado de tapa superior 005.JPG372.9 KB · Views: 77
 -
 encolado de tapa superior 003.JPG464.7 KB · Views: 87
 -
 encolado de tapa superior 002.JPG431.4 KB · Views: 96
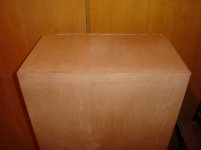
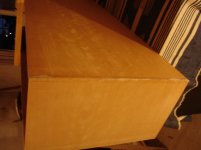
The top panel and glued and sanded, ready to apply paint. I have not yet decided tone, but it is not clear, it is not my taste. 😕 I prefer semi dark woods...🙂
Attachments
-
 v los mellizos.JPG374.4 KB · Views: 112
 -
 u los mellizo bis.JPG405.4 KB · Views: 106
 -
 Terminacion final.JPG284.3 KB · Views: 99
 -
 Terminacion final angulo 45 grados.JPG344.6 KB · Views: 325
 -
 Terminacion angulo 45 grados 013.JPG386.7 KB · Views: 328
 -
 Terminacion angulo 45 grados 005.JPG320.6 KB · Views: 333
 -
 eliminando restos de cola.JPG356.4 KB · Views: 341
 -
 Cola y papel a eliminar.JPG391.4 KB · Views: 362
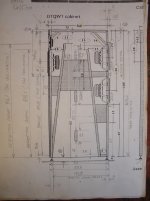
I worked on the rear panel.
I saw a small error in the plane above attached. (See post 12) The measure is correct because it was added 0.8 cm thickness of the original rear panel, making a total of 3 cm.Pero the arrow must go from the front panel to the rear panel. See bottom of the diagram. The total is correct, 50.8 cm.
I saw a small error in the plane above attached. (See post 12) The measure is correct because it was added 0.8 cm thickness of the original rear panel, making a total of 3 cm.Pero the arrow must go from the front panel to the rear panel. See bottom of the diagram. The total is correct, 50.8 cm.
Attachments
Here the updates 🙂
Attachments
-
 Fresado 2x10 panel trasero 014.JPG329.9 KB · Views: 123
 -
 Fresado 2x10 panel trasero 017.jpg264 KB · Views: 124
 -
 Fresado 2x10 panel trasero 021.jpg218 KB · Views: 107
 -
 Fresado 2x10 panel trasero 036.JPG425.5 KB · Views: 103
 -
 Fresado 2x10 panel trasero 013.JPG388.6 KB · Views: 113
 -
 Fresado 2x10 panel trasero 011.JPG273.4 KB · Views: 93
 -
 Fresado 2x10 panel trasero 009.JPG299.1 KB · Views: 96
 -
 Fresado 2x10 panel trasero 007.JPG388.4 KB · Views: 97
 -
 Fresado 2x10 panel trasero 006.JPG359.3 KB · Views: 98
 -
 Fresado 2x10 panel trasero 004.JPG324.1 KB · Views: 134
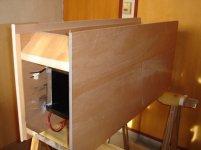
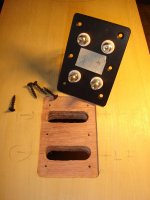
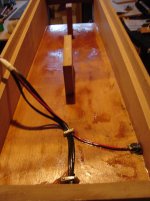
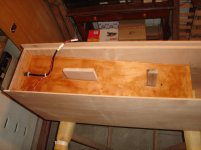
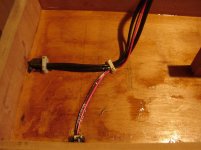
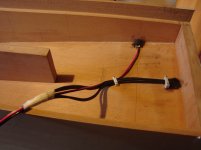
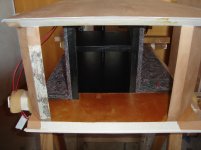
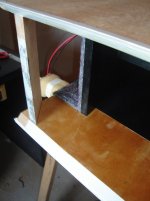
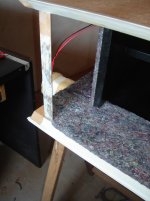
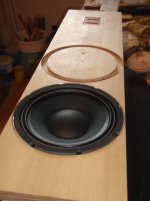
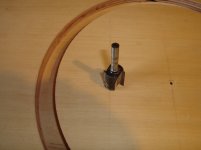
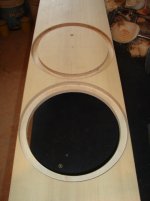
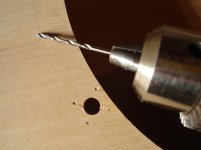
Leave photos of the latest advances, placement of cushioning the bass sector, and marking the polarity of the wires ...
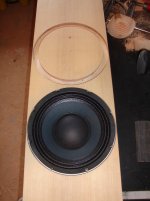
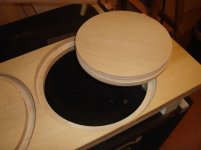
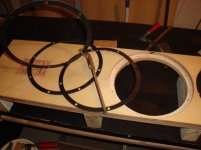
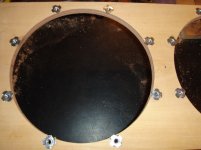
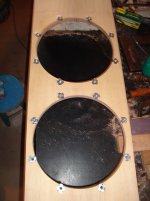
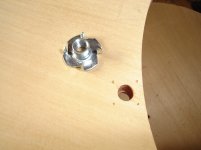
I also prepared the rear panel with T-nuts for fixing drivers Eminence Deltalite 2510 II. I removed the back board to achieve just leveling with the panel.
I also prepared the rear panel with T-nuts for fixing drivers Eminence Deltalite 2510 II. I removed the back board to achieve just leveling with the panel.
Attachments
-
 Detalles antes de cerrar atrás 014.JPG648.7 KB · Views: 76
 -
 Detalles antes de cerrar atrás 013.JPG368.4 KB · Views: 90
 -
 Detalles antes de cerrar atrás 012.JPG424.6 KB · Views: 77
 -
 Detalles antes de cerrar atrás 010.JPG213.7 KB · Views: 73
 -
 Detalles antes de cerrar atrás 003.JPG297.2 KB · Views: 84
 -
 removidas.JPG300.5 KB · Views: 99
 -
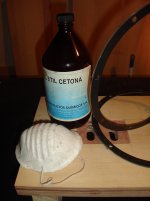 MEK.JPG326.4 KB · Views: 81
 -
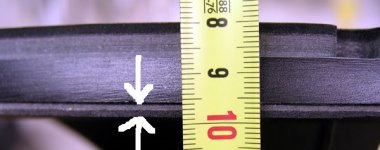 3 mm.jpg62.1 KB · Views: 91
 -
 2 mm apretadas.JPG384.1 KB · Views: 107
I forgot placement of T-nuts on the rear panel and the basket without the back seal.
Regards
Regards
Attachments
-
 colocando t-nuts 044.JPG399.9 KB · Views: 101
 -
 colocando t-nuts 036.JPG406.1 KB · Views: 95
 -
 colocando t-nuts 035.JPG446.5 KB · Views: 97
 -
 colocando t-nuts 008.JPG399.1 KB · Views: 86
 -
 colocando t-nuts 007.JPG266.4 KB · Views: 86
 -
 colocando t-nuts 002.JPG356.7 KB · Views: 92
 -
 Junta eliminada.JPG498.5 KB · Views: 95
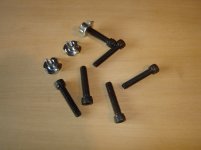
I'll use screws with t-nuts are Allen head type. I could not get in my country appropriate screws for wood and of my taste. I wanted blued (black oxid) and head round type Phillips)
This has taken me a lot, but did not want to do as I advised in stores, "Paint it black" !! 🙄, as sung by the Rolling Stones ...
Up the volume !!!
https://www.youtube.com/watch?v=-dkAiWswi8A
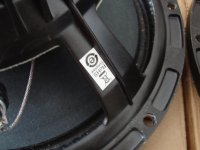
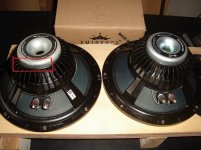
One of four drivers Eminence has come with reverse polarity....😱 You can read something about it here :
http://www.diyaudio.com/forums/pa-systems/296692-eminence-deltalite-2510-ii-error-assembly-2.html
My god, my english is very bad ...😱
Regards
Rolando
This has taken me a lot, but did not want to do as I advised in stores, "Paint it black" !! 🙄, as sung by the Rolling Stones ...
Up the volume !!!
https://www.youtube.com/watch?v=-dkAiWswi8A
One of four drivers Eminence has come with reverse polarity....😱 You can read something about it here :
http://www.diyaudio.com/forums/pa-systems/296692-eminence-deltalite-2510-ii-error-assembly-2.html
My god, my english is very bad ...😱
Regards
Rolando
Attachments
OUCH... reversed magnet polarity... 😱 makes me wonder about Eminence production testing 🙄
I'm thinking of something now ... I made the smaller version, the TQWT, and yet I can not move/lay down this box alone ... I like to have a hoist at home to move it. I imagine when you need to move this DTQWT to the listening room ...

I'm thinking of something now ... I made the smaller version, the TQWT, and yet I can not move/lay down this box alone ... I like to have a hoist at home to move it. I imagine when you need to move this DTQWT to the listening room ...
My god, my english is very bad ...😱
Regards
Rolando
Your English is perfect.
Your excellent tutorial is generous.
Kudos
Sent from my Nexus 6 using Tapatalk
This is an important consideration. I built a similar DTQWT cabinet and barely managed to move it from my basement shop up two flights of stairs.OUCH... reversed magnet polarity... 😱 makes me wonder about Eminence production testing 🙄
I'm thinking of something now ... I made the smaller version, the TQWT, and yet I can not move/lay down this box alone ... I like to have a hoist at home to move it. I imagine when you need to move this DTQWT to the listening room ...
This much plywood is HEAVY.
Sent from my Nexus 6 using Tapatalk
Your English is perfect.
Your excellent tutorial is generous.
Kudos
Thanks Kudos ! , it's good to hear, San Google helps a lot, I must admit, although I correct enough ....
- Home
- Loudspeakers
- Multi-Way
- DTQWTII from Argentina