thanks for your opinion, I'm glad to be equal to that of the builders who raised their impressions on the page Troels.Maybe not... 😀🙂
Time to some additional notes, from my experience with my TQWT:
These TW034 tweeter or it's norwegian cousin are very well behaved and well integrated via waveguide to JA/HMQ8008, so they sound smooth without any hint of own harshness, but reveal most poor recordings.
All visitors have praise to this tweeter, saying things like "Oh, is impossible to find one defect in them" and so on. Of course not sound like ribbons, but I've compared them with my DIY plasma tweeter, and resembles very much the HF sound since both have almost zero energy storage in that area. But I prefer to use the lower attenuation in tweeter, and sometimes with zero ohm, when listening very off-axis (or with some amps/recordings on axis), to raise the power response and perceived HF at side listening.
I have found less sense of depth if compared to my now defunct OB (open baffle) project, but is good if paired with good amps, specially tubed ones.
Midrange is clean since the JA-8008 is very well behaved in this area, and bass is clean and fast.
So maybe you can expect great results but of course is taste-dependent.
Indeed, one of the most weighted virtues is the excellent integration between midrange and treble, almost like a single conductor extended range ..
( widespread in treble 😀 )
Thanks for your opinion, I'm glad to be equal to that of the builders who raised their impressions on the page Troels.
Indeed, one of the most weighted virtues is the excellent integration between midrange and treble, almost like a single conductor extended range (widespread extended in treble 🙄)
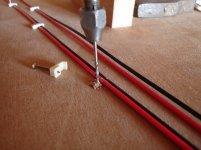
I'm welding cables crossover network these days, they are not to my liking pressure connectors. I agree on your way to solder, tin must complete and strengthen contacts, not act as an element that allows the passage of electrons only. Welding is a complement of two or more joints must be mechanical. 🙂
Listen long time ago tweeters of Dr.Oskar Heil, AMT, but did not finish convince me, too soft. But perhaps they have improved a lot, the Ess brand is making yet, I have understood. I remember the monster AMT6 ..... it was not for use with vacuum valves .....

In tweeters tape I liked much one that produced JVC (rara avis) Excellent, but (nothing is perfect, once again) its vertical dispersion was very poor. But I am now entering the danger zone, many memories and I get nostalgic ...😱
Last edited:
OK. I'm very happy with this K's, not with the others, you know.
With only 12W per channel, all the house vibrates hardly.
Sí, yo sé .....12 watts es mucha potencia para nosotros .....😉
Rolando, the devil is the details!
Bueno, aquí se me complica, me temo que puedo malinterpretar.
El diablo está en los detalles ?
Al diablo con los detalles ?
De todas formas es como la fábula de la rana y el escorpión , " es mi naturaleza ", no lo puedo evitar.....🙂
Eu ouvi estes tweeteres da JVC há uns 10 anos atrás, e gostei do que eu ouvi. Desde então eu fiquei curioso sobre tweeteres "esotéricos" e/ou a implementação "esotérica".The monster Ess AMT6 and ribbon tweeter JVC HSW1101
Regards
Those JVC tweeters I've listened some 10 years ago, and I liked them. And since I become curious about "esoteric" tweeters and/or implementations.
(no Spanish this time, I ran out of time 🙁🙂 )
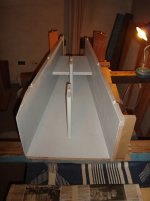
Update photos!
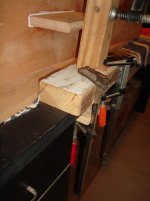
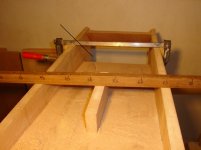
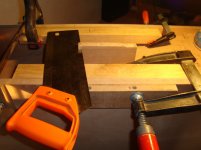
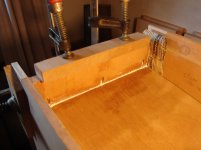
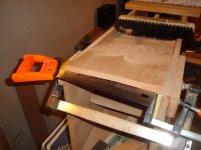
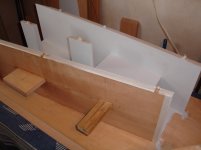
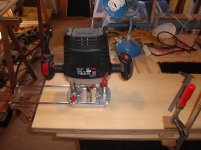
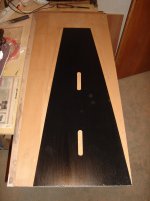
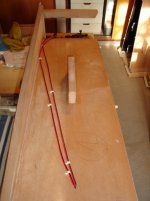
I have perfected the method for cutting the reinforcements of the front and rear panels :
I have perfected the method for cutting the reinforcements of the front and rear panels :
Attachments
-
 DSC00439.JPG405 KB · Views: 78
 -
 DSC00438.JPG386.7 KB · Views: 86
 -
 DSC00437.JPG380 KB · Views: 88
 -
 DSC00432.JPG324.9 KB · Views: 86
 -
 DSC00429.JPG332.9 KB · Views: 82
 -
 DSC00425.JPG345.1 KB · Views: 78
 -
 DSC00421.JPG334.6 KB · Views: 275
 -
 DSC00419.JPG376.1 KB · Views: 303
 -
 DSC00417.JPG395.6 KB · Views: 299
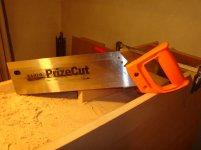
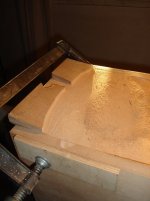
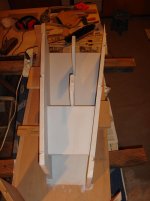
The template manufactured to use the router reduces the total vertical travel of the milling cutter ..... is not a professional tool, of 5 cm is reduced to 3 cm, so leave the method suggested by Troels, and became the old fashioned way: with hand saw, wooden brush and lots of sand. there is no major problem, just a little extra physical exercise ..😀
Attachments

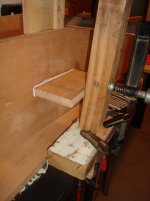
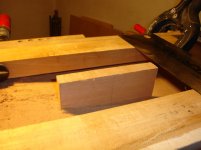
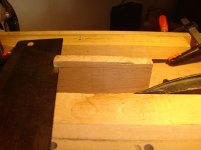
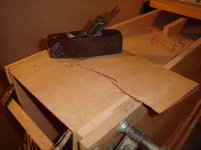
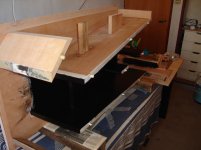
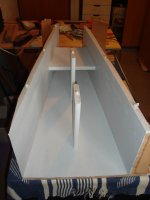
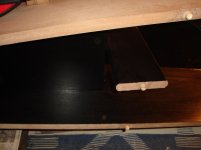
Finished cutting angled front panel ...
Attachments
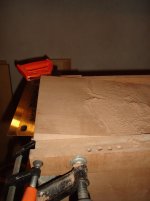
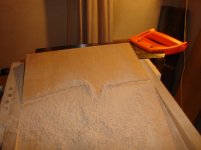


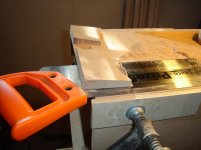
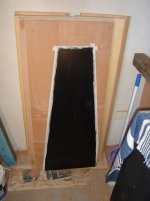
I must not forget to protect the parts to be glued with tape mask ....😉
Attachments
-
 Pintado interno-calado borneras - etc 043.JPG325.8 KB · Views: 89
 -
 Pintado interno-calado borneras - etc 042.JPG359.3 KB · Views: 97
 -
 Pintado interno-calado borneras - etc 040.JPG427 KB · Views: 97
 -
 Pintado interno-calado borneras - etc 039.JPG176.8 KB · Views: 86
 -
 Pintado interno-calado borneras - etc 037.JPG378.9 KB · Views: 85
 -
 Pintado interno-calado borneras - etc 035.JPG361.3 KB · Views: 76
 -
 Pintado interno-calado borneras - etc 031.JPG330 KB · Views: 80
 -
 Pintado interno-calado borneras - etc 026.JPG137.2 KB · Views: 84
 -
 Pintado interno-calado borneras - etc 025.JPG290.7 KB · Views: 99
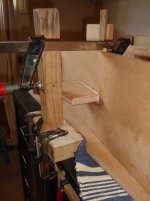
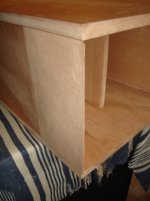
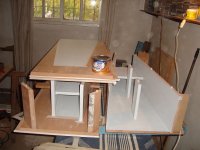
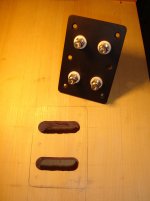
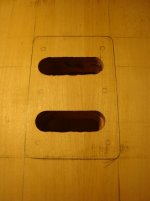
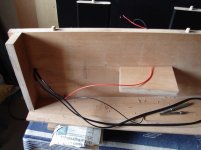
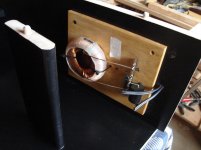
Preparation of the rear panel to screw the plate with terminal block connection. I thought a few millimeters reduce the wood to flush .... but stay well .... one less thing to do and will not change the outcome or aesthetic or sound ....🙄
Attachments

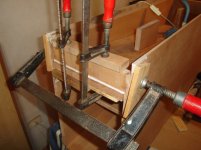
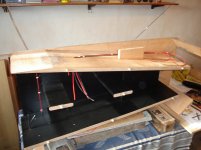
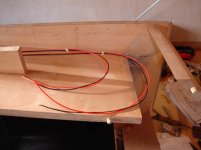
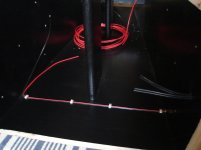
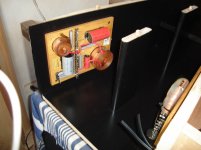
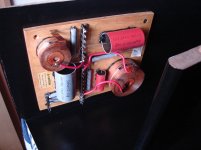
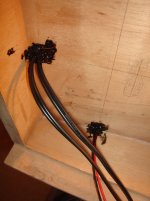
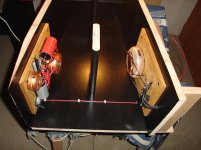
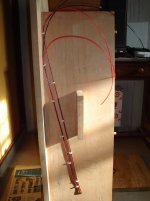
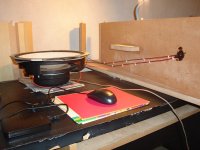
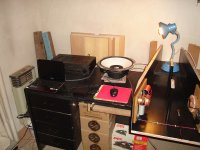
We begin with the installation of the crossovers and the connection .....🙂
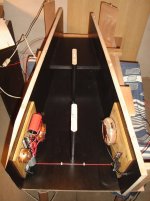
The box will close at the end, this will allow us to work comfortably and correct if it were to encounter problems.
The box will close at the end, this will allow us to work comfortably and correct if it were to encounter problems.
Attachments
-
 dtqwt cableado 031.JPG382.7 KB · Views: 93
 -
 dtqwt cableado 030.JPG320.9 KB · Views: 92
 -
 dtqwt cableado 026.JPG365.8 KB · Views: 83
 -
 dtqwt cableado 021.JPG397.2 KB · Views: 88
 -
 dtqwt cableado 019.JPG274.7 KB · Views: 91
 -
 dtqwt cableado 010.JPG349.6 KB · Views: 106
 -
 dtqwt cableado 008.JPG418.3 KB · Views: 114
 -
 dtqwt cableado 007.JPG353.9 KB · Views: 109
 -
 dtqwt cableado 006.JPG347.1 KB · Views: 89
 -
 dtqwt cableado 001.JPG402.5 KB · Views: 81
Follows .....😀
Attachments
-
 soldaduras xovers y sellado cables 012.JPG407.4 KB · Views: 91
 -
 soldaduras xovers y sellado cables 014.JPG431 KB · Views: 94
 -
 soldaduras xovers y sellado cables 015.JPG307.9 KB · Views: 78
 -
 soldaduras xovers y sellado cables 019.JPG448.9 KB · Views: 81
 -
 soldaduras xovers y sellado cables 008.JPG397.8 KB · Views: 93
 -
 soldaduras xovers y sellado cables 005.JPG429.3 KB · Views: 97
 -
 soldaduras xovers y sellado cables 004.JPG356.1 KB · Views: 91
 -
 soldaduras xovers y sellado cables 003.JPG349.6 KB · Views: 86
 -
 dtqwt cableado 038.JPG376.1 KB · Views: 89
 -
 dtqwt cableado 035.JPG414.7 KB · Views: 101
You think it's better to solder crimp? I ask because if a big brand like Sonus Faber uses these simple connectors, metal against metal under pressure .....
I work in the racing and auto industry, the standard there is crimp connections with spring contact and that is a substantially harsher and more vibration affected environment than audio.
I use crimp connections and spring spade terminals for all my speaker connections, if done properly as reliable as soldering.
Also virtually all drivers are designed for this type of standard spade connection, as some see even soldering to terminals often melts the connection to the voice coil leads and damages the driver terminals.
Javad
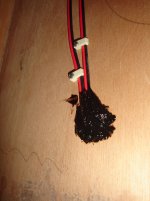
You are doing a very nice job. May I suggest running a bead of glue or silicon sealant along those cables you have clipped neatly to the wood. It would prevent any possibility of them vibrating against each other.
I work in the racing and auto industry, the standard there is crimp connections with spring contact and that is a substantially harsher and more vibration affected environment than audio.
I use crimp connections and spring spade terminals for all my speaker connections, if done properly as reliable as soldering.
Also virtually all drivers are designed for this type of standard spade connection, as some see even soldering to terminals often melts the connection to the voice coil leads and damages the driver terminals.
Javad
Thanks for the feedback.
I would like to just say that one of the main reasons for the use of connectors is that it allows mounting and dismounting plates and other components comfortably and quickly.
Not imagine a line of automotive assembly workers welding cables...😉
In the case of the speakers, it is true that much has extended its use, but also bring the housing bore welding wire. There are two possibilities, I choose welding, assembly will elect a line pressure connectors.
*A few months ago some cabinets Technics repair ancient the 70s, the drivers were disconnected, repaired and reassembled with the original pressure connectors and there were no problems...
There is much voodo in audio connectors are currently promoted with gold film .... because it sells more! They look good ! But gold is worse conductor of electricity than silver! Why fans demand hi end welds with silver alloys ...!
I'm using conventional welding 60/40, my budget does not allow me that luxury ....😀
I share your opinion the risk of overheating when welding in all cases, it becomes critical because costs are reduced using materials highly susceptible to heat.
Welding a simple miniplug connector to make an extension of headphones, for example, it can be a very difficult task and craft.
Greetings friend ! 🙂
Attachments

You are doing a very nice job. May I suggest running a bead of glue or silicon sealant along those cables you have clipped neatly to the wood. It would prevent any possibility of them vibrating against each other.
Thanks friend for your comments ! 🙂
The idea is good, on these wires stuck anger absorbent material, " kill two birds with one stone ". 😉
Regards !
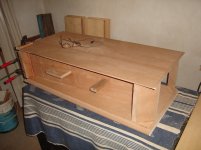
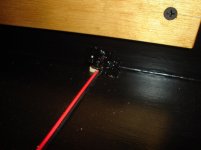
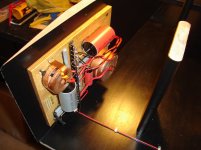
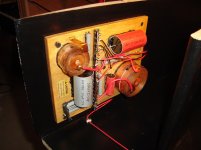
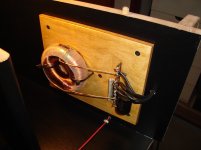
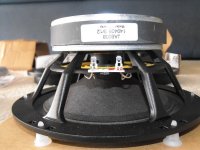
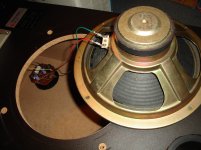
Before closing the cabinet I wanted to check the operation of the crossovers. So I dismounted from his box LE14C JBL coaxial driver and everything works perfectly.
The mids and highs are well integrated because the crossing is similar, 2000 hz. and coaxial speaker has for its constructive features very good integration (all frequencies emanate from the same axis) Of course the development of Troels also provides impedance matching topologies and specific crossing for drives and load Horn DTQWT (if read this sure think I'm a heretic by doing this) but this is only a test, but very funny. I explore many works of music well known to me and .... wow ..... voices are very clean, clear, and there is much details!
And despite the short acoustic bass very clean too ...!
I think I have some suggestion, or should I stop drinking ....🙄
These connectors JBL speakers if they were good,
(JShadzi the would approve surely 😉) drivers have been disassembled and assembled many times, in so many years of use have two refoam, plus several experiments damping boxes and tests with long pipe tuned and continue tightening the cable efficiently.
Attachments

True and proven... in new cars, or well preserved onesI work in the racing and auto industry, the standard there is crimp connections with spring contact and that is a substantially harsher and more vibration affected environment than audio.
I use crimp connections and spring spade terminals for all my speaker connections, if done properly as reliable as soldering.
Also virtually all drivers are designed for this type of standard spade connection, as some see even soldering to terminals often melts the connection to the voice coil leads and damages the driver terminals.
Javad
If one are playing with old cars, is almost guaranteed to trash all connectors and make all new (of course, connectors don't have long lifetime like good soldering). Like some worn old amplifiers and receivers coming from kitchens and (sometimes not so) dirty/wet areas
I'm saying that because I have one '94 car which from time to time I need to substitute or at least clean some connectors, because it tarnish and make some bad contacts with desastrous results specially in fuel injection. The symptoms vanishes when I make that
And several others practical examples with varios old friends cars
So my desire is to substitute all connectors to soldering in these cases 😡😱🙁😀🙂
The practical solution is to buy new cars... 😀😉🙂 but these old cars are for collections and etc plus functional.
But with a domestic louspeaker like these here, without the harsh conditions found in cars, and with all caution to make the connectors, will survive far more time.
Last edited:
- Home
- Loudspeakers
- Multi-Way
- DTQWTII from Argentina