While you're in software mode, could you please check whether it is possible to route additional I2S channels to a header somewhere? I'm getting close to finishing a build that joins the nadja to an 8ch twisted pair DAC via I2S and really (really!) want to use all 8ch of that DAC.I'm currently back on the software now.
Also, thanks very much for support with the relay control - I'm now using it to switch on my DAC, ADC, 8ch of amp, separate volume control and vu meters. For such a small feature of the board it's made a big impact to how I use the system 🙂
PS: I'm happy to run a 'beta', 'dev', or 'hack' firmware that enables the I2S routing to save your time in updating the HMI and/or documents. Static routing is fine - if you can route over to expansion port 1, I'm only using the stereo I2S input there. If it must stay on port 0, I'm not using any of the power supply pins but plan to buy the expansion board as soon as it's offered.
UrSv: What diameter do you screws have? Also 2.5mm?
Yes, I'd say that's probably what they are.
Hi Meelis,
The CS3318 cannot amplify the input signal beyond the power supply rails, this explains why the full 22 dB gain is not available.
Did it mean that DAC output level is so high that with 22 dB gain CS3318 output will clip on Najda and because of that you restricted gain to 15 dB?
Is it so that volume 0 dB and gain 0 dB on Najda is same resulting level as 0 dB level by CS3318 documentation?
Understand I CS3318 document right, that with every resulting level from full 118 dB range what is lower than 0 dB will not use gain stage (gain remains on 0 dB)?
I feel (but I am not sure) problem is not in files but mechanism how settings are synchronized between file and Najda in synced state. Somehow for example section 5 transfers to section 7 during sync. I newer lost any wrong section in Offline state, but of cause I nearly always use Najda in Synced state and problems occurred after longer usage in Synced state.Until now I haven't been able to reproduce the bug with your files. I'll keep trying and I'll let you know. I'm currently back on the software now.
Last edited:
Hi,
thanks for your replies so far.
Indemini wrote:
UrSv wrote:
So there is seems to be consensus on 6mm length. UrSV uses self-threading, Idemini threaded screws. So both types seem to work.
UrSv: What diameter do you screws have? Also 2.5mm?
Uwe
I used M2 20 mm long with bolster. Works fine, and no damage to the connectors with the threading
While you're in software mode, could you please check whether it is possible to route additional I2S channels to a header somewhere? I'm getting close to finishing a build that joins the nadja to an 8ch twisted pair DAC via I2S and really (really!) want to use all 8ch of that DAC.
Yes I'll look at this. It's going to take some time as I need to delve into the (thick) datasheet of the DSP and change the initialization routines.
Also, thanks very much for support with the relay control - I'm now using it to switch on my DAC, ADC, 8ch of amp, separate volume control and vu meters. For such a small feature of the board it's made a big impact to how I use the system 🙂
Yeah the relay control is probably the only thing you can from the original design 😉
Where's the pic BTW? 🙂
That's correct.Did it mean that DAC output level is so high that with 22 dB gain CS3318 output will clip on Najda and because of that you restricted gain to 15 dB?
You cannot talk about an output level for the CS3318. It's an amp: if you set the gain to 0 dB, the levels will be identical at the input and the output.Is it so that volume 0 dB and gain 0 dB on Najda is same resulting level as 0 dB level by CS3318 documentation?
Understand I CS3318 document right, that with every resulting level from full 118 dB range what is lower than 0 dB will not use gain stage (gain remains on 0 dB)?
I don't know anything about the internals of the chip besides what's in the datasheet. I really can't tell how this is organized.
You could try contacting the people at Cirrus Logic and ask the question - but in my experience they're not quite talkative over there.
New stuff today: get your special displays out of the drawer 😉
OLED (WS0010)

VFD (PT6314)

Coming soon!
"Yeah the relay control is probably the only thing you can from the original design"
I meant the only thing you kept from the original design.
I meant the only thing you kept from the original design.
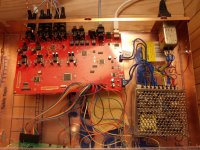
Making progress!
(Disclaimer: Not a single cable is connected or routed the way it will be eventually! This is just a ghetto get started version)
I got a display today, courtesy of UrSv 🙂)), that I'll be using to get things running until I get the one I've ordered.
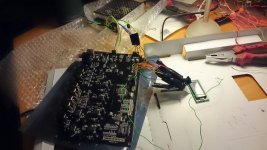
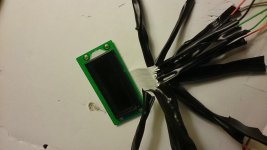
It came with a tiny ribbon cable for which I had no suitable connector. Fear not, I took a Stanley knife and started cutting carefully between the tiny conductors trying not to mess up too much of the isolating material. Not an easy feat when the isolating material is about as wide as the knife blade! After shredding the cable I clamped on wires scavenged from an old computer chassis, the kind that attaches front panel USB-connectors and audio IO to the main board (I believe they may be dupont standard? They fit nicely on the Najda headers in any case).
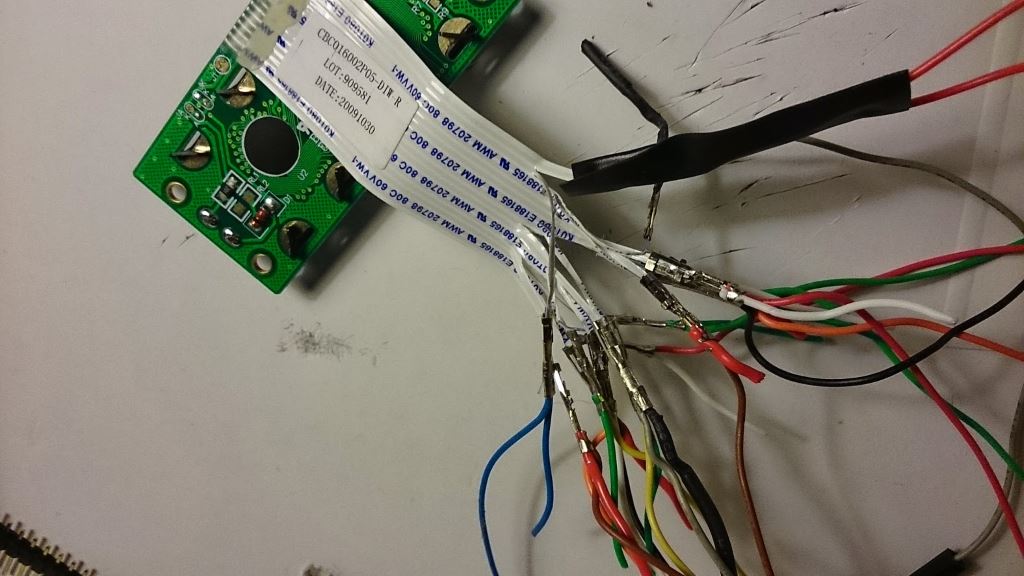
Next I clumsily added way too much electricians tape to isolate the bare metal connectors as well as the ribbon cable conductors as there were some bare parts where I cut it too close. Much later I realized I have lots of heat shrink tubing which would have worked a lot better here, oh well.

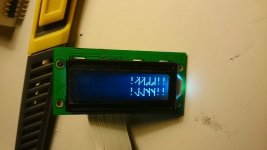
Step 3: Connect to Najda and start it up (I had previously started it up using a LED connected to the display backlight connectors as per Nick's suggestion earlier).
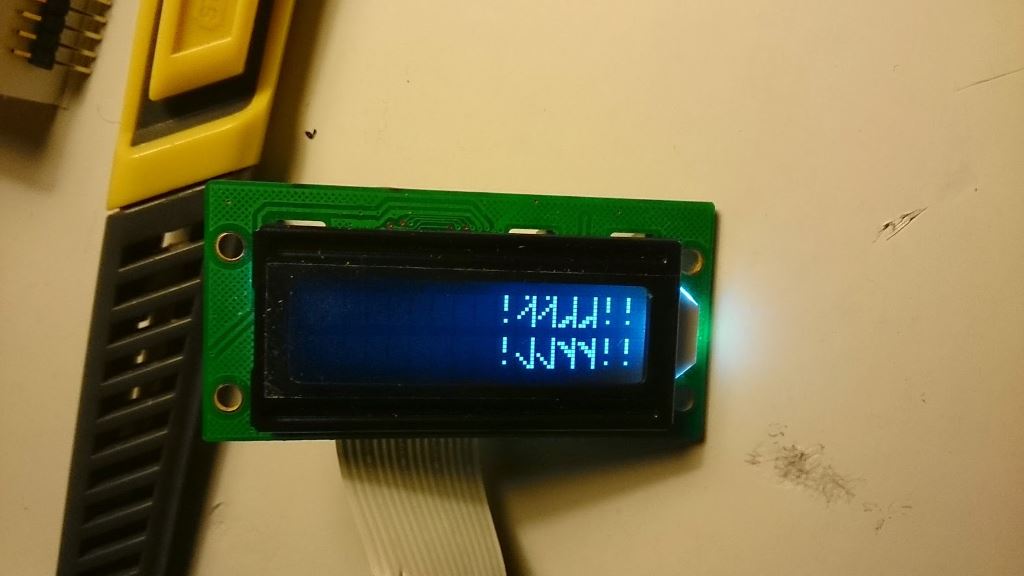
Ooops, that doesn't look right. Better disconnect and recheck for any possible shorts and make sure I connected all cables correctly.
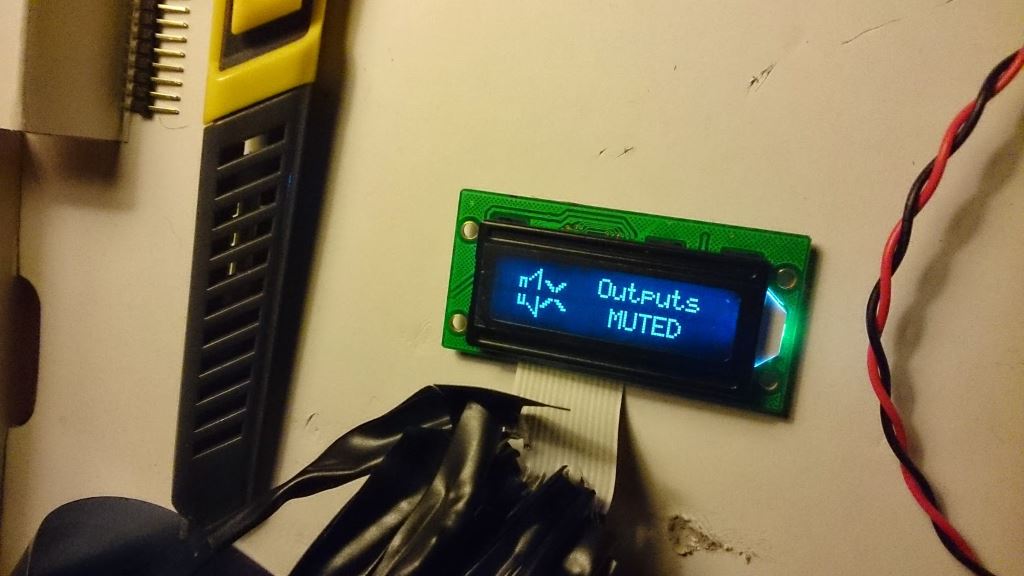
Tada!
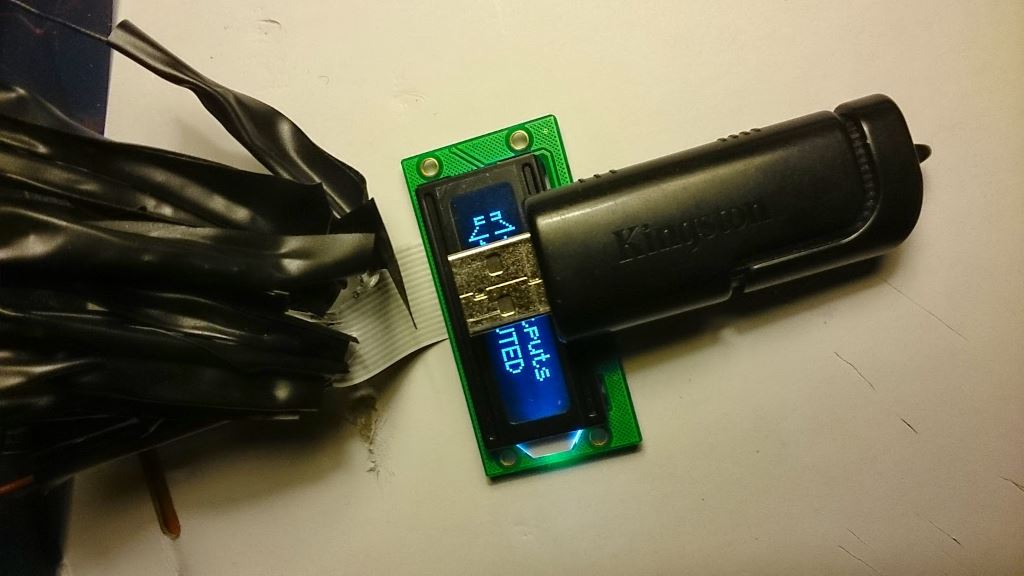
Here's a USB-memory to give a better scale reference. That's one tiny ribbon cable.
Here I've connected the IR-receiver in a similar manner. You can also see my multi function "button" in the form of that lone green wire. It's connected to ground on the button header and I simply touch it to the relevant pins to navigate the menus. Or rather, I did that before I looked around and found an old Yamaha amplifier remote with rotten batteries. After borrowing batteries from my gamepad I tried using the IR-learn function on the Najda, and luckily the remote used NEC-standard IR and I could successfully program it.

Now all that remains is to load the first program (all ready to be uploaded) and see if I can get some sound out of this too! To start with I'll be using the coaxial input, but the plan is to connect it to my Raspberry Pi via I2S.
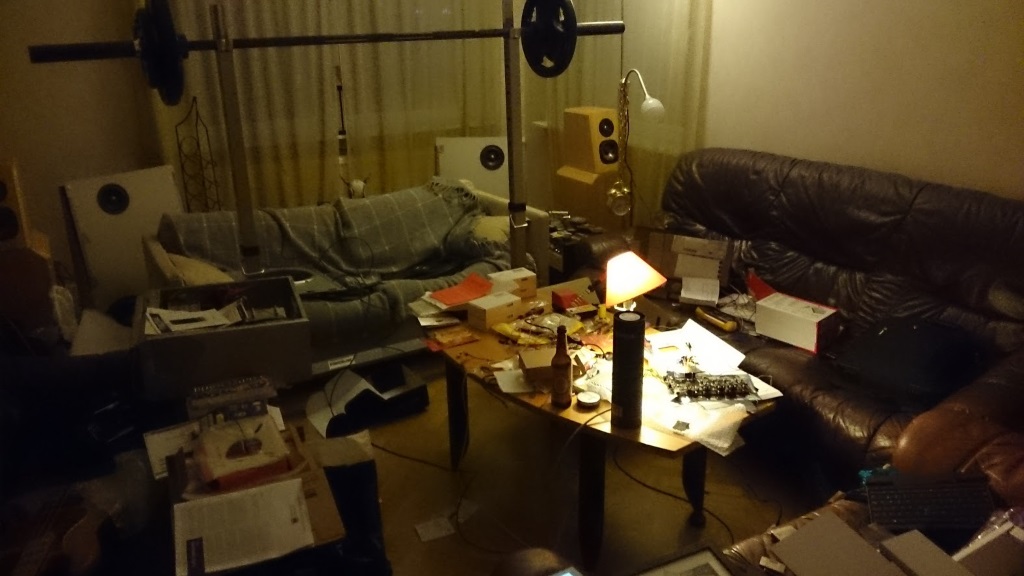
Here's a bonus shot of my workshop, ie living room, currently in quite a state 😀
(Disclaimer: Not a single cable is connected or routed the way it will be eventually! This is just a ghetto get started version)
I got a display today, courtesy of UrSv 🙂)), that I'll be using to get things running until I get the one I've ordered.
It came with a tiny ribbon cable for which I had no suitable connector. Fear not, I took a Stanley knife and started cutting carefully between the tiny conductors trying not to mess up too much of the isolating material. Not an easy feat when the isolating material is about as wide as the knife blade! After shredding the cable I clamped on wires scavenged from an old computer chassis, the kind that attaches front panel USB-connectors and audio IO to the main board (I believe they may be dupont standard? They fit nicely on the Najda headers in any case).
Next I clumsily added way too much electricians tape to isolate the bare metal connectors as well as the ribbon cable conductors as there were some bare parts where I cut it too close. Much later I realized I have lots of heat shrink tubing which would have worked a lot better here, oh well.
Step 3: Connect to Najda and start it up (I had previously started it up using a LED connected to the display backlight connectors as per Nick's suggestion earlier).
Ooops, that doesn't look right. Better disconnect and recheck for any possible shorts and make sure I connected all cables correctly.
Tada!
Here's a USB-memory to give a better scale reference. That's one tiny ribbon cable.
Here I've connected the IR-receiver in a similar manner. You can also see my multi function "button" in the form of that lone green wire. It's connected to ground on the button header and I simply touch it to the relevant pins to navigate the menus. Or rather, I did that before I looked around and found an old Yamaha amplifier remote with rotten batteries. After borrowing batteries from my gamepad I tried using the IR-learn function on the Najda, and luckily the remote used NEC-standard IR and I could successfully program it.
Now all that remains is to load the first program (all ready to be uploaded) and see if I can get some sound out of this too! To start with I'll be using the coaxial input, but the plan is to connect it to my Raspberry Pi via I2S.
Here's a bonus shot of my workshop, ie living room, currently in quite a state 😀
Attachments
-
 7_workshop_small.jpg133.6 KB · Views: 613
 -
 6_button_ir_small.jpg93.8 KB · Views: 605
 -
 5_forscale_small.jpg58.7 KB · Views: 605
 -
 4_success_small.jpg64.6 KB · Views: 627
 -
 3_oops_small.jpg46 KB · Views: 607
 -
 2_display_isolated_small.jpg56.7 KB · Views: 608
 -
 1_display_connected_small.jpg82 KB · Views: 614
Thanks PMental for the pics! It's been a long time I hadn't seen any new stuff here 😉
I also have now RC5 in place, so this will make the Najda understand most of the remote controllers.
For those who would be tempted by a OLED display, here's a european supplier. I got mine from them recently and paid EUR 12. Note they have various coulours and sizes.
Here's a supplier of VFD displays. Paid EUR 17.5, it's much cheaper than the Noritake model.
Keep in mind however that VFD drivers aren't fully compatible with HD44780 when it comes to custom characters. This is because the lower segment is a single line that can't be divided into points. I'll modify slightly the custom characters to go around this limitation (but still we'll end with 5x7 characters instead of 5x8 ones as in a fully compatible display).
(I have no connection with these companies other than I bought my displays from them. Also, don't be turned down by the Polish webpages: the guys behind read and write English).
New stuff today: get your special displays out of the drawer 😉
OLED (WS0010)
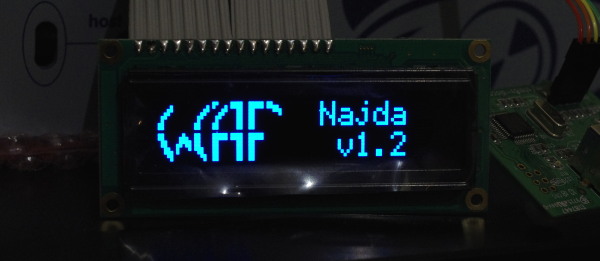
VFD (PT6314)
Coming soon!
Yay!


Thanks, Nick. What I've been waiting for.
Last edited:
That's not true! The optical receiver is still mounted on the board too! (although I did de-solder the other RCA's) 🙂 I build very slowly but will try to remember to take a photo tonight.Yeah the relay control is probably the only thing you kept from the original design 😉
Where's the pic BTW? 🙂
Glad to see the oled is coming. Mine is gathering dust here. £20 from Maplin in the UK;
OLED 2x16 Green Character Display | Maplin
I'll try and post some pics of my build, though it is still in limbo while things get sorted, slooowly. Next to do;
- Connect Amanero USB board to Najda - I have no idea where to start🙁
- Hold out for expansion board (cost permitting😉) since it allows 5 way, and a I believe a better input sensitivity suitable for 2volts?
- Make a rear panel - the thread regarding a group buy seems to have stopped
- find different buttons, the ones I have are too shallow threaded for the acrylic I am using
- finish my speakers/amps - recently interested in Legacy Whisper XD speakers "compound woofers" - because I have a spare couple of alpha15s and sidewall proximity issues. These done properly would make a 5-way speaker since the second woofer should have a delay on it (a Harry Olsen theory originally).
Speakers are Nao Note II - though with alpha15s on the bottom. The third 15" propped up under the side table is a Legacy Whisper XD experiment.
Attachments
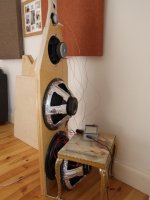
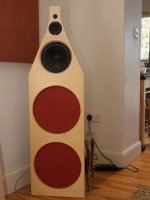
That´s a nice workshop.. 🙂Here's a bonus shot of my workshop, ie living room, currently in quite a state
New stuff today: get your special displays out of the drawer 😉
OLED (WS0010)
View attachment 412475
Coming soon!
Congratulations Nick!! 🙂
I have a question: the supplier you mentioned in your link has 3 different OLED's in blue:
WEH001602ABPP5N00000
WEH001602BBPP5N00000
WEH001602DBPP5N00001
Apart from size, what is the difference and which one is needed for Najda?
Regards
Sigi
Hi Sigi,
All 3 references should be fine as they all iclude the same driver chip.
The first one, WEH001602ABPP5N00000, is the one I have myself.
The second one, WEH001602BBPP5N00000, is bigger and has a reversed pinout, which is probably easier to wire to the Najda.
The third one, WEH001602DBPP5N00001, is identical to the first reference except for the layout of the pins. These are indeed located on the side of the display (instead of above). It shouldn't be too hard to wire.
On their webpage, if you click on the 'Adobe' logo, you'll get the datasheet with the drawings of the part.
If you want a normal sized display, then I'd probably recommend the 3rd reference.
If you want a bigger display, then go for the second reference.
The first one is OK too, but in my experience not so cool to install because the wires are crossing in a X pattern. Well nothing too bad anyway 😉
Nick
It works! I mean, it actually outputs sound 😀
Here's a blurry picture of my equipment chain apart from amps and speakers. From the Raspberry Pi via USB to a ESS Sabre32 DAC, which I use for coaxial S/PDIF output to the Najda. The raspberry streams FLAC-files from a NAS. Later I plan to go via I2S straight from the Raspberry Pi to the Najda.
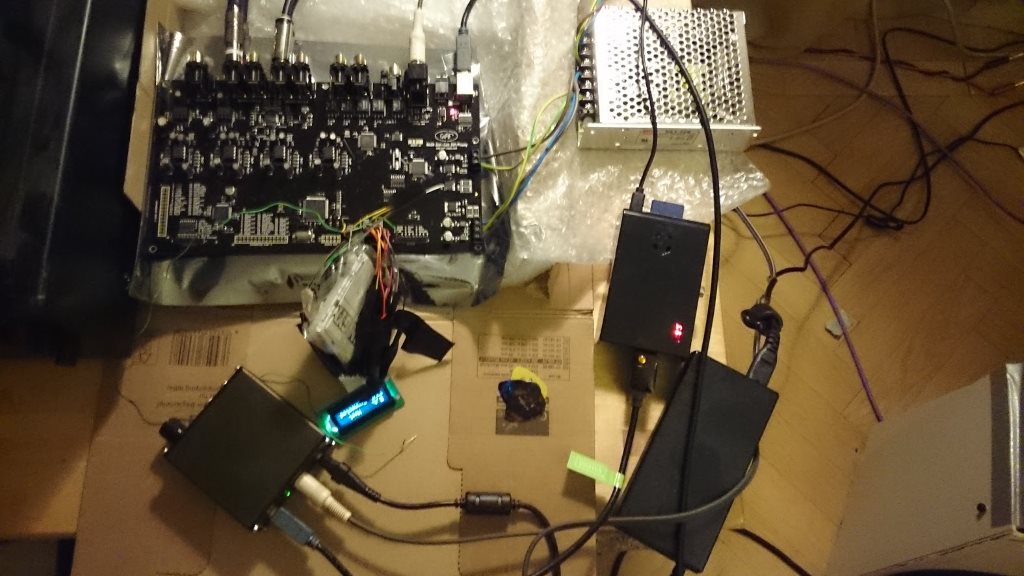
Since I don't actually have enough amps for running active yet (as they haven't arrived), I'm using my Rotel RB-991 for the bass and going through my ancient Sony surround receiver that I normally use for my computer speakers (it's ancient, first gen. Pro Logic) for my full rangers. No pre-ins on this one, so it's through the normal inputs, through the entire amp via the volume control 🙂
The first draft of my EQ/crossover needs some adjustments, but it's close enough to sound great already. It sounds way too good for going through that mess of stuff to be honest. It can only get better though. As it is, I've been listening to music for a couple of hours and not messing with settings at all which is a good sign! 😀
To celebrate I drank some 18 year old Single Malt Whisky straight from the bottle😎
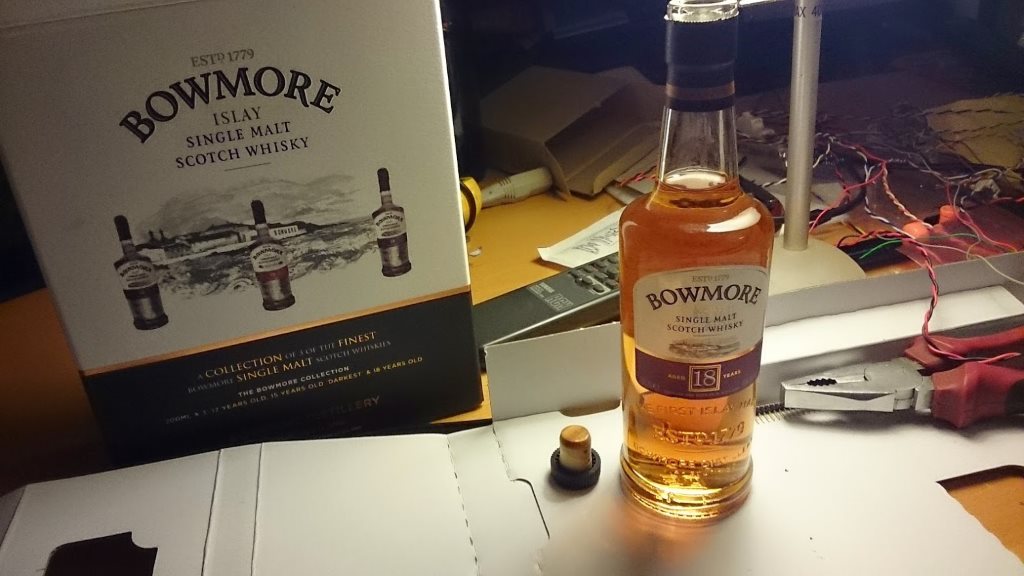
You can see part of the remote I'm using (for now) too.
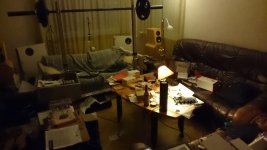
Here's a blurry picture of my equipment chain apart from amps and speakers. From the Raspberry Pi via USB to a ESS Sabre32 DAC, which I use for coaxial S/PDIF output to the Najda. The raspberry streams FLAC-files from a NAS. Later I plan to go via I2S straight from the Raspberry Pi to the Najda.
Since I don't actually have enough amps for running active yet (as they haven't arrived), I'm using my Rotel RB-991 for the bass and going through my ancient Sony surround receiver that I normally use for my computer speakers (it's ancient, first gen. Pro Logic) for my full rangers. No pre-ins on this one, so it's through the normal inputs, through the entire amp via the volume control 🙂
The first draft of my EQ/crossover needs some adjustments, but it's close enough to sound great already. It sounds way too good for going through that mess of stuff to be honest. It can only get better though. As it is, I've been listening to music for a couple of hours and not messing with settings at all which is a good sign! 😀
To celebrate I drank some 18 year old Single Malt Whisky straight from the bottle😎
You can see part of the remote I'm using (for now) too.
Attachments


Lots of pics here lately, that's great 🙂
That's actually pretty easy.
1. Sort out the power for the Amanero. Either USB powered or fed straight from the PSU if it can handle it (probably it can).
Don't power via the expansion port, the Amanero draws far too much current.
2. Refer to the StartUp Guide section I.6. Keep the wire run short and don't forget to tie IS_EXP1 to DGND.
3. Sit back and listen. Optionally, get yourself a drink 😉
- Connect Amanero USB board to Najda - I have no idea where to start🙁
That's actually pretty easy.
1. Sort out the power for the Amanero. Either USB powered or fed straight from the PSU if it can handle it (probably it can).
Don't power via the expansion port, the Amanero draws far too much current.
2. Refer to the StartUp Guide section I.6. Keep the wire run short and don't forget to tie IS_EXP1 to DGND.
3. Sit back and listen. Optionally, get yourself a drink 😉
- Home
- Source & Line
- Digital Line Level
- DSP Xover project (part 2)