Bilsch - In addition to what others have mentioned, you can use a very nice simulator, PSUD. There are a few threads dedicated to its use, and it's freeware. There is a learning curve, but it's worth the effort, IMO.
44V rails for a M2x?
If you need a guide or exact parts recommendations along the lines of what was used in the commercial First Watt amplifiers, you could follow the build guide posted in the Aleph J for Noobs blog. That will provide a +- 24ish volt supply for your M2x and many other First Watt clones. For your ACA, you could simply use the exact same build guide and use only the V+ if you'd like to experiment with a linear supply vs. the normally-used SMPS.
the spreadsheet references for RS1/2 and C1-8 and the type/size for D1...8. What would I want re differences is this just voltage and ensuring its > the power supply and thats it? How do I come up with the values for the caps and the input snubbers 😉What do you mean by the various values?
Transformer secondaries = Rail Voltage/1.414
Filter caps VDC > Rail Voltage.
Transformer VAC > .5 x Expected Current Draw x Secondary Voltage
Rectifiers > 35 Amp, 200V
Are there other values you're looking for?
Yea its 44v for the m2x.Bilsch - In addition to what others have mentioned, you can use a very nice simulator, PSUD. There are a few threads dedicated to its use, and it's freeware. There is a learning curve, but it's worth the effort, IMO.
44V rails for a M2x?
If you need a guide or exact parts recommendations along the lines of what was used in the commercial First Watt amplifiers, you could follow the build guide posted in the Aleph J for Noobs blog. That will provide a +- 24ish volt supply for your M2x and many other First Watt clones. For your ACA, you could simply use the exact same build guide and use only the V+ if you'd like to experiment with a linear supply vs. the normally-used SMPS.
Yea the wall wort is kinda noisy. I put the smps inline filter in and that cleaned it up but moving to this kind of power supply vs switching seems like a better chance for clean sound. ( this is because I can - eg I'll build the smaller powersupply first and then the one for the m2x )
For the snubbers, most people use the Quasimodo test jig to figure out the values: https://www.diyaudio.com/community/...rmer-snubber-using-quasimodo-test-jig.243100/the spreadsheet references for RS1/2 and C1-8 and the type/size for D1...8. What would I want re differences is this just voltage and ensuring its > the power supply and thats it? How do I come up with the values for the caps and the input snubbers 😉
Others argue that it is a Class A amplifier and snubbers are un-needed.
As for the filter caps, make sure the rated VDC is > DC coming out of the rectifiers. The more headroom, the longer they can last. Using 50VDC caps can make the PSU pretty universal since it can handle most any bias voltage for the 1stW clones. The capacitance value isn't too critical as long as it is in the range given in the spreadsheet. Some opt for big honkin' caps (BHCs) but if driving Class A amps, they act more as a filter than a reservoir.
The thread is long but lots of useful information to glean that a spreadsheet might not lend itself to find.
That for output snubbers. Input snubbers also relevant for class A 🙂For the snubbers, most people use the Quasimodo test jig to figure out the values: https://www.diyaudio.com/community/...rmer-snubber-using-quasimodo-test-jig.243100/
Others argue that it is a Class A amplifier and snubbers are un-needed.
The Quasimodo test is for the input snubbers, I believe. But I can be and often am wrong.
Here's the thread started for folks to record the various snubber values for specific transformers. https://www.diyaudio.com/community/threads/quasimodo-results-only.313202/
Others still argue that input snubbers are not needed for Class A as the only transient is at startup. I ran my first variation of the F6 without them and had no issues. Didn't look at the output on an o-scope though. Using the full-wave bridge rectifier bricks, there is no way to implement a snubber circuit as it is on the rectifier portion of the PSU PCB.
It is fully possible to solder the snubber circuit across the bridges, but it is a bit tight and you will need to heatshrink the resistor legs iot avoid shorts. Zen Mod does it all the time. I wass going to, but time constraints made me drop it. Being a real sissyThe Quasimodo test is for the input snubbers, I believe. But I can be and often am wrong.
Here's the thread started for folks to record the various snubber values for specific transformers. https://www.diyaudio.com/community/threads/quasimodo-results-only.313202/
Others still argue that input snubbers are not needed for Class A as the only transient is at startup. I ran my first variation of the F6 without them and had no issues. Didn't look at the output on an o-scope though. Using the full-wave bridge rectifier bricks, there is no way to implement a snubber circuit as it is on the rectifier portion of the PSU PCB.

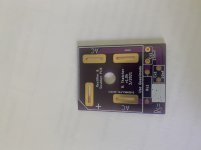
Well, after staring at these boards for a while, I've figured out how to make them more universal. Machine out 2 slots connecting C4-C3 and C8-C7 reverse polarity of C-3 and C-7 and voila, a board with CRC V+, CRC V- ! Will need to tap DC - in/out from the bottom and add two more pi resistors on the bottom, but pretty simple mod really and easier than trying to wire point to point etc. PS 2 jantzen 10w and a vishay 5w from the bin...mundorf mlytics 10k uf, 100v. Project is hafler 9500. Cheers


Any chance you can fix the link to the schematic?diyAudio Universal Power Supply Circuit Board v3 illustrated build guide. (October 2013)
(Any photo with a link directly below will go to full-size file of the photo)
This build guide will show a typical use of the diyAudio PSU v3 circuit board. This specific build will be suitable for any of the Pass/Firstwatt amps that use a +/-25V supply. If you need a higher voltage make sure you use capacitors of a suitable voltage rating for your project. You may always have a higher voltage rating, but do not use a cap with a lower voltage rating than your rails.
Useful Links
BOM - http://www.diyaudio.com/forums/images/diy/store/board-documentation/P-PSU-1V30/P-PSU-1V30-bom.xls
Schematic - http://www.diyaudio.com/forums/imag...mentation/P-PSU-1V30/P-PSU-1V30-schematic.pdf
https://cdn.shopify.com/s/files/1/1006/5046/files/P-PSU-1V30-schematic.pdfAny chance you can fix the link to the schematic?
Can you also provide the bill of materials so I can match the resistor values to the schematic?
I found it on the DIY Store. Thank you.Can you also provide the bill of materials so I can match the resistor values to the schematic?
Rand
Randy Thatcher came up with a clever little PCB he included in the Classic Aleph UMS group buy that sits on top of the monolithic bridges and lets you put in snubber caps and resistors.
It is fully possible to solder the snubber circuit across the bridges, but it is a bit tight and you will need to heatshrink the resistor legs iot avoid shorts. Zen Mod does it all the time. I wass going to, but time constraints made me drop it. Being a real sissy
Randy Thatcher came up with a clever little PCB he included in the Classic Aleph UMS group buy that sits on top of the monolithic bridges and lets you put in snubber caps and resistors.
Attachments
Can you please share the answer you came up with for myself / others? 😉Never mind, found the answer.
Bonjour à tous nouveau sur le forum
je voudrais me lancer dans la construction d un pass f5 de 50w
au niveau de l'alimentation je pense m en sortir en fabriquant mon propre psu a base de transformateur de 750va 24v et de condensateur de 47000
je vous envoie une photo de mon projet de psu ( désolé pour le shema je ne suis électricien j ai appris sur le tas)
 Veuillez publier une traduction en anglais avec votre langue maternelle.
Please post an English translation along with your native language.
je voudrais me lancer dans la construction d un pass f5 de 50w
au niveau de l'alimentation je pense m en sortir en fabriquant mon propre psu a base de transformateur de 750va 24v et de condensateur de 47000
je vous envoie une photo de mon projet de psu ( désolé pour le shema je ne suis électricien j ai appris sur le tas)
Hello everyone new on the forum I would like to embark on the construction of a 50W F5 pass In terms of power I think I get out of it by manufacturing my own psu based on transformer of 750VA 24V and capacitor of 47000 I send you a photo of my PSU project (sorry for the shema I am not an electrician I learned on the job)
Veuillez publier une traduction en anglais avec votre langue maternelle. Please post an English translation along with your native language.
Last edited by a moderator:
Last edited by a moderator:
L idee de mon schéma est d alimenter chaque condensateurs séparément et de sortir (v+ et v-) au milieu de manière à former un seul tres gros condensateur ( chaque fil aura la même longueur)
The idea of my diagram is to supply each capacitors separately and to go out (V+ and V-) in the middle of forming a single very large capacitor (each wire will have the same length)
Last edited by a moderator:
I am sorry, I obviously found my question stupid and deleted it. I cant seem to find the question post and dont remember what it was.Can you please share the answer you came up with for myself / others? 😉
- Home
- Amplifiers
- Power Supplies
- diyAudio Power Supply Circuit Board v3 illustrated build guide