I went back and opened U28 and U29 - +84mv at right MC input and -14mv on the left input
At turn on they start at a few hundred mv and settle after a minute or so
At turn on they start at a few hundred mv and settle after a minute or so
Hello and happy new year.
I have a question about components.
I have just order component that I found in the BOM (June 2023) but the Mom not matching with overlay on PCB!
Where is the right value ? On the PCB ?
i have just started with resistors and there are some missing value in the BOM compared to the PCB !
Perhaps I don0t have the good BOM ?

Good afternoon. Tell me, please, what is the reason for the installation of capacitors C90, C75, C3, C4 (2,2µF/63V FILM) on the underside (bottom) of the PCB? Is it possible to use ZTX753, ZTX653 transistors in place of Q1-Q4 transistors?
Attachments
Last edited:
Cazoff, these are the interstage coupling capacitors that are mounted under the board to save space. You can use the Zetex ZTX753 and 653 but the noise performance won’t be quite as good.
Hello
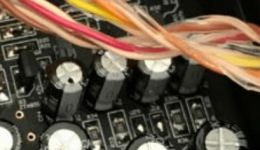
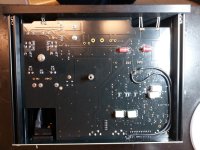
some pictures of my build, I just need to drilled the front panel and also make some tests
I'm missing the MC/MM push button cap. I stupidly ordered the model without a hood. This one is currently not available from early June at mouser

I'm thinking of using it with my teac series 300 set.
I am going to make a dedicated front panel at Schaeffer with screen printing and I will put rectangular blue LEDs as in the photo below.
I'm also thinking of making the top out of aluminium.


some pictures of my build, I just need to drilled the front panel and also make some tests
I'm missing the MC/MM push button cap. I stupidly ordered the model without a hood. This one is currently not available from early June at mouser
I'm thinking of using it with my teac series 300 set.
I am going to make a dedicated front panel at Schaeffer with screen printing and I will put rectangular blue LEDs as in the photo below.
I'm also thinking of making the top out of aluminium.
Beautiful build! I hope you like the sound 👍.
Will be nice to see the completed preamp in the housing when you are finished. Thanks for posting
😊
(Nice Teac amp BTW!)
Will be nice to see the completed preamp in the housing when you are finished. Thanks for posting
😊
(Nice Teac amp BTW!)
Hi, this may be a stupid question: in a 2 turntable set up, one mm mono and one MC not requiring any changes in the switch board, would it be reasonable to plug 2 turntables simultaneously in the X-Altra?
Yes - you can plug 2 turntables into the X-Altra MC/MM. You can then select either one with the push button (BUT turn the volume on your preamp or integrated amp down before doing this as you may get some loud plops from the speakers). Unfortunately, I put the input select PB on the rear panel, mainly because I wanted to avoid drilling the front panel other than the 3.1mm LED holes.
Boards ordered.
I am assembling a second vinyl setup for headphones only and will be comparing my current Salas Simplistic Phono to the X Altra.
Turntable is Rega RP8 with a dynavector XX2 km2 LOMC cartridge. The phono stages have quite different design philosophy so it will be a fun comparison!
I am assembling a second vinyl setup for headphones only and will be comparing my current Salas Simplistic Phono to the X Altra.
Turntable is Rega RP8 with a dynavector XX2 km2 LOMC cartridge. The phono stages have quite different design philosophy so it will be a fun comparison!
One question regarding the power inlet: is there space to mount a filtered which is longer than the non filtered ones? is there an advantage in using a filtered one?
Just to add to the above, if you want to connect two inputs, one must be MM and the other MC. You can then select either from the push button switch on the rear.Yes - you can plug 2 turntables into the X-Altra MC/MM. You can then select either one with the push button (BUT turn the volume on your preamp or integrated amp down before doing this as you may get some loud plops from the speakers). Unfortunately, I put the input select PB on the rear panel, mainly because I wanted to avoid drilling the front panel other than the 3.1mm LED holes.
Manuel,
The absolute max depth behind the rear panel including terminals available for your filtered receptacle is 43mm deep by 38mm wide.
That said, please consider the following:
Most filters offer common-mode and series-mode attenuation. The common-mode attenuation will usually use some small value capacitances from each power line (Live[Hot] and Neutral) to Earth [Ground] after a lossy inductance. You may inject noise into the ground if this is not managed well and make any attempt at HF noise reduction worse.
I would just use an ordinary IEC receptacle as specified in the BOM. The preamp already has a 100nF X-cap across the transformer primary (C43). If you are worried about series mode noise, a 22 Ohm 1W resistor in the live and neutral lines will offer a -3dB cut-off of c. 36 kHz with 20 dB/decade above this. Since the mains current draw is about 10mA, the voltage drop is negligible.
In the BOM I see items 42, 43, 44 and 45 which are mouser parts for DIP switches and they reference items 49,50, 51 and 52 respectively. I don’t see
any place in the PCB where these should go.
What are these parts?
Also, some of the designations in the BOM do not match the PCB’s shown here in pictures in the thread Such as C5 being a 33nF in the board and a 1000uF in the BOM

any place in the PCB where these should go.
What are these parts?
Also, some of the designations in the BOM do not match the PCB’s shown here in pictures in the thread Such as C5 being a 33nF in the board and a 1000uF in the BOM
Last edited:
Another question, regarding MC gain. I’ll be using a Dynavector XX2mk2 with an output current of 46,67uA and a resistance of 6OHM.
Mate is not my strong so looking at the formula in the user instrucions I have:
Rlot = (0.005/0.0028)X(6+ Rin) What is Rin? The MM stage input resistance 47k?
Mate is not my strong so looking at the formula in the user instrucions I have:
Rlot = (0.005/0.0028)X(6+ Rin) What is Rin? The MM stage input resistance 47k?
Re the BOM
1. The 2 way DIP switches are individually numbered on the schematic, but all come together as a single 12-way DIP switch on the BOM (item 51). So you just have to buy 1 off item 51.
2. The BOM is correct and matches the PCB per the errata list. I'll send you a PM with the Excel spreadsheet attached.
Re the cartridge, you calculate the input current to the X-Altra MC stage like this:-
X-Altra MC Input current = Cart Output Voltage/(Cartridge resistance + X-Altra Input resistance)
Your cartridge gives 0.28mV output and the coil resistance is 6 ohms so
= 280uV/(6 +3.5)
= 29.47 uA
Ideally you want an output from the MC stage on the X-Altra to be about 5mV, so the load for this must be
5mV/29.47uA
= 169 ohms
The closest switch setting you can get is 194 Ohms which will give you 5.7mV output. To get this, switches 1 and 3 must be OFF and switches 2 and 4 must be ON. Switches 5 through 8 have no effect on MC (these are the MM resistive loading switches. If you need a bit more gain, use switches 9 through 10 to do that per the table below.
- Home
- Source & Line
- Analogue Source
- Bonsai’s X-Altra MC/MM Phono Preamp