It's the process that matters!
I have also started on a design that I'll share later today.
Glad to hear you are still on board 🤗
I have also started on a design that I'll share later today.
Glad to hear you are still on board 🤗
Did I miss it somehow?I have also started on a design that I'll share later today.
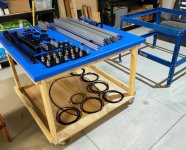
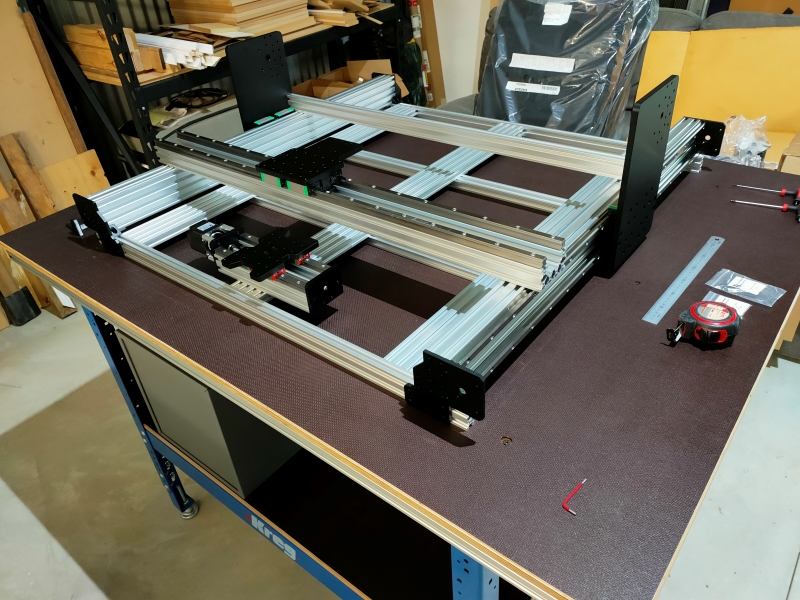
The old CNC came apart much easer than it went together and I now have a nice assembly table 🙂
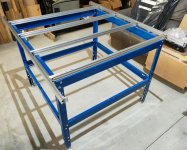
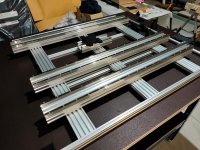
New base frame is taking shape, non ferrous blades really do cut aluminium nicely
Attachments
Last edited:
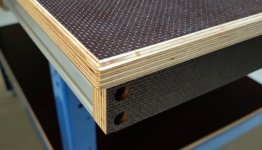
The new table top is now completed, this is much better and considerably lighter than the previous try.

Hopefully in the near future I'll be able to do woodworking on a speaker instead of a tool to make a speaker 🙂

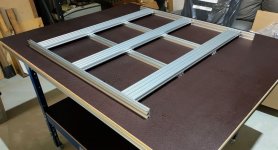
New spoilboard supports are much stiffer and better braced than before

Hopefully in the near future I'll be able to do woodworking on a speaker instead of a tool to make a speaker 🙂
New spoilboard supports are much stiffer and better braced than before
Attachments

Serious tools for a serious speaker build!
Hope you get to make some sawdust (or CNC-dust) soon!
Hope you get to make some sawdust (or CNC-dust) soon!
I will probably lose both those races 🙂Its a race, who gets to build vs who gets to listen 🙂
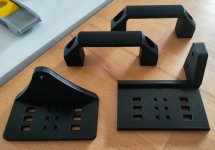
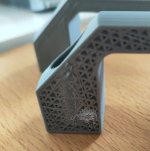
Some functional parts have been 3D printed, drag chain mounts and enclosure handles
I can see why ABS is tricky. Almost at the end of this print something went wrong and a lot of spaghetti was the result.
Attachments
So here's what's been in the oven.
I made a pair of speakers that will be wall mounted in a low ceiling apartment.
And due to the placement they could only be about 25cm high.


I'm not a fan of horizontal speakers, but this was the only option.
I made a pair of speakers that will be wall mounted in a low ceiling apartment.
And due to the placement they could only be about 25cm high.
I'm not a fan of horizontal speakers, but this was the only option.
Nice 🙂
Did you not want to try porting the woofers into the horn? Seems like it would have been a good application.
Did you not want to try porting the woofers into the horn? Seems like it would have been a good application.
I'm not sure the Purifi drivers are ideally suited but don't let that stop you from trying 🙂
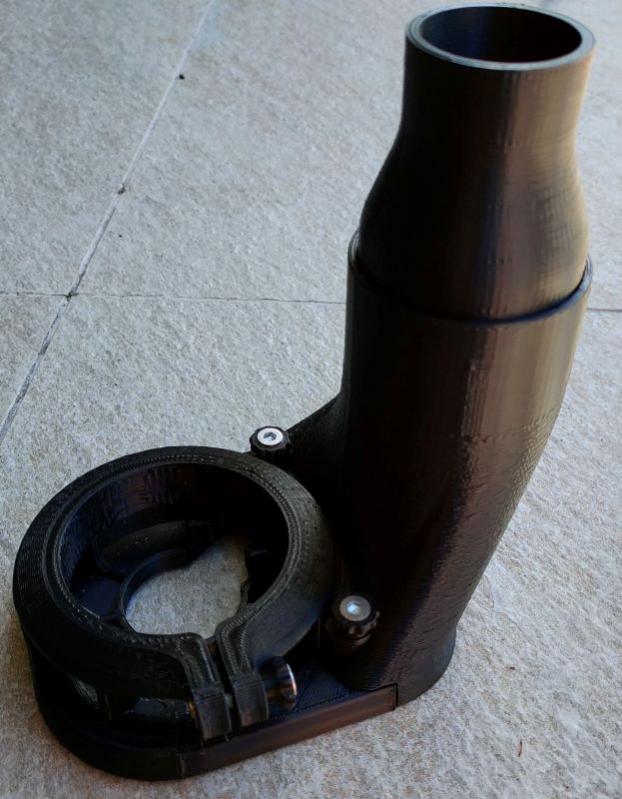
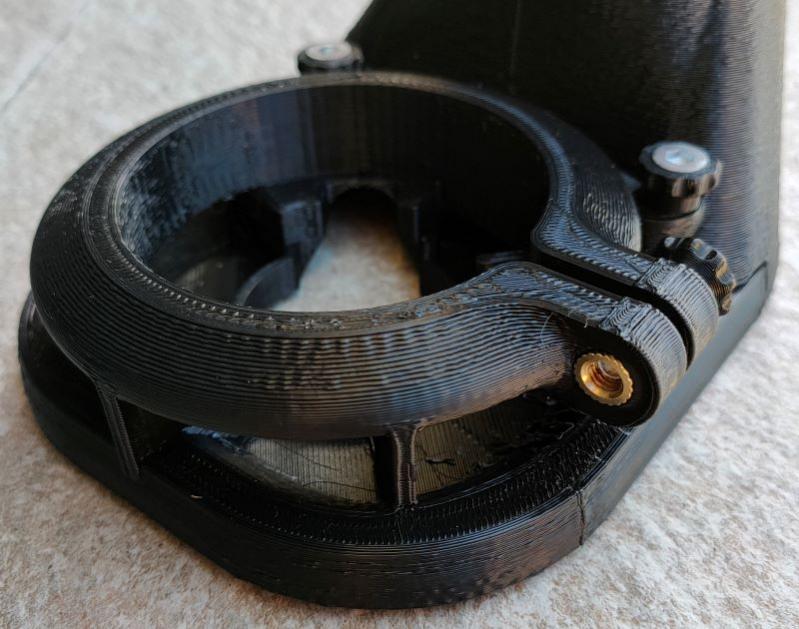
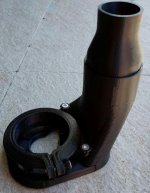
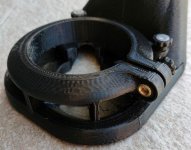
Progress is happening if slowly. I found a nice dust shoe to print for my Makita Router, waiting on a brush strip to arrive to see if it fits the slot as the one it was designed for is impossible to get here.
Printed very fast with a 0.3mm layer so the finish is rough but the parts are strong.
Progress is happening if slowly. I found a nice dust shoe to print for my Makita Router, waiting on a brush strip to arrive to see if it fits the slot as the one it was designed for is impossible to get here.
Printed very fast with a 0.3mm layer so the finish is rough but the parts are strong.
Attachments
Nice 🙂
Did you not want to try porting the woofers into the horn? Seems like it would have been a good application.
I did, but my friend who ordered the speakers wanted good punchy bass...
I feel like the bass from taps isn't as punchy and doesn't extend quite as much-
Unless the taps are very big which would degrade the performance of a small horn like this.
Hi Fluid,
Nice project you have there. I have been thinking about picking up a CNC kit and 3D printer too, for prototypes and such. Look forward to seeing how you progress.
Where in Australia are you?
Nice project you have there. I have been thinking about picking up a CNC kit and 3D printer too, for prototypes and such. Look forward to seeing how you progress.
Where in Australia are you?
So here's what's been in the oven.
I made a pair of speakers that will be wall mounted in a low ceiling apartment.
*Snip*
is the waveguide 3d printed? it looks quite like a QSC/B52.
It's generated with Ath and cnc'd out of valchromat which is some sort of high density fiber board. It's then sealed with beeswax.
Gold CoastWhere in Australia are you?
When I looked before I wondered where the layer lines came from and now it makes sense.It's generated with Ath and cnc'd out of valchromat which is some sort of high density fiber board. It's then sealed with beeswax.
That material is beautifully cnc'd and if the contour spacings are tight enough doesn't need much sanding at all.
It looks pretty nice when sealed with beeswax.
Only thing is the dust from it stains a lot and is probably not very healthy to be arond.
The finish is waaay better than MDF
It looks pretty nice when sealed with beeswax.
Only thing is the dust from it stains a lot and is probably not very healthy to be arond.
The finish is waaay better than MDF
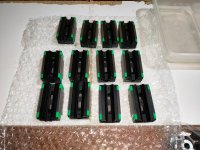
While I have been having some fun with 3D printing I haven't forgotten the CNC. Fairly close to having the mechanical setup completed. Getting the lubricant for the bearings and rails proved to be difficult. Standard amber lithium grease caused the small guides to grind to a halt. Slickoleum which is used in cycling and motocross for fork seals turned out to be the right consistency and viscosity to make the balls roll instead of drag in the races.

Attachments

- Home
- Loudspeakers
- Multi-Way
- 2 way waveguide speaker build ABEC modelling